
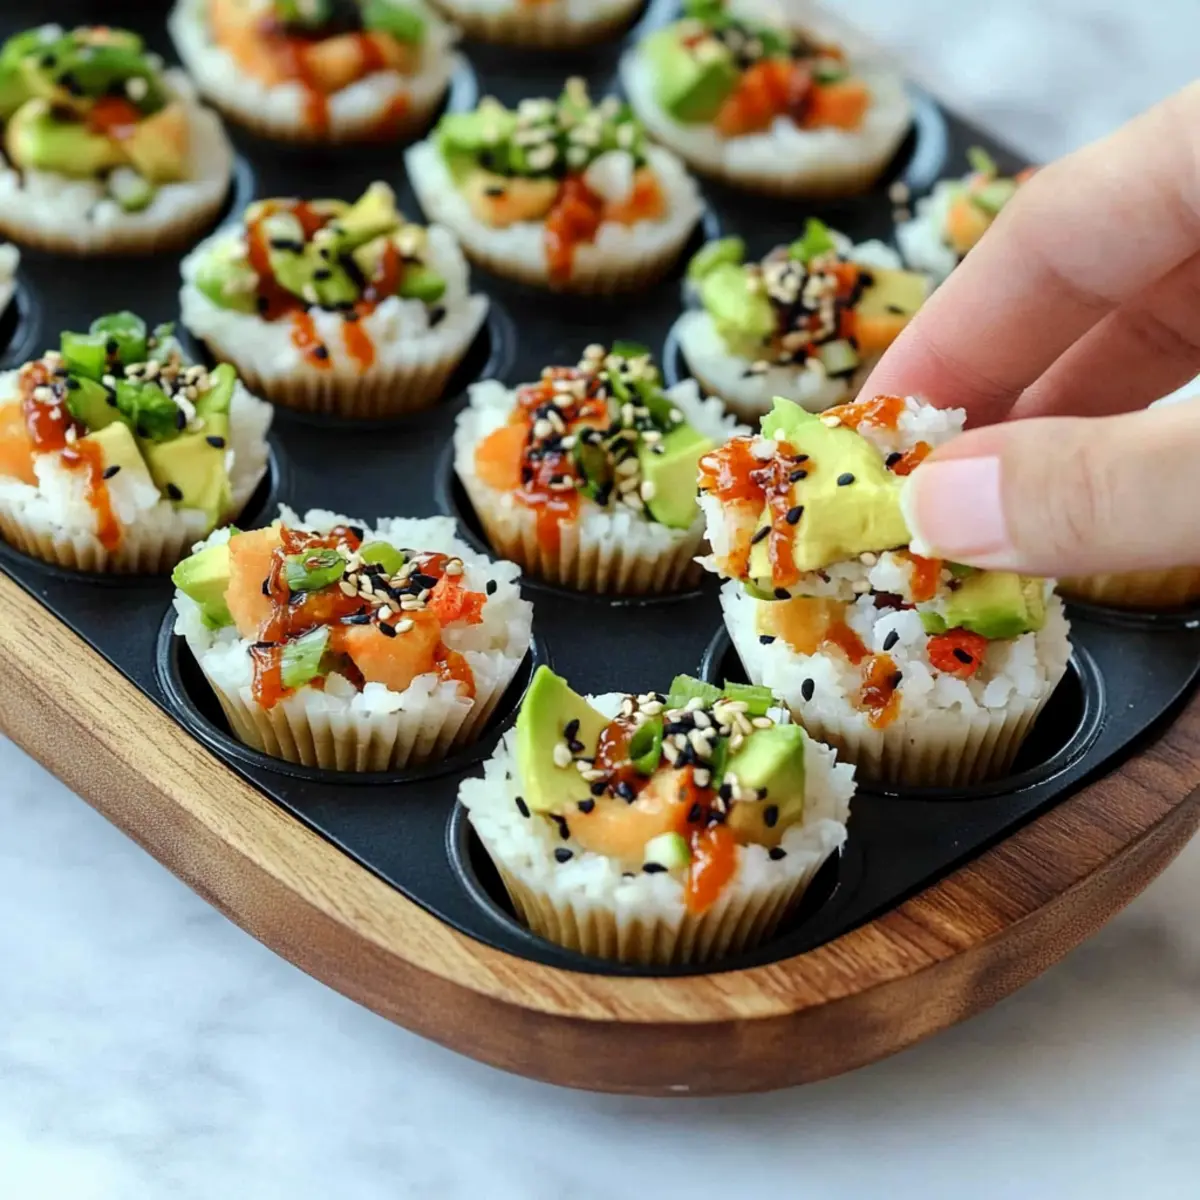
As I stood at my kitchen counter, a vision of vibrant colors and enticing flavors danced in my mind. That’s when I decided to whip up these delightful sushi cups. Perfect for anyone craving a bite-sized appetizer, these sushi cups are completely customizable and make the ideal healthy snack or party treat. With no baking required and quick prep, you can fill them with whatever fresh veggies or proteins you have on hand, or simply enjoy them with creamy avocado and a hint of spicy mayo. Each delightful cup offers a satisfying crunch, a touch of creaminess, and just the right amount of kick that will leave everyone coming back for more. Are you ready to dive into this sushi-inspired adventure?
Why Are Sushi Cups a Must-Try?
Customization Awaits: These sushi cups are endlessly adaptable, so you can swap in your favorite veggies or proteins for a fresh twist each time.
Quick and Easy: With no baking involved, you can whip these up in no time, making them perfect for spontaneous gatherings or meal prep days.
Healthy Ingredients: Packed with nutritious components, each cup is around 110 calories, making them a guilt-free indulgence!
Impressive Presentation: Their colorful and fun appearance makes them a show-stopping appetizer for any occasion.
You’ll also love pairing them with other treats like Cheesecake Cookie Cups for a complete feast!
Sushi Cups Ingredients
• Dive into the vibrant world of sushi cups with these essential ingredients!
For the Sushi Rice Base
- Sushi Rice – Rinse thoroughly before cooking to achieve the perfect texture.
- Water – Needed to cook the rice until it’s tender and fluffy.
For the Filling
- Finely Chopped Veggies (Carrots, Cucumber, Bell Peppers, Sprouts) – Use a mix for crunch and color; any raw veggies can be substituted according to your preference.
- Steamed Mukimame (Shelled Edamame) – Adds protein and texture; regular edamame can be used if mukimame isn’t available.
- Diced Avocado – Provides a creamy touch; about half a small avocado works per cup.
For the Sauces
- Sauce (Soy Sauce, Tamari, or Coconut Aminos) – Choose based on dietary needs to enhance flavor.
- Mayonnaise – Gives creaminess to the spicy mayo blend.
- Sriracha Sauce – Adjust the spiciness of your mayo to your taste!
- Honey – Balances the heat; omit for a sugar-free alternative.
- Sesame Oil – Adds a nutty flavor that elevates the mayonnaise mix.
For Garnish
- Black Sesame Seeds – Sprinkle on top for a beautiful finish and a delightful crunch.
Creating these sushi cups allows for endless customization while ensuring each bite is packed with flavors and health benefits!
Step‑by‑Step Instructions for Sushi Cups
Step 1: Cook the Sushi Rice
In a medium pot, combine 1 cup of rinsed sushi rice with 1.5 cups of water. Bring the mixture to a boil over medium heat, then reduce the heat to low, cover, and let it simmer for 20 minutes. After the time is up, the rice should be tender and the water absorbed, indicating it’s ready for the next step.
Step 2: Cool the Rice
Once the sushi rice is cooked, remove the pot from heat and allow it to cool slightly, about 10 minutes. Fluff the rice gently with a fork to prevent it from becoming too sticky. The ideal texture should be slightly sticky yet holding individual grains, perfect for forming your sushi cups.
Step 3: Form the Rice Cups
Press approximately 2 heaping tablespoons of the cooled sushi rice into each cavity of a muffin tin. Use the back of a small spoon to compact the rice firmly, ensuring it holds its shape. Chill the muffin tin in the refrigerator for at least 20 minutes, allowing the rice to set neatly into cups for your sushi cups.
Step 4: Prepare the Filling
While the rice sets, in a large mixing bowl, combine finely chopped veggies like carrots, cucumber, and bell peppers with steamed mukimame and diced avocado. Stir gently until the mixture is well combined, allowing the vibrant colors to shine through. This filling will bring a refreshing crunch to your sushi cups.
Step 5: Whisk the Spicy Mayo
In a small bowl, prepare the spicy mayo by whisking together ¼ cup of mayonnaise, 1-2 tablespoons of Sriracha (depending on your spice preference), 1 teaspoon of honey, and ½ teaspoon of sesame oil. Blend until the mixture is smooth and creamy, tasting as you go to adjust the heat if necessary.
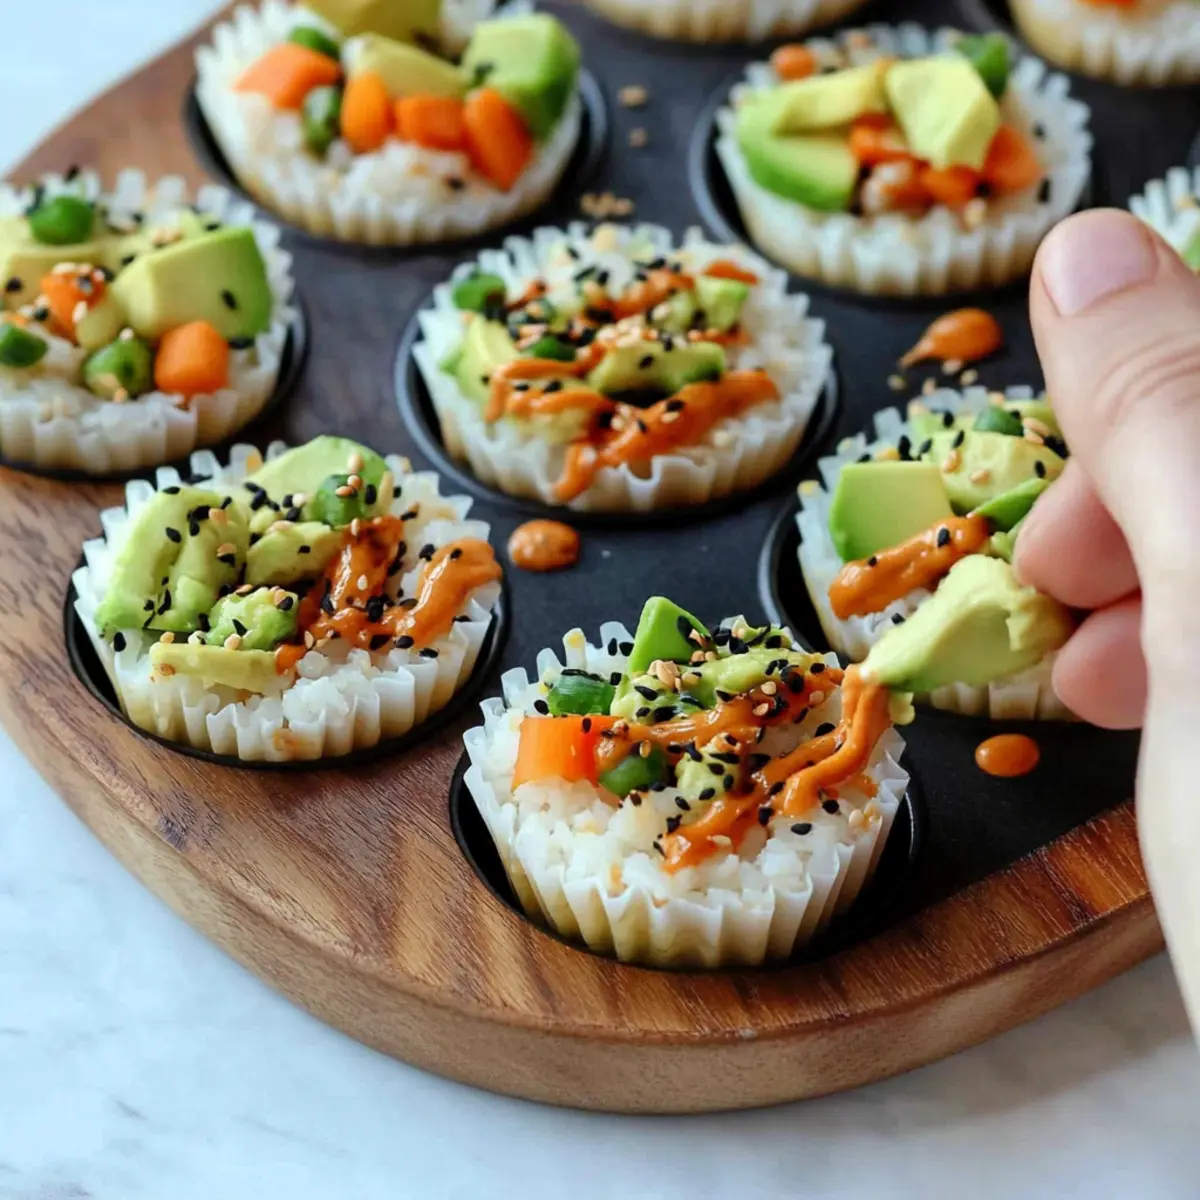
Step 6: Assemble the Sushi Cups
Once the rice cups have chilled, carefully remove them from the muffin tin. Spoon the veggie filling generously into each cup, making sure to evenly distribute for a delightful crunch in every bite. Drizzle the prepared spicy mayo over the filling and finish with a sprinkle of black sesame seeds for an appealing garnish and added texture.
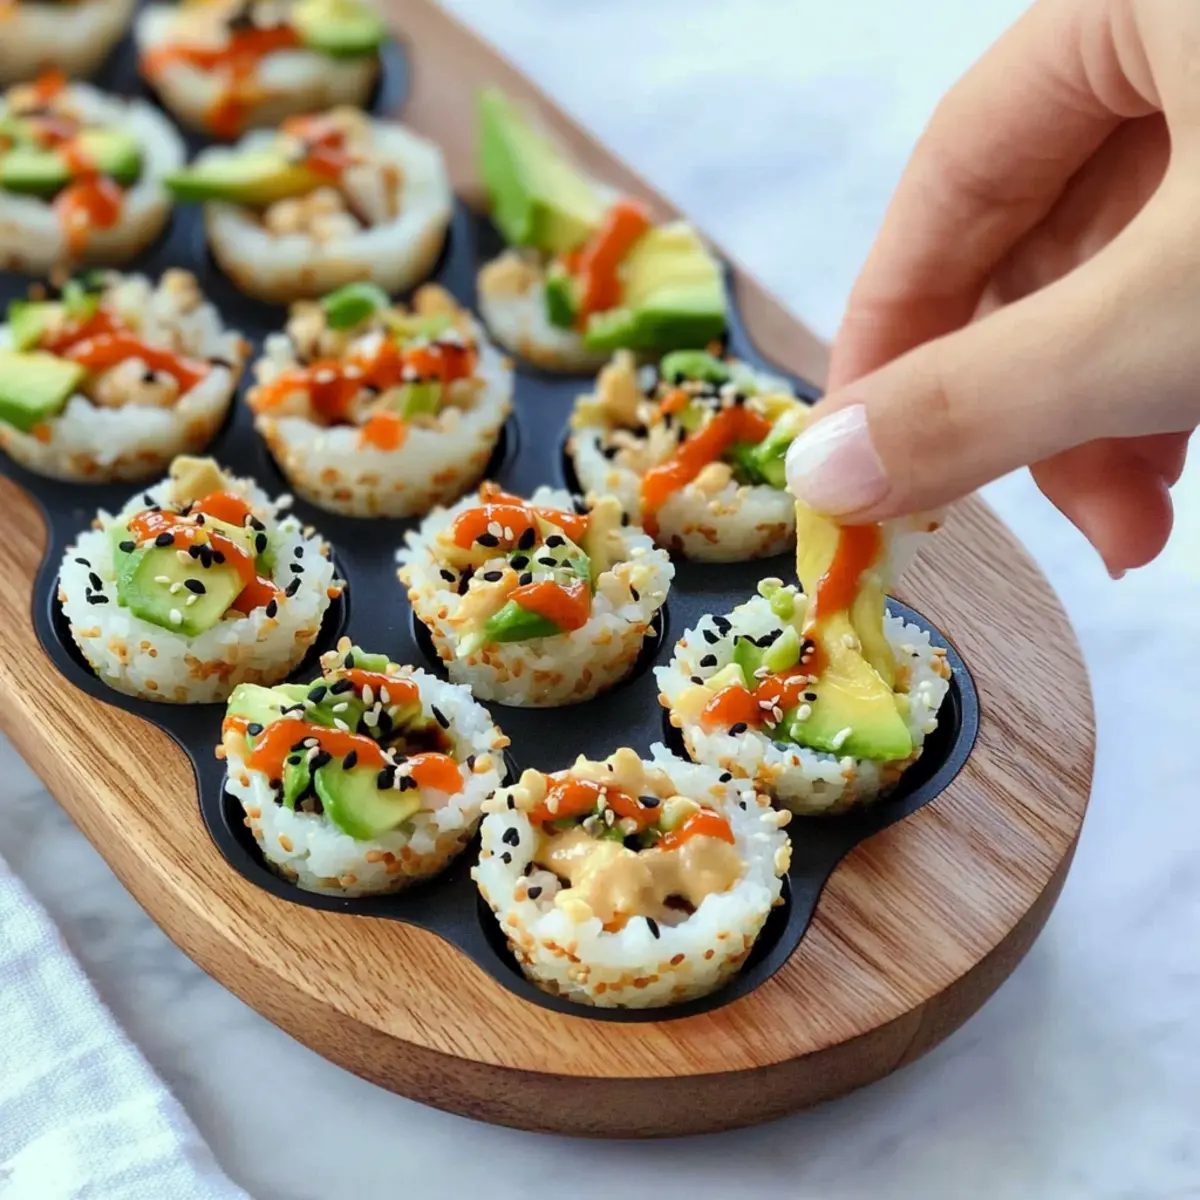
Step 7: Serve and Enjoy
Your delicious sushi cups are now ready to impress! Serve them as a bite-sized appetizer at gatherings or enjoy them as a healthy snack whenever you crave something flavorful. These customizable sushi cups are sure to be a hit for any occasion with their vibrant presentation and mouthwatering taste.

Make Ahead Options
These sushi cups are perfect for meal prep, allowing you to enjoy a delicious appetizer without all the last-minute stress! You can prepare the sushi rice and press it into muffin tins up to 24 hours in advance; just ensure they chill well in the fridge to maintain their shape. The veggie filling can also be mixed and stored in an airtight container for up to 3 days. To keep the avocado looking fresh and vibrant, store it separately and add it just before serving. When you’re ready to impress your guests, simply spoon the filling into the rice cups, drizzle with spicy mayo, and garnish with black sesame seeds for a delightful treat that’s just as delicious as when freshly made!
Storage Tips for Sushi Cups
- Room Temperature: Sushi cups are best enjoyed fresh. If left out, consume within 2 hours to ensure food safety.
- Fridge: Store leftover sushi cups in an airtight container for up to 2 days. Keep the spicy mayo separate until ready to serve for optimal freshness.
- Freezer: These sushi cups can be frozen for up to 1 month. Wrap individually in plastic wrap and place in a freezer-safe bag. Thaw overnight in the fridge before reheating.
- Reheating: Reheat gently in the microwave for 15-20 seconds, or enjoy cold—either way, these sushi cups are delicious!
Sushi Cups Variations & Substitutions
Feel free to get creative and play with flavors in your sushi cups to make them your own!
- Quinoa Base: Substitute sushi rice with quinoa for a nutty flavor and added protein.
- Tofu Delight: Swap in cubed tofu for a vegetarian protein boost; it’s a great canvas for flavors.
- Creamy Avocado Alternative: Use cashew cream instead of avocado for a dairy-free creaminess that everyone will love.
- Go Spicy: Add diced jalapeños or pickled ginger to the filling for an extra layer of heat and zing.
- Vegan Mayo: For a completely plant-based option, use vegan mayo for your spicy mayo mixture; it works beautifully.
- Wrap It Up: Instead of cups, use rice paper wrappers for a fun twist; it’s like a sushi roll in a new shape!
- Sauce Variations: Try a dressing like ponzu or a tangy ginger soy sauce for a different flavor dynamic—deliciously refreshing!
- Mix Up the Fillings: Incorporate fruits like mango or strawberries for a surprising sweetness that pairs perfectly with the savory ingredients.
Don’t be afraid to showcase your creativity; every tweak can add a delightful surprise! You can even consider pairing your sushi cups with delightful treats like Cheesecake Cookie Cups for an unforgettable dining experience.
What to Serve with Customizable Sushi Cups?
These delightful bites are sure to shine when paired with complementary dishes, creating a memorable meal experience.
-
Light Asian Salad: A crisp, refreshing salad with a tangy dressing enhances the sushi cups’ flavors, balancing the richness of the avocado. The crunch of cucumbers and bell peppers in the salad mirrors the vibrant fillings of the sushi cups.
-
Teriyaki Chicken Skewers: These succulent skewers provide a savory contrast to the sushi cups. Marinated in a sweet soy glaze, they add a delightful protein element to your meal. Perfect for grilling on a summer evening!
-
Miso Soup: This savory soup adds warmth and umami to your meal. Sipping on miso soup while enjoying sushi cups creates a comforting and nourishing dining experience, accentuating the freshness of your appetizers.
-
Pickled Vegetables: The tangy crunch of pickled veggies offers a delightful flavor explosion alongside sushi cups. Their acidity helps cleanse the palate and enhances the overall dining experience, providing a perfect crunchy counterpart.
-
Fresh Edamame: Steamed edamame sprinkled with sea salt complements the sushi cups nicely. It’s a classic pairing that provides a satisfying bite and enhances the healthy aspect of your snack table.
-
Cucumber Lemonade: A refreshing drink, this lemonade mixed with cucumber slices not only looks beautiful but provides a rejuvenating sip between bites of sushi cups. The lightness of the drink perfectly pairs with the vibrant flavors of your meal.
-
Green Tea: A warm cup of green tea works wonderfully with the sushi cups, offering a calming and healthful beverage option. Its subtle flavors elevate the meal, making it feel more authentic and complete.
-
Sesame Ice Cream: For dessert, this unique treat provides a sweet finish with a hint of nuttiness that echoes the flavors of the sushi cups, creating a delightful end to your meal.
Elevate your dining experience with these fantastic pairings, making your sushi cups the star of the show!
Expert Tips for Sushi Cups
- Choose the Right Rice: Use sushi rice for the perfect texture; other rices may not hold together as well. Rinse thoroughly before cooking to avoid stickiness.
- Keep it Cool: Allow rice cups to chill for at least 20 minutes. This helps them maintain their shape and makes for easier assembly of your sushi cups.
- Customize Wisely: Feel free to swap in your favorite ingredients, but ensure everything is fresh for the best flavor. Avoid overloading the cups, as they are bite-sized!
- Spice Control: Adjust Sriracha to your liking in the spicy mayo; add slowly and taste as you go to find your perfect heat level.
- Garnish with Care: Black sesame seeds add a beautiful touch, so sprinkle them over the top just before serving for maximum visual appeal.
Sushi Cups Recipe FAQs
How do I select the best sushi rice for my cups?
Absolutely! When choosing sushi rice, look for short-grain varieties labeled specifically for sushi. They have the right starch content to achieve that perfect sticky texture. Rinse the rice under cold water several times until the water runs clear; this helps remove excess starch and prevents gummyness while cooking.
How long can I store my sushi cups in the fridge?
You can store your sushi cups in an airtight container in the refrigerator for up to 2 days. However, for the best flavor and freshness, I recommend consuming them within the first day. Make sure to keep the spicy mayo separate until serving to prevent the rice from becoming soggy.
Can I freeze my sushi cups for later?
Yes, absolutely! To freeze your sushi cups, wrap each one individually in plastic wrap and place them in a freezer-safe bag. They can be stored in the freezer for up to 1 month. When you’re ready to enjoy them, simply thaw them in the refrigerator overnight and enjoy cold or gently reheat in the microwave for about 15-20 seconds.
What should I do if my sushi rice ends up too sticky?
If your sushi rice turns out too sticky, it might be due to not rinsing thoroughly before cooking or overcooking. To troubleshoot, try adding a small amount of cold water to the rice to loosen it and fluff gently with a fork. For future batches, ensure you rinse until the water is clear, and keep an eye on the cooking time to avoid excess moisture.
Are these sushi cups safe for people with allergies?
While sushi cups can be customized to accommodate different dietary needs, be cautious with ingredients like soy sauce, mayonnaise, and sesame oil, as they can contain allergens such as gluten and nuts. For gluten-free diets, opt for tamari or coconut aminos for the sauce. Always read labels carefully and consider individual allergies when preparing.
Can I substitute the veggies in my sushi cups?
Very much! Feel free to swap out the veggies based on your personal taste or what you have on hand. Think shredded cabbage, zucchini, or avocado for creaminess. The more you play with the fillings, the more exciting your sushi cups can become!
Delicious Sushi Cups: Customizable Bites of Joy
Ingredients
Equipment
Method
- In a medium pot, combine sushi rice with water. Bring to boil, then reduce heat and simmer for 20 minutes.
- Remove pot from heat and let rice cool for about 10 minutes. Fluff with a fork.
- Press approximately 2 heaping tablespoons of cooled sushi rice into each muffin tin cavity. Chill for 20 minutes.
- In a large bowl, combine finely chopped veggies, mukimame, and diced avocado. Stir gently.
- In a small bowl, whisk together mayonnaise, Sriracha, honey, and sesame oil for spicy mayo.
- Remove rice cups from muffin tin, fill with veggie mixture, drizzle with spicy mayo, and sprinkle with sesame seeds.
- Serve as a bite-sized appetizer or healthy snack.
Leave a Reply