
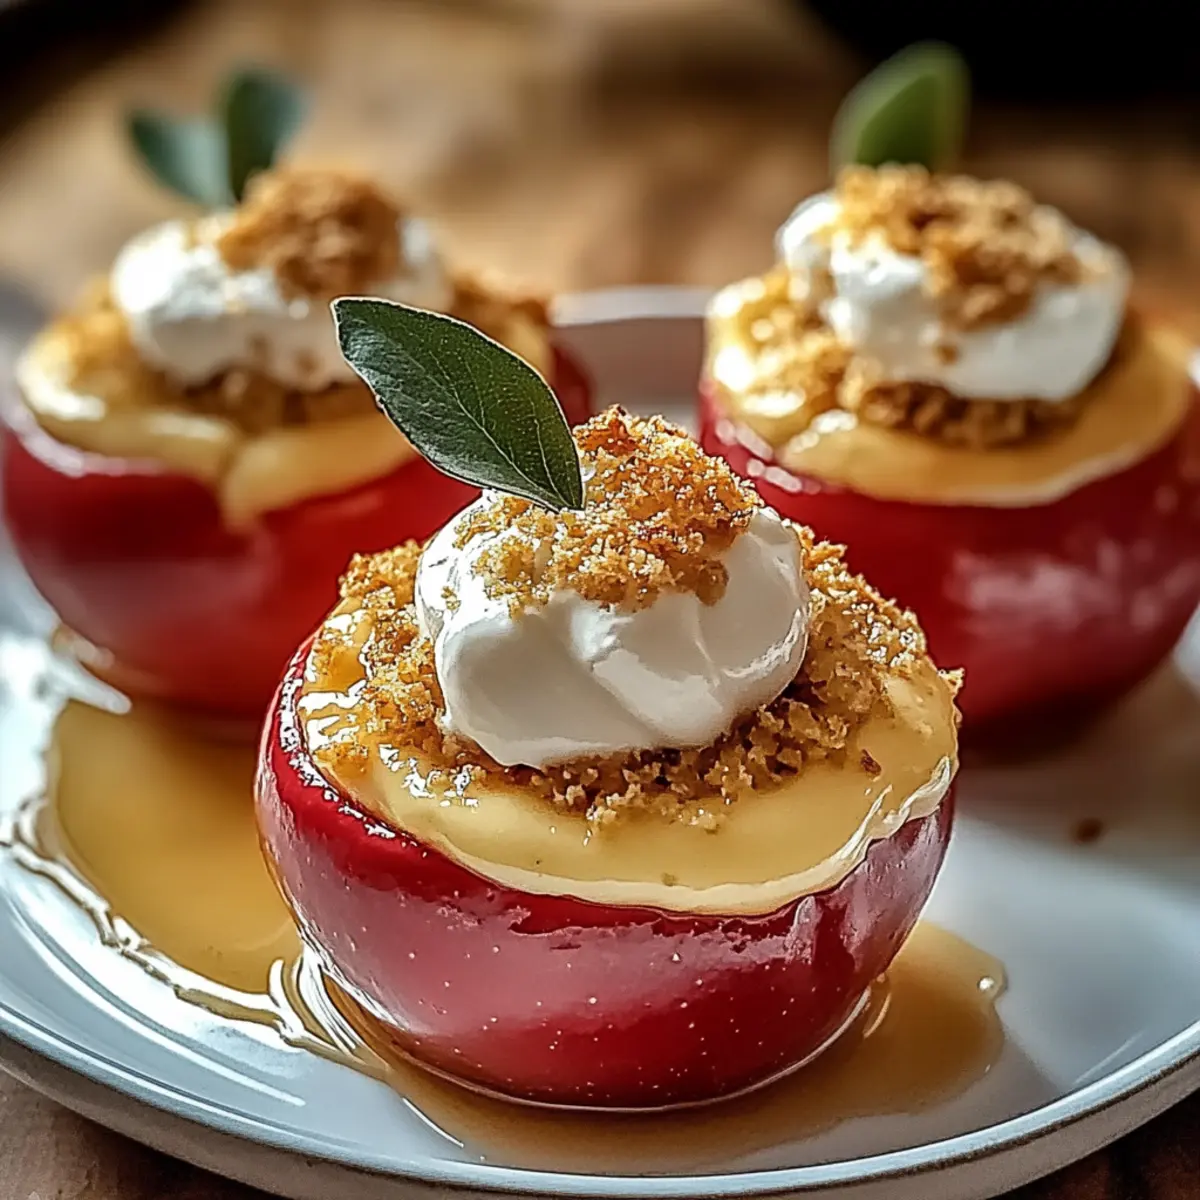
As the leaves begin to turn golden and the air carries a crispness that signals the arrival of fall, I find myself irresistibly drawn to the warm, inviting scents of fresh-baked apples and cinnamon. This season, I’m thrilled to share my recipe for Tasty Cheesecake-Stuffed Baked Apples, a delightful dessert that perfectly captures the essence of autumn. Not only is this recipe incredibly beginner-friendly, but it’s also gluten-free and fully customizable, making it a hit for gatherings or cozy nights in. With every bite, you’ll savor the tender apples enveloping a creamy, cheesecake-like filling, bringing comfort and joy to your table. Are you ready to bring the flavors of fall into your kitchen? Let’s dive into this scrumptious adventure together!
Why Are These Baked Apples Irresistible?
Cozy Fall Flavors: Enjoy the warm embrace of apple and cinnamon, creating a dessert that feels like a hug.
Customizable Fun: Easily tailor these treats to your taste—try different apple varieties or add your favorite nuts!
Beginner-Friendly: The simple steps make this recipe perfect for anyone looking to brighten their kitchen without hassle.
Gluten-Free Delight: Ideal for any dietary need without compromising flavor; everyone can indulge!
Crowd-Pleasing Treat: Serve at gatherings, and watch as guests rave about this unique, comforting dessert!
This easy recipe is the perfect excuse to gather loved ones and celebrate the crispness of fall!
Tasty Cheesecake-Stuffed Baked Apples Ingredients
For the Apples
- Sweet-tart Apples – Choose Honeycrisp or Gala to hold their shape and enhance flavor.
- Lemon Juice – Prevents browning and keeps your apples looking fresh.
For the Cheesecake Filling
- Cream Cheese – Make sure it’s softened for a creamy filling that’s easy to blend.
- Granulated Sugar – Essential for adding just the right sweetness to the cheesecake mixture.
- Vanilla Extract – Provides a lovely depth of flavor that pairs perfectly with the apples.
- Ground Cinnamon – Infuses the filling with the cozy aroma of fall spices.
- Ground Nutmeg – Adds a subtle earthiness that rounds out the flavor profile.
For the Crunchy Topping
- Graham Cracker Crumbs – Mimics the classic cheesecake crust, offering delightful texture.
- Chopped Nuts (optional) – Use walnuts or pecans for added crunch and flavor enhancement.
- Melted Butter – Drizzle carefully to encourage a beautiful browning on the apples.
For Serving
- Whipped Cream (optional) – A fluffy topping that complements the cheesecake flavor for extra indulgence.
Enjoy creating these tasty cheesecake-stuffed baked apples that embody the essence of autumn!
Step‑by‑Step Instructions for Tasty Cheesecake-Stuffed Baked Apples
Step 1: Preheat the Oven
Preheat your oven to 350°F (175°C), allowing it to reach the perfect temperature for baking. This step is crucial for achieving that golden-brown finish on your tasty cheesecake-stuffed baked apples. Prepare a baking dish by lightly greasing it or lining it with parchment paper for easy cleanup.
Step 2: Prepare the Apples
Wash your sweet-tart apples, such as Honeycrisp or Gala, and slice off the tops, creating a cap. Carefully core the apples to remove the seeds while keeping the bottoms intact. Brush the interiors with fresh lemon juice to prevent browning and enhance the apples’ natural flavors.
Step 3: Make the Filling
In a mixing bowl, combine the softened cream cheese, granulated sugar, vanilla extract, ground cinnamon, and nutmeg. Using a hand mixer or a spoon, blend together until the mixture is smooth and creamy. This filling will be the star of your tasty cheesecake-stuffed baked apples, so ensure it’s well combined.
Step 4: Incorporate Crumbs and Nuts
Gently fold in the graham cracker crumbs and any chopped nuts you’ve chosen to enhance the crunch factor. Mix until everything is evenly distributed, ensuring that each bite of your filling is packed with flavor. This combination will mimic the classic cheesecake crust beautifully.
Step 5: Stuff the Apples
Spoon the luscious cheesecake filling generously into each apple cavity, mounding it slightly to create an impressive presentation. Ensure the filling is evenly distributed among the apples to achieve uniform baking. This step brings your tasty cheesecake-stuffed baked apples to life!
Step 6: Arrange in Dish
Place your stuffed apples upright in the prepared baking dish, taking care to space them evenly. Drizzle melted butter over the tops, allowing it to soak into the filling and create a lovely, browned crust while baking. This ensures your dessert has that rich, inviting finish.
Step 7: Bake Covered
Cover the baking dish with foil to keep the moisture in and bake in the preheated oven for 25-30 minutes. This covered baking allows the apples to become tender while keeping the cheesecake filling creamy. You’ll know they’re ready when the apples are fork-tender.
Step 8: Brown Tops
Remove the foil and bake for an additional 10 minutes to achieve a beautiful golden color on top. Keep a close eye on your tasty cheesecake-stuffed baked apples as they bake, allowing them to reach that perfect level of browning without burning.
Step 9: Cool and Serve
After baking, take the dish out of the oven and let the apples cool for a few minutes. Serve them warm for the best texture, and consider topping with a dollop of whipped cream if desired. These irresistible, tasty cheesecake-stuffed baked apples are ready to delight your family and friends!
Make Ahead Options
These tasty cheesecake-stuffed baked apples are perfect for meal prep enthusiasts! You can prepare the apples and cheesecake filling up to 24 hours in advance. Start by coring and brushing the apple interiors with lemon juice, then mix your cheesecake filling and stuff the apples. Simply cover the stuffed apples with plastic wrap and refrigerate them until you’re ready to bake. When it’s time to enjoy, pop them in the oven—first covered for 25-30 minutes, then uncover for an additional 10 minutes to achieve that delicious golden top. This way, you’ll have a delectable dessert ready with minimal effort, making your busy weeknights a little sweeter!
Tasty Cheesecake-Stuffed Baked Apples Variations
Feel free to add your personal touch to these baked apples with these simple yet delightful substitutions and variations!
- Different Apple Varieties: Use Fuji or Granny Smith for a burst of tangy sweetness that balances the cheesecake filling.
- Dairy-Free Option: Substitute cream cheese with a dairy-free alternative for a deliciously creamy, lactose-free treat.
- Add Nuts: Fold in walnuts or pecans for an extra layer of crunch, enhancing the texture and flavor profile beautifully.
- Flavor Infusions: Incorporate almond extract or fresh orange zest to give your filling a refreshing twist and aromatic depth.
- Sweet Toppings: Drizzle warm caramel or rich chocolate sauce over the apples just before serving for a decadent finish.
- Spice Up the Filling: Want a kick? Add a pinch of cayenne pepper or ground ginger to the filling for a hint of heat.
- Top with Oat Crumble: Create a crumbly topping with oats, brown sugar, and melted butter for a delicious crunchy contrast.
- Fruit Additions: Mix in chopped dried cranberries or raisins in the filling for added sweetness and chewiness, enhancing each bite.
These variations ensure that everyone can enjoy a personalized version of these tasty cheesecake-stuffed baked apples. Adapt and play around with your favorite ingredients to make this dish truly your own!
Expert Tips for Tasty Cheesecake-Stuffed Baked Apples
-
Choose Firm Apples: Select varieties like Honeycrisp or Gala. This ensures your tasty cheesecake-stuffed baked apples hold their shape and avoid mushiness after baking.
-
Soften Cream Cheese: Always let your cream cheese sit at room temperature for at least 30 minutes. This prevents lumps and allows for a silky smooth filling in your dessert.
-
Mind the Baking Time: Keep an eye on your apples while baking. Overbaking can lead to overly soft apples, compromising their delicious texture; aim for fork-tenderness instead.
-
Make Ahead: Prep your apples and filling a day in advance. Stuff the apples and refrigerate them, then bake when you’re ready, making entertaining stress-free.
-
Customize Flavors: Experiment with different nuts or spices to personalize your baked apples. Adding a splash of almond extract can elevate the flavor profile beautifully.
What to Serve with Tasty Cheesecake-Stuffed Baked Apples
Indulging in warm, cinnamon-laced apples is a delightful experience, and pairing them with the right accompaniments elevates the moment even more.
-
Vanilla Ice Cream: A scoop of creamy vanilla adds a rich and delightful contrast to the warm apples—truly a match made in heaven.
-
Caramel Sauce: Drizzling warm caramel over the apples enhances the sweetness while adding a decadent touch. The smooth texture pairs beautifully with the soft fruit.
-
Cinnamon-Sugar Breadsticks: These crunchy, sweet treats provide a fun and interactive way to enjoy your dessert, balancing the creamy filling with their light, crispy texture.
-
Chai Tea: The spiced, warm notes of chai complement the fall flavors in your dish, creating an inviting atmosphere that warms the heart.
-
Candied Pecans: Adding crunchy, sweet nuts mirrors the texture of the baked apples while infusing even more seasonal flavor into the meal.
-
Whipped Cream: For that finishing touch, a dollop of whipped cream creates an airy, luscious topping, amplifying the creamy element of the cheesecake stuffing.
Try these suggestions alongside your tasty cheesecake-stuffed baked apples to create an unforgettable dining experience that celebrates the essence of fall!
Storage Tips for Tasty Cheesecake-Stuffed Baked Apples
-
Fridge: Store leftover baked apples in an airtight container in the refrigerator for up to 3 days. This will help maintain their flavor and texture.
-
Freezer: For longer storage, freeze individual apples wrapped tightly in plastic wrap, then place them in a freezer-safe bag for up to 2 months.
-
Reheating: To enjoy your tasty cheesecake-stuffed baked apples again, thaw in the fridge overnight, then reheat in the oven at 350°F (175°C) for about 10-15 minutes, or until warmed through.
-
Air-tight Preservation: Be sure to wrap the apples well to prevent freezer burn, ensuring they remain moist and flavorful when it’s time to indulge again!
Tasty Cheesecake-Stuffed Baked Apples Recipe FAQs
What type of apples should I use for baking?
I highly recommend using sweet-tart apples like Honeycrisp or Gala for your tasty cheesecake-stuffed baked apples. These varieties are firm and hold their shape beautifully during baking, preventing mushiness and enhancing the flavor of your dessert.
How should I store leftover baked apples?
You can store your leftover tasty cheesecake-stuffed baked apples in an airtight container in the refrigerator for up to 3 days. This helps preserve their flavor and texture. If you don’t think you’ll finish them in that time, freezing is a great option!
Can I freeze cheesecake-stuffed baked apples?
Absolutely! To freeze, wrap each individual apple tightly in plastic wrap, and then place them in a freezer-safe bag. They can be frozen for up to 2 months. When you’re ready to enjoy them, simply thaw in the fridge overnight and reheat in a preheated oven at 350°F (175°C) for about 10-15 minutes.
How do I prevent my cream cheese filling from being lumpy?
To ensure a smooth filling, make sure your cream cheese is softened before mixing—let it sit at room temperature for at least 30 minutes. This step is essential for preventing lumps in your tasty cheesecake-stuffed baked apples. Using an electric mixer can also help achieve that creamy consistency.
Are these baked apples suitable for people with gluten allergies?
Yes, they are! This recipe is designed to be gluten-free by using gluten-free graham cracker crumbs. Just double-check any products you use, and this delightful dessert can be safely enjoyed by everyone, including those with gluten sensitivities.
Can I customize the flavor of the cheesecake filling?
Very! You can easily tailor your tasty cheesecake-stuffed baked apples by adding different spices, such as nutmeg or ginger, or by including a splash of almond extract or orange zest to the filling. Even folding in some chopped nuts can enhance the flavor and crunch. The options are limitless, so get creative!
Tasty Cheesecake-Stuffed Baked Apples for a Cozy Fall Treat
Ingredients
Equipment
Method
- Preheat your oven to 350°F (175°C) and prepare a baking dish.
- Wash the apples and slice off the tops. Core the apples and brush interiors with lemon juice.
- In a bowl, combine cream cheese, sugar, vanilla, cinnamon, and nutmeg. Blend until smooth.
- Fold in graham cracker crumbs and chopped nuts, mixing until evenly distributed.
- Stuff each apple with the cheesecake filling.
- Arrange the stuffed apples in the baking dish and drizzle with melted butter.
- Cover with foil and bake for 25-30 minutes until tender.
- Remove the foil and bake for an additional 10 minutes for browning.
- Let cool slightly and serve warm, optionally topped with whipped cream.
Leave a Reply