
As I stood in the kitchen, a delightful aroma swirled around me, hinting at the chocolaty magic about to unfold. I couldn’t help but smile, envisioning the awe on my family’s faces as I presented this Spiderweb Chocolate Cake—a showstopper that perfectly blends rich chocolate decadence with an enchanting white chocolate drizzle. This cake isn’t just for Halloween; it’s ideal for any occasion that calls for a little celebration. One of the best parts? It’s simple to create, and with a few clever twists, it can easily cater to gluten-free or vegan diets. Imagine the joy of indulging in a dessert that not only tastes incredible but also fits your dietary needs. Ready to enchant your guests and spark your inner pastry artist? Let’s dive into this spooktacular recipe!
Why is this cake a must-try?
Irresistible Flavor: The rich, deep chocolate paired with a sweet white chocolate spiderweb creates a harmonious flavor profile that captivates all palates.
Versatility: Whether you’re vegan, gluten-free, or simply want to indulge, this recipe has you covered with easy substitutions that don’t compromise taste.
Perfect for Any Occasion: While it’s a showstopper for Halloween, this Spiderweb Chocolate Cake shines at birthdays, gatherings, or just whenever you crave something special.
Effortlessly Elegant: With its stunning spiderweb design, you’ll impress your friends and family without spending hours in the kitchen.
Quick Preparation: Get this cake in the oven in just under 15 minutes—leave the rest to bake while you relax. Don’t forget to check out our delicious Oreo Icebox Cake for another easy dessert idea!
Spiderweb Chocolate Cake Ingredients
For the Cake
- All-Purpose Flour – Creates the structure for a moist, tender cake, but can be substituted with a 1:1 gluten-free flour blend.
- Sugar – Adds sweetness and helps achieve the perfect texture.
- Cocoa Powder – Infuses rich chocolate flavor for an indulgent treat; unsweetened cocoa is recommended for best results.
- Baking Powder – Ensures the cake rises beautifully.
- Baking Soda – Works alongside baking powder for perfect lift.
- Salt – Balances sweetness and enhances flavor.
- Eggs – Acts as a binding agent, providing fluffiness; can be replaced with flaxseed meal mixed with water (1 tbsp + 2.5 tbsp) for a vegan option.
- Milk – Adds moisture for a rich, tender crumb; substitute with almond milk for a dairy-free version.
- Vegetable Oil – Keeps the cake moist and adds delectable texture.
- Vanilla Extract – Provides warm, aromatic sweetness.
- Boiling Water – Intensifies the chocolate flavor and smooths the batter.
For the Frosting and Decoration
- Chocolate Frosting – Use your favorite recipe for a luscious topping that enhances the rich flavor.
- White Chocolate Chips – Creates the stunning spiderweb effect; melt for drizzling on top.
Indulge in the sweetness of this Spiderweb Chocolate Cake that’s not just a treat but an artistic masterpiece perfect for any special occasion!
Step‑by‑Step Instructions for Spiderweb Chocolate Cake
Step 1: Preheat the Oven
Start by preheating your oven to 350°F (175°C). This ensures the ideal baking environment for your Spiderweb Chocolate Cake. While the oven heats up, gather your ingredients and prepare your cake pans by greasing and lightly flouring them to prevent sticking.
Step 2: Mix Dry Ingredients
In a large mixing bowl, whisk together 2 cups of all-purpose flour, 2 cups of sugar, ¾ cup of cocoa powder, 1½ teaspoons of baking powder, 1½ teaspoons of baking soda, and 1 teaspoon of salt. Make sure the mixture is well combined, with no clumps of cocoa powder, as this creates a rich and delightful cake.
Step 3: Combine Wet Ingredients
Add 2 large eggs, 1 cup of milk, ½ cup of vegetable oil, and 2 teaspoons of vanilla extract to the dry ingredients. Mix everything together until you achieve a smooth batter. The mixture should be glossy and well-incorporated, signaling that your Spiderweb Chocolate Cake is coming together beautifully.
Step 4: Add Boiling Water
Carefully pour in 1 cup of boiling water to the batter. This step intensifies the chocolate flavor and aids in achieving a moist cake. Stir gently until the batter is smooth and combined; it will be quite thin, which is perfect for a tender crumb.
Step 5: Pour Into Pans
Evenly pour the cake batter into the prepared cake pans. It’s crucial to distribute the batter evenly to ensure that both layers bake at the same time. Tap the pans lightly on the counter to remove any air bubbles and promote an even rise.
Step 6: Bake the Cakes
Place the pans in the preheated oven and bake for 30–35 minutes. Keep an eye on them, and test for doneness by inserting a toothpick in the center; it should come out clean or with a few moist crumbs attached. The cakes will rise beautifully and smell heavenly!
Step 7: Cool the Cakes
Once baked, remove the pans from the oven and let them cool in the pans for 10 minutes. Then, invert the cakes onto a wire rack to cool completely. This cooling process is essential as it helps the layers firm up and makes frosting easier.
Step 8: Frost the Cakes
Once your cakes are completely cool, spread a generous layer of chocolate frosting over the top of one layer. Then, place the second layer on top and frost the entire cake. The rich frosting complements the decadent chocolate flavor of the Spiderweb Chocolate Cake.
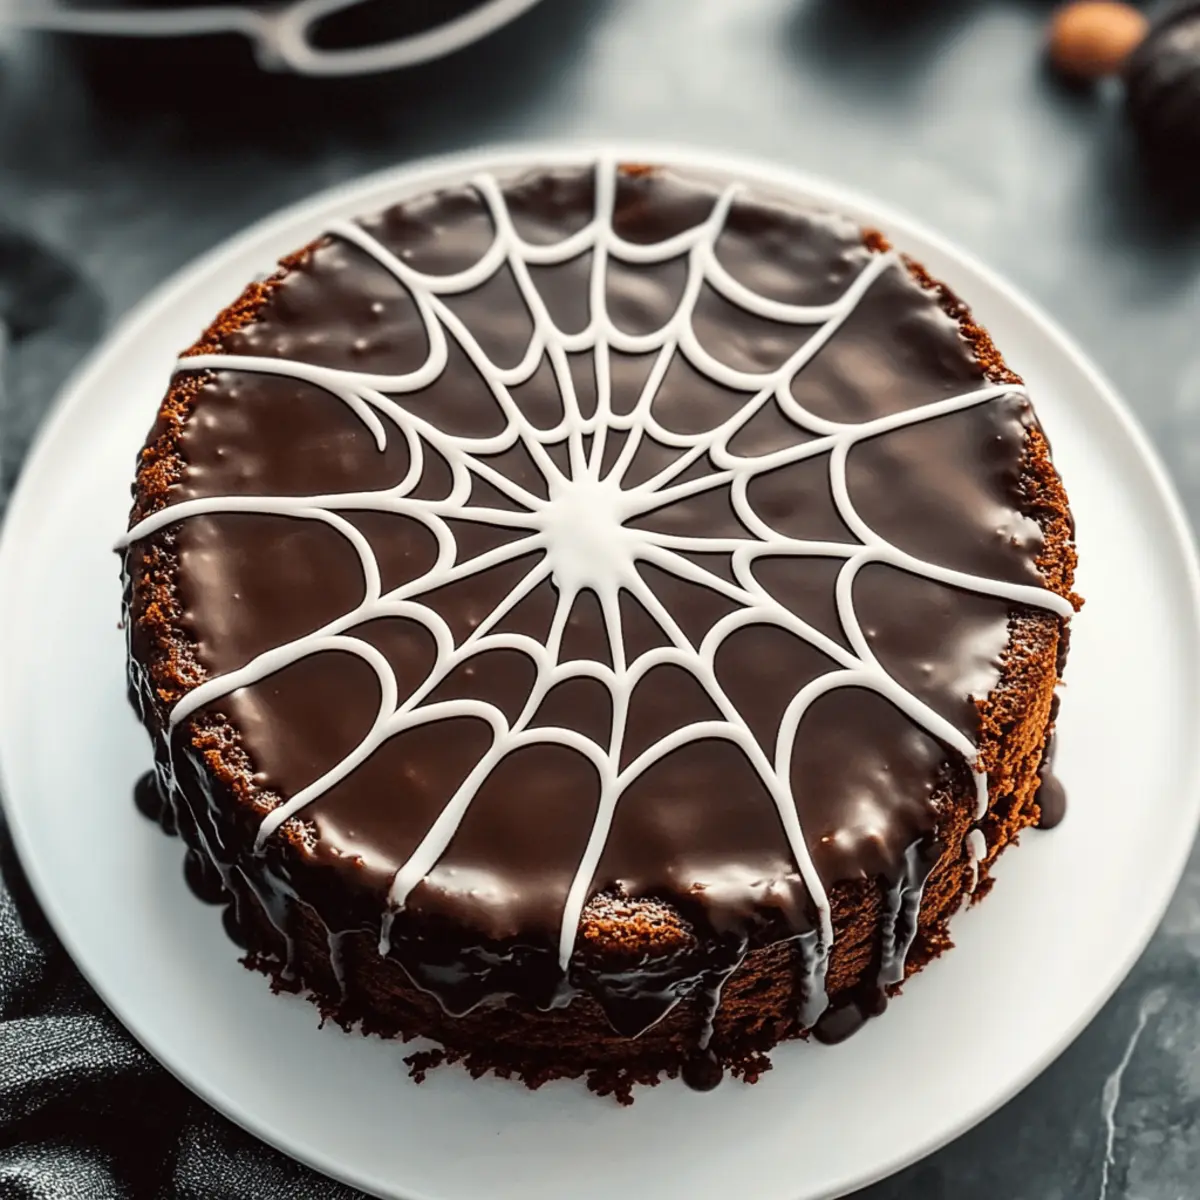
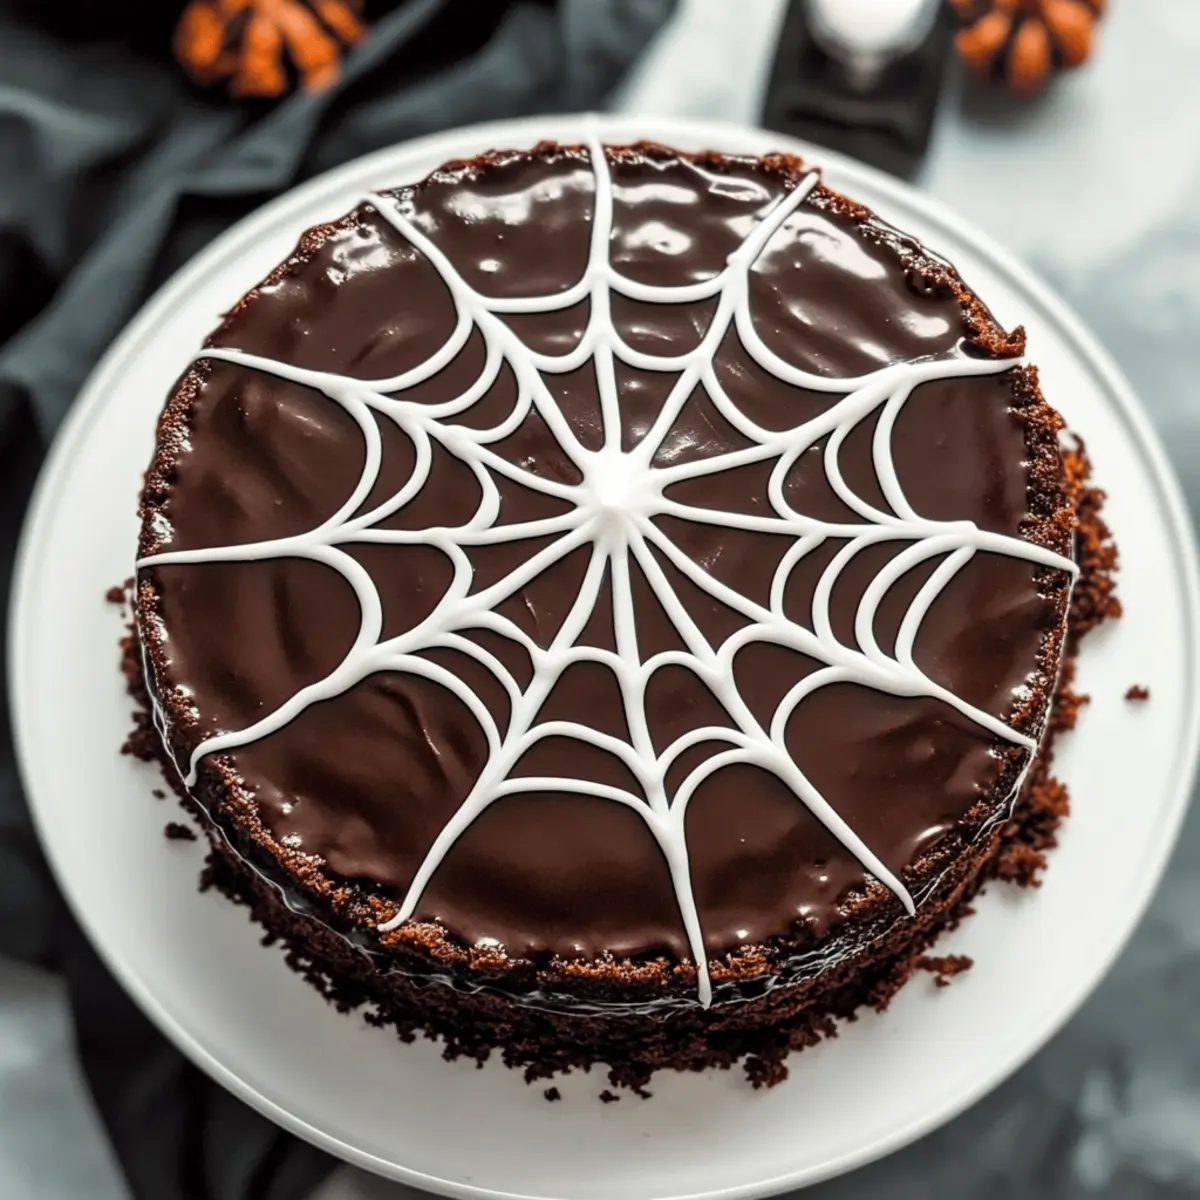
Step 9: Create the Spiderweb Design
Melt 1 cup of white chocolate chips in a microwave or double boiler. Once melted, drizzle the white chocolate over the frosted cake in a circular motion to create the spiderweb effect. Use a toothpick to pull lines from the center outward to enhance the design and make it look spectacular.

Tips for the Best Spiderweb Chocolate Cake
Accurate Measurements: Ensure that you measure all ingredients precisely; even a small discrepancy can affect the cake’s texture and rise.
Avoid Overmixing: Mix the batter just until combined. Overmixing can result in a dense cake instead of the light, airy texture you want.
Cooling Time: Let the cakes cool completely before frosting. This prevents the frosting from melting and sliding off, maintaining the beautiful spiderweb design.
Frosting Temperature: Use room temperature frosting for smoother spreading. Cold frosting can be difficult to apply evenly and may tear the cake.
Chocolate Quality: Choose high-quality cocoa powder and chocolate for rich flavor. The better your ingredients, the more indulgent your Spiderweb Chocolate Cake will be!
Decorating Fun: Get creative with the spiderweb design! Use a toothpick to create delicate lines and shapes, making your cake even more eye-catching for guests.
Make Ahead Options
These Spiderweb Chocolate Cakes are perfect for busy home cooks who want to make dessert preparations seamless! You can bake the cake layers up to 3 days in advance; just ensure they cool completely before wrapping tightly in plastic wrap and refrigerating to maintain moisture. Additionally, the chocolate frosting can be prepared up to 5 days ahead—store it in an airtight container in the fridge for the best flavor and texture. When you’re ready to serve, simply frost the chilled layers and create the spiderweb design with melted white chocolate. This way, you’ll have a stunning cake ready to impress your guests with minimal effort!
How to Store and Freeze Spiderweb Chocolate Cake
Fridge: Store the cake in an airtight container for up to 5 days. Make sure it’s completely cool before covering, to maintain freshness and moisture.
Freezer: For longer storage, wrap the cooled cake tightly in plastic wrap and aluminum foil. It can be frozen for up to 3 months; thaw in the fridge overnight before serving.
Reheating: If you prefer a warm treat, slice a piece and microwave for about 10–15 seconds. Enjoy the decadent chocolate flavor just as delightful as the first time!
Layered Cakes: If you’ve made a multi-layer Spiderweb Chocolate Cake, keep the layers stacked but wrapped. This helps preserve the moisture and taste, making every slice enjoyable.
Spiderweb Chocolate Cake Variations
Feel free to get creative and personalize your Spiderweb Chocolate Cake with these delightful variations!
- Gluten-Free: Use a 1:1 gluten-free flour blend to keep it just as moist and delicious.
- Vegan: Substitute eggs with flaxseed meal and milk with almond milk for a compassionate twist.
- Extra Chocolatey: Mix in 1 cup of chocolate chips for a rich, gooey surprise with every bite.
- Nutty Texture: Add 1 cup of chopped nuts, like walnuts or pecans, for a delightful crunch and depth.
- Coffee Enhancer: Replace half of the boiling water with brewed coffee to deepen the chocolate flavor beautifully.
- Spicy Kick: Add a teaspoon of cayenne pepper or cinnamon for an unexpected warmth that dances on the palate.
- Berry Burst: Stir in 1 cup of fresh raspberries or strawberries for a juicy fruitiness that brightens each slice.
- Coconut Twist: Fold in shredded coconut for a tropical touch, complementing the chocolate perfectly and enhancing the visual appeal.
If you’re tempted for something equally delightful, try pairing this with our luscious Coconut Cloud Cake or a charming, fruity Italian Lemon Cake. Customize your cake, and watch it wow your guests!
What to Serve with Spiderweb Chocolate Cake
As you prepare to unveil this stunning creation, consider delightful pairings that elevate your dessert into a full experience.
- Vanilla Ice Cream: This classic pairing adds a cool, creamy contrast to the rich chocolate, enhancing every bite. A scoop on the side balances the flavors perfectly.
- Whipped Cream: Light and airy, whipped cream offers a fluffy texture that complements the decadent cake, creating a blissful harmony.
- Fresh Berries: Strawberries or raspberries provide a natural tartness that cuts through the richness while adding a pop of color on your plate.
- Coffee: A warm cup of coffee complements the chocolate’s depth by introducing a bitter note, creating a delightful flavor synergy.
- Chocolate Ganache: For an extra touch of indulgence, consider drizzling warm chocolate ganache over each slice—more chocolate? Yes, please!
- Mint Tea: A soothing mint tea creates a refreshing finish after each bite, embracing the chocolate’s richness while cleansing the palate.
- Nutty Biscotti: Crunchy, nutty biscotti offersd a delightful texture contrast, perfect for those cozy moments with coffee or tea.
- Spiced Apple Cider: Especially during the fall months, a cup of warm spiced apple cider pairs beautifully with the chocolate cake, adding seasonal zest.
- Pumpkin Muffins: If you’re in a fall mood, moist pumpkin muffins echo the seasonal flavors and provide a festive touch.
- Peanut Butter Cups: For the adventurous, serve mini peanut butter cups alongside the cake for a playful, nostalgic pairing that brings a fun twist!
Spiderweb Chocolate Cake Recipe FAQs
What is the best way to choose ripe ingredients?
When selecting your ingredients, particularly for key components like eggs and milk, be sure to choose fresh eggs without any cracks and milk that is within its expiration date. If you’re using fresh produce like berries as decorations, look for vibrant colors and firmness. For dry goods like flour, check the expiration date on the package and ensure it’s stored in a cool, dry place to maintain quality.
How should I store my Spiderweb Chocolate Cake?
Absolutely! Store your Spiderweb Chocolate Cake in an airtight container in the fridge for up to 5 days to retain its moisture and flavor. If you prefer to keep it longer, you can freeze cake slices wrapped tightly in plastic wrap and aluminum foil for up to 3 months. Just thaw in the fridge overnight before enjoying to keep the cake’s texture intact.
Can I freeze the Spiderweb Chocolate Cake?
Yes, you can! To freeze the cake, allow it to cool completely, then wrap it tightly in plastic wrap and follow with a layer of aluminum foil. This double protection helps to avoid freezer burn. When you’re ready to enjoy it, simply thaw it in the fridge overnight, and it will be just as delicious as when you first made it!
What if I encounter a dry cake?
If you find your cake turns out drier than expected, don’t worry—it’s an easy fix! To moisten it, I recommend preparing a simple syrup by combining equal parts sugar and water in a saucepan. Heat until the sugar dissolves, then drizzle this syrup over the cake layers before frosting. This will add back some moisture and keep your cake feeling fresh and luscious.
Are there any dietary considerations I should keep in mind?
Of course! If you’re cooking for guests with dietary restrictions, consider using a gluten-free flour blend to make the Spiderweb Chocolate Cake gluten-free. To cater to vegan diets, swap the eggs for flaxseed meal (1 tablespoon mixed with 2.5 tablespoons of water per egg) and the milk for almond milk. Always check for allergy information on packaging, especially for ingredients like nuts or dairy.
How long does the Spiderweb Chocolate Cake last after baking?
The cake will last a delightful 5 days in the fridge when stored properly in an airtight container. If you decide to freeze any leftovers, remember to use tight wrapping to keep it fresh for up to 3 months. Always ensure it’s cool before covering to lock in that delectable taste!

Spiderweb Chocolate Cake: Toast to Spooky Deliciousness
Ingredients
Equipment
Method
- Preheat your oven to 350°F (175°C), and prepare your cake pans by greasing and lightly flouring them.
- In a large mixing bowl, whisk together all-purpose flour, sugar, cocoa powder, baking powder, baking soda, and salt.
- Add eggs, milk, vegetable oil, and vanilla extract to the dry ingredients and mix until smooth.
- Pour in boiling water and stir gently until the batter is smooth and thin.
- Evenly distribute batter into prepared pans, tapping to remove air bubbles.
- Bake for 30-35 minutes, testing for doneness with a toothpick.
- Cool the cakes in pans for 10 minutes before inverting onto a wire rack to cool completely.
- Once cooled, frost the top of one layer with chocolate frosting, add the second layer, and frost the entire cake.
- Melt white chocolate chips and drizzle over the cake in a circular motion, using a toothpick to create the spiderweb effect.
Leave a Reply