
As I stood in my kitchen surrounded by the aromas of fresh ingredients, the idea struck me: why not merge the vibrant flavors of sushi with an unconventional twist? That’s when these Spicy Tuna Sesame Miso Cones came to life. This recipe is not only a feast for the senses, but it also brings a satisfying crunch that will elevate any gathering into a flavorful adventure. Using sushi-grade tuna, you can whip up these delightful cones in no time, making them an irresistible appetizer for game day or any celebration. Plus, with simple substitutions, you can effortlessly tailor them to your taste, whether that means swapping tuna for salmon or opting for Greek yogurt in the spicy mayonnaise. Ready to impress with a dish that truly captures the essence of Asian fusion? Let’s dive into the delicious world of Spicy Tuna Sesame Miso Cones!
What Makes Spicy Tuna Sesame Miso Cones Unique?
Bold flavors: These cones marry the rich taste of sushi-grade tuna with a hint of umami from miso, creating a delectable explosion of flavors in every bite.
Crispy delight: The homemade miso tuiles provide an unmatched crunch, elevating your appetizer game to new heights.
Endless versatility: Feel free to swap tuna for salmon or even cooked shrimp, making this a dish that caters to all seafood lovers.
Health-conscious option: With alternatives like Greek yogurt in the spicy mayo, you can enjoy this dish guilt-free while still packing in the flavor.
Eye-catching presentation: Topped with colorful garnishes, these cones are sure to impress your guests and spark fun conversations, just like my Spicy Crab Pasta!
Perfect for gatherings: Whether it’s game day or a festive celebration, these cones make for a unique and memorable appetizer that everyone will love!
Spicy Tuna Sesame Miso Cones Ingredients
For the Tuile Cones
- Unsalted Butter – Adds richness and helps with the structure of the tuile cones.
- Corn Syrup – Provides sweetness and helps create a crispy texture in the cones.
- Miso Paste – Introduces umami flavors to the cones; ensure it’s gluten-free for dietary needs.
- Salt – Enhances flavor in both the cones and tartare mixture.
- Ground Black Pepper – Adds subtle warmth and depth.
- Toasted Sesame Oil – Infuses a nutty aroma and flavor profile.
- All-Purpose Flour – Provides structure to the tuile cones; substitute with gluten-free flour blend if needed.
- Powdered Ginger – Adds a zesty kick and flavor complexity.
- Black and White Sesame Seeds – Provide crunch and visual appeal in the cones.
For the Spicy Tuna Mixture
- Sushi-Grade Tuna – The star ingredient, crucial for freshness and flavor; can be substituted with sushi-grade salmon or cooked shrimp.
- Pickled Ginger – Adds brightness and refreshing contrast to the richness.
- Scallions – Contributes freshness and a mild onion flavor.
- Soy Sauce-Wasabi Mixture – Boosts umami and adds heat; adjust wasabi amount for preferred spice level.
- Spicy Chili Mayonnaise – Provides creaminess and heat to the tartare; Greek yogurt can be used for a lighter version.
For Toppings
- Daikon Sprouts – Adds freshness and a nice crunch.
- Massago Roe – Enhances the visual appeal and umami factor.
- Bonito Flakes – Adds a savory, smoky flavor and additional texture.
This delightful combination promises a burst of flavors with every bite, making the Spicy Tuna Sesame Miso Cones a must-try appetizer!
Step‑by‑Step Instructions for Spicy Tuna Sesame Miso Cones
Step 1: Prepare the Tuile Mixture
Preheat your oven to 175°C (350°F). In a small saucepan, melt 1/4 cup of unsalted butter and 1/4 cup of corn syrup over low heat, stirring until smooth. Whisk in 2 tablespoons of miso paste, 1/4 teaspoon of salt, 1/4 teaspoon of ground black pepper, and 1 tablespoon of toasted sesame oil until well combined. Set aside to cool slightly.
Step 2: Mix the Tuile Ingredients
In a mixing bowl, combine the cooled butter mixture with 1/2 cup of all-purpose flour, 1 teaspoon of powdered ginger, and 2 tablespoons each of black and white sesame seeds. Stir until a smooth batter forms, ensuring no lumps remain. You’re looking for a thick but pourable consistency that will hold its shape when baked.
Step 3: Bake the Tuile Cones
Line a baking sheet with parchment paper. Using a spoon, drop tablespoon-sized dollops of the tuile mixture onto the sheet, leaving ample space between each mound. Bake in the preheated oven for about 12 minutes, or until the edges are golden brown. Keep an eye on them and rotate the pan halfway through for even baking.
Step 4: Shape the Tuiles
Once baked, remove the tuiles from the oven and quickly shape them around cone molds or shaped paper cones while they are still warm and pliable. Hold the shaped cones for a few seconds until they cool and harden. This will ensure that your Spicy Tuna Sesame Miso Cones have the perfect crunchy texture.
Step 5: Prepare the Soy-Wasabi Mixture
In a small bowl, mix 1 teaspoon of wasabi paste with 1 tablespoon of water and 2 tablespoons of soy sauce until smooth and well-blended. This zesty mixture will enhance the umami flavor of your tuna filling. Set it aside to let the flavors meld while you prepare the tuna tartare.
Step 6: Make the Spicy Tuna Mixture
In a chilled mixing bowl, combine 1 cup of diced sushi-grade tuna, 2 tablespoons of chopped pickled ginger, 2 sliced scallions, and the prepared soy-wasabi mixture. Add 2 tablespoons of spicy chili mayonnaise, adjusting the amount to your preferred heat level. Gently fold the mixture together, taking care not to mash the tuna.
Step 7: Assemble the Cones
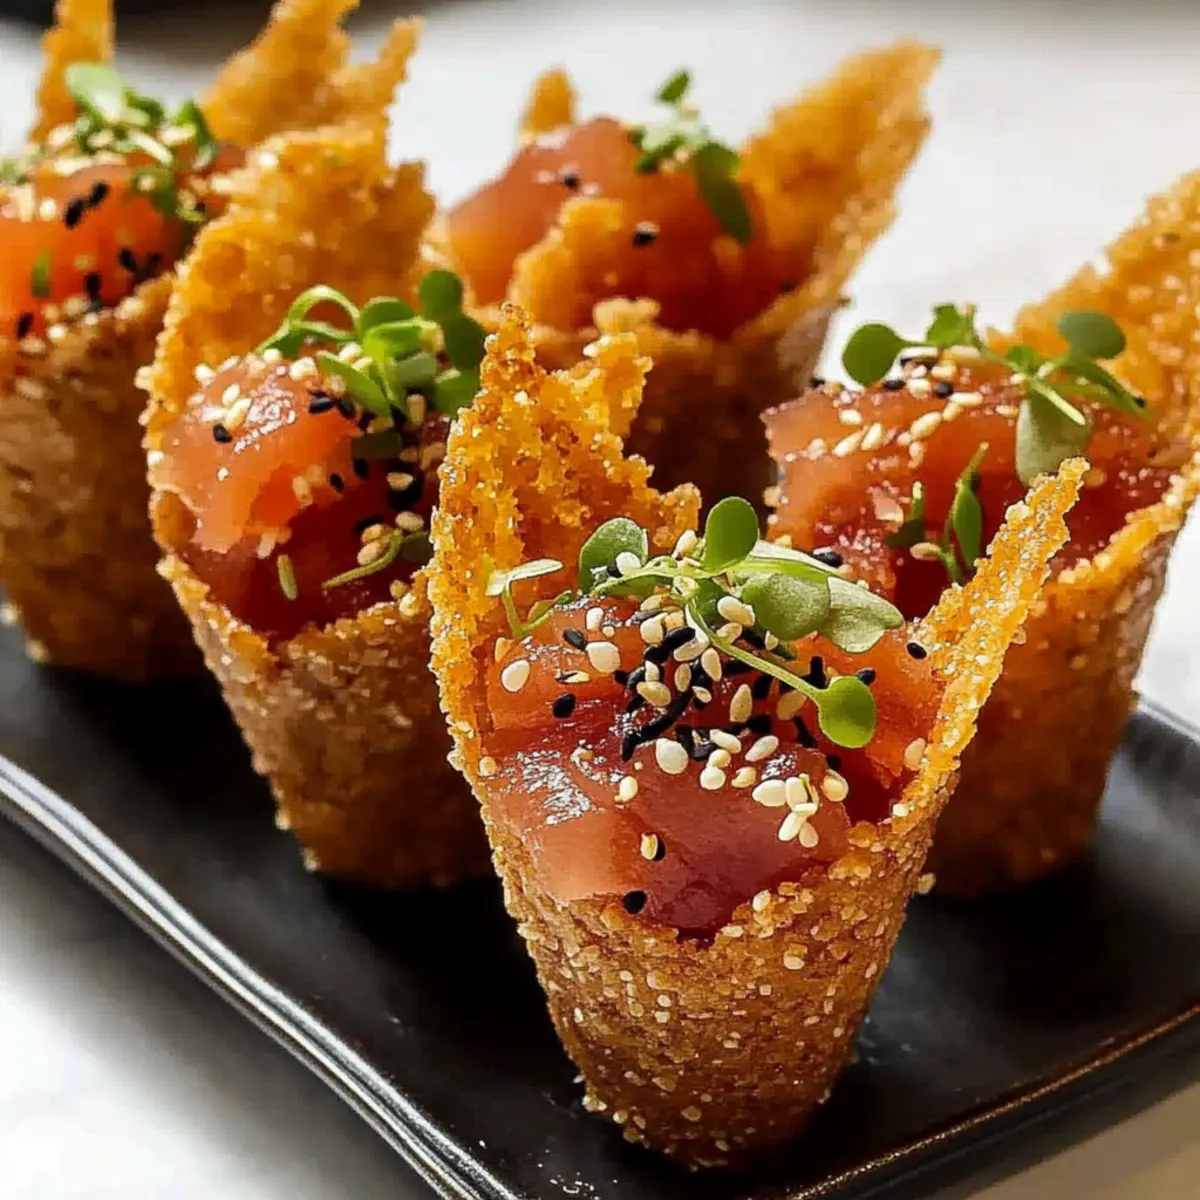
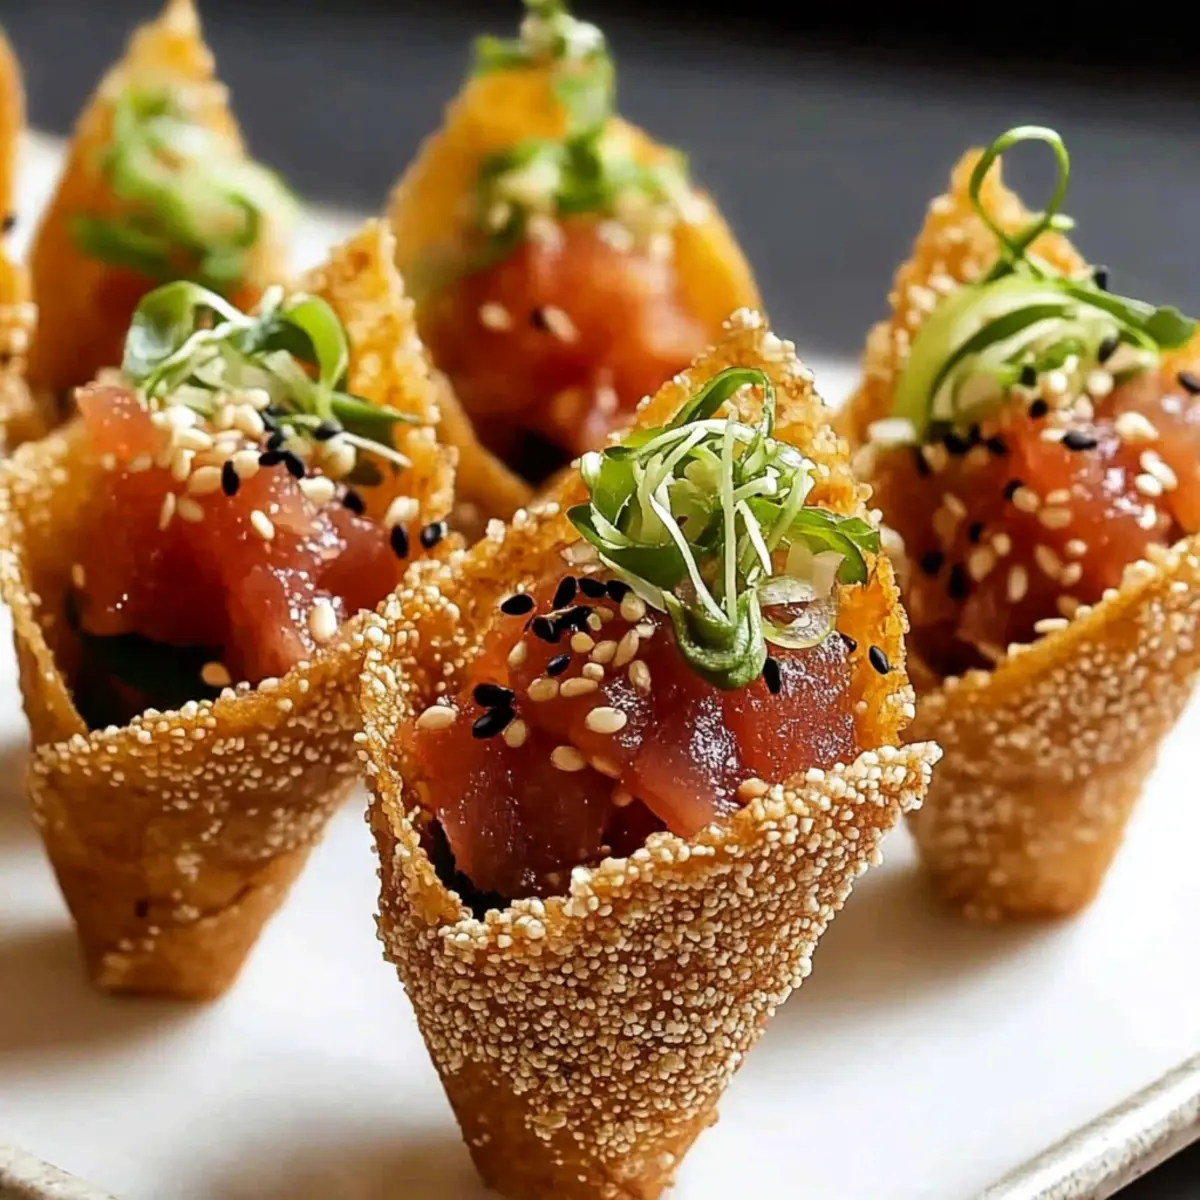
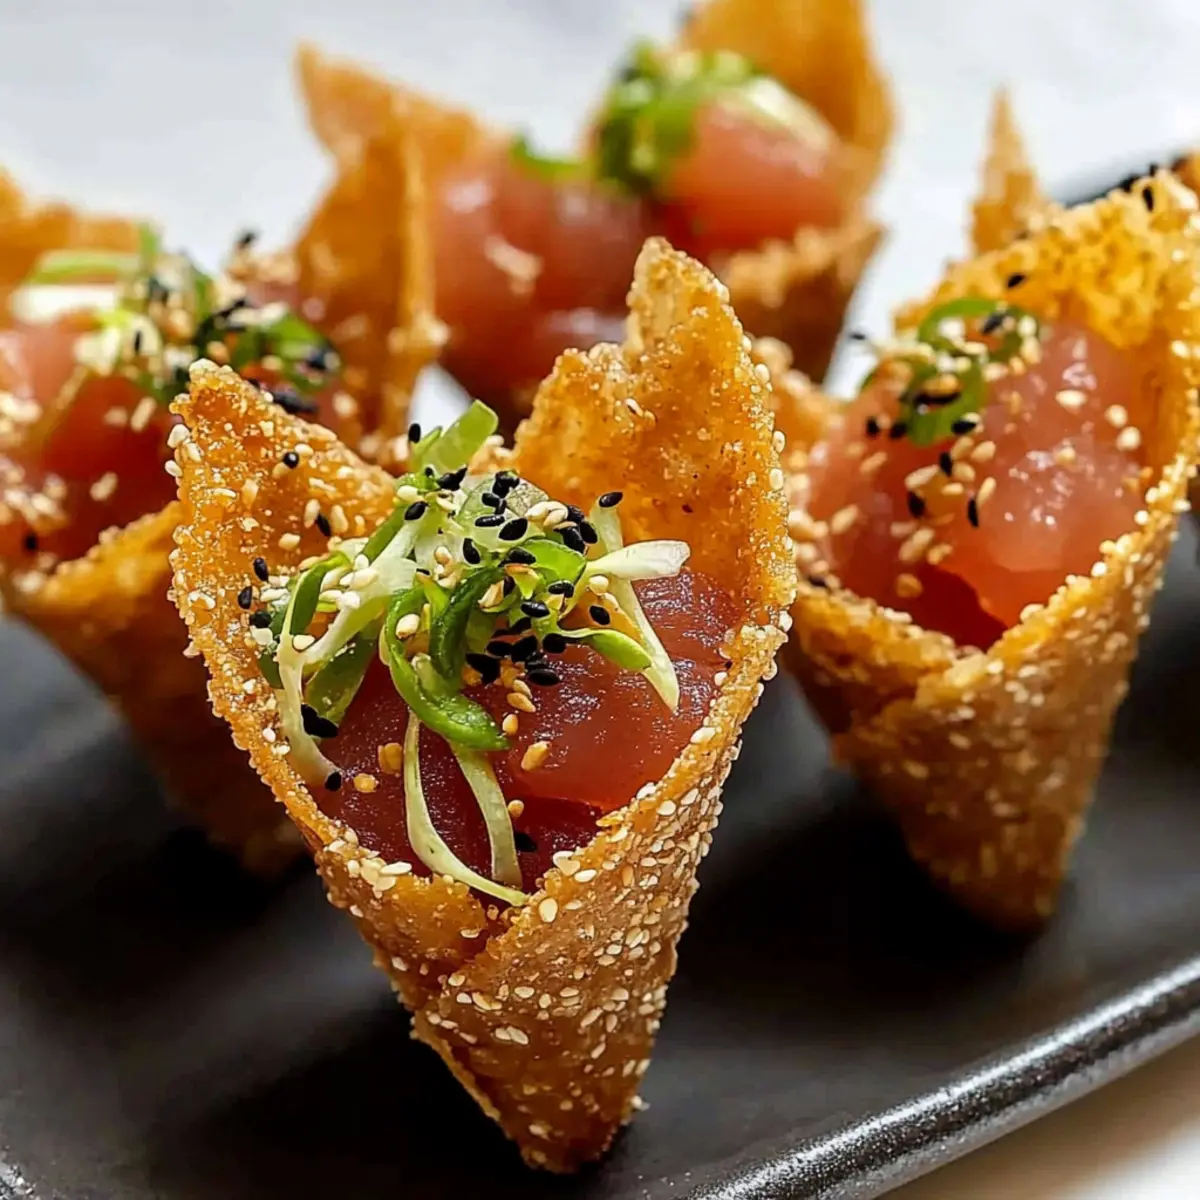
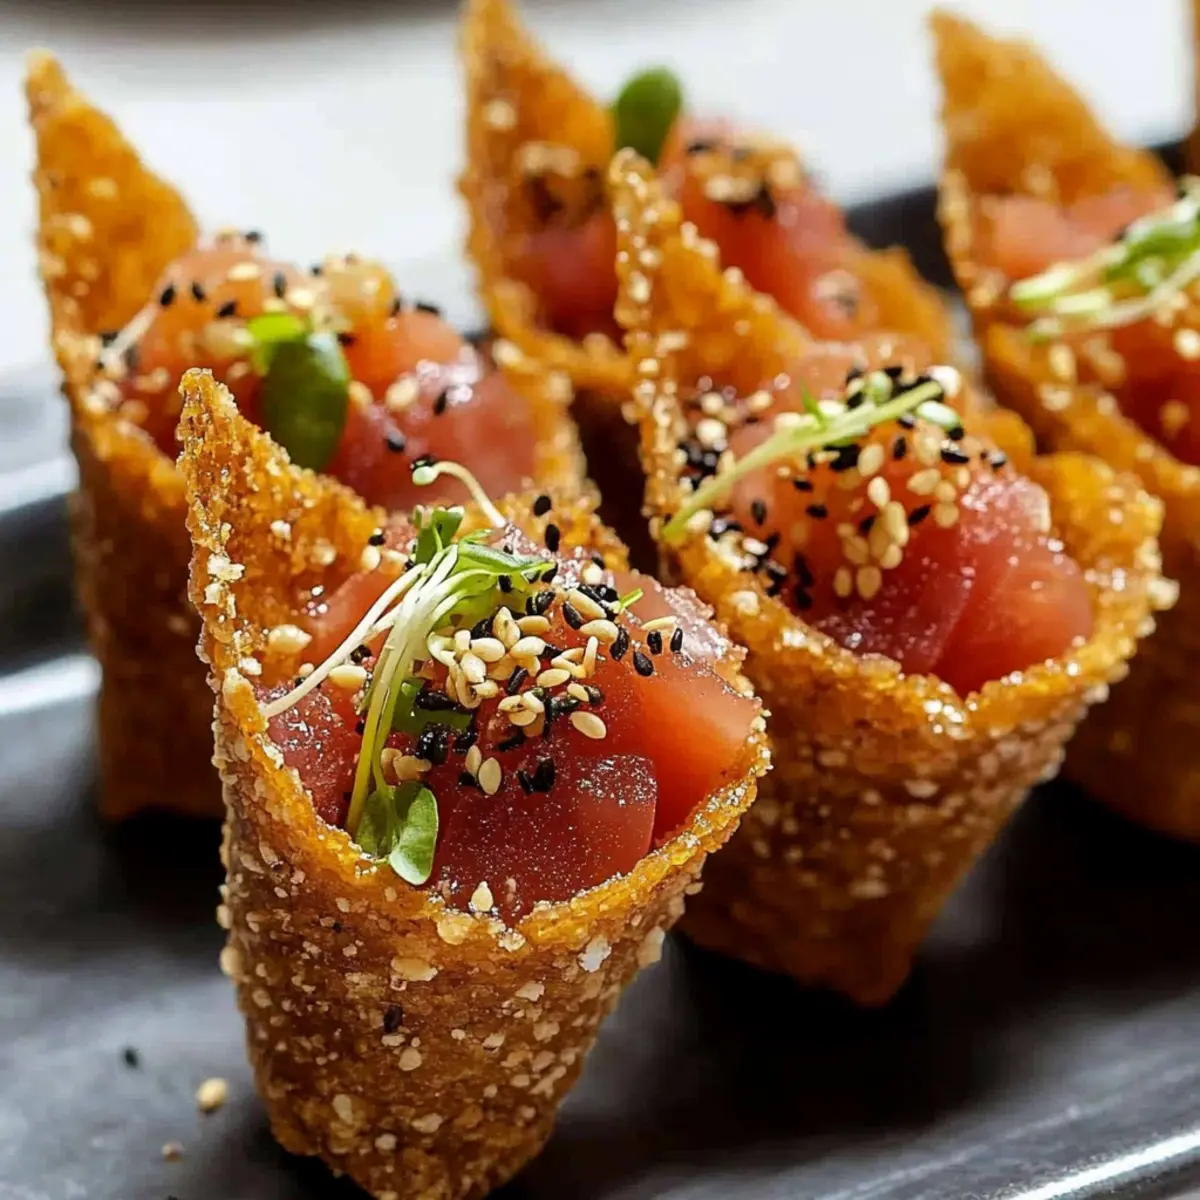
To assemble your Spicy Tuna Sesame Miso Cones, start by placing a handful of daikon sprouts at the bottom of each cone. Follow this with a generous scoop of the spicy tuna mixture, allowing it to fill the cone. For added flavor and garnish, top with additional scallions, a sprinkle of massago roe, chopped ginger, a drizzle of the soy-wasabi mix, and a few bonito flakes.
Step 8: Serve Immediately
Arrange the assembled cones on a beautiful platter, showcasing their vibrant colors and inviting textures. Serve them immediately while the cones are still crisp, and enjoy the delightfully satisfying crunch paired with the rich, savory tuna filling. These Spicy Tuna Sesame Miso Cones are sure to impress at any gathering!
How to Store and Freeze Spicy Tuna Sesame Miso Cones
Fridge: Store any leftover Spicy Tuna Sesame Miso Cones in an airtight container in the refrigerator for up to 4 hours to maintain optimal freshness and flavor.
Freezer: If you wish to freeze the tuile cones, separate them from the tuna mixture and place in a freezer-safe container for up to 1 month. They can be reheated directly from frozen.
Reheating: To crisp up the frozen tuile cones, bake them at 175°C (350°F) for about 5 minutes until warmed through. Avoid microwaving, as this can make them soggy.
Preparation Tip: It’s best to prepare the spicy tuna mixture fresh to ensure the quality and flavor of your Spicy Tuna Sesame Miso Cones are at their peak before serving.
Helpful Tricks for Spicy Tuna Sesame Miso Cones
-
Fresh Ingredients: Use sushi-grade tuna: Freshness is key for the best flavor and safety; don’t compromise on quality.
-
Avoid Overmixing: Gently fold the tuna mixtures: Overmixing can make the tuna mushy; a soft touch retains texture.
-
Cooling Time: Shape cones while still warm: This ensures they hold their shape and maintain that delightful crunch when served.
-
Make-Ahead Options: Prepare tuiles in advance: Bake and store them in an airtight container with silica gel to keep them crisp.
-
Adjust Spice Levels: Tailor your spicy mayo: If you’re sensitive to heat, start with less chili and adjust to your liking for the Spicy Tuna Sesame Miso Cones.
Spicy Tuna Sesame Miso Cones Variations
Ready to make these Spicy Tuna Sesame Miso Cones your own? Let your creativity shine with these fun and tasty variations!
-
Salmon Swap: Replace sushi-grade tuna with sushi-grade salmon for a different experience packed with flavor. The richness of the salmon nicely complements the other ingredients.
-
Shrimp Delight: For a change, use cooked shrimp instead of tuna. Simply chop the shrimp and mix it with the same ingredients for a delightful twist that seafood lovers will adore.
-
Creamy Upgrade: Substitute the spicy mayonnaise with Greek yogurt for a lighter, creamier option. This keeps the delicious flavor while giving a healthier boost!
-
Avocado Treat: Go vegetarian by using ripe avocado mixed with sesame oil and a splash of soy sauce. It adds a creamy texture and fresh taste, perfect for non-seafood lovers.
-
Crunchy Alternatives: Serve the spicy tuna mixture over thin cucumber slices or crispy rice crackers instead of cones. They create a fresh bite-sized alternative that’s just as delicious!
-
Flavor Boost: Add a hint of garlic or citrus zest to the spicy mayonnaise for an extra flavor punch. These small adjustments can take the dish to a whole new level!
-
Heat It Up: Adjust the spice level of your soy-wasabi mixture by adding more wasabi based on your heat preference. If you’re a fan of spice, go for a bold kick!
-
Mixed Veggie Topping: Enhance the presentation and nutrition by topping your cones with a colorful array of shredded carrots or radishes. This adds a sweet crunch and vibrant color that will wow your guests!
Make any of these variations, or create your own! Whether you’re whipping up a casual weeknight dinner or prepping for a festive gathering, the possibilities are endless. For another spicy adventure, check out my delightful Spicy Southern Chicken recipe or explore delectable options like One Pot Spicy Pasta for more culinary inspiration!
Make Ahead Options
These Spicy Tuna Sesame Miso Cones are perfect for meal prep enthusiasts! You can make the miso tuiles up to 24 hours in advance; just ensure they are stored airtight with silica gel packets to keep their crispness. The spicy tuna mixture, however, should be prepared on the day of serving to maintain the freshness of the sushi-grade tuna. When ready to serve, simply fill the cooled cones with the prepared daikon sprouts and tuna mixture, drizzle with the soy-wasabi sauce, and garnish. Following these steps guarantees that your Spicy Tuna Sesame Miso Cones will be just as delicious and satisfying, saving you precious time on busy weeknights!
What to Serve with Spicy Tuna Sesame Miso Cones?
Pairing the vibrant flavors of these delightful cones with complementary dishes will create an unforgettable dining experience.
-
Creamy Avocado Salad: The smoothness of avocado adds richness and balances the crunch of the cones beautifully. Toss with lime for extra zest.
-
Crispy Tempura Vegetables: Lightly battered and fried veggies bring a satisfying crunch and a touch of sweetness, enhancing the overall texture of the meal.
-
Cucumber and Seaweed Salad: Refreshing and light, this salad offers a cool contrast, perfectly cutting through the richness of the spicy tuna.
-
Miso Soup: A warm bowl of miso soup deepens the umami experience, connecting the flavors of your meal and providing a comforting element.
-
Chilled Sake: This refreshing drink complements the flavors of seafood beautifully while enhancing the overall dining experience with its smooth finish.
-
Mango Sticky Rice: As a sweet ending, this dessert combines creamy coconut and sweet mango, providing a delightful contrast after the savory appetizers.
Serving these sides with Spicy Tuna Sesame Miso Cones will not only impress your guests but also create a memorable fusion feast that lingers in everyone’s hearts.
Spicy Tuna Sesame Miso Cones Recipe FAQs
How do I select the right sushi-grade tuna for my cones?
Absolutely! When choosing sushi-grade tuna, look for a bright red color and a fresh, clean scent. The texture should be firm without any dark spots all over. Ask your fishmonger for recommendations, and don’t hesitate to ask if it’s suitable for raw consumption. Trust me, quality makes all the difference in this recipe!
How should I store any leftover Spicy Tuna Sesame Miso Cones?
To keep your leftovers fresh, store the filled cones in an airtight container in the refrigerator for up to 4 hours. The tuiles will lose some crispness, but they’ll still be tasty. Just remember to avoid leaving them out for more than 2 hours to maintain their flavor and safety.
Can I freeze the components of my Spicy Tuna Sesame Miso Cones?
Yes, it’s a great idea to freeze the miso tuiles separately from the tuna mixture! The tuiles can be frozen for up to 1 month in an airtight bag. Just make sure they are fully cooled before packing them. For the tuna mixture, it’s best to make it fresh each time you prepare the cones, as the texture and flavor are optimal when served immediately.
What should I do if my tuile cones turn out chewy instead of crispy?
If your tuiles aren’t crispy, they might not have baked long enough. Ensure they are golden and crisp before removing them from the oven. Additionally, check your oven temperature with a thermometer to ensure it’s accurate. If they soften after storage, a quick reheat in a preheated oven at 175°C (350°F) for about 5-7 minutes can help revive their crunch!
Can I modify the recipe to accommodate dietary restrictions?
Very! To keep your Spicy Tuna Sesame Miso Cones gluten-free, just choose gluten-free miso and a gluten-free flour blend for the tuiles. For a dairy-free option, using margarine instead of butter works well. If anyone has seafood allergies, you can also swap the tuna for a mix of avocado and sesame oil for a delicious vegetarian take!
How do I know if my miso paste is gluten-free?
To ensure your miso paste is gluten-free, always check the label for any wheat-based ingredients. Look for brands specifically labeled as “gluten-free.” If you are in doubt, I recommend brands like Miso Master or Hikari that offer certified gluten-free options. This way, you can enjoy your Spicy Tuna Sesame Miso Cones without worry!
Spicy Tuna Sesame Miso Cones: A Flavor-Packed Delight
Ingredients
Equipment
Method
- Preheat your oven to 175°C (350°F). Melt the butter and corn syrup over low heat until smooth. Whisk in miso paste, salt, pepper, and sesame oil.
- Combine the cooled butter mixture with flour, powdered ginger, and sesame seeds in a mixing bowl. Stir until a smooth batter forms.
- Drop tablespoon-sized dollops of the batter onto a baking sheet lined with parchment paper. Bake for about 12 minutes or until golden brown.
- Shape baked tuiles around cone molds while still warm. Hold the shape until cooled and hardened.
- Mix wasabi paste with water and soy sauce in a small bowl.
- In a chilled bowl, mix tuna, pickled ginger, scallions, and the soy-wasabi mixture. Fold in spicy mayonnaise.
- Assemble the cones by adding daikon sprouts, spicy tuna mixture, and toppings.
- Serve immediately and enjoy.
Leave a Reply