
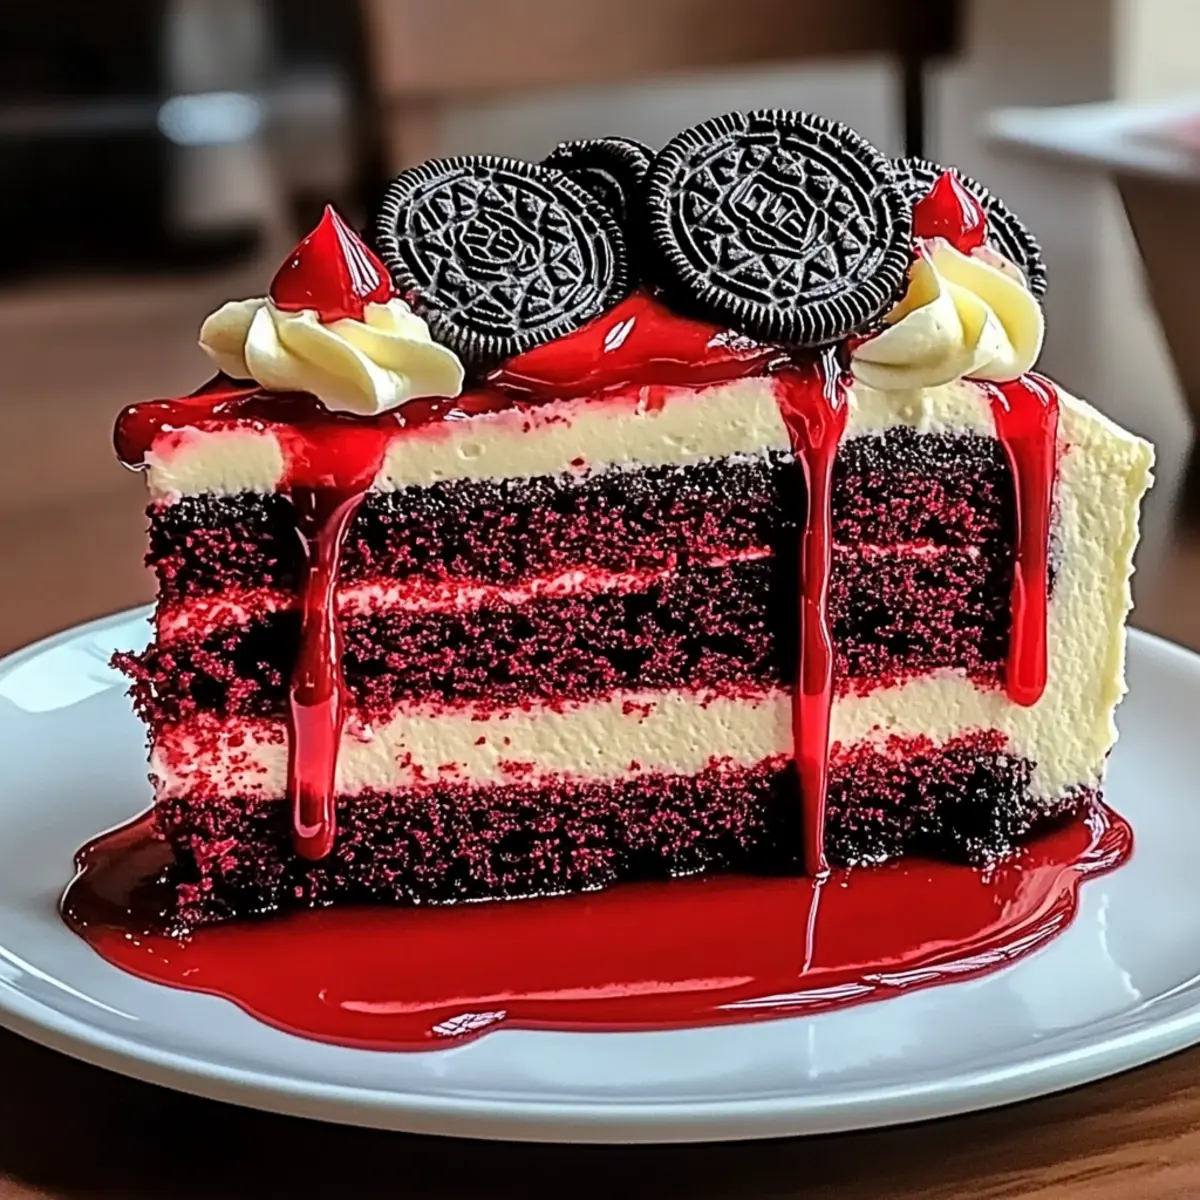
As I stood in my kitchen, the rich aroma of red velvet wafted through the air, reminding me that some desserts have a magical way of enticing our senses. The spotlight of this culinary creation? The show-stopping Oreo Red Velvet Cheesecake Drip Cake. Combining a crunchy Oreo crust, luscious red velvet cake, and a velvety cheesecake filling, this indulgent dessert is not only stunning to behold but also a delight to savor. What’s even better is that it’s a make-ahead treat—perfect for impressing guests at your next gathering. Plus, it offers versatile variations to cater to different tastes and dietary needs, whether you want a gluten-free option or a rich chocolate twist. Ready to dive into a dessert that promises both beauty and flavor? Let’s bake this masterpiece together!
Why is this cake a showstopper?
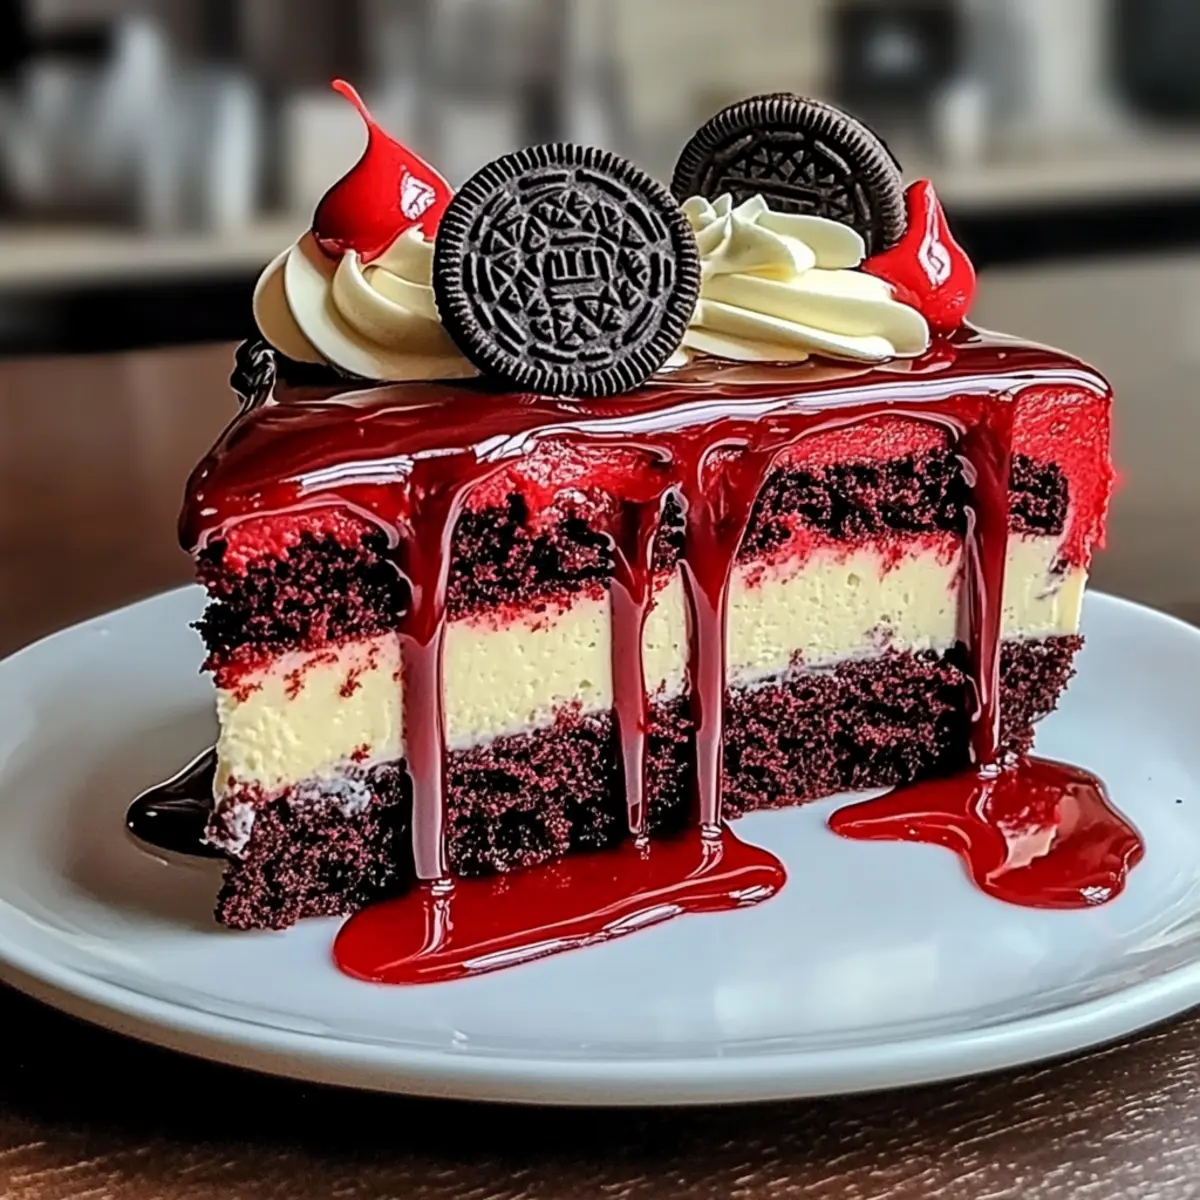
Decadence Awaits: The Oreo Red Velvet Cheesecake Drip Cake is a visual and flavorful spectacle that wows at any gathering.
Customizable Options: With variations such as gluten-free or dairy-free, you can personalize this dessert to your guests’ preferences.
Make-Ahead Friendly: This recipe is perfect for prepping in advance, allowing the flavors to meld beautifully overnight.
Indulgent Flavors: A harmonious blend of red velvet’s richness, Oreo’s crunch, and creamy cheesecake makes every bite memorable.
Crowd-Pleasing Delight: It’s a dessert that appeals to both chocolate lovers and classic cake enthusiasts alike—ideal for parties or special occasions.
Whether you’re looking for a stunning centerpiece or a delicious slice, this cake delivers on all fronts, much like the beloved Oreo Cheesecake Cookie Cups and the elegant Brownie Cheesecake Sweet you may have tried before.
Oreo Red Velvet Cheesecake Drip Cake Ingredients
For the Crust
• Oreo Cookie Crumbs – Provides a crunchy crust. Substitution: Use graham cracker crumbs for a different flavor.
• Melted Butter – Binds the cookie crumbs. Use coconut oil for a dairy-free alternative.
For the Red Velvet Layer
• Red Velvet Cake Batter – Gives the cake its signature color and flavor. Consider using a boxed mix for convenience.
• Eggs – Provides structure and moisture. Ensure they are at room temperature for better incorporation.
For the Cheesecake Filling
• Cream Cheese – Creates a rich and creamy cheesecake filling. Substitution: Use vegan cream cheese for a dairy-free version.
• Granulated Sugar – Sweetens and balances flavors. Brown sugar can be used for a deeper flavor.
• Vanilla Extract – Enhances overall flavor. Almond extract offers a nice twist.
• Sour Cream – Adds moisture and tanginess. Substitution: Greek yogurt can be used instead.
For the Drip Topping
• White Chocolate Chips – Forms the drip topping. Dark chocolate works for a richer flavor.
• Red Gel Food Coloring – Provides the signature red color for the drip. Liquid food coloring can substitute, but may require adjustment for vibrancy.
For Decoration
• Whipped Topping or Buttercream – Used for decoration. Store-bought options can save time.
• Whole Oreo Cookies – For garnish and visual appeal.
With these ingredients, you’re ready to create the delightful Oreo Red Velvet Cheesecake Drip Cake that will impress everyone at your next gathering!
Step‑by‑Step Instructions for Oreo Red Velvet Cheesecake Drip Cake
Step 1: Prepare the Crust
Preheat your oven to 350°F (175°C). In a mixing bowl, combine Oreo cookie crumbs and melted butter, mixing until it resembles wet sand. Press this mixture firmly into the bottom of a springform pan, creating an even layer. Bake for 10 minutes until set, then remove from the oven and let the crust cool completely at room temperature.
Step 2: Bake the Red Velvet Layer
While the crust is cooling, prepare your red velvet cake batter according to your recipe or box instructions. Once mixed, pour the vibrant batter over the cooled Oreo crust, ensuring it spreads evenly. Bake in the preheated oven for 25–30 minutes, or until a toothpick inserted in the center comes out clean. Allow the cake to cool thoroughly before moving on to the next step.
Step 3: Make the Cheesecake Filling
In a large bowl, beat softened cream cheese until smooth and creamy. Gradually add in granulated sugar and mix until fully incorporated. Introduce eggs one at a time, mixing well after each addition. Stir in optional sour cream and vanilla extract for additional richness. This silky cheesecake filling will be poured over the red velvet layer, creating a luscious base for the final cake.
Step 4: Bake the Cheesecake
Pour the cheesecake filling over the cooled red velvet layer in the springform pan. Prepare a water bath by placing the springform pan inside a larger baking dish filled with hot water. Bake at 325°F (163°C) for 50–60 minutes, or until the center is slightly jiggly but not liquid. Remove from the oven, allow to cool to room temperature, and then refrigerate to set.
Step 5: Chill and Set
For the best results, refrigerate the cheesecake for at least 4 hours, but overnight is ideal. This chilling time enhances the flavors and allows the cheesecake to firm up perfectly. Once ready, carefully remove the springform pan to reveal the beautiful layers of your Oreo Red Velvet Cheesecake.
Step 6: Prepare the Drip Topping
Melt white chocolate chips in a microwave-safe bowl, heating in 30-second intervals and stirring until smooth. Once melted, mix in red gel food coloring to achieve your desired drip color intensity. Allow the chocolate mixture to cool slightly before you drizzle it over the top of the cheesecake, creating a stunning drip effect around the edges.
Step 7: Top the Cake
Decorate the top of your cheesecake with whipped topping or buttercream, adding a delightful layer of creaminess. For a finishing touch, garnish with whole Oreo cookies, spacing them evenly around the top to enhance the cake’s visual appeal. This adds an extra layer of texture and indulgence to the dessert.
Step 8: Slice and Serve
To serve your stunning Oreo Red Velvet Cheesecake Drip Cake, carefully release the sides of the springform pan. Use a sharp knife, heated in hot water for neat cuts, to slice the cheesecake into wedges. Serve chilled and admire the beautiful layers before enjoying this showstopper dessert with family and friends!
Make Ahead Options
Preparing the Oreo Red Velvet Cheesecake Drip Cake ahead of time is a fantastic way to save precious moments on busy days! You can make the crust and bake the red velvet layer up to 24 hours in advance, ensuring they are cooled completely before refrigerating. Additionally, the cheesecake filling can be made a day prior and allowed to chill overnight for optimal flavor melding. Simply keep it covered to maintain its creamy texture. When ready to finish, just prepare the drip topping and assemble all layers—this way, you’ll have a stunning dessert ready to impress, allowing you to focus on enjoying the occasion without stress!
Oreo Red Velvet Cheesecake Drip Cake Variations
Feel free to unleash your creativity and customize this cake to suit your palate and dietary needs!
-
Dairy-Free: Substitute cream cheese with a plant-based version and use coconut milk; swap butter with coconut oil for a creamy texture. Enjoy every bite without compromising on flavor!
-
Gluten-Free: Use gluten-free Oreo crumbs and select a gluten-free red velvet mix to keep this cake accessible for all. A delicious option that everyone can enjoy!
-
Chocolate Lovers: Elevate the taste by mixing chocolate chips into the cheesecake filling for an even richer dessert. The added chocolate transforms each slice into a decadent experience.
-
Nutty Delight: Incorporate crushed nuts, such as pecans or walnuts, into the crust for a satisfying crunch. This twist adds texture and wonderful flavor to your cake.
-
Fruit Infusion: Add fresh raspberries or crushed strawberries to the cheesecake filling for a burst of fruity flavor. The tangy berries provide a delightful contrast to the rich, creamy layers.
-
Spicy Twist: For an unexpected kick, add a pinch of cinnamon or cayenne pepper to the cheesecake batter. It will awaken your senses and add depth to the sweetness!
-
Peppermint Flavor: Infuse your cake with peppermint extract during the holidays and top it with crushed candy canes for a festive touch. This refreshing variation can become a seasonal favorite.
Indulge in these customizable options to create a stunning centerpiece that not only looks good but tastes incredible. And if you’re seeking more scrumptious delights, don’t miss out on the heavenly Velvet Strawberry Cheesecake or the delightful Creamy Coffee Cheesecake!
Expert Tips for Oreo Red Velvet Cheesecake Drip Cake
-
Layer Cooling: Chill each layer before adding the next to avoid any messy transitions and ensure distinct layers in your Oreo Red Velvet Cheesecake Drip Cake.
-
Water Bath Truc k: Always use a water bath while baking the cheesecake, as it helps maintain moisture and prevents cracks for a smooth, decadent finish.
-
Slicing Sensation: For clean slices, warm your knife in hot water before cutting through the cheesecake. This simple trick keeps the layers intact when serving.
-
Food Coloring Gradation: Add red gel food coloring gradually to achieve the perfect drip color. Start with a little; you can always deepen the shade, but it’s hard to lighten it once mixed.
-
Prep Ahead: This cake is make-ahead friendly, letting flavors meld beautifully overnight—ideal for special occasions where you want to shine.
-
Flavor Enhancements: Feel free to mix in chocolate chips for extra decadence or add a touch of cinnamon for a spicy twist in the cheesecake filling.
How to Store and Freeze Oreo Red Velvet Cheesecake Drip Cake
Fridge: Keep the cheesecake covered in an airtight container for up to 5 days. This helps retain its moistness and rich flavors.
Freezer: Slice the cake and wrap each piece in plastic wrap, then foil, for up to 3 months. Thaw in the refrigerator overnight for the best texture.
Reheating: If desired, heat slices gently in the microwave for about 10 seconds to enjoy that creamy consistency again, but serve chilled for the best experience.
Make-Ahead: This Oreo Red Velvet Cheesecake Drip Cake can be prepared in advance, making it perfect for gatherings—just store it in the fridge until you’re ready to impress!
What to Serve with Oreo Red Velvet Cheesecake Drip Cake
Indulging in a slice of decadent dessert elevates any occasion, especially when perfectly paired with delightful accompaniments.
- Fresh Berries: Juicy strawberries or raspberries add a burst of tartness and color, balancing the creamy sweetness of the cake.
- Whipped Cream: A light layer of fluffy whipped cream enhances the cake’s richness while adding a light, airy texture that complements each bite.
- Chocolate Sauce: Drizzling warm chocolate sauce over the cake enriches the chocolate flavors, giving an extra touch of indulgence that’s irresistible.
- Coffee or Espresso: A cup of freshly brewed coffee or espresso provides a slight bitterness that contrasts beautifully with the sweet layers of the cake, enhancing flavors.
- Vanilla Ice Cream: Creamy vanilla ice cream offers a cool and mild flavor to accompany the rich dessert, keeping each taste experience balanced and enjoyable.
- Mint Leaves: A few fresh mint leaves on the side add a refreshing note, providing a vibrant contrast to the rich flavors of the cheesecake.
- Pistachio Crumble: A sprinkle of crushed pistachios brings nuttiness and a delightful crunch, enhancing the visual appeal while complementing the texture of the cake.
- Dessert Wine: A glass of dessert wine, like Moscato or Port, can elevate the experience with its sweet undertones, perfect for special celebrations.
Oreo Red Velvet Cheesecake Drip Cake Recipe FAQs
How do I choose ripe ingredients for the cake?
Absolutely! For the best results, select fresh, high-quality ingredients. Use room temperature eggs and cream cheese, which blend better into the batter. Look for cream cheese without any dark spots and vibrant red food coloring, as this ensures your cheesecake turns out luscious and bright. When picking sour cream, aim for full-fat versions for creaminess, and verify its expiration date.
What are the best storage methods for this cheesecake?
Very! The Oreo Red Velvet Cheesecake Drip Cake can be stored in the fridge covered with plastic wrap or in an airtight container for up to 5 days. This preserves its moist texture and flavor or keeps the flavors melded. Make sure to store it in the coldest part of your refrigerator, not in the door, for optimal freshness.
Can I freeze the cake, and how do I do that?
Of course! To freeze your Oreo Red Velvet Cheesecake Drip Cake, first slice it into portions. Wrap each slice tightly in plastic wrap, followed by aluminum foil to prevent freezer burn. It can be stored for up to 3 months. When you’re ready to enjoy it, place the wrapped slices in the refrigerator overnight to thaw and regain their creamy texture before serving.
What are common troubleshooting tips for this cake?
If you find your cheesecake cracks while baking, don’t worry! This can happen if the oven is too hot or if there’s not enough moisture in the baking environment. To prevent this, always use a water bath during baking. Simply place the springform pan into a larger dish filled with hot water before it goes into the oven—this helps maintain a steady temperature and adds moisture, yielding a smooth finish. Also, remember to let it cool gradually to room temperature before refrigerating to avoid temperature shock.
Are there any dietary considerations I should keep in mind?
Definitely! If you’re making this cake for individuals with dietary restrictions, opt for gluten-free Oreo crumbs and ensure that your red velvet mix is gluten-free for those who need it. For a dairy-free version, use vegan cream cheese and substitute coconut oil for butter. I often cater to these dietary needs, so I’m happy to provide variations! Just remember to make these substitutions before starting your cake for the best results.
Oreo Red Velvet Cheesecake Drip Cake: A Showstopper Dessert
Ingredients
Equipment
Method
- Preheat your oven to 350°F (175°C). In a mixing bowl, combine Oreo cookie crumbs and melted butter, mixing until it resembles wet sand. Press this mixture firmly into the bottom of a springform pan, creating an even layer. Bake for 10 minutes until set, then remove from the oven and let the crust cool completely at room temperature.
- While the crust is cooling, prepare your red velvet cake batter according to your recipe or box instructions. Once mixed, pour the vibrant batter over the cooled Oreo crust, ensuring it spreads evenly. Bake in the preheated oven for 25–30 minutes, or until a toothpick inserted in the center comes out clean. Allow the cake to cool thoroughly before moving on to the next step.
- In a large bowl, beat softened cream cheese until smooth and creamy. Gradually add in granulated sugar and mix until fully incorporated. Introduce eggs one at a time, mixing well after each addition. Stir in optional sour cream and vanilla extract for additional richness. This silky cheesecake filling will be poured over the red velvet layer, creating a luscious base for the final cake.
- Pour the cheesecake filling over the cooled red velvet layer in the springform pan. Prepare a water bath by placing the springform pan inside a larger baking dish filled with hot water. Bake at 325°F (163°C) for 50–60 minutes, or until the center is slightly jiggly but not liquid. Remove from the oven, allow to cool to room temperature, and then refrigerate to set.
- For the best results, refrigerate the cheesecake for at least 4 hours, but overnight is ideal. This chilling time enhances the flavors and allows the cheesecake to firm up perfectly. Once ready, carefully remove the springform pan to reveal the beautiful layers of your Oreo Red Velvet Cheesecake.
- Melt white chocolate chips in a microwave-safe bowl, heating in 30-second intervals and stirring until smooth. Once melted, mix in red gel food coloring to achieve your desired drip color intensity. Allow the chocolate mixture to cool slightly before you drizzle it over the top of the cheesecake, creating a stunning drip effect around the edges.
- Decorate the top of your cheesecake with whipped topping or buttercream, adding a delightful layer of creaminess. For a finishing touch, garnish with whole Oreo cookies, spacing them evenly around the top to enhance the cake’s visual appeal. This adds an extra layer of texture and indulgence to the dessert.
- To serve your stunning Oreo Red Velvet Cheesecake Drip Cake, carefully release the sides of the springform pan. Use a sharp knife, heated in hot water for neat cuts, to slice the cheesecake into wedges. Serve chilled and admire the beautiful layers before enjoying this showstopper dessert with family and friends!
Leave a Reply