
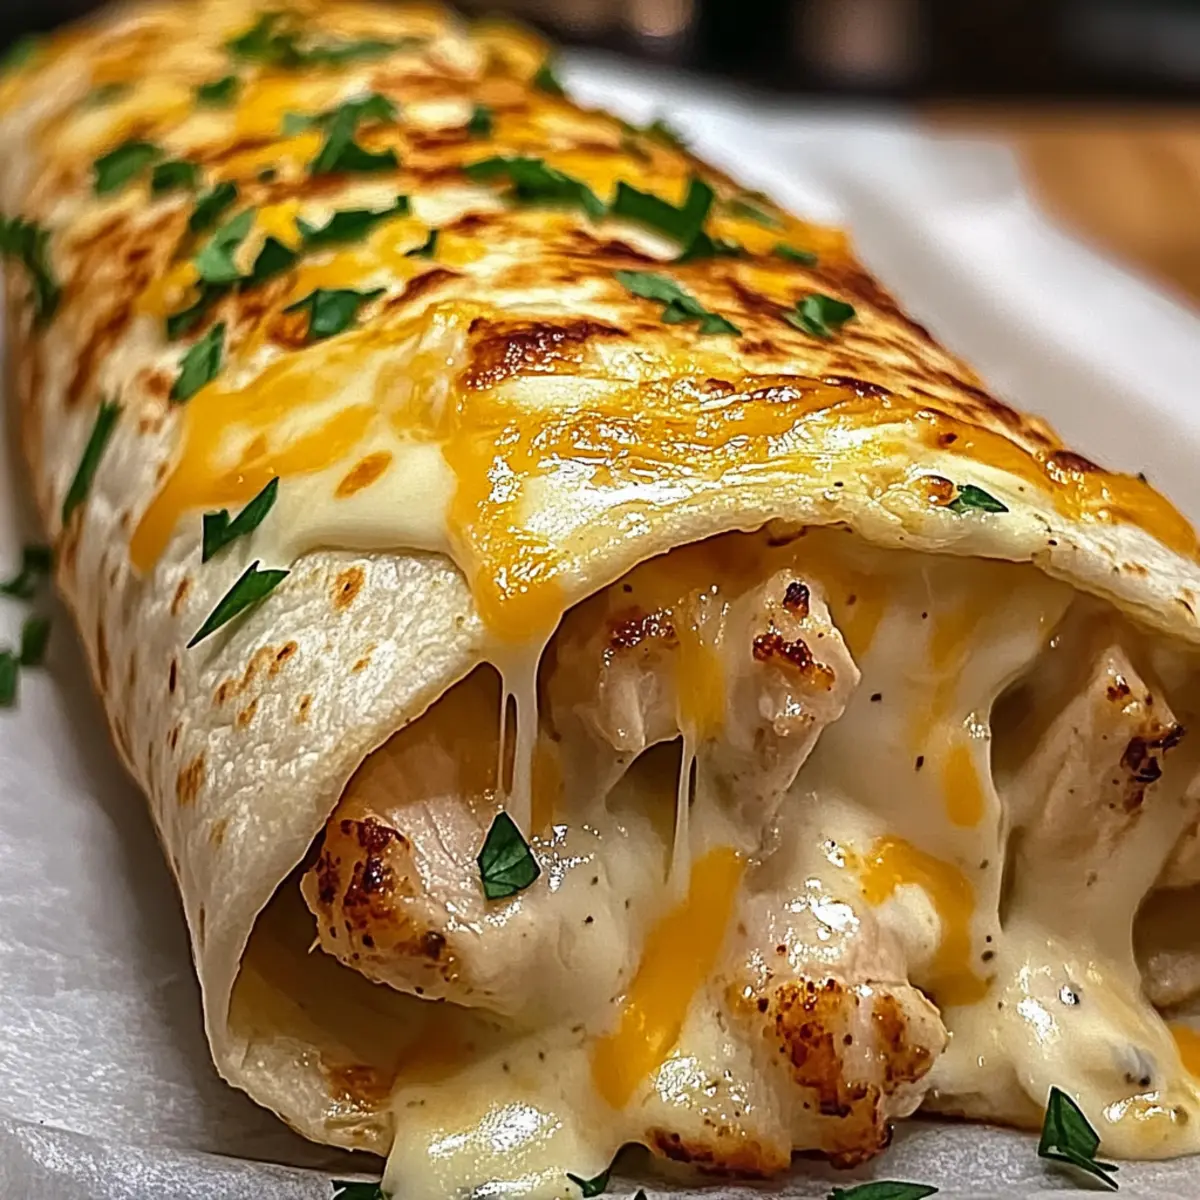
“Can you believe how easy it is to make a meal that’s both delicious and comforting?” This was my reaction the first time I whipped up these Ooey-Gooey Cheesy Garlic Chicken Wraps in just 25 minutes. With tender chicken enveloped in creamy cheese and a crispy tortilla, this quick dinner is the perfect solution for busy weeknights or spontaneous family gatherings. Plus, they’re fully customizable, making it a breeze to cater to everyone’s tastes—whether you’re a cheese lover or a veggie enthusiast. Get ready to elevate your dinner game with this easy recipe that satisfies every craving without the fast food pit stop. What twists will you try on your wrap?
Why Are These Wraps a Must-Try?
Quick and Easy: This recipe comes together in only 25 minutes, making it perfect for weeknight dinners when time is tight.
Comfort Food Delight: With gooey cheese and tender chicken wrapped in a crispy tortilla, every bite is a warm hug!
Customizable Options: Feel free to add your favorite vegetables or switch up the cheese for creative flavors, like using cheddar or pepper jack.
Crowd Pleaser: Whether at a family gathering or a cozy night in, everyone will adore these wraps, leaving no leftovers behind!
To explore more delicious recipes, consider trying my Gooey Cheesy Garlic for your next meal.
Ooey-Gooey Cheesy Garlic Chicken Wraps Ingredients
For the Filling
• Shredded Chicken – The main protein source; opt for leftover rotisserie chicken to save time.
• Mozzarella Cheese – Provides that delightful creaminess; feel free to substitute with your favorite cheese for new flavors.
• Cream Cheese – Adds richness and binds the filling together; using low-fat cream cheese makes for a lighter wrap.
• Minced Garlic – Infuses each bite with robust flavor; reduce the amount for a milder taste or substitute with garlic powder.
• Chopped Parsley – Brings freshness and vibrant color; you can swap it for other herbs like cilantro or basil for a different twist.
For the Wrap
• Tortillas – The perfect base for this dish; try whole wheat tortillas for a healthier option.
• Olive Oil – Essential for frying to achieve a crispy exterior; consider using another cooking oil if preferred.
These Ooey-Gooey Cheesy Garlic Chicken Wraps are not just delicious but also incredibly versatile!
Step‑by‑Step Instructions for Ooey-Gooey Cheesy Garlic Chicken Wraps
Step 1: Prepare the Filling
In a large bowl, mix together shredded chicken, mozzarella cheese, cream cheese, minced garlic, and chopped parsley until you have a creamy, cohesive filling. Take a moment to ensure all ingredients are well-combined without overmixing, which will keep your filling tender. The mixture should look delicious and slightly thick—perfect for wrapping.
Step 2: Season to Taste
Once your filling for the Ooey-Gooey Cheesy Garlic Chicken Wraps is ready, season it with salt and pepper to taste. Start with a small pinch of each, stirring and tasting as you go. This step enhances the flavors without overwhelming the dish. Adjust until you find that perfect balance, ensuring every bite is flavorful and satisfying.
Step 3: Assemble the Wraps
Lay out your tortillas on a clean surface and evenly distribute the chicken filling across each, leaving about an inch of space at the edges. This helps to avoid spillage when rolling. Carefully press the filling into the tortillas to create a compact roll as you go, allowing each bite to be filled with the cheesy goodness.
Step 4: Roll the Tortillas
Starting from one end, tightly roll each tortilla, tucking in the sides as you go to create a secure wrap. Ensure each wrap is tight enough to hold the filling in, while still being gentle to avoid tearing the tortillas. The result should be a neat cylinder, ready for a crispy finish on the skillet.
Step 5: Heat the Skillet
In a large skillet, heat a couple of tablespoons of olive oil over medium heat. Wait until the oil shimmers slightly—this indicates it’s hot enough for frying. Place the wraps seam-side down in the skillet, ensuring not to overcrowd the pan to achieve that perfect golden brown exterior.
Step 6: Cook Until Golden
Let the wraps cook for about 3-4 minutes on one side until they turn golden brown and crispy. Check them occasionally to avoid burning. Once the first side is perfectly crisp, carefully flip each wrap over and cook for another 3-4 minutes until both sides are beautifully browned and the cheese begins to ooze out.
Step 7: Serve Warm
Once cooked, remove the wraps from the skillet and let them rest for a minute. Slice each wrap in half to reveal the ooey-gooey cheese and tender chicken inside. Serve warm with your choice of dipping sauce, like ranch or salsa, to elevate your meal. Each bite will be a delightful reminder of the cozy comfort that these wraps provide!
Ooey-Gooey Cheesy Garlic Chicken Wraps Variations
Feel free to make these wraps your own with delightful twists and flavor upgrades!
- Veggie Boost: Add sautéed spinach, bell peppers, or onions for vibrant color and added nutrition. Each bite will bring a lovely crunch and heartiness!
- Cheesy Excursion: Swap out mozzarella for cheddar or pepper jack cheese to create a whole new flavor adventure. Different cheeses can elevate the wraps and provide a richer taste.
- Spicy Kick: Toss in diced jalapeños or a sprinkle of red pepper flakes for some heat. This twist will satisfy those who crave spiciness with their comfort food.
- Herb Infusion: Replace chopped parsley with fresh basil or cilantro for a pop of freshness. It’s amazing how a simple herb swap can bring new life to your dish!
- Low-Calorie Option: Use low-fat cream cheese and whole wheat tortillas to lighten the wraps without sacrificing flavor. Enjoy guilt-free indulgence and still feel satisfied.
- Crunchy Texture: Add crushed tortilla chips or breadcrumbs to the filling for a delightful crunch. This extra texture gives a pleasant surprise that contrasts with the creamy filling.
- Sweet Surprise: For a unique twist, try adding diced apples or pears into the mix! The sweet and savory combination will take your wraps to a whole new level.
- Saucy Delight: Serve these wraps with a side of homemade spicy aioli or garlic yogurt sauce. Not only does this add a new layer of flavor, but it’s also a fun way to dip as you enjoy your wraps.
Don’t forget to pair your wraps with a side of Street Corn Chicken Casserole for a complete meal that’s just as satisfying!
Make Ahead Options
These Ooey-Gooey Cheesy Garlic Chicken Wraps are perfect for meal prep, allowing you to enjoy comforting flavors even on the busiest nights! You can prepare the filling up to 24 hours in advance by mixing the shredded chicken, mozzarella, cream cheese, minced garlic, and parsley; just refrigerate it in an airtight container to keep it fresh. Additionally, you can assemble the wraps in their tortillas and store them tightly wrapped in plastic wrap for up to 3 days, ensuring they don’t dry out. When you’re ready to serve, simply heat oil in a skillet and cook the wraps until golden brown (about 3-4 minutes on each side) for that irresistibly crispy finish. Enjoy your cozy meal without the rush!
What to Serve with Ooey-Gooey Cheesy Garlic Chicken Wraps
Prepare for a delightful meal that combines rich flavors, textures, and fresh elements to elevate your dining experience!
-
Creamy Mashed Potatoes: Smooth and buttery, these potatoes complement the savory wraps beautifully, adding comfort to each bite.
-
Crisp Garden Salad: A refreshing mixture of greens and vegetables offers a light crunch that balances the richness of the wraps perfectly.
-
Roasted Vegetables: Caramelized vegetables like zucchini and bell peppers provide a hearty, flavorful contrast that enhances the meal’s overall appeal.
-
Spicy Salsa: A zesty tomato salsa not only adds a kick but also brings a bright, tangy freshness that cuts through the creaminess of the wraps.
Indulge in the delicious combination of these sides and let each component work together harmoniously. For a special touch, serve with a homemade ranch or garlic aioli on the side for dipping.
-
Chilled White Wine: A glass of crisp Sauvignon Blanc or a light Pinot Grigio works wonderfully, adding a refreshing element to your dinner.
-
Chocolate Chip Cookies: End your meal on a sweet note with warm, gooey cookies that will leave everyone with a smile.
Expert Tips for Ooey-Gooey Cheesy Garlic Chicken Wraps
Mix Gently: Avoid overmixing the filling when combining ingredients; this ensures the texture remains tender and enjoyable.
Preheat Oil: Make sure your olive oil is hot before adding the wraps to the skillet. This prevents sogginess and helps achieve a perfect crisp.
Season Gradually: Start with a pinch of salt and pepper while seasoning your filling for the Ooey-Gooey Cheesy Garlic Chicken Wraps. Taste as you go to find the perfect balance.
Stay Neat: When assembling, leave space at the edges of the tortillas to prevent spillage and ensure easy rolling.
Perfect Storage: If you have leftovers, reheat them in a skillet instead of a microwave to maintain that crispy texture.
How to Store and Freeze Ooey-Gooey Cheesy Garlic Chicken Wraps
Fridge: Keep any leftovers in an airtight container for up to 3 days. Make sure they are completely cool before sealing to maintain freshness.
Freezer: Wrap individual Ooey-Gooey Cheesy Garlic Chicken Wraps tightly in plastic wrap, then place them in a freezer-safe bag. They will last for up to 2 months.
Reheating: For the best results, reheat frozen or refrigerated wraps in a skillet over medium heat until crispy and heated through. Avoid microwaving to preserve the texture.
Make-Ahead: These wraps are perfect for meal prep! Assemble them ahead of time, store in the fridge or freezer, and enjoy a quick, satisfying meal whenever you need it.

Ooey-Gooey Cheesy Garlic Chicken Wraps Recipe FAQs
What type of chicken should I use for the filling?
For the most convenient option, I recommend using shredded rotisserie chicken. It saves time and adds delicious flavor to your Ooey-Gooey Cheesy Garlic Chicken Wraps. If you have leftover grilled or baked chicken, that works wonderfully too!
How should I store leftover wraps?
Store any leftover wraps in an airtight container in the fridge for up to 3 days. It’s best to let them cool completely before sealing to keep them fresh. For optimal taste, reheat them in a skillet rather than the microwave to maintain their crispy texture.
Can I freeze the wraps?
Absolutely! To freeze your Ooey-Gooey Cheesy Garlic Chicken Wraps, wrap each one tightly in plastic wrap. Place them in a freezer-safe bag for up to 2 months. When you’re ready to enjoy, just reheat in a skillet until crispy and heated through for the best results.
What should I do if my wraps are soggy?
If you find your wraps are soggy, it could be due to the oil not being hot enough. Make sure the oil is shimmering before adding the wraps. If you’re reheating leftovers, use a skillet rather than the microwave to restore crispness—this avoids moisture from accumulating.
Are there any dietary considerations for these wraps?
Yes! You can certainly customize your wraps to cater to dietary needs. For a lighter option, substitute with low-fat cream cheese and whole wheat tortillas. If you have dietary restrictions, feel free to add seeds or nuts instead of cheese for added nutrition or to swap the chicken for a plant-based alternative.
Can I add other ingredients to the wraps?
Very! Feel free to get creative by adding your favorite veggies like spinach or bell peppers for extra crunch and nutrients. You can also try different cheeses, like cheddar or pepper jack, to switch up the flavor profile based on your family’s tastes. Enjoy experimenting!
Ooey-Gooey Cheesy Garlic Chicken Wraps for Cozy Nights
Ingredients
Equipment
Method
- In a large bowl, mix together shredded chicken, mozzarella cheese, cream cheese, minced garlic, and chopped parsley until you have a creamy, cohesive filling.
- Season the filling with salt and pepper to taste.
- Lay out your tortillas and evenly distribute the chicken filling, leaving space at the edges.
- Tightly roll each tortilla, tucking in the sides.
- Heat olive oil in a skillet over medium heat.
- Cook the wraps in the skillet until golden brown, about 3-4 minutes on each side.
- Remove from skillet, let cool for a minute, and serve warm.
Leave a Reply