
As the crisp autumn leaves begin to fall, there’s something magical in the air that inspires creativity in the kitchen. Enter the world of Mini Halloween Pizzas—deliciously fun, bite-sized snacks perfect for spooky season gatherings! This kid-friendly recipe not only quickens dinner prep but ignites imagination, allowing everyone to customize their own pizza masterpiece. With gooey mozzarella and a parade of colorful toppings, these mini pizzettes become delightful canvases ready for decorating. Embrace the festive spirit as your loved ones gather around to assemble their creations, sparking joy and laughter with every cheesy bite. Curious to see how you can turn simple ingredients into a Halloween hit? Let’s dive into this tasty adventure!
Why Are Mini Halloween Pizzas a Hit?
Endless customization: These mini pizzas let everyone unleash their creativity, making them perfect for kids!
Quick to assemble: With just 10-12 minutes in the oven, for busy families, these are a lifesaver!
Crowd-pleaser: Their fun appearance and delicious flavors guarantee smiles at any Halloween party.
Kid-friendly fun: Let the little ones decorate; it’s a perfect bonding activity that is both entertaining and delicious.
Versatile toppings: Want something different? Swap the string cheese for olives or add your favorite veggie toppings! For more delightful ideas, try our Mini Lemon Blueberry Cheesecakes for dessert afterward!
Mini Halloween Pizzas Ingredients
For the Crust
• Mini Pizza Crusts – Use either store-bought or homemade crusts for a crispy texture.
For the Sauces
• Olive Oil Spray – Grease the baking sheet to ensure the pizzas don’t stick.
• Pizza Sauce – Adds moisture and flavor; marinara can also be used as a substitute.
For the Cheese
• Mozzarella Cheese – The main cheese that provides delicious creaminess.
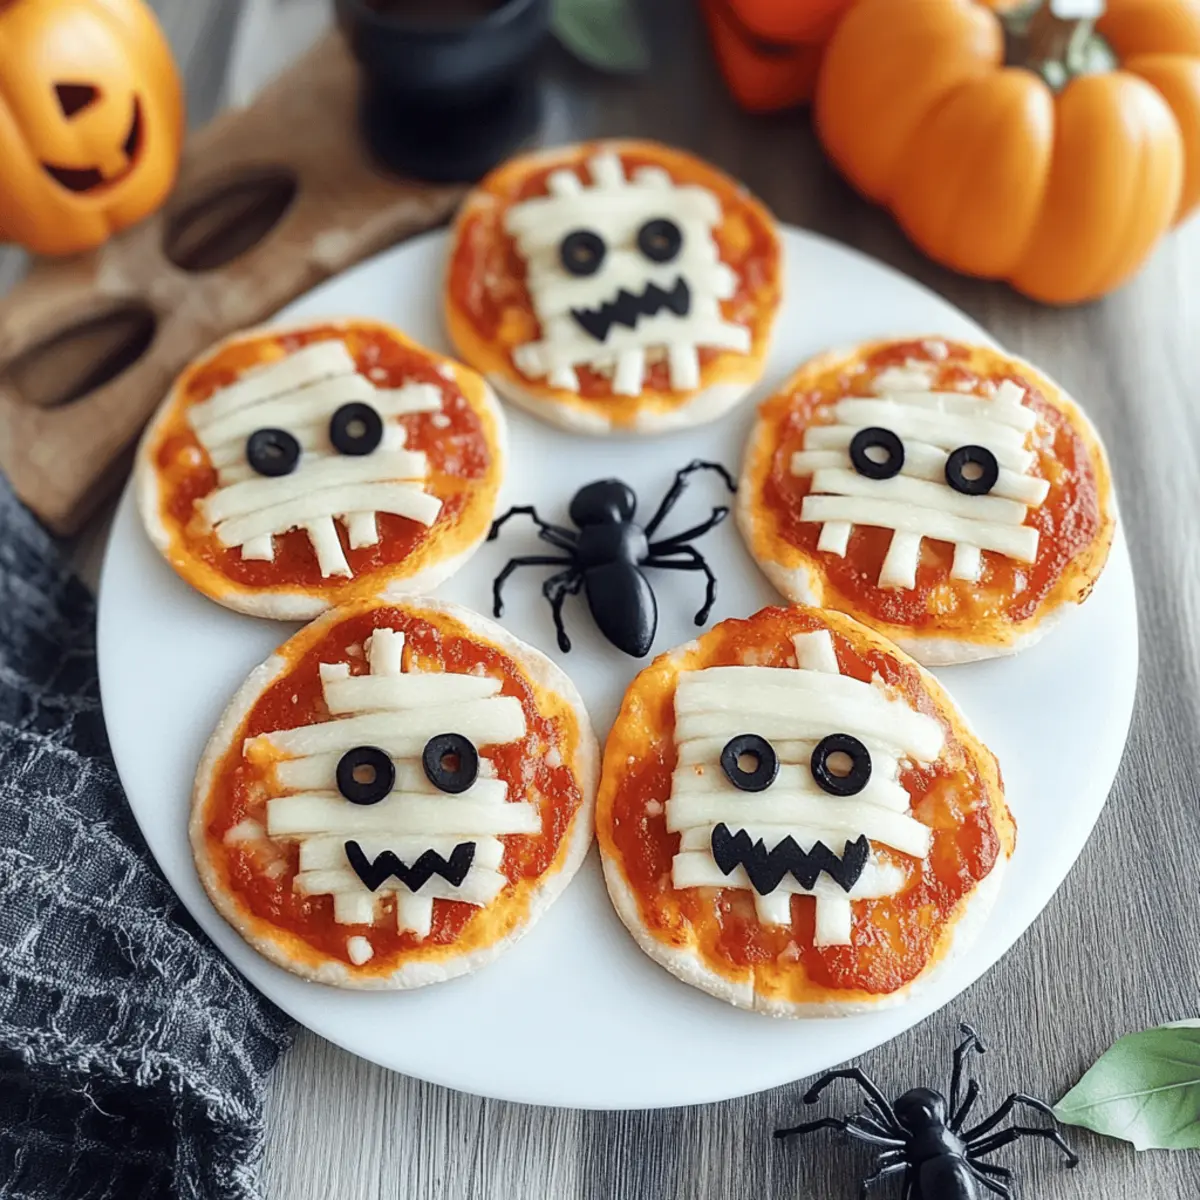
• String Cheese – Perfect for creating spooky mummy decorations.
For the Toppings
• Black Olives – Sliced to resemble spider bodies for a fun and savory addition.
• Mini Pepperoni – Optional; a tasty way to add extra flavor and excitement.
• Orange & Green Bell Peppers – Use these for color; cut them into fun shapes for decoration.
• Fresh Basil – Chiffonade for a fresh garnish that enhances the aroma.
With these ingredients, your Mini Halloween Pizzas will surely be a hit, making your spooky celebration even more delightful!
Step‑by‑Step Instructions for Mini Halloween Pizzas
Step 1: Preheat the Oven
Begin by preheating your oven to 425°F (220°C). While the oven warms up, prepare a baking sheet by misting it with olive oil spray, ensuring the surface is evenly coated to prevent the mini pizzas from sticking. This step sets the stage for achieving that perfectly crispy crust and helps the flavors to meld beautifully.
Step 2: Spread the Sauce
Once the oven is ready, take your mini pizza crusts and spread 1-2 tablespoons of pizza sauce on each one. Make sure to leave a small border around the edges to maintain moisture during baking. The sauce adds a delightful flavor base for your Mini Halloween Pizzas and enhances the overall taste experience.
Step 3: Add the Cheese
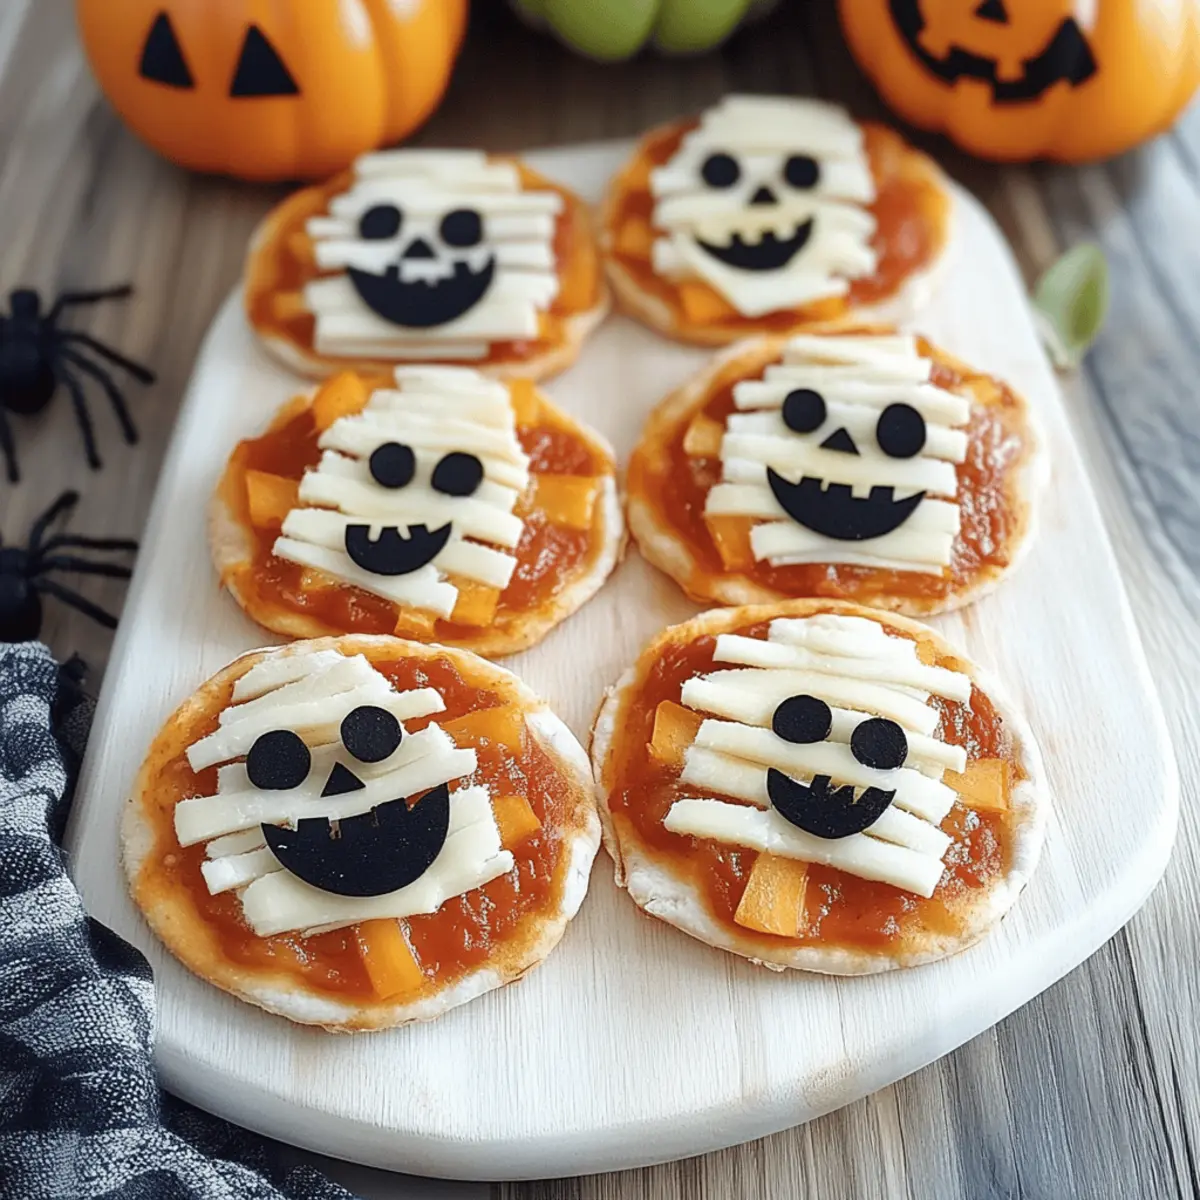
Sprinkle shredded mozzarella cheese generously over half of the pizzas, ensuring that each bite will be ooey-gooey delicious. For those spooky mummy faces, pull apart string cheese and layer it creatively on the designated pizzas. This step not only adds flavor but also contributes to the fun, festive look of your Halloween treat.
Step 4: Get Creative with Toppings
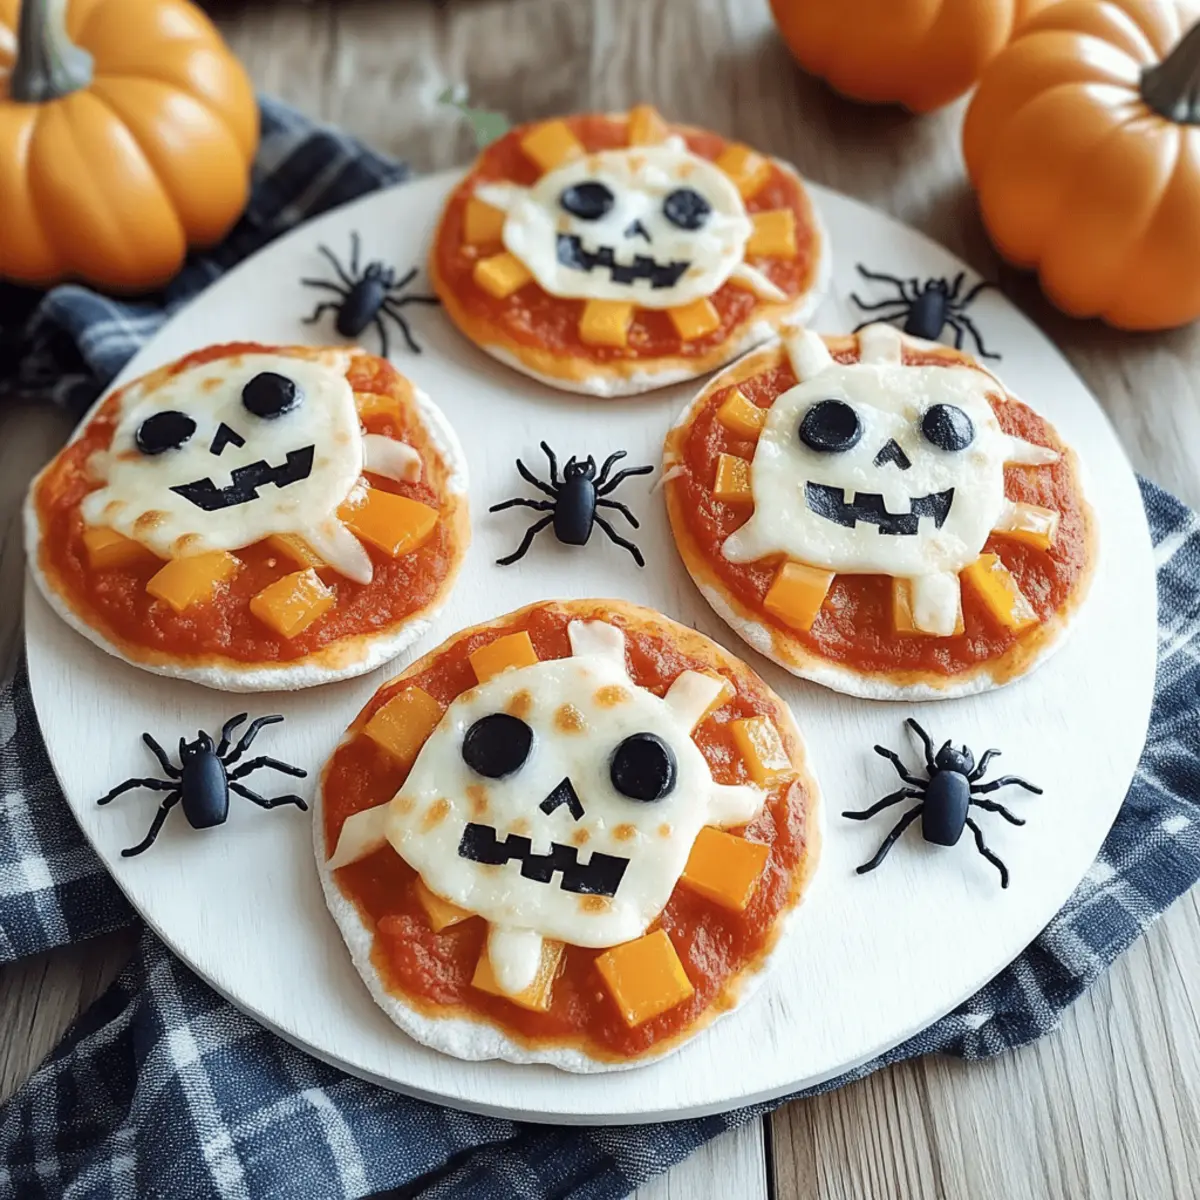
Now it’s time to decorate your Mini Halloween Pizzas! Use sliced black olives to create spider bodies and bell pepper strips to craft whimsical jack-o’-lantern mouths. If desired, sprinkle mini pepperoni across some pizzas for added flavor. Let your creativity shine as you arrange the toppings to bring a spooky festive spirit to each pizza!
Step 5: Bake to Perfection
Carefully place your decorated mini pizzas in the preheated oven and bake for 10-12 minutes. Keep an eye on them, rotating the baking sheet halfway through to ensure even cooking. You’ll know they’re ready when the crusts turn golden brown and the cheese has melted into a bubbly masterpiece that’s irresistible to eat.
Step 6: Cool and Garnish
Once baked to perfection, remove the Mini Halloween Pizzas from the oven and allow them to cool for about 2 minutes. This cooling time helps the cheese set slightly for easier serving. Finish with a sprinkle of fresh basil chiffonade for an aromatic touch that enhances both the flavor and visual appeal of your spooky snacks.

Expert Tips for Mini Halloween Pizzas
- Prep Ahead: Prepare toppings in advance to streamline the assembly process, making it quicker and more enjoyable for everyone involved.
- Thaw Frozen Crusts: If using frozen mini crusts, allow them to thaw slightly before baking to avoid sogginess in your Mini Halloween Pizzas.
- Watch the Bake Time: Keep a close eye on your pizzas while baking; they can go from perfectly golden to overcooked quickly.
- Kid-Friendly Assembly: Involve kids in decorating their pizzas, but supervise them closely when using sharp knives and utensils for safety.
- Creative Variations: Feel free to experiment with different toppings; kids love getting creative, so consider adding their favorite ingredients for a fun twist!
Mini Halloween Pizzas Variations & Substitutions
These Mini Halloween Pizzas are your canvas, inviting you to choose toppings and flavors that suit your family’s tastes and dietary needs.
-
Dairy-Free: Substitute mozzarella and string cheese with plant-based cheese alternatives for a delicious, dairy-free option. Your cheese-loving friends will never know the difference!
-
Gluten-Free: Use gluten-free mini pizza crusts or make your own with gluten-free flour blends for a safe and tasty treat that everyone can enjoy. It’s all about ensuring everyone at your party can join in the fun.
-
Veggie Boost: Add a rainbow of vegetables like cherry tomatoes, mushrooms, or spinach to make your mini pizzas even healthier. Mixing flavors not only enhances nutrition but also elevates their visual appeal!
-
Heat It Up: If you’re feeling adventurous, sprinkle red pepper flakes or drizzle hot sauce on top for a spicy kick. This twist adds excitement and makes these treats more grown-up friendly!
-
Sweet Variation: Consider using peach or tomato jam instead of traditional pizza sauce for a sweet-savory combo. Pair this with mozzarella and prosciutto for a taste sensation that surprises!
-
Mini Topping Bar: Set up a toppings station with various cheeses, meats, and veggies. Let your family create their own unique combinations, turning dinner into a fun, shared experience.
-
Theme Nights: Host different theme nights by switching up toppings based on seasonal favorites. For example, replace the standard pepperoni with cute, shaped veggie slices for a festive fall feel!
For dessert, don’t miss the chance to continue the fun. Pair these Mini Halloween Pizzas with delightful treats like our Mini Blackberry Mousse Cakes or a fun, refreshing Key Lime Pie Mini Desserts to round out your spooky gathering!
What to Serve with Mini Halloween Pizzas
As you gather around the table for a Halloween celebration, consider these delightful pairings to create the perfect festive spread.
- Crispy Veggie Platter: A colorful assortment of fresh carrots, cucumbers, and bell peppers adds a crunchy contrast, keeping the spooky theme alive.
- Spooky Punch: Mix apple cider with ginger ale and add floating gummy worms for a refreshing drink that’s as fun as it is tasty.
- Garlic Breadsticks: Cheesy and garlicky, these are the perfect complement to the mini pizzas, making every meal comforting and delicious.
- Fruit Skeletons: Arrange slices of banana, kiwi, and blueberries into playful skeleton shapes for a fun and healthy dessert option.
- Pumpkin Soup: A warm, creamy pumpkin soup embodies the essence of fall, creating a cozy atmosphere that pairs beautifully with the pizzas.
- Monster Brownies: Fudgy brownies decorated with colorful icing and candy eyes bring an extra level of sweetness for your Halloween party.
With these options, your table will not only be festive but also full of flavor, ensuring everyone leaves with a smile!
How to Store and Freeze Mini Halloween Pizzas
Fridge: Store leftover mini Halloween pizzas in an airtight container for up to 3 days. Layer parchment paper between pizzas to prevent sticking.
Freezer: Fully assembled mini Halloween pizzas can be frozen for up to 2 months. Wrap each pizza individually in plastic wrap, then place them in a freezer bag for best results.
Reheating: Bake frozen mini pizzas directly from the freezer at 425°F (220°C) for 15-20 minutes, until heated through and the cheese is bubbly and golden.
Room Temperature: If left out at room temperature, consume mini pizzas within 2 hours to ensure they remain safe to eat.
Make Ahead Options
These Mini Halloween Pizzas are a fantastic option for those busy weeknights or festive gatherings! You can prepare the mini pizza crusts and toppings up to 24 hours in advance; simply assemble the individual components and store them in airtight containers in the refrigerator. To prevent browning, store cut vegetables like bell peppers in a separate container. When you’re ready to bake, just spread the sauce and cheese on the crusts, add your creative toppings, and pop them in the oven for 10-12 minutes until bubbly and golden. Whether it’s for a last-minute Halloween party or a family fun night, having your mini pizzas prepped ahead ensures you can enjoy a spooky celebration with minimal effort!
Mini Halloween Pizzas Recipe FAQs
How do I select the best mini pizza crusts?
Absolutely! Look for mini pizza crusts that have a good color and texture. If you’re purchasing them, opt for those that are golden and free from any dark spots or mold. Homemade crusts can also be delightful; just ensure they are rolled thin enough to achieve that crispy finish.
What’s the best way to store leftover Mini Halloween Pizzas?
The best way to keep your leftover mini Halloween pizzas is to place them in an airtight container in the refrigerator for up to 3 days. For optimal freshness, layer parchment paper between the pizzas to prevent them from sticking together. When you’re ready to enjoy them again, simply reheat in the oven for the best texture!
Can I freeze fully assembled Mini Halloween Pizzas?
Yes! You can freeze fully assembled mini Halloween pizzas for up to 2 months. I recommend wrapping each pizza individually in plastic wrap and then placing them in a freezer bag to prevent freezer burn. When it’s time to bake them, pop them straight from the freezer into a preheated oven at 425°F (220°C) for 15-20 minutes until they’re hot and bubbly.
What if my mini pizzas are soggy after baking?
Very! If you find that your mini pizzas turn out soggy, it could be due to too much sauce or toppings. To avoid this, spread a thin layer of sauce and avoid overloading on toppings. Also, make sure to bake them on a preheated, well-oiled baking sheet to help crisp the crust.
Are there any dietary considerations I should keep in mind?
Yes! If you’re preparing these mini pizzas for kids or guests with allergies, consider common allergens like dairy and gluten. You can use gluten-free crusts, dairy-free cheese, and ensure any optional toppings are allergy-friendly. Always check labels to ensure your chosen ingredients suit everyone’s needs.
Can my pets enjoy Mini Halloween Pizzas?
No, it’s best to keep mini Halloween pizzas away from pets, especially due to ingredients like cheese and pepperoni that might upset their stomachs. It’s always wise to keep our furry friends safe and stick to their special treats!
Mini Halloween Pizzas: Fun, Spooky Treats for All Ages
Ingredients
Equipment
Method
- Preheat the oven to 425°F (220°C) and prepare a baking sheet with olive oil spray.
- Spread 1-2 tablespoons of pizza sauce on each mini pizza crust, leaving a small border.
- Sprinkle shredded mozzarella cheese on half of the pizzas and decorate one with string cheese for mummy faces.
- Use sliced black olives and bell pepper strips to create fun designs on the pizzas.
- Bake for 10-12 minutes, rotating the baking sheet halfway through.
- Allow the pizzas to cool for 2 minutes before garnishing with fresh basil.
Leave a Reply