
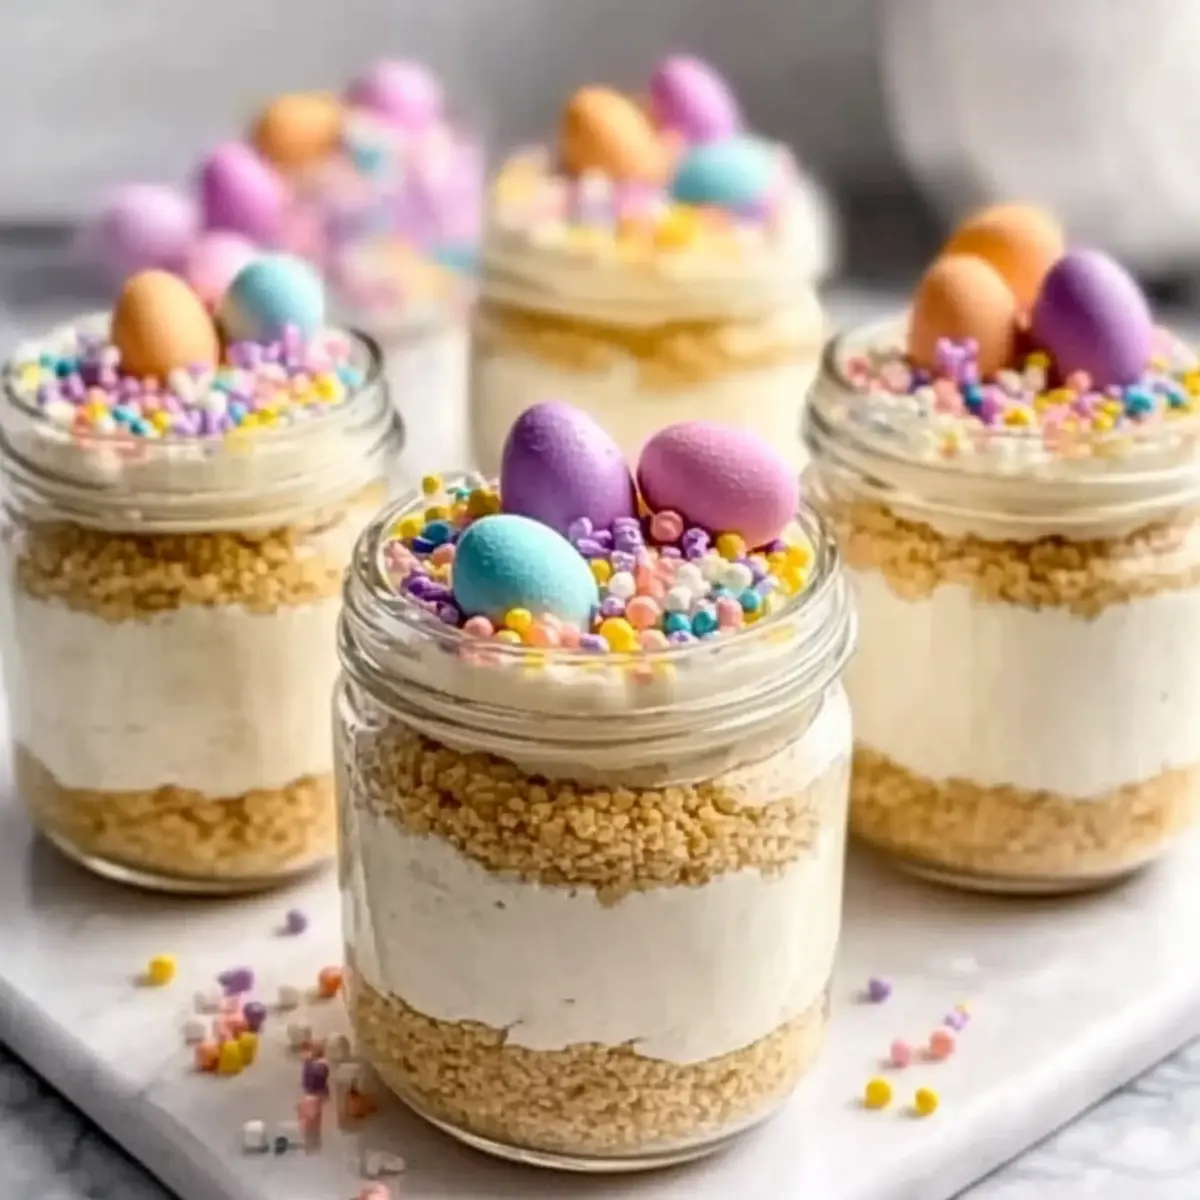
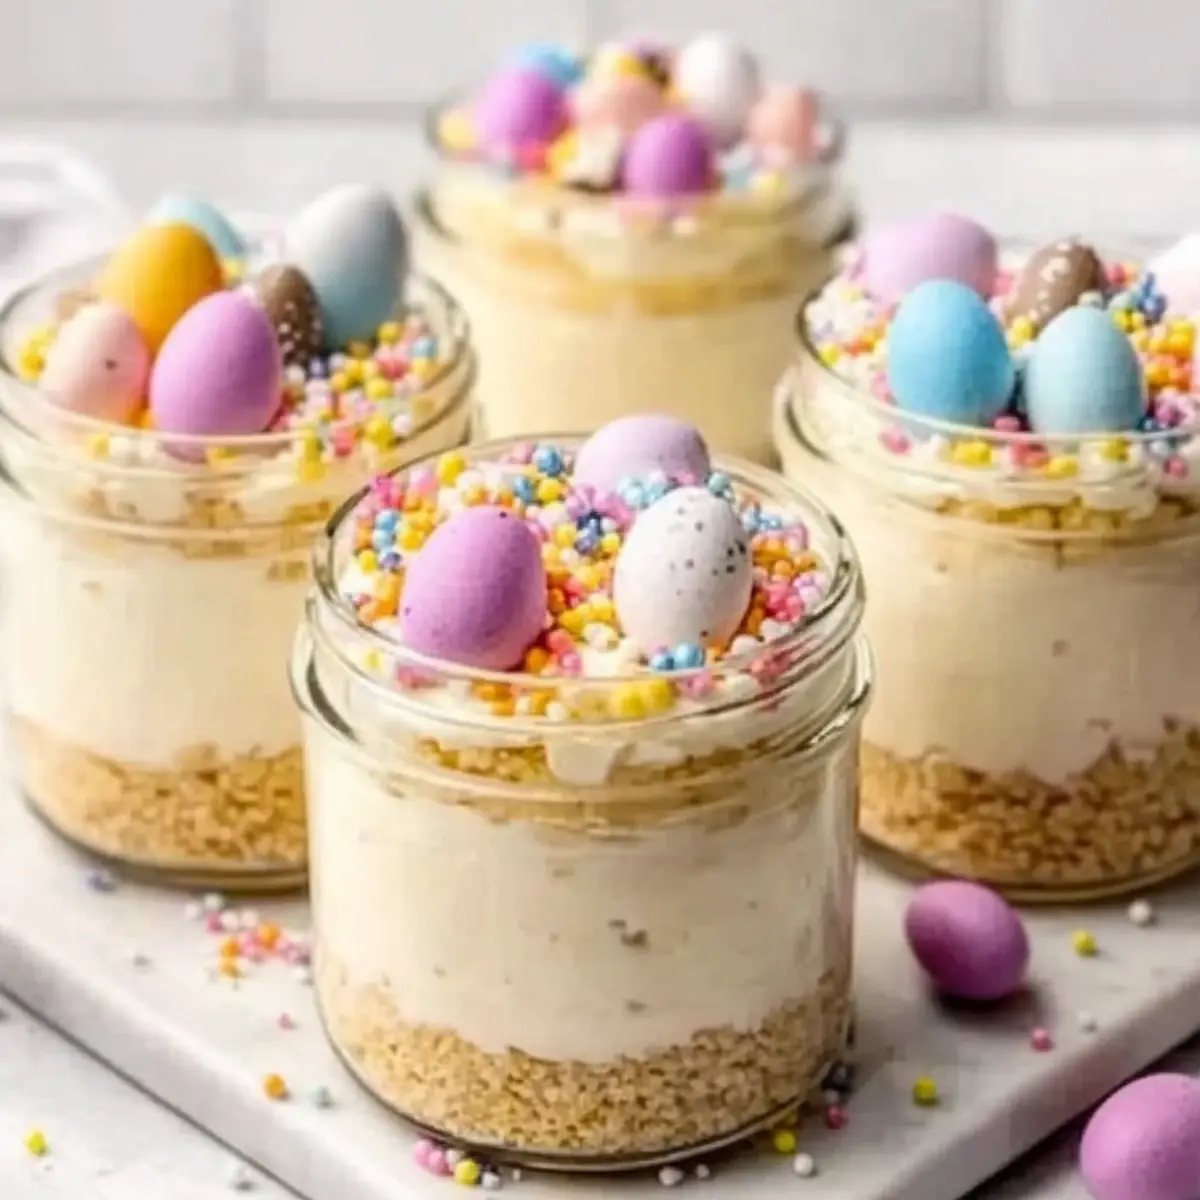
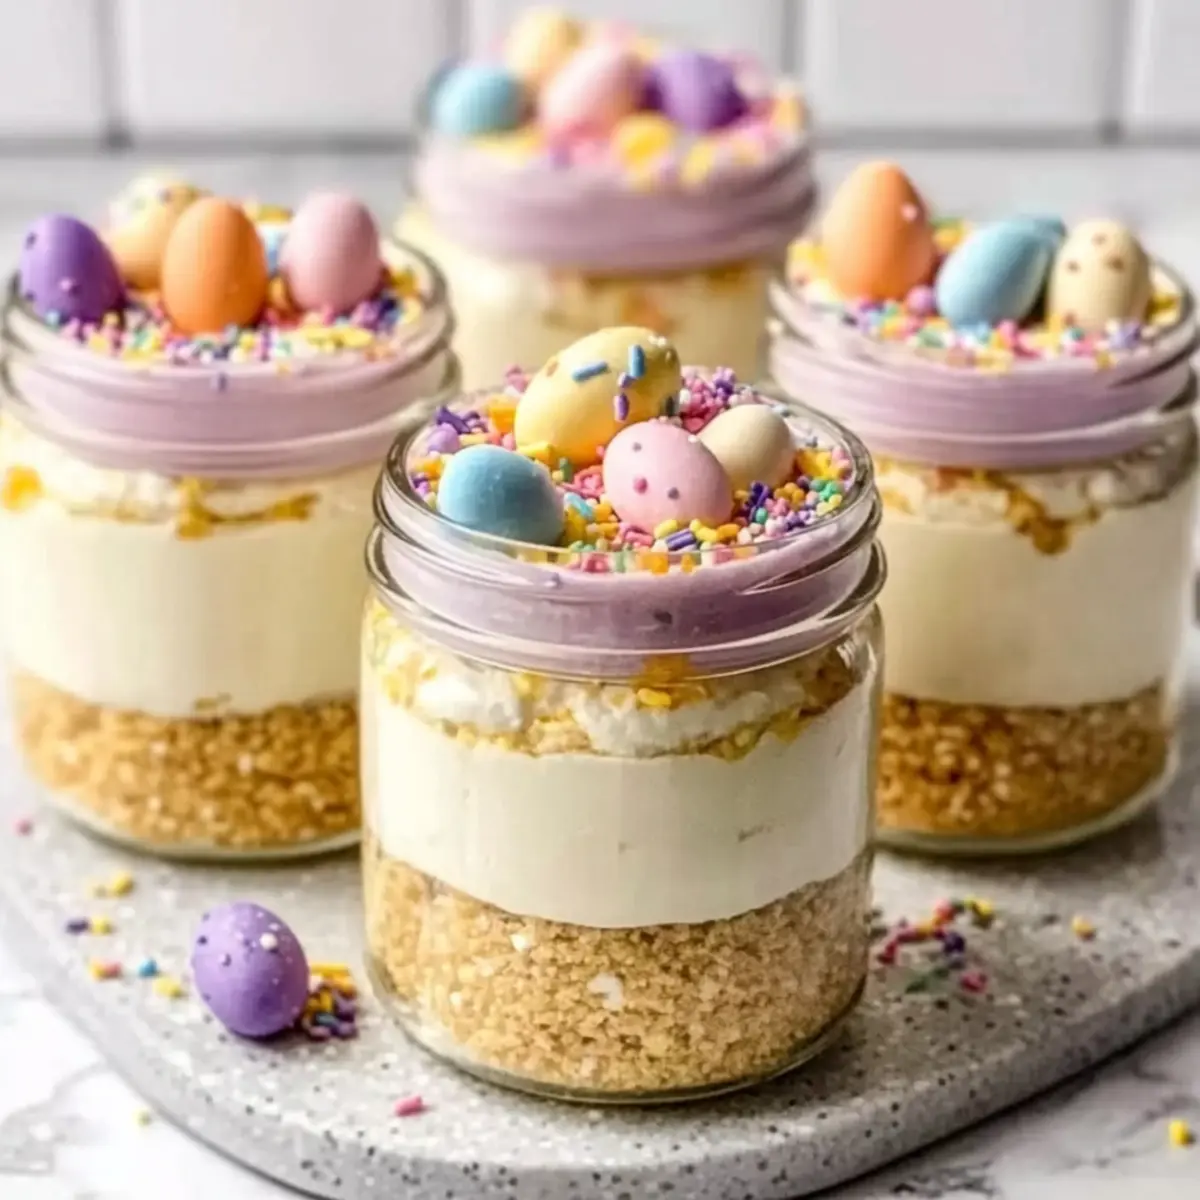
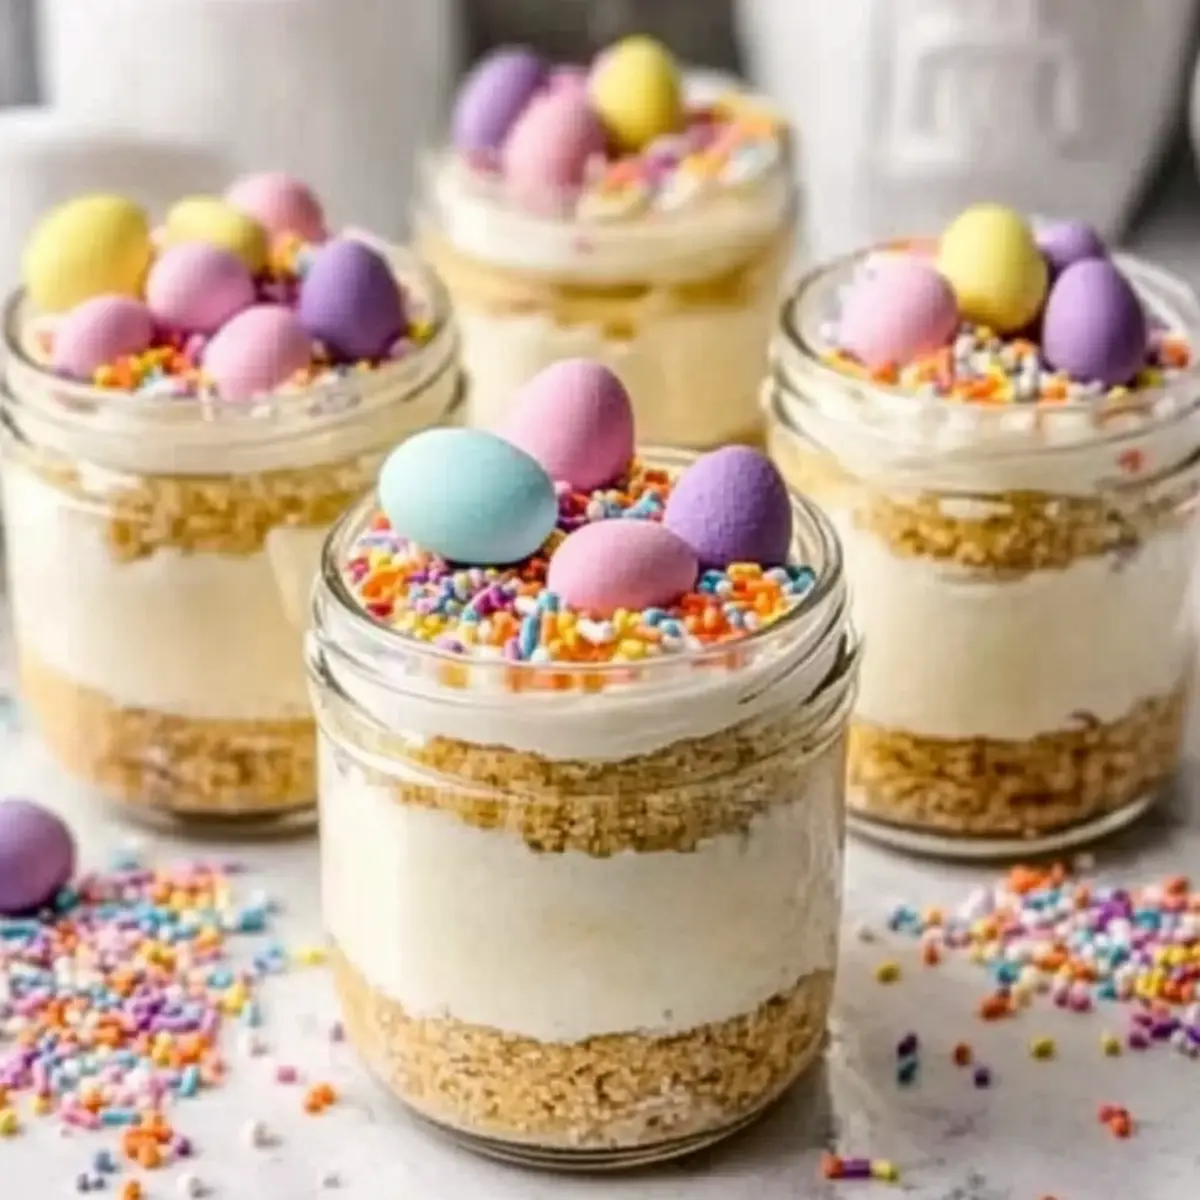
As I rummaged through my pantry, I stumbled upon a treasure trove of vibrant Easter candies just waiting to be transformed into something magical. Enter the Mini Easter Cheesecake Jars, a no-bake delight that not only offers a fun way to get the kids involved in the kitchen but also serves as a crowd-pleaser for any spring celebration. With their luscious creamy filling layered atop a buttery crumb crust, these portion-controlled desserts make entertaining stress-free and oh-so-satisfying. Plus, they’re a breeze to assemble ahead of time, allowing you to enjoy your gathering without any last-minute fuss. Curious about how to bring this colorful treat to life? Let’s hop to it and craft these festive jars together!
Why Are Mini Easter Cheesecake Jars Perfect?
Easy Assembly: You’ll love how quick and simple these jars come together, requiring no baking! Perfect for beginner chefs and busy schedules alike.
Kid-Friendly Fun: Engaging your little ones in the kitchen is a breeze with this recipe. They’ll enjoy decorating their own jars with festive toppings!
Flavorful Layers: Combining a creamy cheesecake filling with a crunchy graham cracker crust results in a delightful blend of textures and taste in every spoonful.
Make-Ahead Magic: Prepping them a day early means they’re ready when you are, making entertaining less stressful and more enjoyable.
Crowd Pleaser: Their colorful appearance, paired with customizable toppings like pastel sprinkles and Easter candies, ensures they’ll be a hit at your spring celebrations!
For those who love cheesecake, don’t miss out on our delicious Mini Lemon Cheesecakes or indulge in a chocolate twist with Brownie Cheesecake Sweet.
Mini Easter Cheesecake Jars Ingredients
For the Crust
• Graham Cracker Crumbs – Base structure for the crust; you can substitute with digestive biscuits for a different flavor.
• Unsalted Butter – Helps bind the crust together; ensure it is melted for the right consistency.
• Sugar – Adds sweetness to the crust; adjust the quantity to suit your taste.
• Salt – Enhances flavors in the crust.
For the Filling
• Cream Cheese – The main component for the cheesecake filling; make sure it’s softened for easy blending.
• Powdered Sugar – Sweetens the cheesecake mixture; reduce if you prefer a less sweet flavor.
• Vanilla Extract – Adds delightful depth of flavor to the filling.
• Lemon Juice – Brightens the overall taste of the cheesecake.
• Heavy Whipping Cream – Creates a light and fluffy texture when whipped; chill before whipping for best results.
• Gel Food Coloring – Optional for tinting the filling in pastel shades for an Easter vibe.
For Toppings
• Mini Chocolate Eggs or Jelly Beans – Festive decorations that add color and fun to your jars.
• Pastel Sprinkles – These vibrant sprinkles make your dessert visually appealing and festive.
• Shredded Coconut (optional) – Can be dyed green for a festive “grass” effect in the jar.
These Mini Easter Cheesecake Jars promise to bring joy and sweetness to your spring festivities!
Step‑by‑Step Instructions for Mini Easter Cheesecake Jars
Step 1: Make the Crust
In a mixing bowl, combine graham cracker crumbs, sugar, and salt. Pour in melted unsalted butter, and mix until the mixture resembles damp sand. Take small handfuls and pack the crust firmly into the bottom of each jar, creating an even layer. Set these aside while you prepare the filling.
Step 2: Whip the Cream
Grab a chilled mixing bowl and pour in the heavy whipping cream. Using an electric mixer, whip the cream on medium speed until it forms medium-stiff peaks, about 3 to 5 minutes. You’ll know it’s ready when the cream holds its shape without drooping. Set the whipped cream aside gently to maintain its airiness.
Step 3: Prepare the Filling
In another bowl, beat the softened cream cheese with powdered sugar, vanilla extract, and lemon juice until the mixture is smooth and creamy, about 2 to 3 minutes. Scrape down the sides to ensure even mixing. This is the luscious cheesecake filling for your Mini Easter Cheesecake Jars, so make sure it’s nice and fluffy!
Step 4: Fold in Whipped Cream
Carefully add half of the whipped cream into the cream cheese mixture. Using a spatula, fold the whipped cream in gently to maintain the light texture. Repeat with the remaining whipped cream, ensuring no streaks remain. This mixture will create the airy cheesecake layer that perfectly complements your crust.
Step 5: Add Color (if desired)
If you’d like to add a festive touch, divide the cheesecake filling into separate bowls and tint each portion with gel food coloring. Use a toothpick to mix in the color gradually until you achieve your desired pastel shades. This step is optional but adds a delightful visual element to your Mini Easter Cheesecake Jars.
Step 6: Fill the Jars
Using a piping bag or a spoon, carefully layer the cheesecake filling over the packed crust in each jar. Leave some space at the top for toppings, creating a colorful and inviting presentation. Smooth the top with a spatula for a neat finish, ready for chilling and decorating.
Step 7: Chill
Cover each jar with a lid or plastic wrap and place them in the refrigerator. Allow the Mini Easter Cheesecake Jars to chill for at least 2 hours to set properly. You can even make them up to 24 hours ahead; just keep them stored in the fridge until ready to enjoy!
Step 8: Decorate
Before serving, remove the jars from the refrigerator and get creative with toppings! Sprinkle shredded coconut tinted green to mimic grass, then nestle mini chocolate eggs or jelly beans on top. This adds a playful and vibrant touch to your Mini Easter Cheesecake Jars, making them even more delightful!
Step 9: Serve Cold
Grab some small spoons and enjoy your Mini Easter Cheesecake Jars straight from the fridge! These portion-controlled desserts are best served cold, providing a refreshing treat for any spring celebration. Share the joy of this delightful no-bake dessert with family and friends!
Make Ahead Options
These Mini Easter Cheesecake Jars are perfect for meal prep enthusiasts! You can easily prepare the crust and cheesecake filling up to 24 hours in advance, allowing you to enjoy stress-free entertaining. Simply assemble the crust by combining graham cracker crumbs, sugar, and melted butter, then pack it into the jars. Prepare the cheesecake filling by mixing softened cream cheese with powdered sugar, vanilla, and lemon juice, and fold in whipped cream; cover and refrigerate until ready to use. To maintain freshness, store the jars covered in the fridge and add toppings just before serving to ensure they stay vibrant and crunchy. With this make-ahead approach, you’ll delight in the deliciousness of these jars while saving valuable time!
Mini Easter Cheesecake Jars Variations & Substitutions
Feel free to get creative and customize your dessert experience with these delightful variations that will tickle your taste buds!
-
Flavor Twist: Swap vanilla for lemon extract and fold in some lemon zest for a citrusy kick that brightens every bite. The zest adds a lovely aroma and a fresh burst of flavor.
-
Chocolate Variant: Use chocolate cookie crumbs for the crust and fold cocoa into the filling for an indulgent twist, topping with chocolate eggs. This combination will satisfy any chocolate lover’s cravings!
-
Berry Garden: Layer a homemade strawberry compote between the crust and filling for a fruity surprise. This added layer brings a tart sweetness that beautifully complements the creaminess of the cheesecake.
-
Nutty Delight: Stir in some pistachio paste into the filling and sprinkle chopped walnuts or pecans on top. The nuts add a crunchy texture that contrasts nicely with the silky cheesecake.
-
Almond Coconut Nest: Mix shredded coconut with almond extract for a fragrant topping that brings a delightful nutty flavor. This variation evokes the essence of spring with its tropical essence.
-
Vegan Option: Substitute cream cheese with a dairy-free cream cheese and use coconut cream instead of heavy whipping cream. This keeps your jars creamy while maintaining a plant-based approach.
-
Gluten-Free Delight: Replace graham cracker crumbs with gluten-free cookies or almond flour for the crust, ensuring everyone can enjoy these tasty jars.
-
Spicy Kick: For those who like a little heat, add a pinch of cayenne pepper to the filling or sprinkle some spicy candied pecans on top for an unexpected flavor explosion.
For an extra treat, explore the flavors of our delicious Mini Lemon Cheesecakes or dive into the rich taste of Brownie Cheesecake Sweet!
How to Store and Freeze Mini Easter Cheesecake Jars
Refrigerator: Store covered jars in the fridge for up to 3 days for optimal freshness and flavor retention.
Freezer: For longer storage, freeze jars without toppings for up to 1 month. Thaw in the refrigerator overnight before serving.
Airtight Protection: Ensure jars are sealed tightly with lids or plastic wrap to prevent any absorption of odors or moisture.
Serving Reminder: Always serve your Mini Easter Cheesecake Jars cold for the best texture and taste!
Expert Tips for Mini Easter Cheesecake Jars
-
Crust Consistency: Make sure the crust mixture resembles wet sand. If it’s too dry, it won’t hold together well in the jar.
-
Chill Your Cream: Always chill the heavy whipping cream before whipping for the best, fluffiest results. This makes a significant difference in your Mini Easter Cheesecake Jars’ texture.
-
Gentle Folding: When incorporating the whipped cream into the cheese mixture, fold gently to maintain airiness—overmixing can lead to a dense filling.
-
Color Wisely: If tinting your filling, start with a tiny amount of gel food coloring and mix gradually until you achieve your desired shade. This avoids overpowering the cheesecake’s flavor.
-
Fresh Toppings: Add mini chocolate eggs or jelly beans just before serving to keep toppings colorful and crunchy. This ensures a fresh and appealing look for your Mini Easter Cheesecake Jars.
-
Storage Secrets: Store jars covered in the refrigerator, allowing them to stay fresh for up to 3 days. This makes them perfect for make-ahead desserts.
What to Serve with Mini Easter Cheesecake Jars
Looking to elevate your dessert experience and craft a delightful springtime feast? Try these complementary dishes that add flavor and fun to your table.
-
Fruit Salad: A colorful mix of seasonal fruits balances the rich cheesecake with lightness and freshness, enhancing the overall meal experience.
-
Coffee or Tea: A steaming cup of coffee or refreshing iced tea helps to cleanse the palate between bites, making each spoonful of cheesecake even more enjoyable.
-
Chocolate-Covered Strawberries: These sweet, indulgent bites are the perfect luxurious contrast to the creamy cheesecake, enhancing your dessert spread with romance.
-
Mini Cupcakes: Bite-sized cupcakes in fun spring flavors add whimsical charm to your dessert table. They encourage guests to indulge and share small bites.
-
Carrot Cake Bars: Infused with warm spices and topped with cream cheese frosting, these bars offer a delicious nod to the season, making them a wonderful pairing for the cheesecake jars.
-
Lemonade Spritzer: A zesty, sparkling drink provides a refreshing counterpoint to the cheesecake’s sweetness—ideal for sipping alongside your Mini Easter Cheesecake Jars.
Let the celebration begin, and enjoy creating lasting memories with these delightful additions!
Mini Easter Cheesecake Jars Recipe FAQs
What kind of graham cracker crumbs should I use?
You can use either store-bought graham cracker crumbs or crush your own from whole graham crackers. If you prefer a different flavor, digestive biscuits make a great substitute!
How long can I store Mini Easter Cheesecake Jars in the fridge?
Absolutely! These delightful jars can be covered and stored in the refrigerator for up to 3 days, allowing you to prepare them ahead of time and enjoy them with minimal fuss.
Can I freeze Mini Easter Cheesecake Jars?
Yes, you can freeze them! Just make sure to store the jars without any toppings for up to 1 month. To thaw, place them in the refrigerator overnight before serving to retain the creamy texture.
What should I do if my whipped cream isn’t holding its shape?
If your whipped cream isn’t holding its shape when whipped, it might not have been chilled enough beforehand. Ensure your mixing bowl and beaters are cold as well. Whip on medium speed until you reach medium-stiff peaks—this typically takes about 3 to 5 minutes.
Are Mini Easter Cheesecake Jars safe for my gluten-sensitive friends?
If you have gluten-sensitive guests, simply substitute the graham cracker crumbs with gluten-free cookie or biscuit crumbs. Always double-check ingredient labels for any hidden gluten, and you’ll have a delightful dessert everyone can enjoy!
How can I avoid a runny cheesecake filling?
To ensure a perfectly set filling, make sure your cream cheese is just softened (not too warm) and that you’re folding the whipped cream in gently. Overmixing can lead to a dense or runny filling. Layer it carefully, and refrigerate for at least 2 hours to help it firm up!
Mini Easter Cheesecake Jars for a Sweet Spring Treat
Ingredients
Equipment
Method
- In a mixing bowl, combine graham cracker crumbs, sugar, and salt. Pour in melted unsalted butter, and mix until the mixture resembles damp sand. Pack the crust into the bottom of each jar.
- In a chilled mixing bowl, whip the heavy whipping cream on medium speed until it forms medium-stiff peaks, about 3 to 5 minutes.
- In another bowl, beat the softened cream cheese with powdered sugar, vanilla extract, and lemon juice until smooth and creamy, about 2 to 3 minutes.
- Fold in half of the whipped cream into the cream cheese mixture gently, then repeat with the remaining whipped cream.
- If desired, divide the cheesecake filling into bowls and tint each with gel food coloring until you achieve your desired shades.
- Layer the cheesecake filling over the crust in each jar and smooth the top with a spatula.
- Cover and refrigerate the jars for at least 2 hours to set properly.
- Before serving, top with shredded coconut and mini chocolate eggs or jelly beans.
- Serve cold and enjoy your Mini Easter Cheesecake Jars!
Leave a Reply