
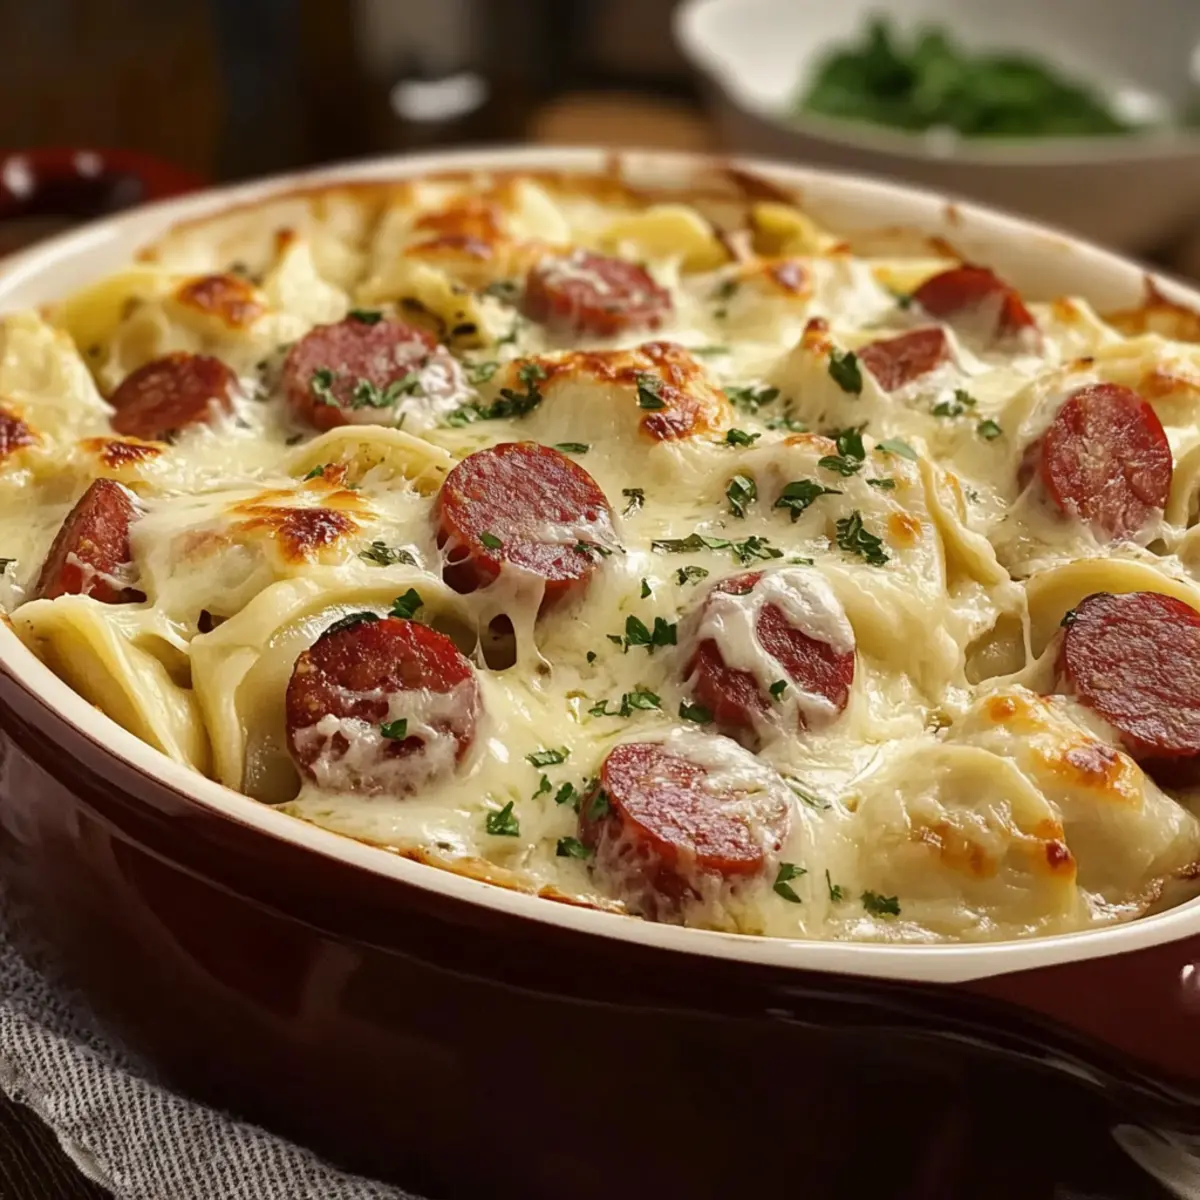
As I stood in the kitchen, the warmth of the oven wrapping around me, I couldn’t help but think of chilly evenings spent savoring hearty meals. Enter my Kielbasa and Pierogi Bake—a delightful casserole that brings the comforting essence of Eastern European flavors straight to your table. This dish is a crowd-pleaser, combining creamy potatoes and savory kielbasa in an easy, oven-baked format. Not only does it make for the perfect family dinner, but it also adapts beautifully to meet your dietary needs, whether you’re aiming for a vegetarian version or simply looking to cut back on calories. With every bubbly, golden bite, this recipe promises both comfort and satisfaction on even the busiest of nights. Ready to awaken your taste buds with this gem? Let’s dive in—your next favorite dish awaits!

Why is This Recipe a Must-Try?
Comforting and satisfying, this Kielbasa and Pierogi Bake warms the soul on chilly evenings. Adaptable for dietary preferences, it can easily be customized for vegetarians or those seeking lower-fat options. Effortless to prepare, just layer and bake for a hassle-free meal. Crowd-pleaser at family gatherings, everyone will love the cheesy goodness! Serve it alongside a fresh salad or pair with a light lager for a delightful dining experience. Don’t forget to try this alongside my Oatmeal Cookies Bake for a sweet ending!
Kielbasa and Pierogi Bake Ingredients
• Get ready to create a delightful dish!
For the Casserole
- Kielbasa – Adds a rich, smoky flavor; swap it for meat-free sausage or sautéed mushrooms for a vegetarian dish.
- Frozen Pierogies – Provides a creamy potato and cheese filling; avoid overcrowding them during baking to maintain texture.
- Sour Cream – Infuses creaminess and tanginess; use low-fat alternatives for a lighter touch.
- Cream Cheese – Boosts the dish’s richness; feel free to substitute with light cream cheese if desired.
- Onions – Contributes sweetness and depth; can be omitted for a less pronounced flavor.
- Cheddar Cheese – Melts beautifully for a creamy, salty kick; consider smoked gouda or Monterey Jack as alternatives.
- Parsley – For garnishing your dish, adding a fresh splash of color; while optional, it’s highly recommended for presentation.
- Spices (e.g., red pepper flakes) – For a touch of heat; adjust according to your taste preference and enjoy the zest in your Kielbasa and Pierogi Bake!
Step‑by‑Step Instructions for Kielbasa and Pierogi Bake
Step 1: Preheat and Prepare
Preheat your oven to 375°F (190°C) and lightly grease a 9×13-inch baking dish with cooking spray or butter. This will ensure that your Kielbasa and Pierogi Bake doesn’t stick and that it bakes evenly. Set aside the prepared baking dish as we get ready for the delightful layers to come together.
Step 2: Brown the Kielbasa
In a large skillet over medium heat, add sliced kielbasa and cook for about 5–7 minutes, stirring occasionally, until browned and slightly crispy. This step enhances the flavor and texture of the sausage, releasing its savory juices. Once done, remove from heat and let it cool slightly while you mix the creamy sauce.
Step 3: Make the Creamy Sauce
In a large bowl, combine sour cream, cream cheese, and optional spices like red pepper flakes for a hint of heat. Using a spatula, mix until smooth and creamy, ensuring all ingredients are well blended. This luscious sauce will bring the Kielbasa and Pierogi Bake together, offering a perfect balance of creaminess and tang.
Step 4: Layer the Pierogies
Begin assembling the dish by placing half of the frozen pierogies in the greased baking dish. Spread them evenly across the bottom, ensuring they aren’t overcrowded to avoid sogginess. Next, layer half of the browned kielbasa over the pierogies, allowing the flavors to meld beautifully throughout the bake.
Step 5: Repeat the Layers
Repeat the layering process by adding the remaining pierogies on top of the kielbasa, followed by the rest of the sausage. This two-layer build ensures that every bite of your Kielbasa and Pierogi Bake is bursting with flavor, creating a deliciously satisfying casserole for your family.
Step 6: Pour the Creamy Mixture
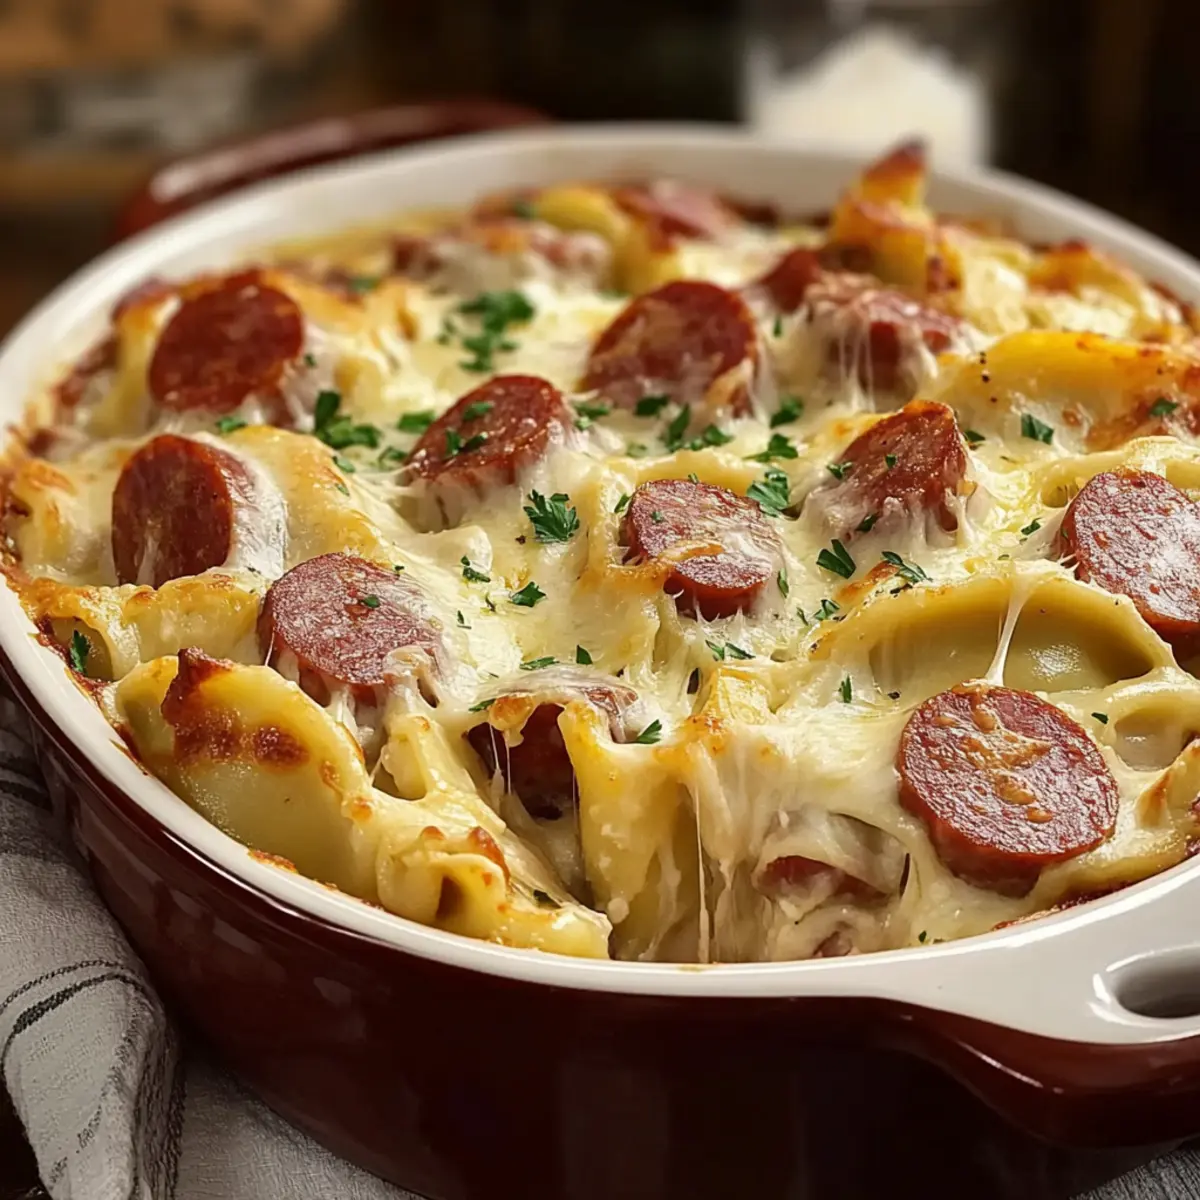
Carefully pour the creamy sauce over the layered pierogies and kielbasa, spreading it evenly to cover all ingredients. Then, sprinkle a generous layer of shredded cheddar cheese on top, which will melt and form a bubbly golden crust during baking. This step is essential for that deliciously gooey finish.
Step 7: Bake to Perfection
Cover the baking dish tightly with aluminum foil and place it in the preheated oven. Bake for 30 minutes, then carefully remove the foil and bake for an additional 10–15 minutes, or until the top is golden brown and bubbly. The gradual cooking ensures that all flavors meld beautifully in this comforting Kielbasa and Pierogi Bake.
Step 8: Garnish and Serve
Once the bake is out of the oven, let it rest for about 5 minutes. Garnish with fresh parsley for that lovely pop of color and freshness, which adds a delightful touch to your dish. Your Kielbasa and Pierogi Bake is now ready to be served, offering warmth and satisfaction for your family or guests.
Make Ahead Options
These Kielbasa and Pierogi Bake are perfect for busy home cooks looking to save time in the kitchen! You can prepare the entire casserole up to 24 hours in advance by assembling it completely and then covering it tightly with plastic wrap or foil before refrigerating. This allows the flavors to meld beautifully while keeping the pierogies from becoming soggy. When you’re ready to bake, simply remove it from the fridge and add an extra 10-15 minutes to the baking time to ensure it’s heated through. With this make-ahead option, you can have a comforting meal ready with minimal effort, making your busy weeknights that much easier!
What to Serve with Kielbasa and Pierogi Bake?
Imagine cozying up with a hearty plate alongside sides that accentuate the comforting charm of your dish.
- Crisp Green Salad: A fresh salad with vinaigrette adds brightness and crunch, balancing the richness of the casserole.
- Roasted Vegetables: Seasonal roasted vegetables provide a sweet, caramelized side that complements the smoky kielbasa beautifully.
- Garlic Bread: Toasty garlic bread offers a crunchy texture and buttery flavor, perfect for soaking up the creamy sauce.
- Sauerkraut: Tangy sauerkraut adds an exciting zing, enhancing the dish with its pickled notes while embracing Eastern European roots.
- Light Lager: A cold light lager brings a refreshing contrast, cleansing the palate between bites of the rich casserole.
- Apple Crisp: Top off your meal with a warm apple crisp, allowing the sweet, spiced flavors to contrast deliciously with the creamy bake.
- Coleslaw: Creamy coleslaw adds a crunchy, tangy element, serving as a perfect contrast to the hearty pierogi and kielbasa.
- Pickles: Enjoy some dill pickles on the side for a crisp, tangy bite that cuts through the richness of your dish.
- Buttered Corn: Sweet buttered corn provides a pleasant sweetness and soft texture, pairing wonderfully with the savory casserole.
- White Wine: A chilled glass of white wine, such as Riesling, can enhance the meal, adding a touch of elegance to your dining experience.
How to Store and Freeze Kielbasa and Pierogi Bake
Fridge: Store leftovers in an airtight container for up to 4 days to keep your Kielbasa and Pierogi Bake fresh and flavorful.
Freezer: For longer storage, freeze the dish wrapped tightly in aluminum foil or plastic wrap for up to 2 months. To reheat, thaw overnight in the fridge before baking.
Reheating: Reheat individual portions in the microwave for 2–3 minutes or in the oven at 350°F (175°C) until heated through, about 15–20 minutes, covered with foil to retain moisture.
Make-Ahead Tips: Assemble the dish a day in advance and refrigerate—the flavors meld beautifully. Increase baking time by about 10 minutes when ready to bake.
Kielbasa and Pierogi Bake Variations
Feel free to unleash your creativity and personalize this delightful dish to suit your taste and dietary needs!
-
Vegetarian Option: Swap kielbasa for sautéed mushrooms or plant-based sausage for a delightful meat-free twist. You’ll still enjoy a hearty meal bursting with flavor.
-
Extra Veggies: Add spinach, bell peppers, or broccoli for an extra dose of nutrition and a splash of color. These veggies not only enhance the dish but also elevate the overall flavor profile.
-
Cheese Switch-Up: Experiment with different cheese varieties such as smoked gouda or Monterey Jack for a unique taste twist. This is perfect for cheese lovers looking to explore new flavors!
-
Spicy Kick: Amp up the heat by adding jalapeños or a sprinkle of cayenne pepper for an extra layer of warmth. Adjust the spice level to your liking and experience a new level of flavor.
-
Creamy Twist: Replace sour cream with Greek yogurt for a tangy, protein-packed alternative. It offers a lovely creaminess while being a lighter option!
-
Low-Sodium Alternative: For a healthier version, use reduced-sodium kielbasa and low-fat dairy products. You can savor this comfort food without the guilt.
-
Grain-Free Variation: For a gluten-free twist, substitute pierogies with cauliflower or zucchini slices. This will give the dish a refreshing and lighter texture.
-
Casserole Medley: Combine leftover meats or different types of sausages from your fridge for a delicious mixed-meat casserole. This is a great way to use up ingredients and reduce food waste!
Don’t forget to pair this hearty dish with a fresh side salad or some roasted seasonal vegetables to brighten up your meal. If you’re in the mood for something a bit sweeter afterwards, try making my delightful Oatmeal Cookies Bake for a perfect ending to a cozy night in!
Expert Tips for Kielbasa and Pierogi Bake
-
Spacing Matters: Ensure pierogies aren’t overcrowded in the baking dish to prevent sogginess while baking.
-
Layering Effect: Alternate layers of pierogies and kielbasa evenly for a harmonious mix of flavors in every bite of your Kielbasa and Pierogi Bake.
-
Crispy Finish: For a golden, bubbly top, remove the foil during the last 10–15 minutes of baking to allow the cheese to brown beautifully.
-
Storage Smart: Store any leftovers in airtight containers to maintain texture and flavor—enjoy your delicious casserole for days to come!
-
Taste Test: Adjust spices and seasonings in the creamy sauce to suit your preferences—making your Kielbasa and Pierogi Bake truly your own.
Kielbasa and Pierogi Bake Recipe FAQs
How do I choose the best kielbasa?
Absolutely! When selecting kielbasa, look for high-quality sausages with a good balance of meat and fat. Check for ones that feel firm to the touch and have no visible dark spots or excessive moisture in the packaging. If going for a vegetarian option, ensure the meat-free sausage has a hearty texture and flavor.
What’s the best way to store leftovers?
To keep your Kielbasa and Pierogi Bake fresh, store leftovers in an airtight container in the refrigerator for up to 4 days. Allow the casserole to cool before sealing to avoid condensation, which can make the dish soggy.
Can I freeze Kielbasa and Pierogi Bake?
Absolutely! You can freeze your Kielbasa and Pierogi Bake for up to 3 months. Just let it cool completely, then wrap tightly in aluminum foil or plastic wrap. When you’re ready to enjoy it again, thaw in the fridge overnight before reheating to maintain the best texture.
What should I do if my pierogies are soggy?
Very! To prevent sogginess, avoid overcrowding the pierogies in the baking dish. If you find they are already soggy after baking, you can try broiling them for a few minutes to crisp up the top and provide a better texture. To improve future bakes, ensure they’re spaced apart and dry before layering.
Are there any allergy considerations with this recipe?
Yes! As always, consider any dietary needs or allergies. This recipe contains dairy and gluten, so if anyone has sensitivities, you can use gluten-free pierogies and dairy alternatives like cashew cream and vegan cheese to create a deliciously inclusive version.
How can I make this dish healthier?
Definitely! To lighten your Kielbasa and Pierogi Bake, substitute lower-fat versions of sour cream and cream cheese and choose turkey kielbasa instead of traditional pork. You can also add more vegetables like spinach or bell peppers for extra nutrition, which makes it both delicious and heart-healthy!

Kielbasa and Pierogi Bake: A Cozy Family Favorite Casserole
Ingredients
Equipment
Method
- Preheat your oven to 375°F (190°C) and lightly grease a 9x13-inch baking dish.
- In a large skillet over medium heat, add sliced kielbasa and cook for about 5–7 minutes until browned.
- In a large bowl, combine sour cream, cream cheese, and spices. Mix until smooth and creamy.
- Begin assembling by placing half of the frozen pierogies in the greased baking dish.
- Layer half of the browned kielbasa over the pierogies.
- Repeat layering by adding the remaining pierogies and kielbasa.
- Pour the creamy sauce over the layers and sprinkle cheddar cheese on top.
- Cover with aluminum foil and bake for 30 minutes, then remove the foil and bake for an additional 10–15 minutes.
- Let it rest for 5 minutes and garnish with fresh parsley before serving.
Leave a Reply