
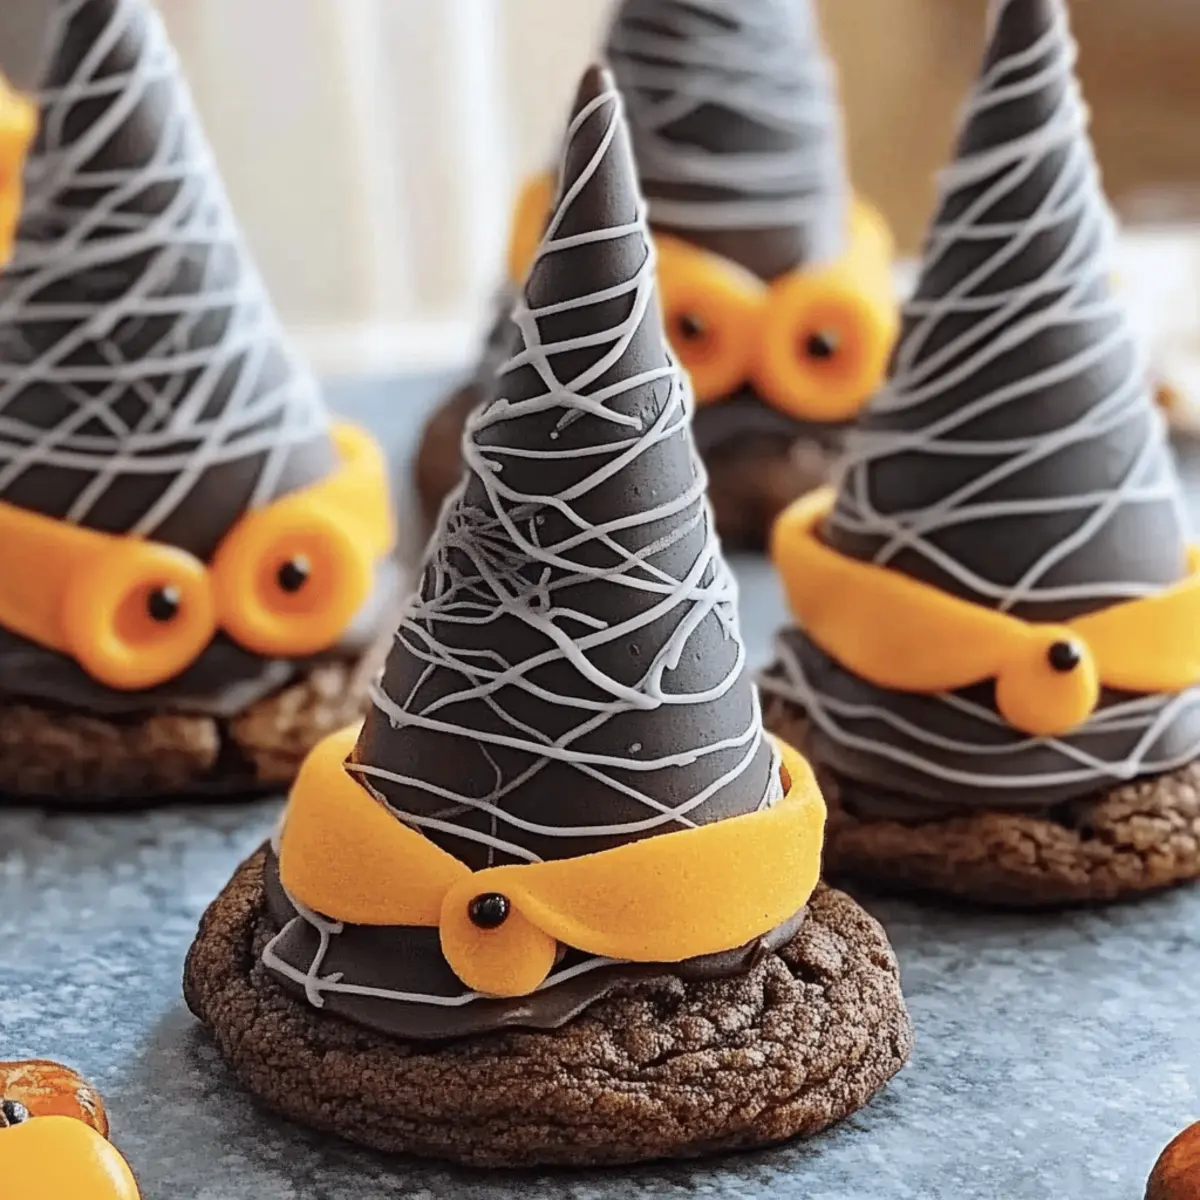
As the sun dips lower, casting eerie shadows across your kitchen, a cauldron of anticipation bubbles up with Halloween around the corner. I’ve concocted the perfect recipe for this festive season: Fun Halloween Witch Hat Cookies! These delightful treats are not only a whimsical sight to behold, with their charming sugar cone hats perched atop a soft cookie base, but they also offer a chance to customize and unleash your creativity. The best part? They’re super easy to whip up, making them ideal for both bustling Halloween parties and cozy family gatherings. Whether you opt for classic colors or get adventurous with your icing, these cookies promise to enchant everyone at the table. Are you ready to embrace this sweet spell and turn ordinary baking into a magical adventure?
Why Are These Witch Hat Cookies a Must-Try?
Easily Customizable: Crafted with a simple cake mix, these cookies invite creativity with color and flavor. Experiment with delicious twists like a pumpkin spice base or vibrant icing colors beyond classic black and orange!
Kid-Friendly Fun: These cookies are perfect for kids to help with. Shaping and decorating provides a delightful bonding experience while introducing little ones to the joy of baking.
Festive Presentation: With their charming and whimsical design, these cookies make a stunning addition to any Halloween spread, sure to impress your guests at gatherings.
Time-Saving Treats: Enjoy the ease of using store-bought ingredients without compromising flavor. Just like our Lemon Oatmeal Cookies are quick and simple.
Crowd Pleaser: Kids and adults alike will be drawn to the playful design and delicious taste, ensuring you leave with empty plates every time. Embrace the spirit of Halloween and create magical moments with these cookies!
Fun Halloween Witch Hat Cookies Ingredients
Get ready to create some delightful treats for the spooky season!
For the Cookie Base
- Favorite Cake Mix – Essential for the cookie base, adding sweetness with easy preparation. Homemade chocolate cake can be used for a more personal touch.
- Store Bought Chocolate Cookies – Provides a simplified cookie base. Feel free to substitute with homemade chocolate cookies if desired.
For the Witch Hats
- Sugar Cones – Creates the iconic witch hat shape. No substitute would provide the same structural integrity.
- Black Color Mist Food Coloring Spray – Adds a spooky hue to the cones. Black icing can serve as a substitute, though application differs.
For the Icing
- Creamy White Decorator Icing – Used for decorating the cookies. Royal icing can be substituted for a firmer finish.
- Lemon Yellow Icing Color – Brightens decorations. Natural dyes can be effective substitutes.
- Rose, Violet, Golden Yellow, & Orange Icing Colors – Adds vibrant colors to the decorations. Other food colorings can be interchangeable based on desired theme.
Unleash your creativity with these Fun Halloween Witch Hat Cookies and let the magic of baking transform your kitchen into a spooky wonderland!
Step‑by‑Step Instructions for Fun Halloween Witch Hat Cookies
Step 1: Prepare Cookie Base
Begin by preheating your oven to 350°F. In a mixing bowl, combine your favorite cake mix according to the package instructions. Fill each sugar cone with about 2 tablespoons of the batter, anchoring them upright on a baking sheet. Bake for 15-18 minutes until the cones are golden and spring back lightly when touched. Let the cookie bases cool completely on a wire rack.
Step 2: Color the Cones
Once cooled, carefully trim the excess cake from the tops of the baked cones to create a clean edge. Use the black color mist food coloring spray to coat each cone evenly, ensuring to hold the can about 6 inches away for a smooth application. Allow the cones to dry completely on a wire rack, achieving a spooky hue perfect for your witch hat cookies.
Step 3: Tint the Icing
Divide the creamy white decorator icing into separate bowls for coloring. Add lemon yellow, rose, violet, or any vibrant shades you desire to create your icing palette. Mix well until the colors are rich and vivid, and then transfer each colored icing into prepared piping bags. This will allow for precise decoration when assembling your Fun Halloween Witch Hat Cookies.
Step 4: Assemble Hats
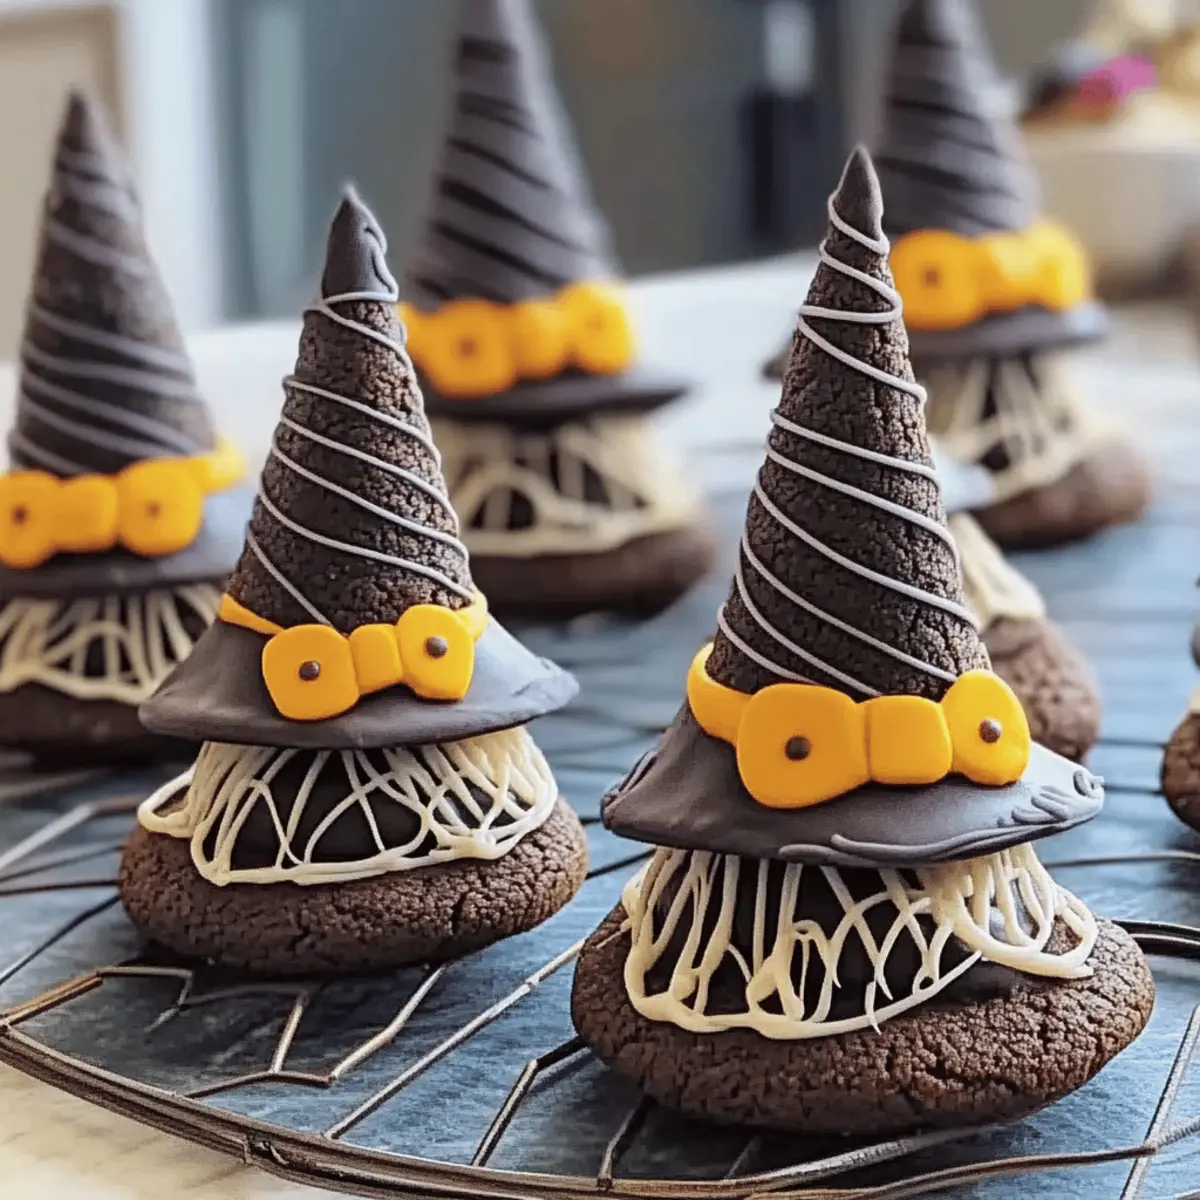
To assemble your witch hats, take a piping bag filled with orange icing and pipe a small dollop onto the center of each cookie base to serve as adhesive. Gently position the decorated sugar cone atop the cookie, pressing down slightly to secure it in place. Add additional piping around the base of the cone to form a decorative glue, helping to complete your whimsical witch hat look.
Step 5: Finish Details
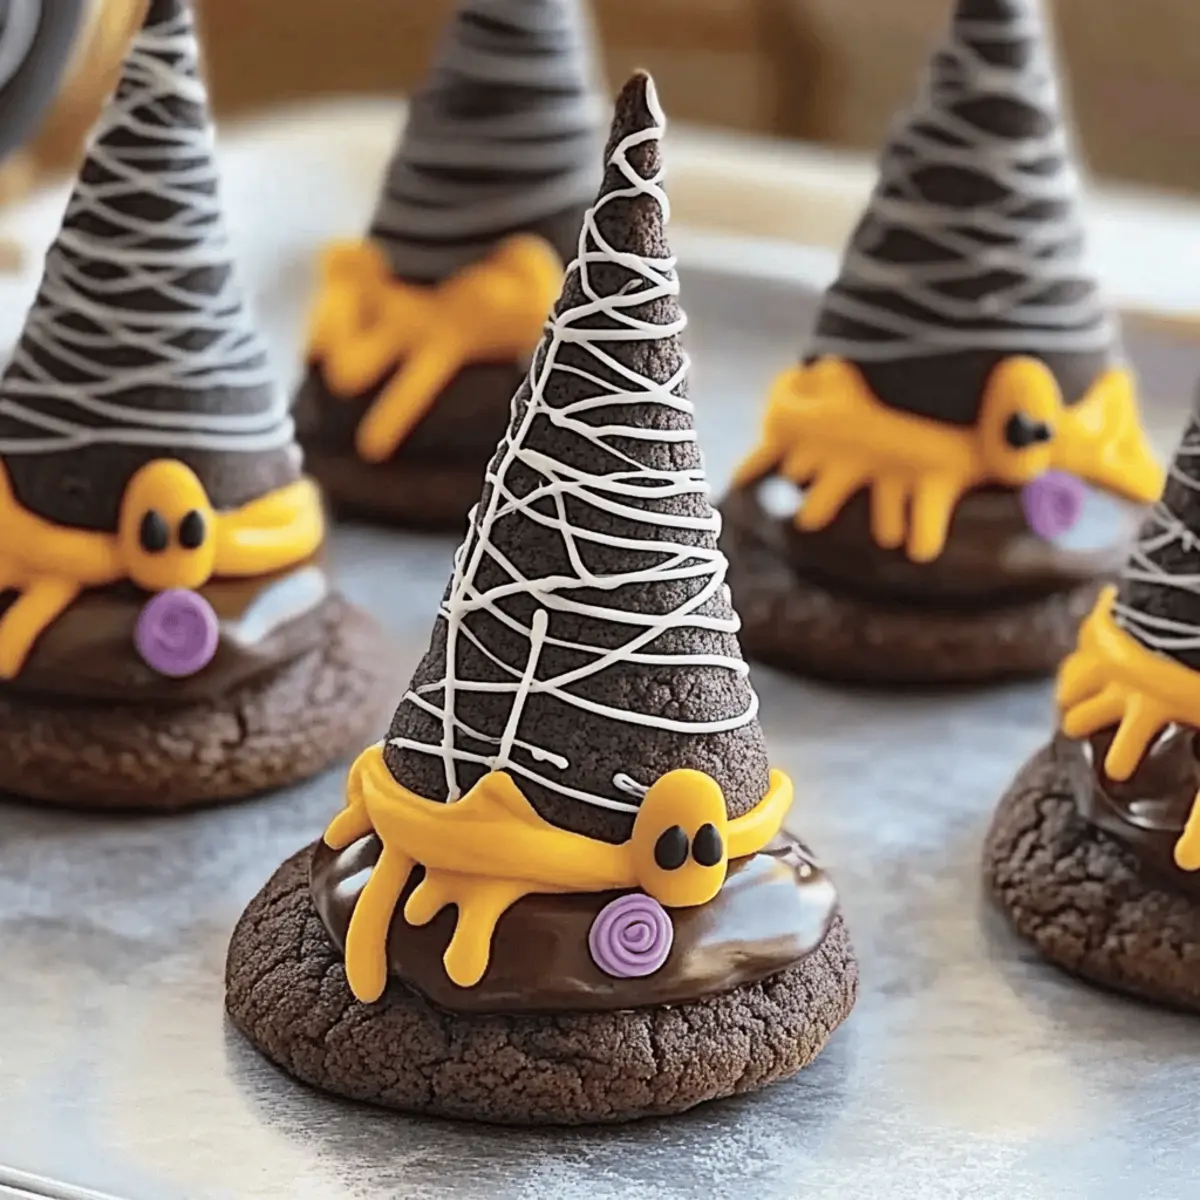
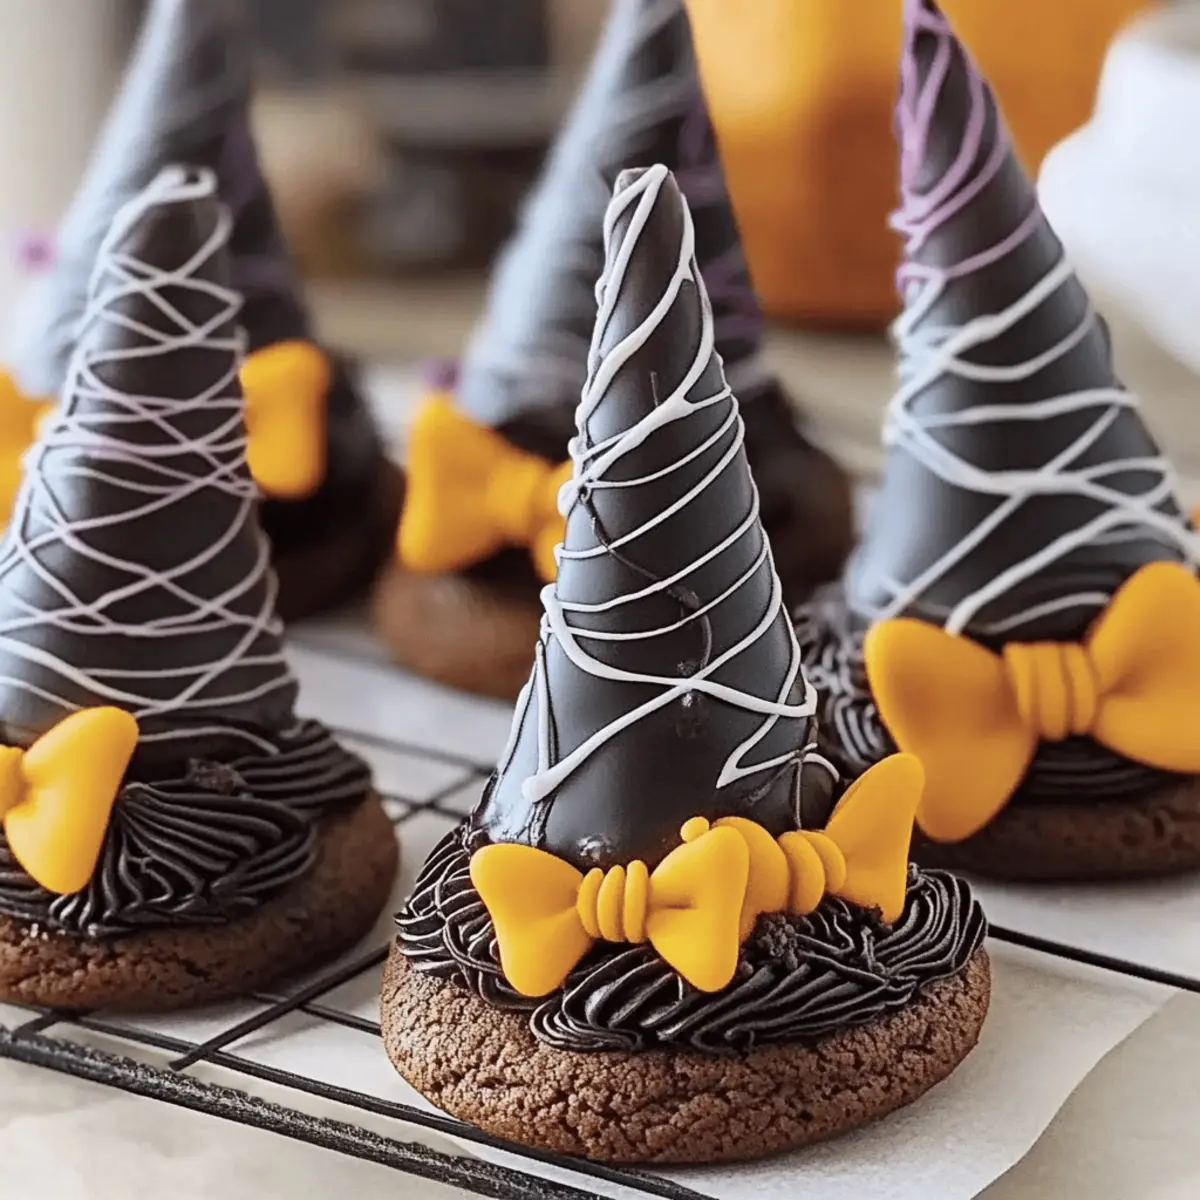
After the initial icing sets, unleash your creativity by piping decorative designs around each cone using the various colored icing. Consider making whimsical patterns such as buckles or starbursts to add a festive touch. Allow all the icing to dry thoroughly before serving your Fun Halloween Witch Hat Cookies, ensuring they maintain their charming appeal at your Halloween gatherings.
Expert Tips for Fun Halloween Witch Hat Cookies
-
Get Creative with Colors: Use vibrant icing colors to personalize the cookies. Experiment with greens or purples for a more modern spooky look.
-
Allow Drying Time: Be patient with the black color mist and icing. Let them dry completely between steps to prevent smudging and ensure a polished finish.
-
Storage Secrets: Keep your cookies fresh by placing them in an airtight container at room temperature. They last up to 5 days, perfect for holiday sharing!
-
Avoid Overfilling: When adding batter to the sugar cones, aim for about 2 tablespoons. Overfilling can lead to messy results in the oven.
-
Sharp Tool for Precision: Use a sharp knife to trim the cooled cones neatly; this will help them look more appealing and professional when assembled.
-
Watch the Kids: Engage children in the decorating process, but supervise to ensure they manage the piping bags safely and don’t over-ice the cookies!
These tips will help you master these Fun Halloween Witch Hat Cookies and ensure delightful creations that everyone will love!
Storage Tips for Fun Halloween Witch Hat Cookies
Room Temperature: Store cookies in an airtight container at room temperature for up to 5 days. This keeps them fresh and maintains their delightful texture.
Freezer: For longer storage, individually wrap each cookie and freeze for up to 3 months. Thaw at room temperature before serving for the best taste and texture.
Reheating: If desired, reheat cookies in the microwave for about 10-15 seconds to enjoy a warm, soft treat.
Keep Decorated Cookies Safe: Make sure to stack cookies carefully to avoid smudging the icing when storing.
Fun Halloween Witch Hat Cookies Variations
Feel free to get creative and customize these cookies for a spooky twist that delights the senses!
-
Color Swap: Try using vibrant icing colors like green or pink for a whimsical modern touch. Your guests will be amazed by the unexpected hues.
-
Flavorful Cakes: Swap the cake mix for pumpkin spice or vanilla to add seasonal flair. The change in flavor will enchant everyone at your gatherings.
-
Additional Crunch: Enhance the texture by incorporating crushed pretzels or toffee bits into the cake batter. This adds a delightful surprise in every bite!
-
Gummy Accessories: Top your cookies off with gummy worms or colorful candies for a playful twist that kids will absolutely love. Everyone enjoys a little extra fun on Halloween!
-
Chocolate Hats: Elevate richness by dipping sugar cones in melted chocolate instead of cake batter. This indulgent twist creates a striking visual and flavor contrast.
-
Mini Versions: Bake bite-sized cookies for easy munching at parties. These mini treats are perfect for sharing and allow for a whimsical assortment.
-
Spice It Up: Add a pinch of cayenne or cinnamon to the icing for a spicy surprise. This unique twist will tease the taste buds and add complexity to your cookie creations.
If you’re seeking something more traditional, consider crafting a batch of Lemon Oatmeal Cookies for a festive cookie platter. You can also follow up with some roasted warm Beef Manhattan Savor for a comforting meal after all those sweets!
What to Serve with Fun Halloween Witch Hat Cookies
These enchanting treats pair perfectly with festive delights, creating a whimsical feast for your Halloween gatherings.
- Spiced Hot Apple Cider: The warm, cozy flavors of cider enhance the sweetness and add a comforting element to your spooky spread.
- Ghoulish Green Fruit Salad: A mix of green grapes, kiwi, and green apple slices adds freshness and a pop of color to balance the sugary cookies.
- Crispy Pumpkin Chips: These crunchy, savory bites provide a delightful contrast to the sweetness, making them an ideal nibble alongside the cookies.
- Chocolate Dipped Pretzels: Their salty crunch paired with the sweetness of the cookies creates a delightful flavor explosion that everyone will love.
- Ghostly Marshmallow Treats: Light and fluffy, these spooky snacks can be quick to make and fun to decorate, complementing the whimsical charm of the cookies.
- Monster Milkshakes: Creamy and festive, these tasty drinks are perfect for kids and can be customized with Halloween-themed toppings.
Create a magical Halloween spread that ensures your Fun Halloween Witch Hat Cookies shine even brighter among these delightful accompaniments!
Make Ahead Options
These Fun Halloween Witch Hat Cookies are perfect for meal prep, allowing you to enjoy more time with friends and family during the festivities! You can prepare the cookie base (filled sugar cones) up to 24 hours in advance by baking them and then storing them in an airtight container at room temperature. To ensure they stay fresh and maintain their chewy texture, let them cool completely before sealing. The icing can be colored and piped into separate containers and refrigerated for up to 3 days; just give it a good stir before using. When you’re ready to serve, simply assemble the hats by layering the cones on the cookies with a dot of orange icing and completing the decorations. This way, you can whip up these enchanting treats with minimal effort on the day of your gathering!
Fun Halloween Witch Hat Cookies Recipe FAQs
How do I choose the best cake mix for the cookie base?
Absolutely! When selecting your cake mix, go for your favorite flavor—like chocolate or vanilla—since it forms the delicious base of your cookies. For a custom touch, consider using a homemade cake mix for a deeper flavor profile. The idea is to use a mix that will yield a moist and chewy texture.
What are the best storage methods for Witch Hat Cookies?
To maintain the freshness of your cookies, it’s best to store them in an airtight container at room temperature for up to 5 days. This method ensures their delightful texture remains intact. If you want to keep them for longer, individually wrap each cookie and place them in a freezer bag. They can last in the freezer for up to 3 months. When you’re ready to enjoy them, simply thaw at room temperature.
Can I freeze these Witch Hat Cookies? How?
Absolutely! To freeze your Fun Halloween Witch Hat Cookies, first ensure they’re completely cooled. Wrap each cookie individually in plastic wrap, then place them in a freezer-safe bag or container. They will stay fresh for up to 3 months. When it’s time to indulge, simply remove a cookie from the freezer and allow it to thaw at room temperature for about 20-30 minutes before enjoying that sweet treat!
What should I do if my sugar cone hats are falling over?
Very! If your sugar cone hats aren’t standing tall, there could be a couple of reasons. First, make sure you’re filling the cones with just the right amount of batter—about 2 tablespoons—to prevent overflow. If they still wobble, try adding a bit more icing around the base as a glue to anchor them better. Ensuring the cone is sprayed completely with the black food mist before assembly can also help create a pleasing finish.
Are there any dietary considerations for these cookies?
Certainly! When making Fun Halloween Witch Hat Cookies, be aware of common allergens found in store-bought cake mixes and icings, such as gluten and dairy. If you have guests with dietary restrictions, consider using gluten-free cake mixes or dairy-free icing options. Always check labels for allergens, and if you’re preparing for little ones, use natural coloring in your icings for safer consumption.
Fun Halloween Witch Hat Cookies for Spooky Sweet Treats
Ingredients
Equipment
Method
- Preheat your oven to 350°F. In a mixing bowl, combine your favorite cake mix according to the package instructions. Fill each sugar cone with about 2 tablespoons of the batter, anchoring them upright on a baking sheet. Bake for 15-18 minutes until the cones are golden and spring back lightly when touched. Let the cookie bases cool completely on a wire rack.
- Once cooled, carefully trim the excess cake from the tops of the baked cones to create a clean edge. Use the black color mist food coloring spray to coat each cone evenly, ensuring to hold the can about 6 inches away for a smooth application. Allow the cones to dry completely on a wire rack.
- Divide the creamy white decorator icing into separate bowls for coloring. Add lemon yellow, rose, violet, or any vibrant shades you desire to create your icing palette. Mix well until the colors are rich and vivid, and then transfer each colored icing into prepared piping bags.
- To assemble your witch hats, take a piping bag filled with orange icing and pipe a small dollop onto the center of each cookie base to serve as adhesive. Gently position the decorated sugar cone atop the cookie, pressing down slightly to secure it in place.
- After the initial icing sets, pipe decorative designs around each cone using the various colored icing. Allow all the icing to dry thoroughly before serving your Fun Halloween Witch Hat Cookies.
Leave a Reply