
As I stood in the kitchen, the scent of vanilla wafting through the air, I couldn’t help but feel the holiday spirit take over. There’s something magical about crafting delicate Christmas Tree Meringues that brings such joy—these airy, whimsical treats are a feast for both the eyes and the palate. With a simple piping technique, even novice bakers can impress friends and family at holiday gatherings. Not only do these meringues provide an elegant touch to your dessert table, but they also happen to be vegetarian and gluten-free, making them a versatile option for everyone. Perfectly crispy on the outside and light as a feather, they capture the very essence of the festive season. Ready to dive into this delightful baking adventure? Let’s sprinkle some holiday cheer into your kitchen!
Why should you make Christmas Tree Meringues?
Whimsical Delights: These charming Christmas Tree Meringues are not only visually stunning but also incredibly fun to make, adding a festive touch to your holiday celebrations.
Simple Techniques: With a straightforward piping method, they’re perfect for beginners looking to impress.
Light & Crispy: Enjoy a delightful contrast of airy texture and satisfying crunch—each bite feels like a little cloud of joy!
Customizable Colors: Feel free to get creative! Try using different gel food colors to match your holiday décor or personal preferences.
Guilt-Free Indulgence: At just 25 calories per meringue, you can indulge in this sweet treat without the worry.
For more festive ideas, check out my Street Corn Chicken for an amazing main dish!
Christmas Tree Meringues Ingredients
For the Meringue
- Egg Whites – Ensure they’re at room temperature for better whipping, creating that glorious volume.
- Granulated Sugar – Essential for sweetness and stability; it helps form stiff peaks in your meringues.
- Cream of Tartar – This stabilizer creates the right texture; if unavailable, fresh lemon juice or white vinegar works as a substitute.
- Vanilla Extract – Adds a lovely flavor that complements the sweetness of the meringues.
- Green Gel Food Coloring – Use this to provide a festive color without thinning the meringue; avoid liquid coloring for best results.
- Sprinkles (optional) – Perfect for adding a fun, decorative touch that will delight guests of all ages.
Let’s celebrate this festive season together by creating delectable Christmas Tree Meringues that bring warmth and joy to your home!
Step‑by‑Step Instructions for Christmas Tree Meringues
Step 1: Preheat and Prepare
Begin by preheating your oven to 225°F (110°C). While that warms up, line a baking sheet with parchment paper. The parchment will help the Christmas Tree Meringues release easily after baking, ensuring they maintain their delightful shapes.
Step 2: Whisk the Egg Whites
In a clean, dry mixing bowl, add your room-temperature egg whites. Use an electric mixer on medium speed, whisking until the egg whites become foamy, which should take about 2 minutes. This stage is crucial for creating the airy base of your meringues, setting you up for perfect whipping ahead.
Step 3: Add Stabilization
Now, add the cream of tartar to the foamy egg whites. Continue whisking until soft peaks form, which typically takes another 1-2 minutes. You’ll know it’s ready when the peaks gently tip over but still hold some shape. This step will help stabilize the meringue for the best structure.
Step 4: Incorporate Sugar
Increase the mixer speed to high and gradually add the granulated sugar, one tablespoon at a time. Continue whisking for 8-10 minutes, until the mixture transforms into stiff, glossy peaks. This shiny meringue will bring your Christmas Tree Meringues to life, creating a beautiful texture that’s both light and crisp.
Step 5: Flavor and Color
Gently fold in the vanilla extract and the green gel food coloring using a silicone spatula. Be careful not to deflate the meringue; you want to maintain that airy quality. Fold until just combined, and the color is evenly distributed, creating a festive green hue perfect for your tree-themed treats.
Step 6: Pipe Your Trees
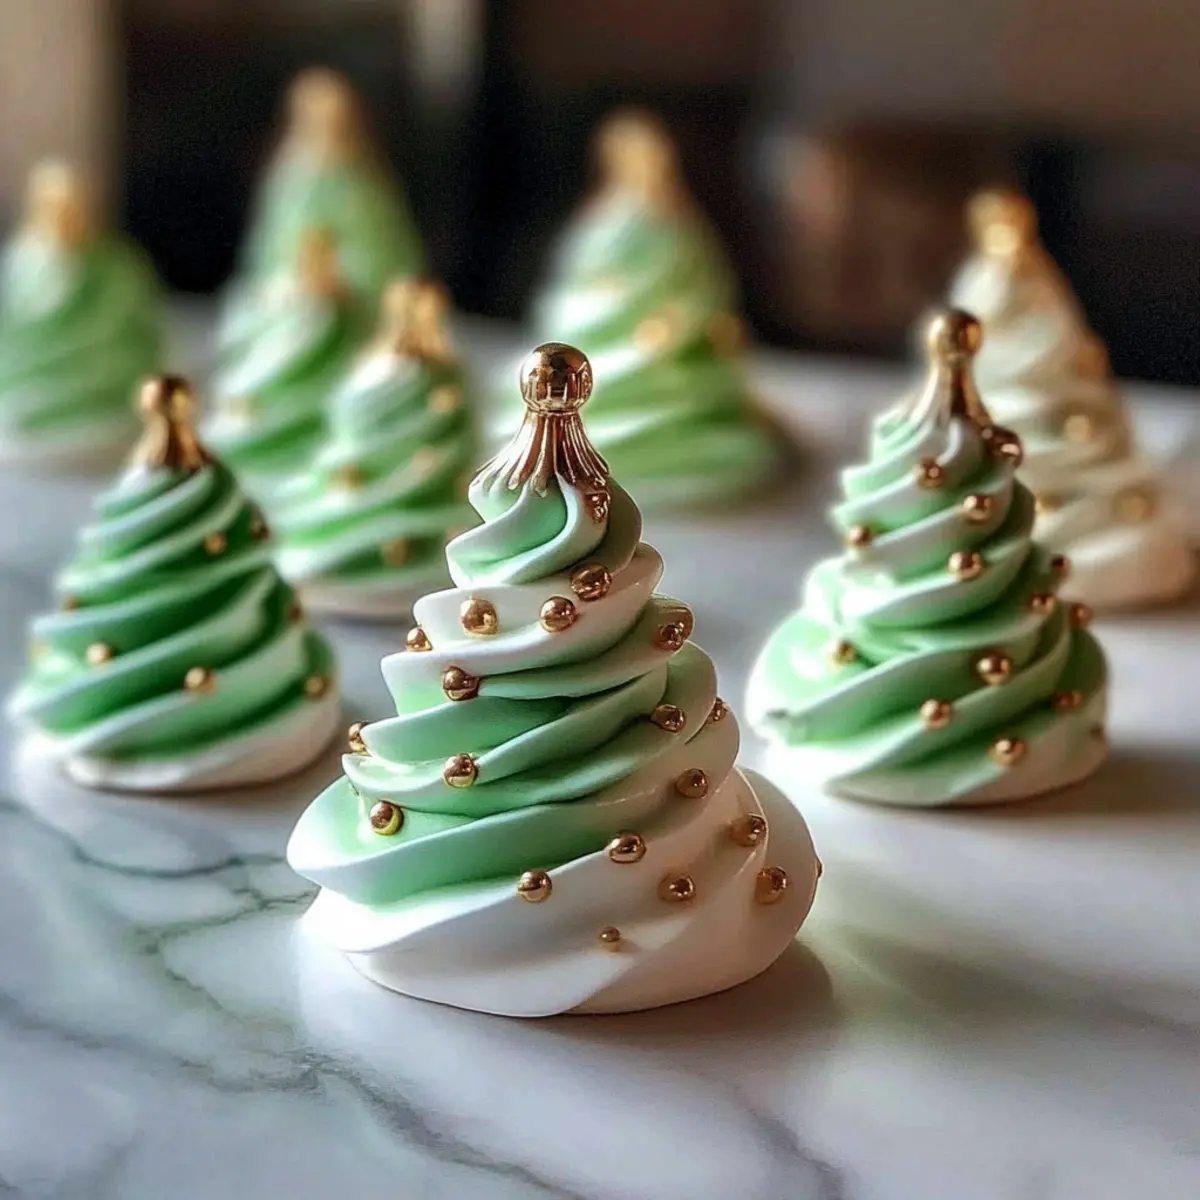
Transfer the meringue mixture into a piping bag fitted with a large star tip. Begin piping on the prepared baking sheet, starting with a wide base and spiraling upward to create tree shapes with pointed tops. Aim for varied sizes to add a whimsical, natural look to your Christmas Tree Meringues.
Step 7: Bake the Meringues
Place your piped meringues into the preheated oven and bake for 1 hour and 30 minutes. Do not open the oven door during this time, as this can affect the drying process. The meringues should be completely dry and firm to the touch when done, ensuring they achieve that delightful crispy texture.
Step 8: Cool Gradually
Once baking is complete, turn off the oven and leave the door slightly ajar. Allow the meringues to cool in the oven for 30 minutes. This gradual cooling helps them to further set while maintaining their fragile, airy texture, perfect for your charming Christmas Tree Meringues.
Christmas Tree Meringues Variations & Substitutions
Feel free to get creative with your meringue masterpiece and make these delightful treats truly your own!
-
Color Swap: Switch out the green gel food coloring for red to create festive candy cane-themed meringues. These vibrant pops of color will be a showstopper at any holiday gathering.
-
Pastel Delight: Use pastel gel food colors to craft meringues perfect for spring or baby showers. Soft pinks, blues, or yellows will add a sweet touch for any occasion.
-
Flavor Boost: Add a splash of almond extract in place of vanilla for a delicious twist that complements the sweetness perfectly. The almond flavor can elevate your meringues to a whole new level.
-
Cocoa Crunch: Fold in a couple of tablespoons of cocoa powder to the meringue mixture for a chocolatey delight. This extra layer of flavor will have chocolate lovers swooning with every bite!
-
Fun Sprinkle: Consider using holiday-themed sprinkles on top of your piped meringues before baking. Each bite will not only be visually appealing but will also add a delightful crunch.
-
Spicy Sweet: For those who crave a little heat, add a pinch of cayenne pepper or cinnamon to the meringue for a surprising twist. The gentle warmth complements the sweetness beautifully.
-
Alternative Sugar: Experiment with coconut sugar in place of granulated sugar for a hint of caramel flavor and a slight golden hue. It’s a unique touch that will surely impress your family and friends.
-
Meringue Kisses: Instead of piping tree shapes, create mini meringue kisses for bite-sized treats. These are perfect for sharing or adding to festive platters alongside your Street Corn Chicken.
With these variations, you can personalize your Christmas Tree Meringues and surprise your loved ones with different flavor experiences this holiday season!
How to Store and Freeze Christmas Tree Meringues
Room Temperature: Store meringues in an airtight container at room temperature for up to 3 days. This keeps them crispy and prevents moisture from ruining their texture.
Avoid Refrigeration: Do not refrigerate the meringues, as cold air can soften their delightful crunch. Keep them sealed to maintain freshness.
Freezer: For longer storage, freeze meringues in a single layer, wrapped in plastic wrap and then placed in a freezer-safe container, for up to 2 months.
Reheating: No reheating is needed; simply thaw meringues at room temperature for a few minutes before serving, allowing their original texture to return.
Expert Tips for Making Christmas Tree Meringues
-
Room Temperature Eggs: Ensure your egg whites are at room temperature to achieve maximum volume and stability when whipping.
-
No Yolk Allowed: Make sure your egg whites are completely free of yolk. Even a small amount can hinder whipping and prevent stiff peaks.
-
Gradual Sugar Addition: When adding sugar, do it one tablespoon at a time. This allows the sugar to dissolve completely and helps form glossy, stiff peaks in the meringue.
-
Avoid Liquid Coloring: Stick to gel food coloring for vibrant hues without compromising meringue consistency. Liquid coloring can add moisture, making it difficult for the meringues to set.
-
Check for Dryness: If your meringues aren’t dry after baking, return them to the oven at 200°F in 15-30 minute intervals. They should feel completely dry to the touch for the best crispy texture.
Make Ahead Options
These delightful Christmas Tree Meringues are perfect for meal prep, allowing busy home cooks to get a head start on their holiday baking! You can prepare the meringue mixture up to 24 hours in advance, storing it in an airtight container at room temperature to maintain its airy texture. Additionally, once piped, the meringues can be baked and stored for up to 3 days in a cool, dry place; layering them with parchment paper prevents breakage. When it’s time to serve, simply present them as is for an eye-catching addition to your dessert table. By prepping ahead, you’ll not only save time but also ensure these treats are just as delicious and festive when your holiday gatherings commence!
What to Serve with Christmas Tree Meringues
These whimsical meringues are not only a treat for the eyes but also perfect for pairing with delightful accompaniments that enhance their charm.
-
Rich Hot Cocoa: Perfectly complements the meringues’ lightness with its decadent warmth, creating a cozy dessert experience.
-
Vanilla Bean Ice Cream: A creamy, sweet contrast to the crispy texture, this classic pairing brings comfort to your holiday desserts.
-
Warm Berry Compote: The tartness of berries plays beautifully against the sweetness of the meringues, adding a fresh and vibrant flavor to each bite.
-
Peppermint Bark: This festive treat provides a delightful crunch and a hint of mint, making every moment indulgent and refreshing.
-
Spiced Chai Latte: The warming spices in this drink bring a comforting note that beautifully balances the sweetness of the meringues.
-
Red Velvet Cake: An elegant dessert to serve alongside, its rich texture pairs nicely with the airy nature of meringues while creating a colorful display.
-
Cranberry Lemonade: A refreshing beverage that adds a zesty finish to your meal, enhancing the overall festive experience.
-
Chocolate Fondue: Dip your meringues into luscious chocolate for a fun and interactive dessert, elevated to festive heights!
-
Christmas Butter Cookies: These buttery treats provide a delightful crunch that complements the meringues’ airy texture, ensuring a variety of bites at your holiday gathering.
Christmas Tree Meringues Recipe FAQs
What type of egg whites should I use for the meringues?
Absolutely! It’s best to use room temperature egg whites for making Christmas Tree Meringues. Warm egg whites whip up more easily and reach greater volume, which is essential for achieving that delightful, airy texture.
How should I store my meringues?
I recommend storing your meringues in an airtight container at room temperature. They will last up to 3 days. Keeping them sealed is crucial; avoid refrigeration as the cold can soften their crisp texture.
Can I freeze Christmas Tree Meringues?
Yes, you can! To freeze, arrange the meringues in a single layer on a baking sheet, wrap them tightly in plastic wrap, and then place them in a freezer-safe container. They can last for up to 2 months in the freezer. Just thaw them at room temperature for a few minutes before enjoying them again.
What if my meringues are not drying properly?
Very! If your Christmas Tree Meringues don’t dry out during baking, don’t fret! Simply return them to the oven set at 200°F (93°C) for 15-30 minute intervals until they feel completely dry to the touch. This extra step ensures you achieve that perfect, crispy texture you’re aiming for!
Are these meringues suitable for people with dietary restrictions?
Absolutely! Christmas Tree Meringues are vegetarian and gluten-free, making them a delightful treat for various dietary needs. However, if you’re considering serving them to guests with allergies, always double-check the labels of your ingredients to avoid any issues, especially with vanilla extract and food coloring.
Can I use liquid food coloring instead of gel?
It’s best to use gel food coloring for these meringues. Liquid food coloring can introduce moisture to your meringue mixture, making it more challenging to whip to a stiff peak. Gel colors maintain the meringue’s integrity while providing vibrant color; feel free to experiment with different shades for a festive flair!

Christmas Tree Meringues: Light, Crispy Holiday Delights
Ingredients
Equipment
Method
- Preheat your oven to 225°F (110°C) and line a baking sheet with parchment paper.
- In a mixing bowl, whisk the egg whites on medium speed until foamy, about 2 minutes.
- Add cream of tartar and whisk until soft peaks form, about 1-2 minutes.
- Gradually add sugar, one tablespoon at a time, and whisk until stiff, glossy peaks form, about 8-10 minutes.
- Fold in vanilla extract and green gel food coloring gently.
- Transfer the meringue to a piping bag and pipe tree shapes on the prepared baking sheet.
- Bake for 90 minutes without opening the oven door.
- Turn off the oven and let the meringues cool inside for 30 minutes.
Leave a Reply