
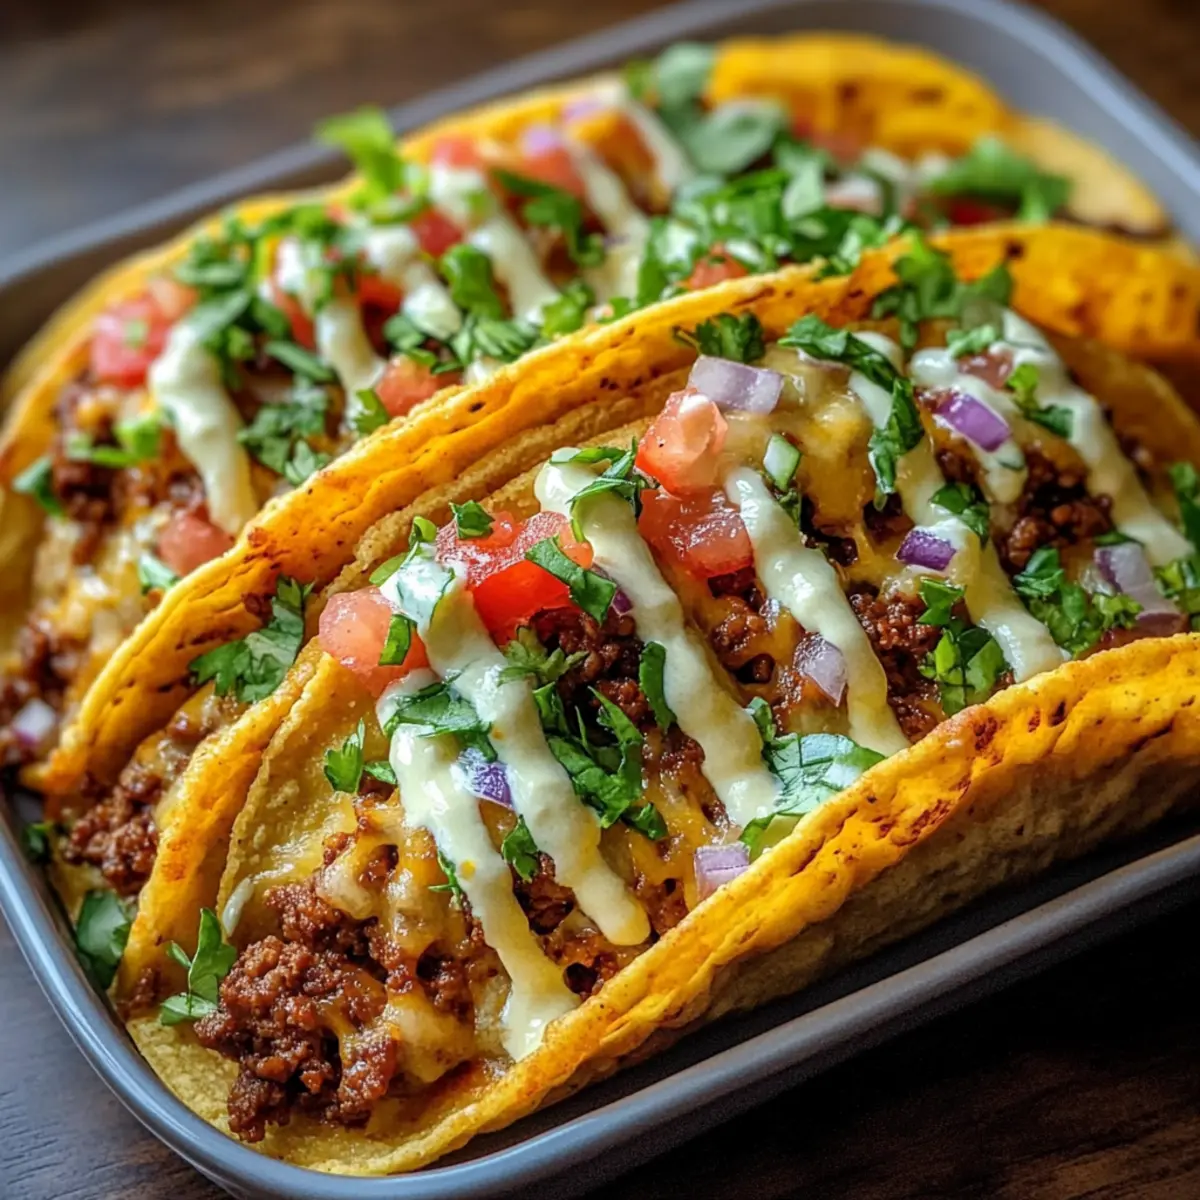
As I stirred the bubbling pot of taco fillings, a familiar aroma filled my kitchen, whisking me back to Friday nights filled with laughter and the crunch of perfect tacos. Today, I’m thrilled to share my recipe for Oven-Baked Cheesy Tacos, a delightfully crispy and loaded meal that comes together in just 30 minutes! These tempting tacos offer convenience without sacrificing flavor, making them a go-to option for busy weeknights or spontaneous gatherings. With a hearty filling of seasoned beef, gooey cheese, and your favorite fresh toppings, every bite promises a satisfying crunch that will have everyone asking for seconds. Are you ready to elevate your taco night with an easy twist? Let’s dive in!
Why Are These Tacos So Irresistible?
Crispy Crunch: The oven-baked method creates perfectly crispy taco shells that hold all the delicious fillings without getting soggy.
Quick Preparation: Ready in just 30 minutes, making them the ideal solution for busy weeknights or last-minute gatherings.
Flavor Explosion: The succulent mixture of seasoned beef and melty cheese brings a robust flavor that will please even the most discerning palate.
Customizable Options: Easily swap out proteins or toppings to cater to dietary preferences, whether you’re in the mood for ground turkey or black beans.
Family Favorite: Kids and adults alike will love these cheesy tacos, making them a hit at the dinner table. Serve them alongside Crunch Cheesecake Tacos for a perfectly sweet ending to your meal!
Oven-Baked Cheesy Tacos Ingredients
For the Taco Filling
- Ground Beef – The heart of these tacos; feel free to substitute with ground turkey, chicken, or even lentils for a plant-based option.
- Onion (finely diced) – Adds a natural sweetness and depth to the beef mixture.
- Garlic (minced) – Fresh garlic enhances the overall flavor, providing an aromatic boost.
- Taco Seasoning – A must for that authentic taco flavor; store-bought is convenient, but homemade is even better!
- Tomato Sauce or Salsa – Choose according to your taste; both add moisture and the perfect tanginess to the filling.
For the Taco Assembly
- Hard Taco Shells – These crispy shells provide the structure needed to hold all your delicious fillings; arrange them upright for even baking.
- Shredded Cheese – The star of the dish that melts perfectly; mix different cheeses for an extra flavor boost.
For the Toppings
- Fresh Toppings (lettuce, tomatoes, red onion, cilantro) – Add a refreshing crunch and colorful presentation; customize to your liking!
- Sour Cream or Guacamole (optional) – These creamy additions elevate your tacos; serve on the side for a delightful contrast in texture.
Dive into these Oven-Baked Cheesy Tacos that promise a satisfying crunch with every bite!
Step‑by‑Step Instructions for Oven-Baked Cheesy Tacos
Step 1: Preheat Oven
Begin by preheating your oven to 400°F (200°C). This initial step is crucial for achieving perfectly crispy taco shells. While the oven warms up, gather your baking dish and spray it lightly with non-stick spray to ensure easy removal of the finished tacos later.
Step 2: Prepare Taco Shells
Once the oven is ready, take your hard taco shells and stand them upright in the baking dish. Arranging them this way allows the heat to circulate evenly, creating a crispy texture all around. Make sure each shell is securely positioned so they can hold all the delicious fillings when baked.
Step 3: Cook Beef Mixture
In a large skillet over medium heat, add your ground beef and finely diced onion. Cook for about 5-7 minutes, stirring frequently until the beef is browned and the onions are translucent. Be sure to drain any excess fat to keep the filling juicy but not greasy for your Oven-Baked Cheesy Tacos.
Step 4: Season
Next, add minced garlic and your taco seasoning to the skillet with the cooked beef and onion. Stir everything together for about 1 minute, allowing the garlic to become fragrant. Pour in either tomato sauce or salsa, stirring well, and let the mixture simmer for an additional 5 minutes to meld the flavors.
Step 5: Assemble Tacos
Remove the skillet from heat and start assembling your Oven-Baked Cheesy Tacos. Spoon the beef mixture into each taco shell, filling them generously. Top each filled shell with a hearty layer of shredded cheese, allowing it to melt beautifully as the tacos bake.
Step 6: Bake
Place the assembled tacos in the preheated oven and bake for 10-15 minutes. Keep an eye on them; the shells should turn golden and crispy while the cheese melts into a gooey delight. This is the moment when your kitchen will start to smell irresistible!
Step 7: Add Toppings
After baking, carefully remove the dish from the oven. Top your tacos with fresh lettuce, diced tomatoes, and chopped red onion to add vibrant colors and textures. You can serve these Oven-Baked Cheesy Tacos with dollops of sour cream or guacamole on the side for an extra creamy touch.
What to Serve with Oven-Baked Cheesy Tacos
Elevate your taco night with complementary sides that enhance the flavors of these crispy delights and create a feast for the senses.
- Mexican Rice: A fragrant side that pairs well, its slightly spiced flavor harmonizes beautifully with the savory tacos.
- Fresh Guacamole: Creamy and smooth, this adds a cooling element that balances the richness of the cheesy filling.
- Zesty Corn Salad: Bursting with fresh veggies, the crunch and tanginess of lime make this salad a vibrant addition to your meal.
- Black Bean Salsa: Packed with nutrients and flavor, this chunky salsa offers a delightful contrast to the crunch of the tacos.
- Refried Beans: Silky and rich, these beans serve as a comforting side, adding another layer of texture and protein.
- Pico de Gallo: This fresh, zesty topping made of tomatoes, onions, and cilantro will bring brightness to every bite.
- Crispy Tortilla Chips: Perfect for dipping into guacamole or salsa, they complement your meal’s theme while offering additional crunch.
- Classic Margaritas: Cool and refreshing, this drink will heighten the festive vibe while cutting through the richness of the tacos.
- Churros: For dessert, these warm, sugary treats with a hint of cinnamon will finish your taco night on a sweet note.
How to Store and Freeze Oven-Baked Cheesy Tacos
Fridge: Store leftover Oven-Baked Cheesy Tacos in an airtight container for up to 3 days. When ready to eat, simply reheat in the oven for that desired crunch.
Freezer: Assemble tacos without toppings, wrap tightly in foil, and freeze for up to 3 months. Bake from frozen at 400°F (200°C) for approximately 20-25 minutes.
Reheating: For best results, reheat tacos in the oven at 350°F (175°C) for 10-15 minutes to restore that crispy texture. Avoid heating in the microwave to prevent sogginess.
Make-Ahead: Prepare the beef filling a day in advance and refrigerate. Assemble and bake fresh when ready to serve for optimal flavor and texture.
Expert Tips for Oven-Baked Cheesy Tacos
- Crispy Perfection: Preheat your oven thoroughly before baking. This step is essential to achieving those perfectly crispy taco shells.
- Grease Control: Always drain excess fat from the beef after browning to prevent a greasy filling and ensure a balanced flavor in your Oven-Baked Cheesy Tacos.
- Advance Prep: Consider preparing the beef mixture a day in advance. Assemble your tacos just before baking for fresh and flavorful results.
- Cheese Choices: Mix different types of cheese, like cheddar and pepper jack, for a richer flavor profile that enhances your tacos.
- Topping Variety: Customize with a range of fresh toppings according to taste; this helps cater to everyone’s preferences at the table.
- Spice It Up: If you enjoy heat, add sliced jalapeños or hot sauce to the filling for an extra kick that complements the cheese beautifully.
Oven-Baked Cheesy Tacos Variations
Feel free to explore these exciting twists and substitutions to make your Oven-Baked Cheesy Tacos truly your own!
-
Vegetarian Option: Swap ground beef for black beans or lentils for a hearty plant-based filling. You’ll still get that satisfying texture and flavor!
-
Gluten-Free: Use corn taco shells instead of traditional flour ones, ensuring everyone can enjoy the meal without dietary worries. Enjoy the crunch with peace of mind!
-
Cheese Variety: Experiment with different cheeses such as pepper jack for a zesty kick or a sharp cheddar for richer flavor. Mixing cheeses can amplify the gooey goodness!
-
Spicy Twist: Add sliced jalapeños or a dash of hot sauce to the beef mixture for an extra layer of heat that will have spice lovers coming back for more.
-
Taco Bar: Set up a taco bar with various toppings like olives, corn, or avocado so everyone can customize their own creation. This adds a fun element to family dinners!
-
Chicken or Turkey: Substitute beef with ground turkey or shredded chicken for a lighter alternative. Both options still provide filling satisfaction while being deliciously different.
-
Crispy Veggies: Incorporate some sautéed bell peppers and zucchini into your beef mix for a veggie-packed twist that adds both flavor and nutrition.
For even more creative ideas, check out my recipes for Cheesy Hot Beef or a side of Cheesy Taco Potatoes to complement your Taco Night experience!
Make Ahead Options
These Oven-Baked Cheesy Tacos are perfect for meal prep, allowing you to enjoy a homemade dinner with minimal fuss on busy weeknights! You can prepare the beef mixture and assemble the tacos up to 24 hours in advance. Simply cook the beef with onions, garlic, and seasoning, then fill the taco shells and layer with cheese. Cover the assembled dish tightly with plastic wrap and refrigerate. When you’re ready to serve, bake the tacos directly from the fridge for 10-15 minutes at 400°F (200°C) until golden and crispy. This method ensures your tacos maintain their delicious quality, making dinner both quick and satisfying!

Oven-Baked Cheesy Tacos Recipe FAQs
What type of ground meat should I use for the filling?
Absolutely! Ground beef is the traditional choice as it offers rich flavor, but feel free to swap it out for ground turkey, chicken, or even lentils for a plant-based option. The choice really depends on your personal preference or dietary needs!
How should I store leftover Oven-Baked Cheesy Tacos?
After enjoying your delicious tacos, store any leftovers in an airtight container in the fridge for up to 3 days. To reheat, pop them back in the oven to maintain that perfect crispiness instead of using the microwave.
Can I freeze the assembled tacos?
Yes, indeed! To freeze your Oven-Baked Cheesy Tacos, assemble them without toppings and wrap each taco tightly in foil. Place them in a freezer-safe bag and store them for up to 3 months. When you’re ready to enjoy, bake them straight from frozen at 400°F (200°C) for about 20-25 minutes.
What to do if my taco shells get soggy?
Oh no! Sogginess is a common issue if taco shells aren’t arranged properly or if the filling is too wet. To avoid this, ensure taco shells are upright in a baking dish before filling, and drain any excess liquid from the beef mixture. If they do end up soggy, a quick re-crisp in the oven at 350°F (175°C) for a few minutes can help!
Are these tacos suitable for a gluten-free diet?
Very much so! You can easily make the Oven-Baked Cheesy Tacos gluten-free by using gluten-free hard taco shells. Always check the labels on your sauces and seasonings as well, but rest assured, you can enjoy these tasty tacos without worry.
What toppings work best with these tacos?
The more, the merrier! Fresh toppings like lettuce, diced tomatoes, red onion, and cilantro add a delightful crunch. Customize to your liking—feel free to throw in sliced jalapeños or even a drizzle of hot sauce if you’re looking for a little extra spice!
Oven-Baked Cheesy Tacos That Crunch with Every Bite
Ingredients
Equipment
Method
- Preheat your oven to 400°F (200°C) and spray a baking dish with non-stick spray.
- Stand hard taco shells upright in the baking dish.
- In a skillet, cook ground beef and onion over medium heat until beef is browned and onions are translucent (5-7 minutes). Drain excess fat.
- Add minced garlic and taco seasoning to the beef mixture and stir for 1 minute. Add tomato sauce or salsa and simmer for 5 minutes.
- Remove from heat and spoon the beef mixture into each taco shell. Top with shredded cheese.
- Bake in the preheated oven for 10-15 minutes until shells are golden and crispy.
- Top with fresh toppings and serve with sour cream or guacamole.
Leave a Reply