
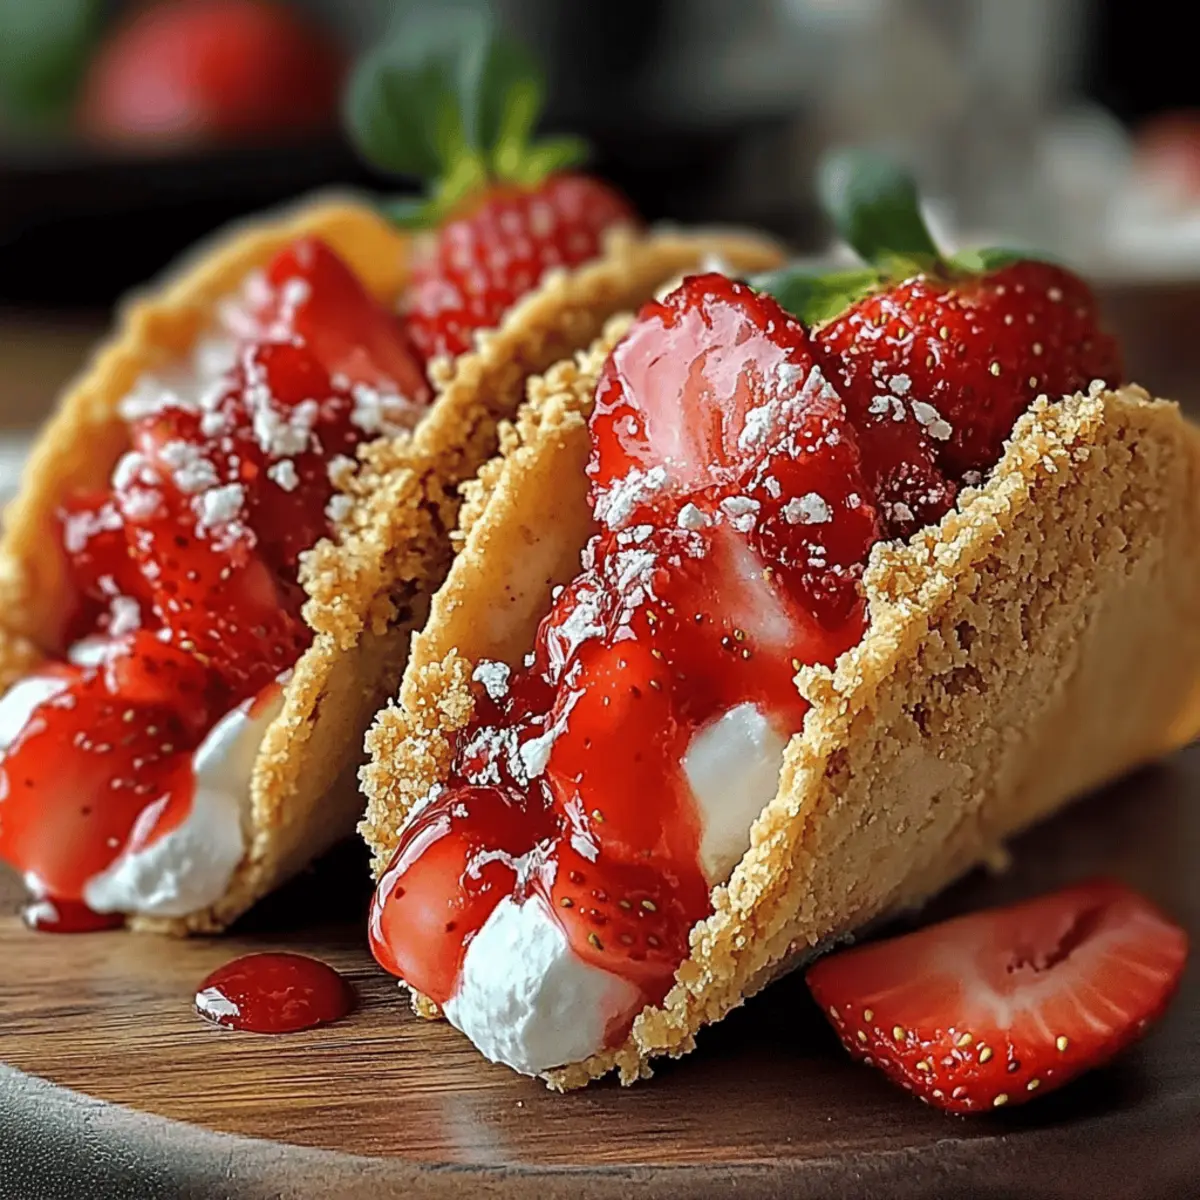
A delightful burst of summer hits your senses as you crunch into these Strawberry Crunch Cheesecake Tacos. This unique, no-bake dessert perfectly marries the creamy goodness of cheesecake with a crispy graham cracker shell, all crowned with juicy strawberries. It’s a playful twist on traditional cheesecake that not only showcases your culinary creativity but also invites everyone to indulge in a fun, hand-held treat. With quick prep time and endless customization options—think different berries or toppings—you’ll have a crowd-pleaser that’s perfect for parties or cozy family gatherings. Ready to dive into this sweet adventure? Let’s explore how to make these irresistible tacos!
Why Try Strawberry Crunch Cheesecake Tacos?
Uniqueness: These tacos blend a classic cheesecake with a playful presentation—every bite is an exciting surprise!
No-Bake Delight: There’s no need to turn on the oven, making them a perfect choice for hot summer days.
Quick Preparation: With just a few simple steps, you can whip these up in no time—ideal for spontaneous gatherings!
Customizable Flavors: Experiment with different berries or nuts; the options are endless! How about a twist with raspberries or a sprinkle of chopped almonds?
Crowd Pleaser: Perfect for both kids and adults, they bring cheer to any occasion—guaranteed to impress your guests!
Don’t forget to check out other delectable options like Strawberry Swirl Cheesecake if you’re in the mood to indulge!
Strawberry Crunch Cheesecake Tacos Ingredients
For the Cheesecake Filling
• Cream Cheese – Provides creamy texture and rich flavor; substitute with Neufchâtel cheese for a lower fat option.
• Granulated Sugar – Sweetens the cheesecake filling; adjust to taste if using sweeter berries.
• Vanilla Extract – Adds depth of flavor; try almond extract for a nutty twist.
• Heavy Cream – Contributes lightness and texture; whipped topping can be used for a lighter option.
• Fresh Strawberries – The star of the show; can be substituted with raspberries or blueberries.
For the Taco Shells
• Graham Cracker Crumbs – Forms a crunchy base; digestive biscuits or gluten-free alternatives work too.
• Unsalted Butter – Binds the crumbs together for a solid shell; coconut oil is a great dairy-free alternative.
Optional Toppings
• Chopped Toasted Pecans – Adds delightful texture and nuttiness; feel free to use any toasted nuts or skip altogether.
• Additional Chopped Strawberries – Enhances both presentation and taste; use as a last-minute garnish.
These Strawberry Crunch Cheesecake Tacos are a unique dessert that will surely impress your family and friends!
Step‑by‑Step Instructions for Strawberry Crunch Cheesecake Tacos
Step 1: Prepare the Cheesecake Filling
In a medium bowl, beat 8 oz. of softened cream cheese with a hand mixer until it’s completely smooth, approximately 2 minutes. Gradually mix in 1/3 cup of granulated sugar and 1 tsp of vanilla extract, blending until combined and free of lumps. This creamy mixture forms the luscious base of your Strawberry Crunch Cheesecake Tacos, ready for the next step.
Step 2: Incorporate the Heavy Cream and Strawberries
Fold in 1 cup of heavy cream into the cheesecake mixture using a rubber spatula until it’s light and fluffy, taking about 1-2 minutes. Gently add in 1 cup of finely chopped fresh strawberries, ensuring the fruit is evenly distributed throughout the filling. The vibrant strawberries will add bursts of flavor to your delightful tacos.
Step 3: Make the Graham Cracker Taco Shells
In a separate bowl, combine 1 ½ cups of graham cracker crumbs and ½ cup of melted unsalted butter. Mix thoroughly until the texture resembles wet sand, ensuring everything is evenly coated. This mixture will create the crunchy taco shells, essential for balancing the creamy cheesecake filling in your Strawberry Crunch Cheesecake Tacos.
Step 4: Shape the Taco Shells
Press the graham cracker mixture firmly into 8 taco-shaped molds or muffin tins, creating an even layer along the bottom and sides. Use your fingers or the back of a spoon to form the shells carefully, ensuring they hold their shape well. The shape should be sturdy enough to hold the delicious filling, ready for chilling.
Step 5: Chill the Taco Shells
Place the formed taco shells in the refrigerator and allow them to chill for at least 2 hours, or until they are firm to the touch. This chilling time is crucial for solidifying the shells, ensuring they will provide the perfect crispy texture for your Strawberry Crunch Cheesecake Tacos.
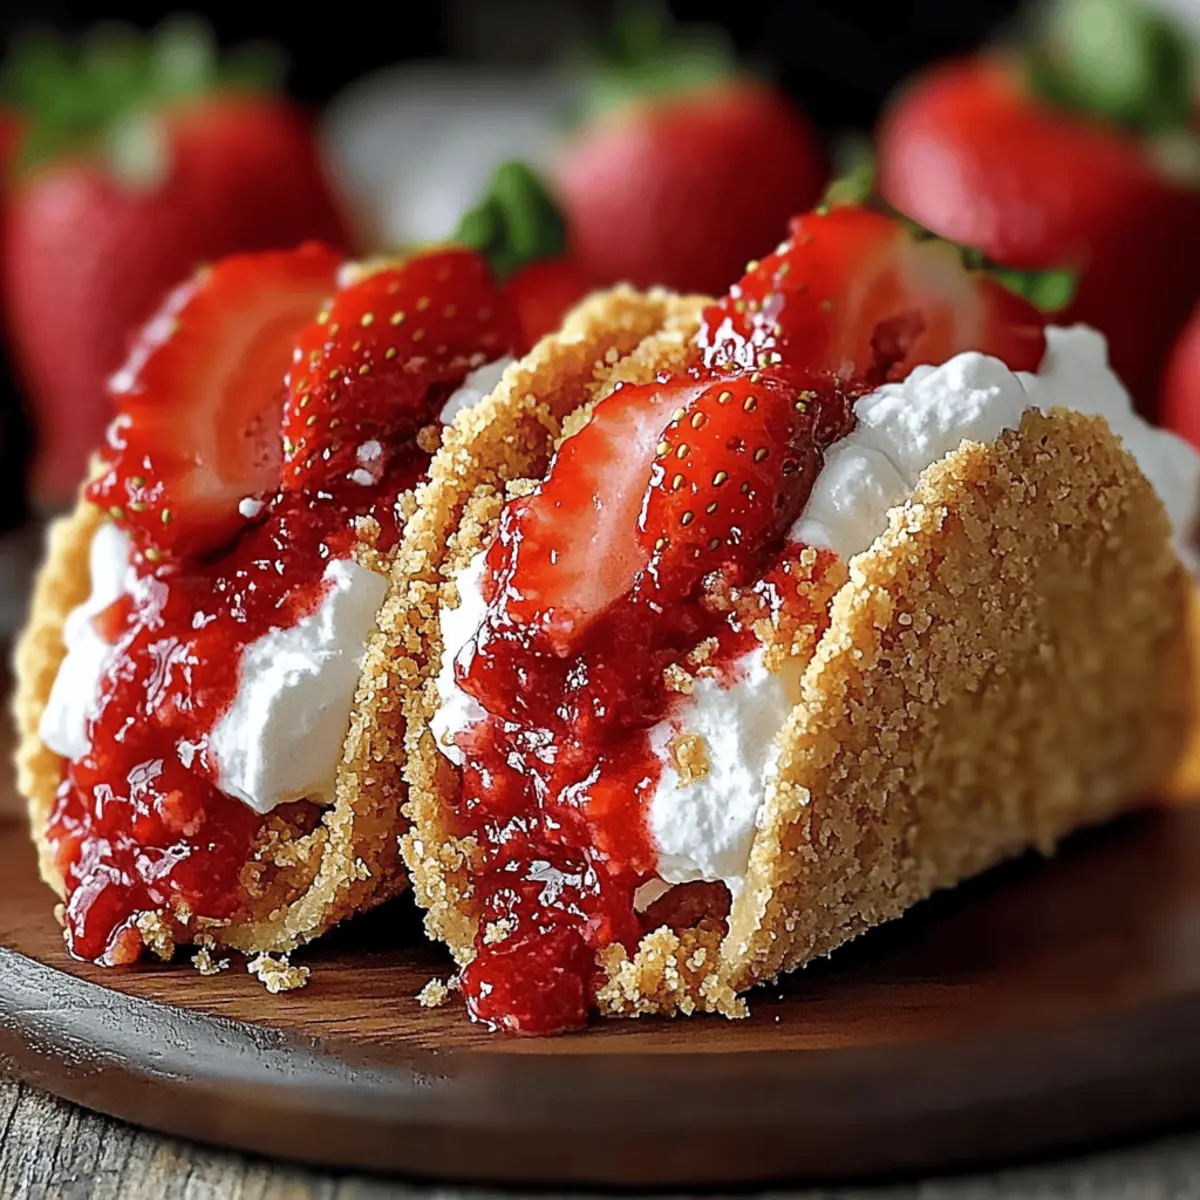
Step 6: Assemble the Tacos
Once the taco shells have set, carefully remove them from the molds. Spoon the cheesecake filling evenly into each shell, filling them about three-quarters full to prevent overflow. This assembly should be done gently to avoid breaking the delicate shells, delivering a beautiful presentation for your delightful dessert.
Step 7: Add Toppings
Sprinkle chopped toasted pecans over the tops of each filled taco for added texture and flavor if desired. This step enhances the contrast between the creamy filling and the crunchy elements, making your Strawberry Crunch Cheesecake Tacos even more irresistible.
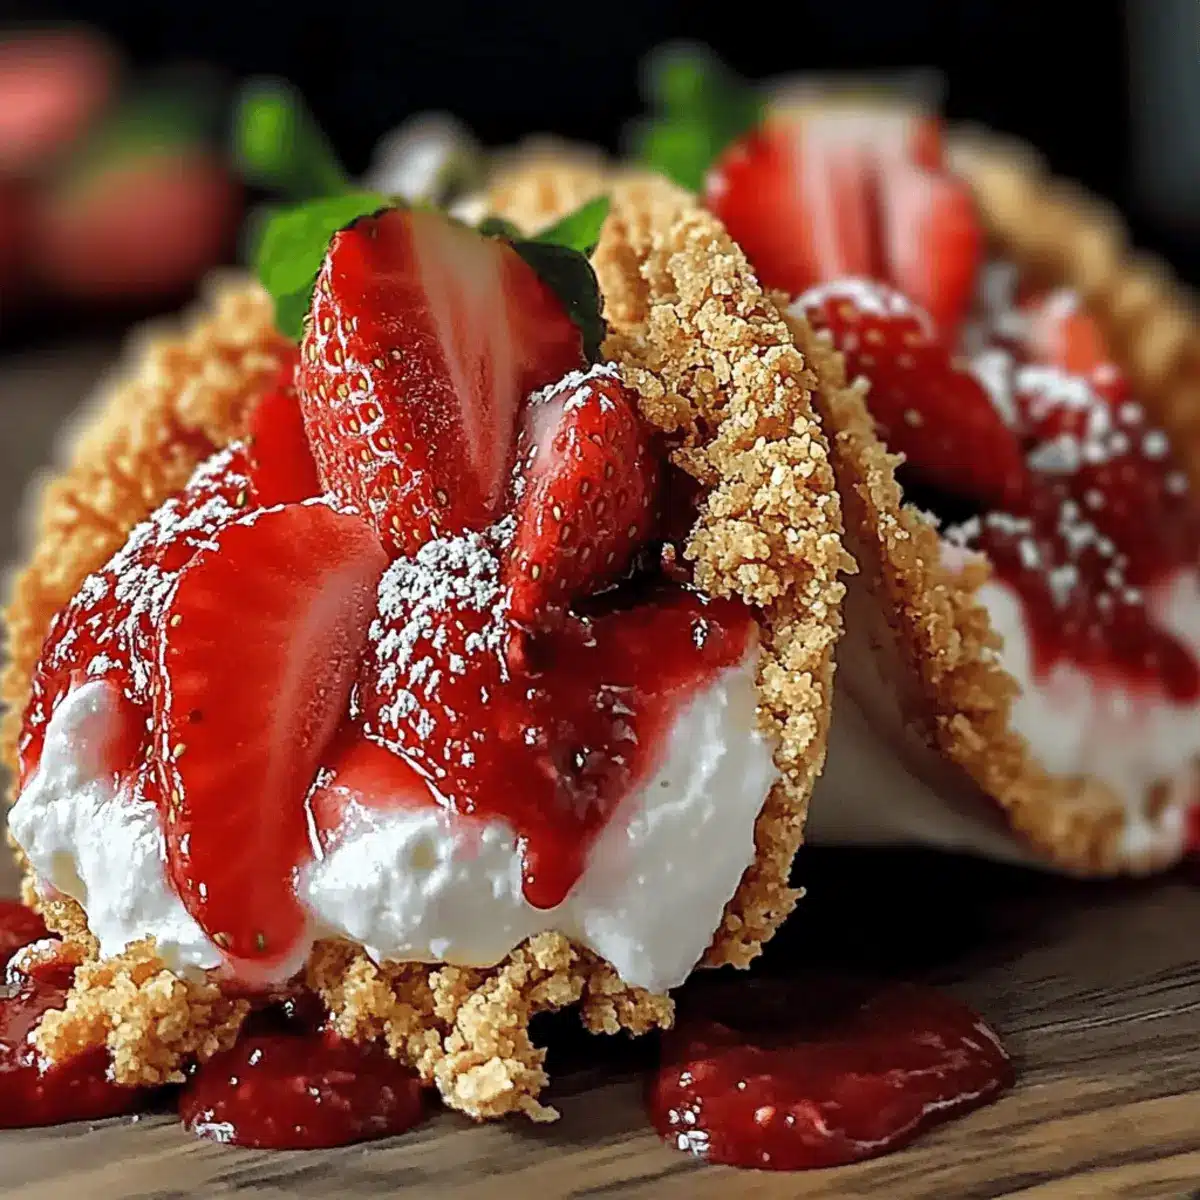
Step 8: Garnish Before Serving
Top each taco with additional fresh chopped strawberries for an inviting presentation and a burst of fruity goodness. The vibrant red strawberries brighten the dish, making it visually appealing. Your delicious Strawberry Crunch Cheesecake Tacos are now ready for everyone to enjoy!
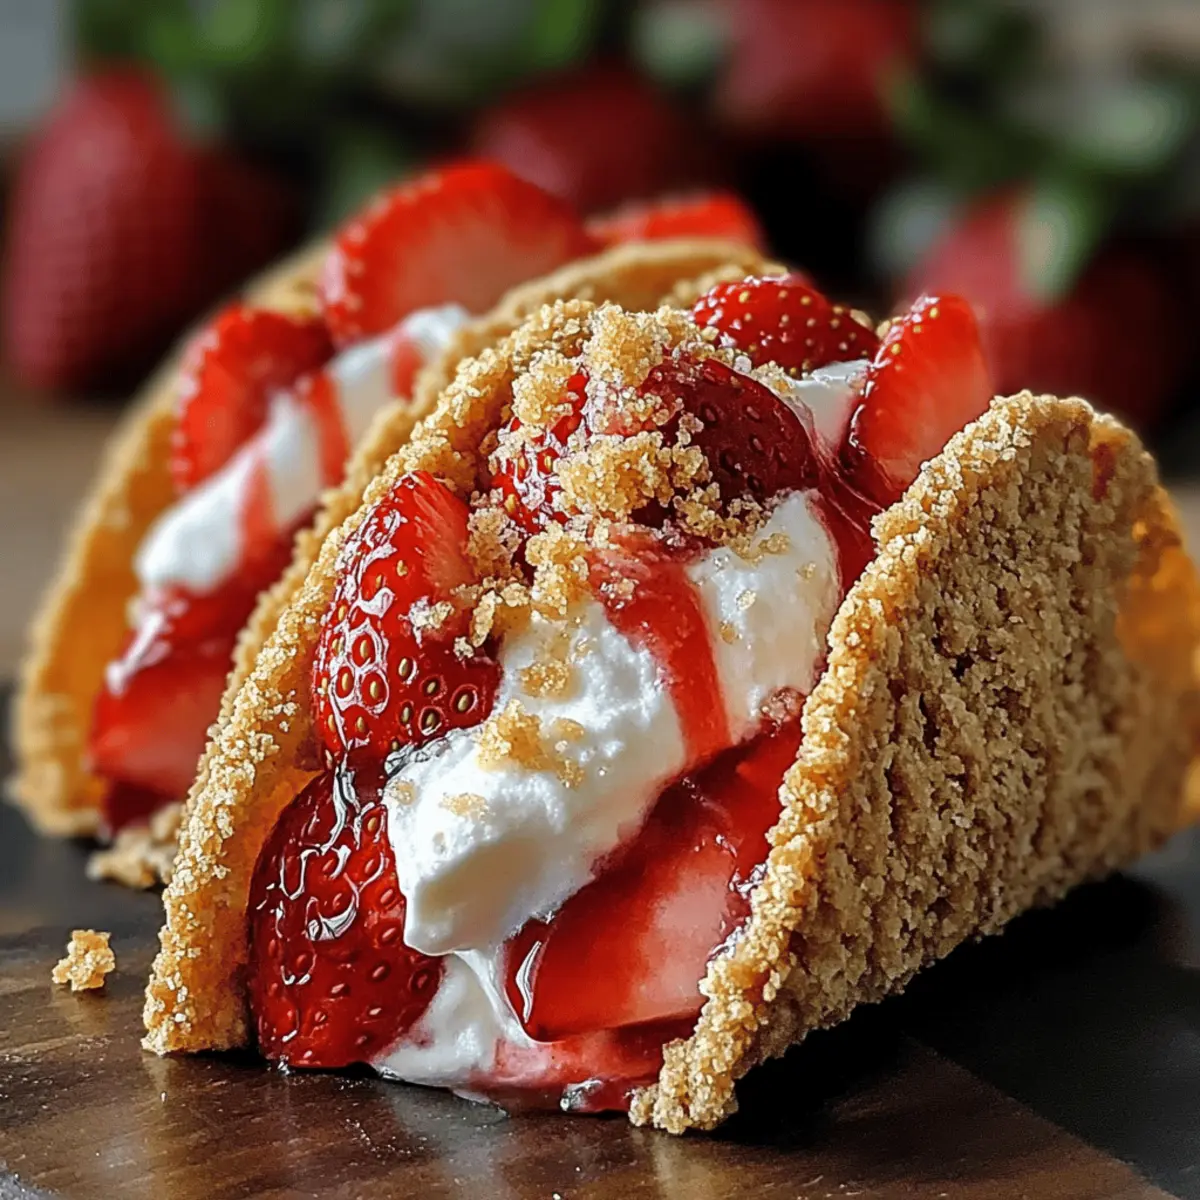
Step 9: Serve and Delight
Serve the Strawberry Crunch Cheesecake Tacos chilled for the best texture and flavor experience. These delightful treats will impress family and friends, combining creaminess, crunch, and vibrant summer flavors in one unique dessert package.
How to Store and Freeze Strawberry Crunch Cheesecake Tacos
Fridge: Store leftover tacos in an airtight container for up to 3 days. For best texture, keep the cheesecake filling and taco shells separate until ready to serve.
Freezer: You can freeze the assembled tacos for up to 1 month. Wrap each taco tightly in plastic wrap and place in a freezer-safe container. Thaw in the fridge before serving.
Reheating: These tacos are best enjoyed chilled. Avoid reheating as the texture may change—serve directly after thawing for the freshest taste.
Assembly Note: For optimal flavor and texture, assemble the Strawberry Crunch Cheesecake Tacos just before serving.
Make Ahead Options
These Strawberry Crunch Cheesecake Tacos are a fantastic option for meal prep enthusiasts! You can prepare the graham cracker taco shells up to 3 days in advance; just ensure they’re stored in an airtight container to maintain their crispiness. The cheesecake filling can also be made ahead and refrigerated for up to 24 hours. To keep the strawberries fresh, add them just before serving—this prevents browning and maintains their juicy texture. When you’re ready to indulge, simply fill the pre-made shells with the cheesecake mixture, garnish with fresh strawberries, and enjoy! With these make-ahead tips, you’ll save precious time and serve a delightful dessert with ease.
Expert Tips for Strawberry Crunch Cheesecake Tacos
• Soften the Cream Cheese: Ensure your cream cheese is at room temperature before mixing; this will help create a smooth, lump-free filling.
• Avoid Overfilling: Fill the taco shells only three-quarters full to prevent spillage and ensure they maintain their shape.
• Chill Thoroughly: Don’t skip the chilling time for the taco shells; it’s crucial for holding their form and enhancing texture.
• Customize Wisely: Experiment with different berries, but remember that juicier fruits may require adjustments in sugar or chilling time for the best result.
• Top Just Before Serving: Add fresh toppings right before serving to maintain freshness and prevent the shells from getting soggy.
Strawberry Crunch Cheesecake Tacos Variations
Feel free to let your creativity shine with these delightful twists and substitutions for your Strawberry Crunch Cheesecake Tacos!
-
Berry Medley: Swap out strawberries for a mix of raspberries, blueberries, and blackberries to elevate the flavor explosion. The tanginess of these berries adds a lovely balance to the sweetness of the cheesecake.
-
Nut-Free Version: Omit chopped toasted pecans or use sunflower seeds as a topping! This way, everyone can enjoy the treat without any nut allergies getting in the way.
-
Dairy-Free Twist: Replace cream cheese with a vegan cream cheese alternative and swap heavy cream for coconut whipped cream. This makes indulgence accessible for dairy-free friends!
-
Chocolate Drizzle: For a decadent touch, drizzle melted chocolate over each taco just before serving. It adds an extra layer of richness that chocolate lovers can’t resist!
-
Citrus Zing: Add a splash of lemon or lime juice to the cheesecake mixture for a refreshing citrus kick. This little touch transforms the flavor and elevates the entire dessert experience.
-
Alternative Crust: For a gluten-free option, use crushed gluten-free cookies instead of graham crackers for the taco shells. The flavor will still be deliciously sweet, just tailored for gluten sensitivities.
-
Caramel Surprise: Drizzle caramel sauce inside the taco shells before adding the cheesecake filling for a sweet surprise with each bite. It pairs beautifully with the creamy and fruity elements.
-
Herbaceous Flair: Try adding finely chopped fresh mint or basil to the chopped strawberries for an unexpected herbaceous twist. This fragrant addition can make the dish even more refreshing on a warm day.
By exploring these variations, you can craft a unique version of your Strawberry Crunch Cheesecake Tacos that suits your personal taste and caters to all your gathering needs. Don’t forget to try them out with delightful options like Lemon Cheesecake or our rich Brownie Cheesecake for even more inspiration!
What to Serve with Strawberry Crunch Cheesecake Tacos
Imagine a cheerful gathering where flavors dance on the palate, complementing the sweet and creamy bite of your delightful tacos.
-
Whipped Cream: A dollop of airy whipped cream adds a luxurious touch, enhancing the creaminess of the cheesecake while balancing sweetness.
-
Fresh Berries: A medley of raspberries, blueberries, or blackberries echoes the fruity notes in the tacos, offering a burst of freshness and color.
-
Mint Leaves: Sprinkling fresh mint leaves over each taco introduces a refreshing note, brightening up the dessert experience and adding a pop of green.
-
Chocolate Drizzle: A rich chocolate drizzle creates a decadent contrast, marrying the sweetness of the cheesecake with a touch of bitter complexity.
-
Ice Cream: A side of vanilla or strawberry ice cream adds creamy indulgence, making every bite an exploration of contrasting flavors and temperatures.
-
Coconut Flakes: To enhance the texture, sprinkle toasted coconut flakes on top, providing a tropical twist that pairs beautifully with the strawberries.
-
Sparkling Lemonade: A glass of fizzy lemonade serves as a refreshing palate cleanser, the zesty citrus elevating the sweetness and making it feel festive.
-
Coffee or Espresso: A warm cup of coffee or espresso can enhance the dessert experience, balancing out the sweetness with rich, bold flavors perfect for post-meal enjoyment.
Strawberry Crunch Cheesecake Tacos Recipe FAQs
How do I choose ripe strawberries for my tacos?
Absolutely! Choose strawberries that are bright red and slightly firm to the touch. Avoid ones with dark spots or mushy areas, as these indicate overripeness. If you can, smell the berries; ripe strawberries should have a sweet, fragrant aroma!
How should I store leftover Strawberry Crunch Cheesecake Tacos?
You can store leftover tacos in an airtight container in the refrigerator for up to 3 days. For the best texture, it’s best to keep the assembled tacos separate from the cheesecake filling until you’re ready to serve, which prevents the shells from becoming soggy.
Can I freeze Strawberry Crunch Cheesecake Tacos?
Yes, you can! To freeze, carefully wrap each assembled taco in plastic wrap and place them in a freezer-safe container. They can be stored in the freezer for up to 1 month. When you’re ready to enjoy them, simply thaw in the refrigerator overnight.
What should I do if my taco shells break while filling?
Very! If your shells crack, don’t worry! Simply transfer the filling into cups or jars to create a deconstructed dessert. Layer the cheesecake filling with crushed graham crackers and chopped strawberries for a fun parfait-style treat.
Are Strawberry Crunch Cheesecake Tacos suitable for people with nut allergies?
If you’re concerned about nut allergies, feel free to omit the chopped nuts entirely. The tacos will still be delicious and satisfying without them! Always double-check your substitutions to ensure all ingredients are allergy-friendly.
Is it possible to substitute any of the ingredients for a lactose-free version?
Yes! For a lactose-free option, you can substitute the cream cheese with dairy-free cream cheese and use coconut cream instead of heavy cream. Always make sure to check the labels for lactose-free alternatives and ensure that your vanilla extract is also free from dairy. Enjoy your creamy goodness without the worry!
Irresistible Strawberry Crunch Cheesecake Tacos You’ll Love
Ingredients
Equipment
Method
- In a medium bowl, beat the cream cheese with a hand mixer until smooth, approximately 2 minutes. Gradually mix in granulated sugar and vanilla extract until combined.
- Fold in heavy cream using a rubber spatula until light and fluffy, then gently add in chopped fresh strawberries.
- In a separate bowl, combine graham cracker crumbs and melted unsalted butter until the texture resembles wet sand.
- Press the graham cracker mixture firmly into taco-shaped molds, shaping the sides and bottom.
- Chill the taco shells in the refrigerator for at least 2 hours until firm.
- Remove the taco shells from the molds and spoon the cheesecake filling into each shell, filling about three-quarters full.
- Sprinkle chopped toasted pecans over the tops of each filled taco for added texture.
- Top each taco with additional chopped strawberries before serving for a fresh presentation.
- Serve the Strawberry Crunch Cheesecake Tacos chilled for the best texture and flavor experience.
Leave a Reply