
As the aroma of warm, melted cheese wafts through the air, it transports me back to laid-back evenings spent with friends, gathered around a table filled with laughter and delicious bites. This Creamy Cheesy Refried Bean Dip isn’t just any old appetizer; it’s an absolute crowd-pleaser, perfect for scooping up with crunchy tortilla chips. The best part? It comes together in a flash, whether you opt for canned beans or whip up a batch of homemade refried beans. Not only is it a game day essential, but it also makes for an easy, comforting snack during those cozy nights at home. Ready to delve into a recipe that transforms simple ingredients into an unforgettable treat? Let’s get dipping!
Why is this Bean Dip a Must-Try?
Creamy Delight: This bean dip brings an irresistibly creamy texture, enhanced by gooey cheese that melts beautifully.
Quick and Easy: With simple prep and minimal cooking time, you can whip it up in minutes, making it perfect for impromptu gatherings.
Customizable Flavors: Tailor your dip with various toppings or spice levels, ensuring each batch is uniquely suited to your taste.
Crowd-Pleasing Appeal: Whether for a game day feast or a cozy movie night, this dip will have everyone coming back for more.
Versatile Serving Options: Pair it with tortilla chips, veggies, or pita chips for delightful munching options. Don’t forget to check out my tips for make-ahead success!
Bean Dip Ingredients
For the Base
• Avocado oil – Ideal for greasing the pan; olive oil also works well.
• Refried beans – The star of the dip, creating a creamy texture; use 1 (16-ounce) can or 2 cups of Homemade Refried Beans for freshness.
• Sour cream or Greek yogurt – Adds richness and tang; choose Greek yogurt for a thicker dip.
• Diced green chiles – Offers flavor and mild heat; swap for jalapeños if you like it spicy!
For Seasoning
• Taco seasoning – Introduces a savory flavor profile; feel free to substitute with chili powder or garlic powder.
• Sea salt – Essential for enhancing the dip’s overall taste; adjust according to the inherent saltiness of your beans.
For Topping
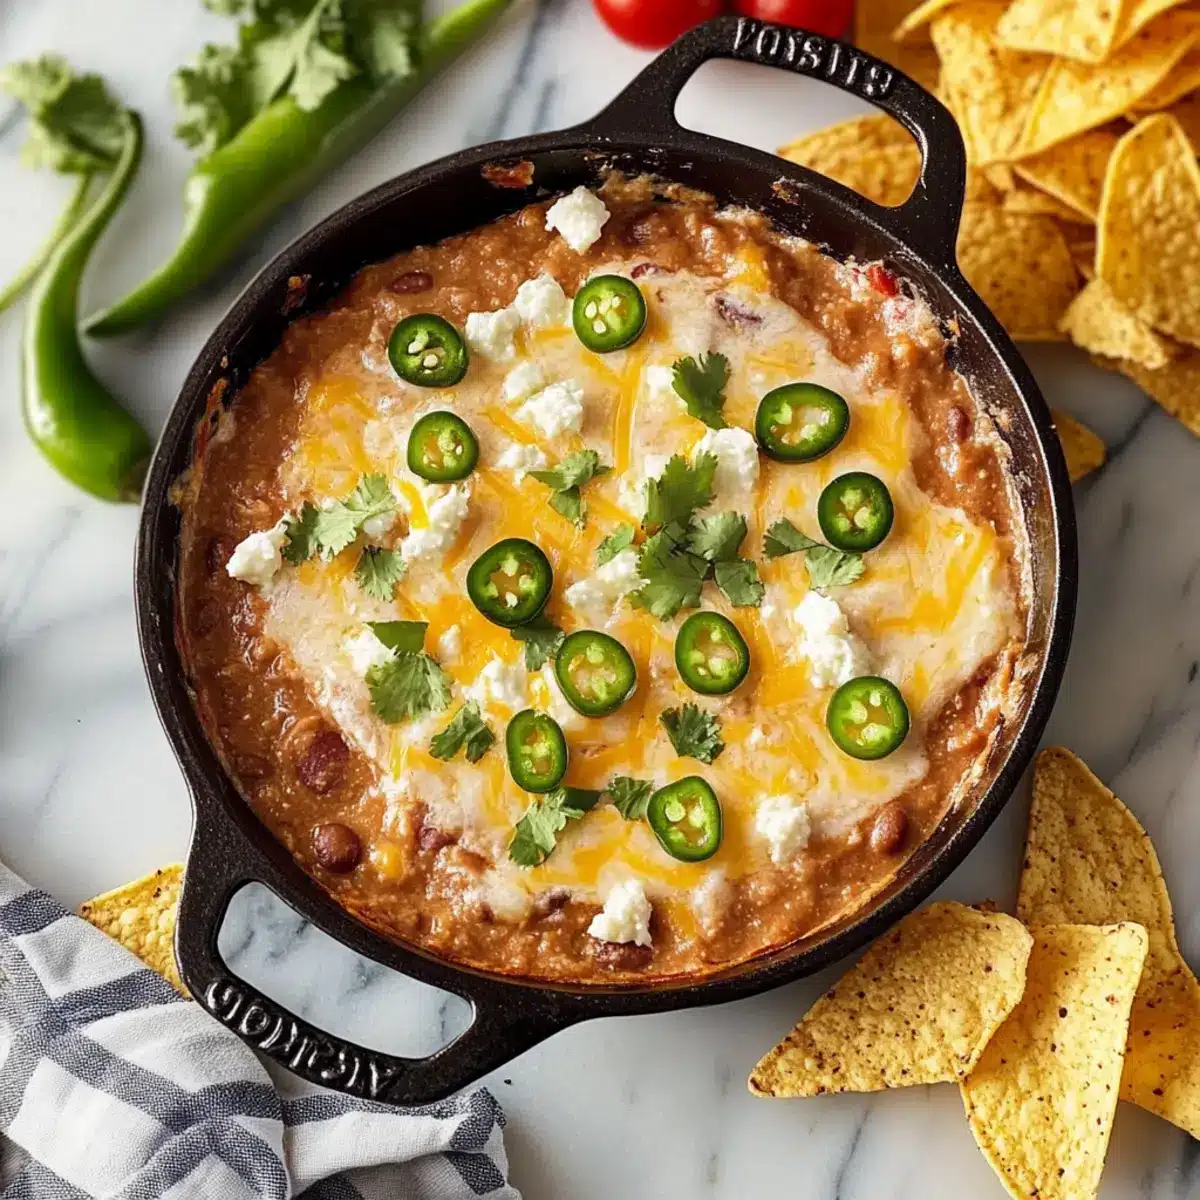
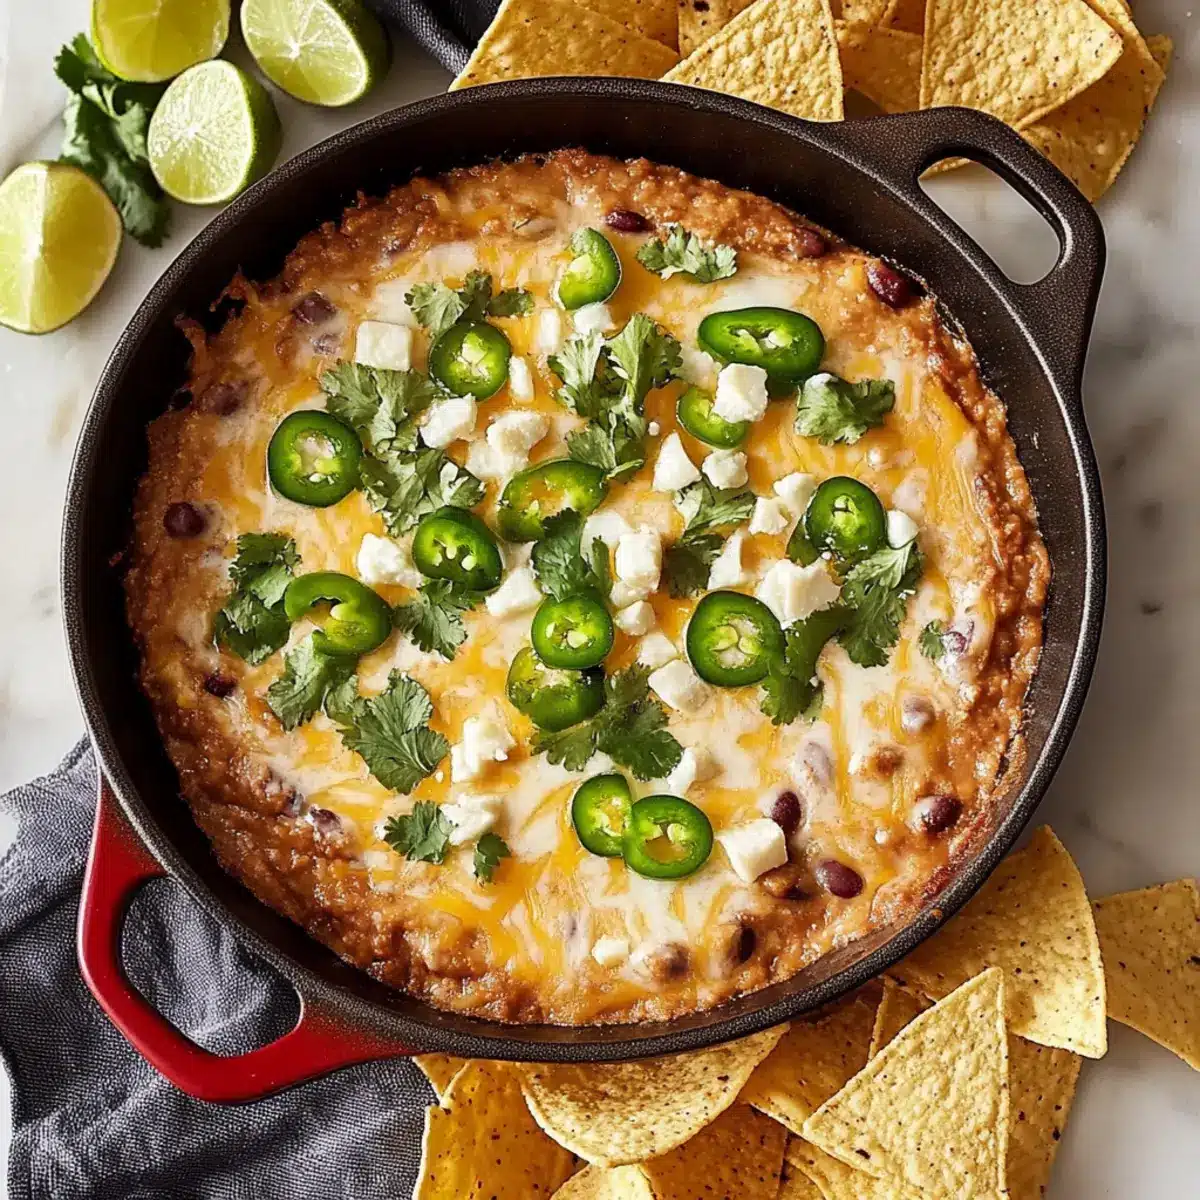
• Grated cheddar cheese or Mexican cheese blend – Melts beautifully into a gooey layer; Monterey Jack or Pepper Jack can spice things up.
To Garnish
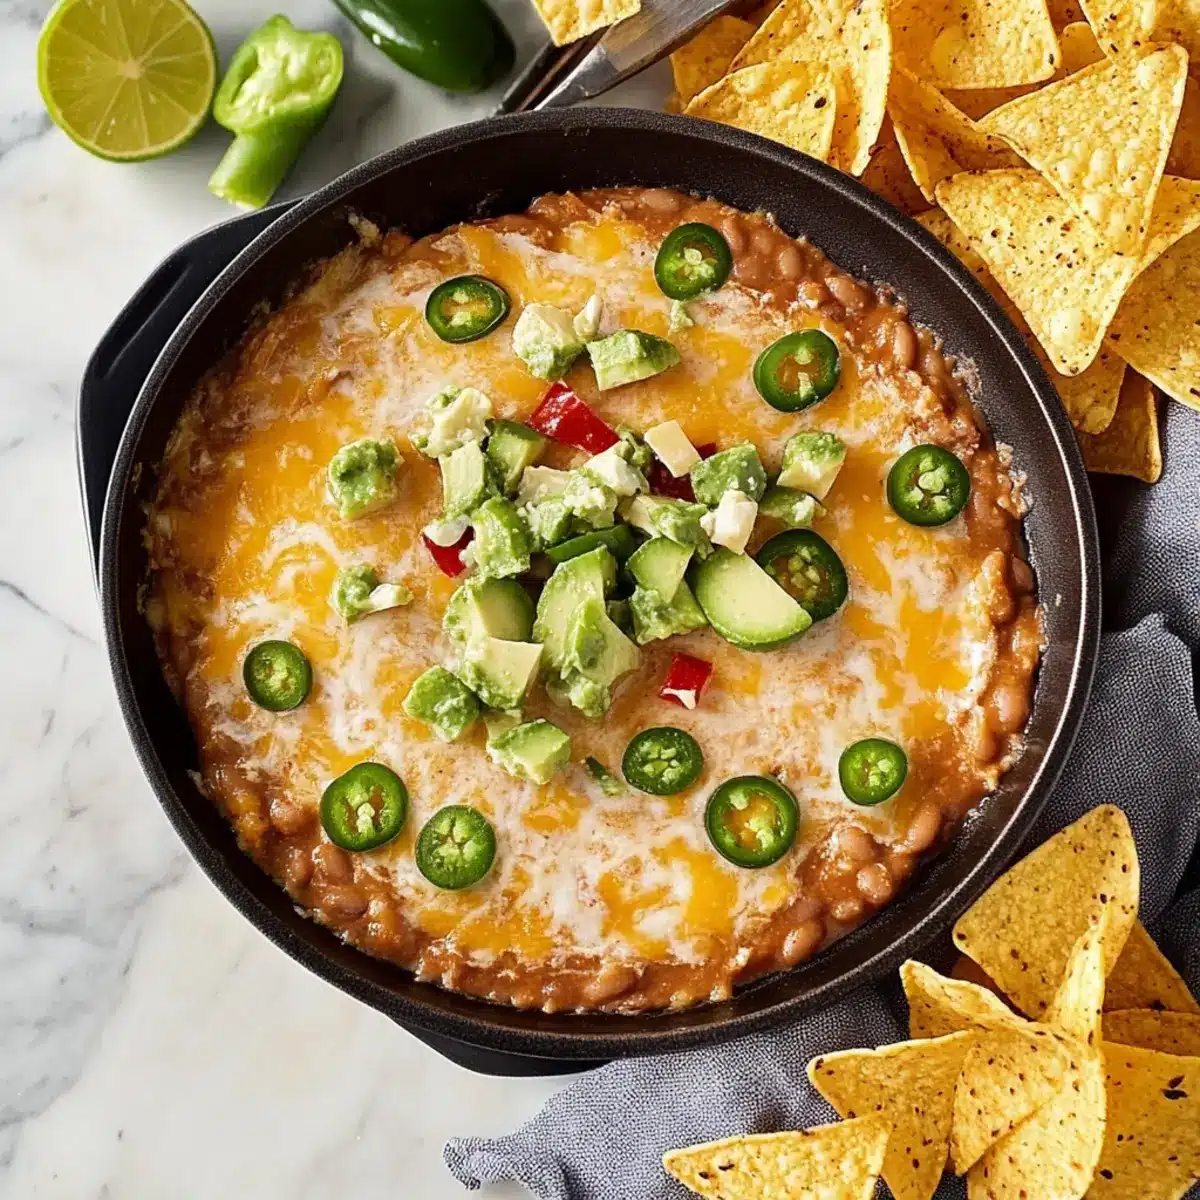
• Lime wedge – Squeeze over for a bright, zesty finish just before serving.
For Serving
• Tortilla chips – Perfect for scooping the dip; consider blue corn chips for a fun twist!
Enjoy whipping up this easy, creamy bean dip that’s sure to be a hit at your next gathering!
Step‑by‑Step Instructions for Creamy Cheesy Refried Bean Dip
Step 1: Preheat the Oven
Begin by preheating your oven to 375°F (190°C). While the oven heats up, lightly grease an 8-inch baking dish or a cast-iron skillet with avocado oil. This will prevent the creamy bean dip from sticking and help achieve a beautifully golden top.
Step 2: Mix the Ingredients
In a medium bowl, combine the refried beans, sour cream or Greek yogurt, diced green chiles, and 1 teaspoon of taco seasoning. Stir the mixture until smooth and well-blended. Taste the dip to ensure the flavors are to your liking, adjusting the seasoning with more taco seasoning or salt if desired for your perfect bean dip.
Step 3: Prepare for Baking
Spread the refried bean mixture evenly into the prepared baking dish. Ensure that the mixture is thick but leave some dip exposed along the edges for an appealing look. This step makes it easier for the cheese to form a lovely, bubbling layer on top as it bakes.
Step 4: Add Cheese and Bake
Sprinkle a generous layer of grated cheddar or Mexican cheese blend over the top of the bean dip. Place the baking dish in the preheated oven and bake for 20 to 25 minutes, or until the cheese is melted, bubbly, and slightly golden around the edges—this signals that your creamy cheesy refried bean dip is ready to shine.
Step 5: Cool and Garnish
After baking, remove the creamy bean dip from the oven and let it cool for about 5 minutes. This cooling period will help set the dip slightly, preventing the toppings from wilting. Use this time to prepare your garnishments, such as lime wedges to add a fresh burst of flavor.
Step 6: Serve and Enjoy
Serve the creamy cheesy refried bean dip warm alongside crunchy tortilla chips. Ensure you have a colorful array of chips, maybe even blue corn chips for a fun twist! Gather your friends and family, and watch them dive in for a delightful taste experience.
Expert Tips for the Best Bean Dip
-
Taste Testing: Always taste the dip after mixing. Adjust the seasonings as needed to ensure the flavor is just right for your palate.
-
Chill for Flavor: Let the refried bean mixture sit in the refrigerator for up to 2 days before baking. This allows the flavors to meld beautifully, creating an even tastier bean dip.
-
Watch the Bake Time: Keep an eye on the dip while baking. Overbaking can lead to a dry texture, and you want that perfect gooey layer of cheese!
-
Cool Before Garnishing: Allow the dip to cool for around 5 minutes after baking. This prevents your fresh toppings from wilting, keeping everything vibrant and fresh.
-
Use a Cast-Iron Skillet: For a rustic touch and added flavor, bake your bean dip in a cast-iron skillet. It helps achieve that sought-after golden bubbly topping!
What to Serve with Creamy Cheesy Refried Bean Dip
As you savor the warm, cheesy goodness of this dip, consider adding a few delights to round out your meal.
-
Crispy Tortilla Chips: Perfect for scooping up the creamy dip, these crunchy companions add the ideal texture contrast.
-
Guacamole: The smooth, rich taste of avocados harmonizes beautifully with the dip, creating a delightful flavor combination that keeps each bite fresh and vibrant.
-
Fresh Veggie Platter: Include vibrant bell peppers, carrots, and cucumbers for a refreshing crunch that lightens up the meal while balancing the richness of the dip.
-
Salsa Verde: This tangy green salsa provides a zesty kick that complements the bean dip and enhances the overall flavor profile.
-
Pico de Gallo: Fresh, diced tomatoes mixed with onions and cilantro offer a burst of brightness, adding a refreshing note that works well with the creamy texture.
-
Cheesy Quesadillas: Crispy on the outside and melty on the inside, these are a wonderful savory addition and cater to the cheesy theme of your spread.
-
Margaritas: Embrace the festive atmosphere with a classic margarita that pairs perfectly with the flavors of the dip while keeping it all party-friendly.
-
Chocolate Chip Cookies: For dessert, these warm treats provide a sweet finish, pairing surprisingly well with the savory notes of the bean dip.
Each of these suggestions elevates your gathering, ensuring that every element has its moment to shine. Enjoy!
Make Ahead Options
These Creamy Cheesy Refried Bean Dip preparations are perfect for meal prep enthusiasts looking to save time on busy game days! You can mix the dip ingredients (refried beans, sour cream or Greek yogurt, diced green chiles, and taco seasoning) up to 3 days in advance and store it in an airtight container in the refrigerator. To maintain its creamy and delicious quality, be sure to cover the mixture tightly to prevent any browning. When you’re ready to serve, simply spread it in a greased baking dish, top with cheese, and bake as directed until warm and bubbly, ensuring restaurant-quality results with minimal effort!
How to Store and Freeze Bean Dip
Fridge: Store any leftover bean dip in an airtight container for up to 3 days. Keep it covered to maintain moisture and freshness.
Freezer: For longer storage, freeze the bean dip in a freezer-safe container for up to 3 months. Thaw in the fridge overnight before reheating.
Reheating: To reheat, warm the dip in the oven at 350°F (175°C) until heated through, about 15–20 minutes, or microwave in short intervals, stirring in between, until hot.
Make-Ahead Tip: Prepare the bean dip mixture up to 2 days in advance and refrigerate it in an airtight container. Just bake before serving for a warm, creamy delight!
Bean Dip Variations & Substitutions
Feel free to play around with this bean dip recipe and tailor it to your taste buds. The options are limitless, making it easy to create something uniquely scrumptious!
- Spicy Kick: Add diced jalapeños or a splash of hot sauce for an extra kick. Elevate your flavor experience with just a hint of heat.
- Vegan Twist: Substitute sour cream with cashew cream or dairy-free yogurt. Your guests will love this creamy yet plant-based version!
- Cheesy Alternative: Try swapping cheddar cheese with a blend of feta and mozzarella for a tangy, Mediterranean twist.
- Heartier Beans: Mix in some black beans along with refried beans for added texture and protein. This hearty combo enhances both flavor and nutrition.
- Fresh Greens: Add chopped spinach or kale for a nutrition boost and vibrant color. It’s a sneaky way to include more veggies in your dip!
- Herbal Infusion: Toss in fresh cilantro or chives right before serving to brighten up the dip with fresh herb flavors. A touch of green goes a long way in elevating this dish.
- Creamy Alternatives: Use Greek yogurt instead of sour cream for a protein punch while maintaining that rich creaminess everyone loves. It’s a subtle swap that makes a healthy difference.
- Layered Style: For a variation on presentation, create a layered dip with beans on the bottom, a creamy layer in the middle, and cheese on top. Check out my other delicious party dips for more inspiration!
Wherever your flavor cravings lead you, these variations are guaranteed to transform your bean dip experience!

Creamy Cheesy Refried Bean Dip Recipe FAQs
How do I choose the right refried beans?
Absolutely! If you’re using canned refried beans, look for options without added preservatives or excessive sodium. If you’re making them at home, select ripe pinto or black beans for a flavorful base. For homemade, ensure they’re cooked thoroughly and soft enough to mash, resulting in a creamy texture.
How should I store leftover bean dip?
Very simply! Store any leftover bean dip in an airtight container in the refrigerator for up to 3 days. Make sure it’s well-covered to maintain moisture and freshness. If you’re storing it in a cast-iron skillet, just cover it tightly with foil.
Can I freeze the bean dip?
Yes, you can! To freeze your creamy bean dip, transfer it to a freezer-safe container and store for up to 3 months. For best results, let it cool completely before freezing. When you’re ready to enjoy it again, thaw it in the fridge overnight and then reheat in the oven at 350°F (175°C) until warm, about 15–20 minutes.
What if the dip comes out too thick or too thin?
No worries! If your dip is too thick, you can stir in a little sour cream or Greek yogurt until it reaches your desired consistency. Conversely, if it’s too thin, bake it a bit longer to help it thicken up, or consider adding more refried beans to the mix to achieve a creamier texture.
Is this bean dip safe for pets?
I recommend caution! The ingredients in this dip, particularly spices like taco seasoning and garlic, can be harmful to pets. It’s best to keep this dip away from your furry friends and serve it safely to your human guests only.
Can I make this dip healthier?
Absolutely! To lighten up your bean dip, opt for reduced-fat cheese or yogurt. You can also substitute half of the refried beans with black beans for added fiber and protein. This way, you’ll enjoy a deliciously creamy bean dip that’s a bit easier on the waistline!
Ultimate Creamy Bean Dip for Your Next Game Day Feast
Ingredients
Equipment
Method
- Preheat your oven to 375°F (190°C). Grease an 8-inch baking dish or cast-iron skillet with avocado oil.
- In a medium bowl, mix refried beans, sour cream or Greek yogurt, diced green chiles, and taco seasoning until smooth.
- Spread the mixture evenly in the prepared baking dish, leaving some dip exposed along the edges.
- Sprinkle cheese over the top. Bake for 20 to 25 minutes until cheese is melted and bubbly.
- Allow to cool for about 5 minutes. Garnish with lime wedges.
- Serve warm with tortilla chips.
Leave a Reply