
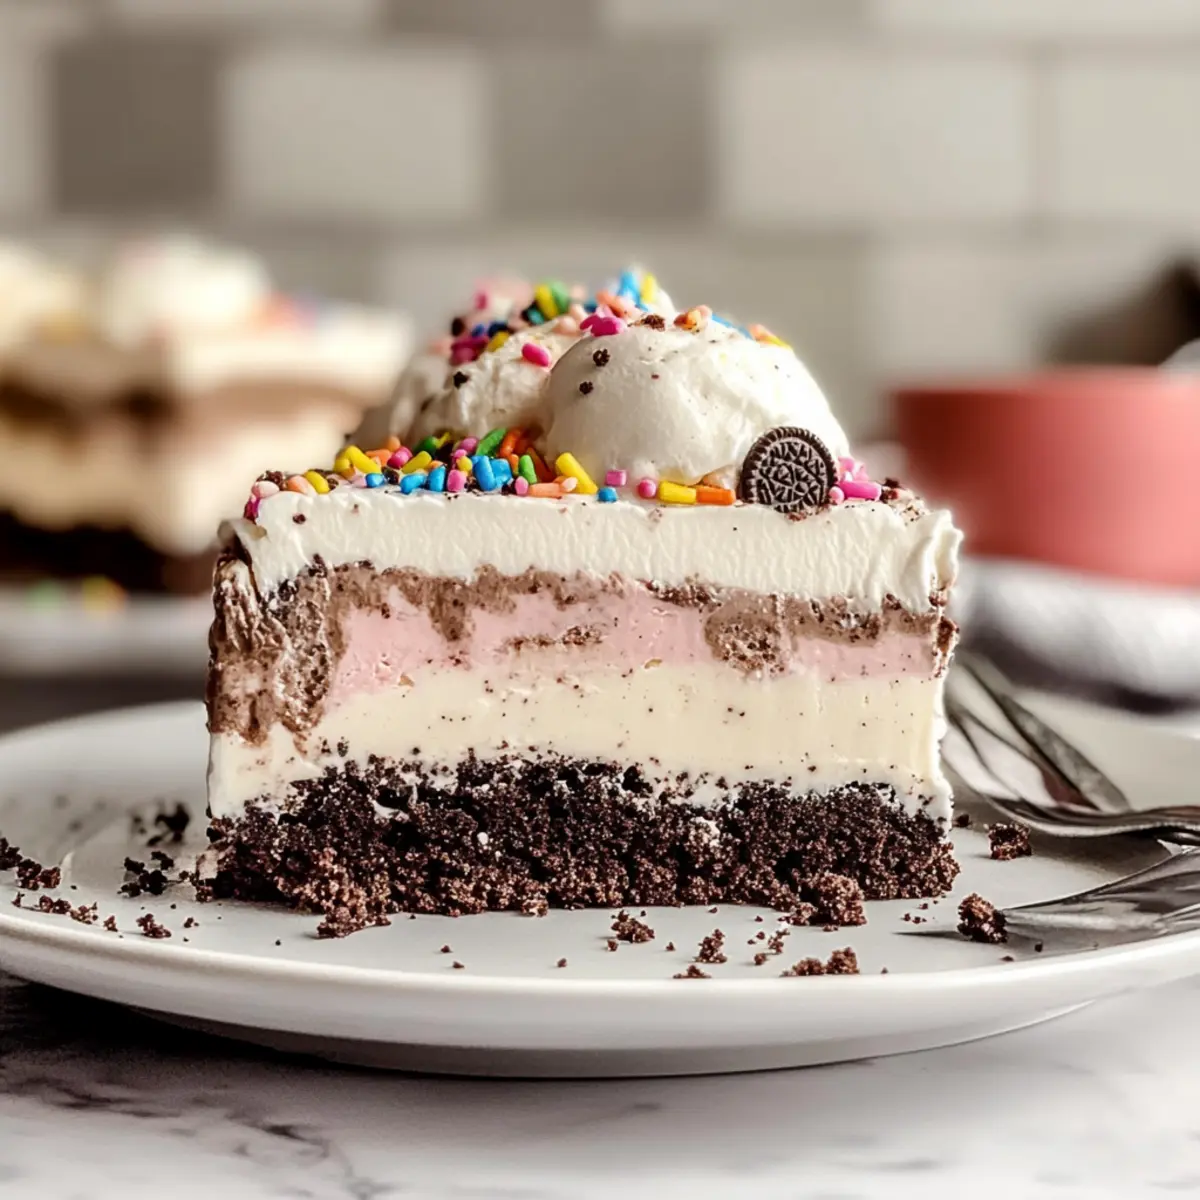
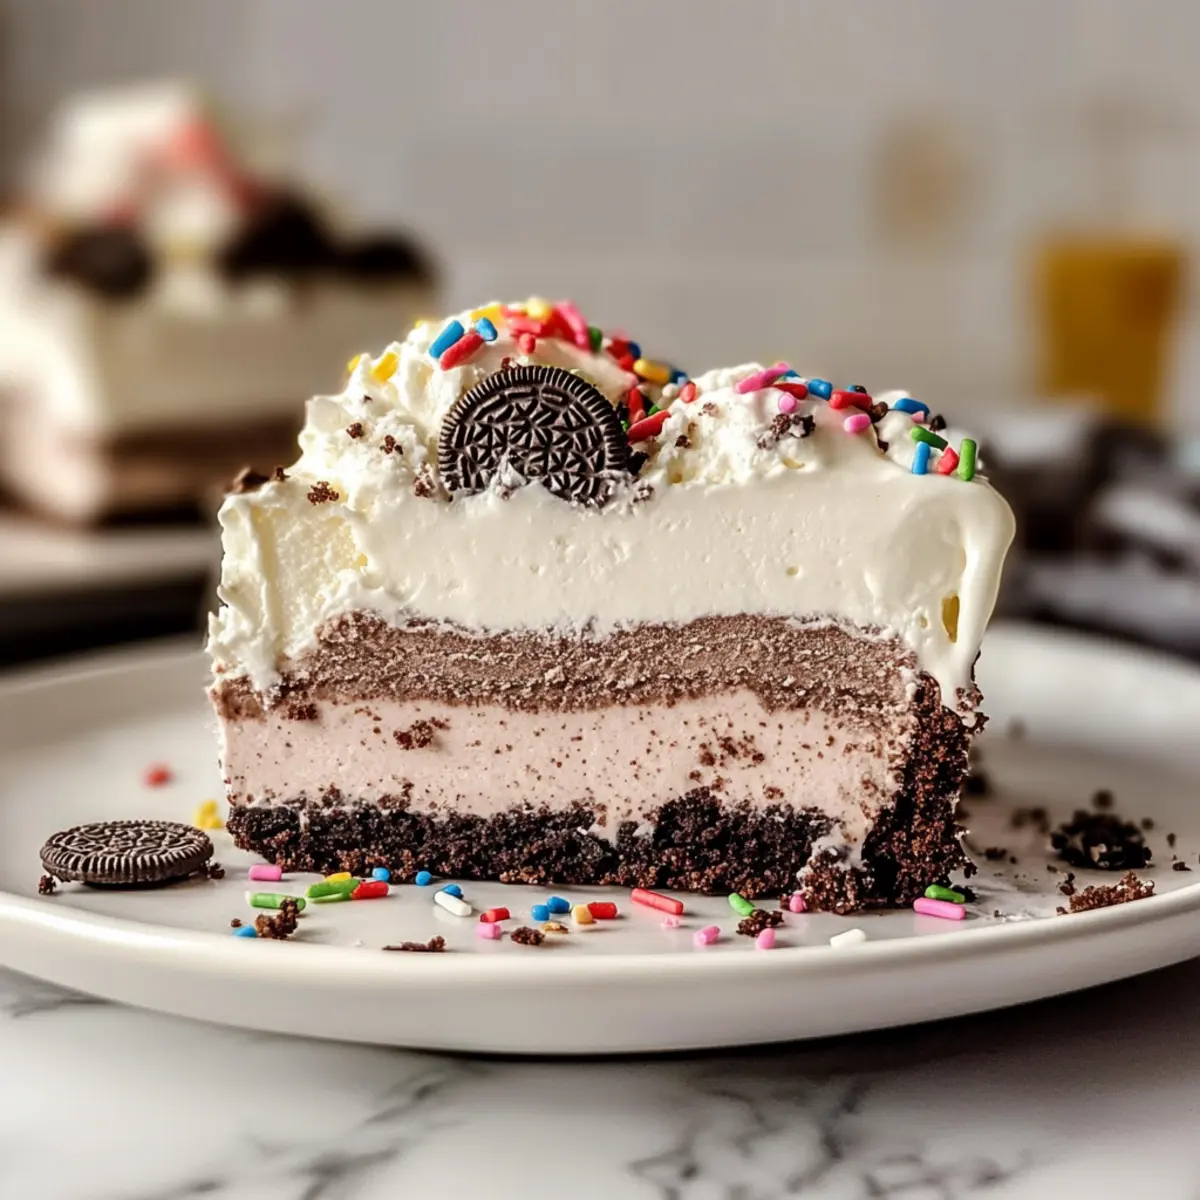
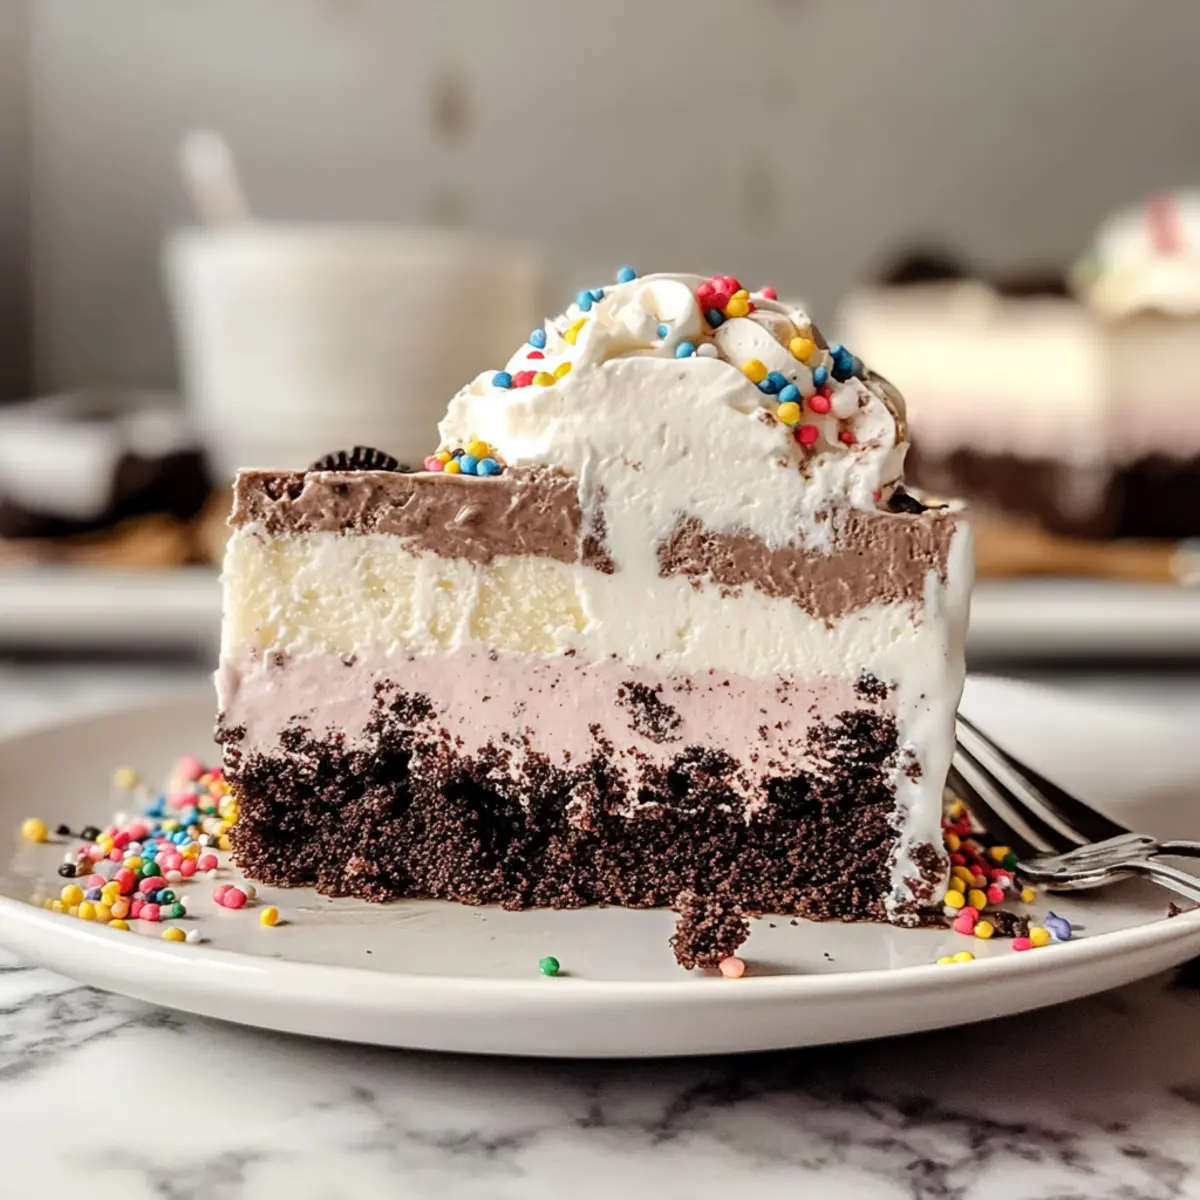
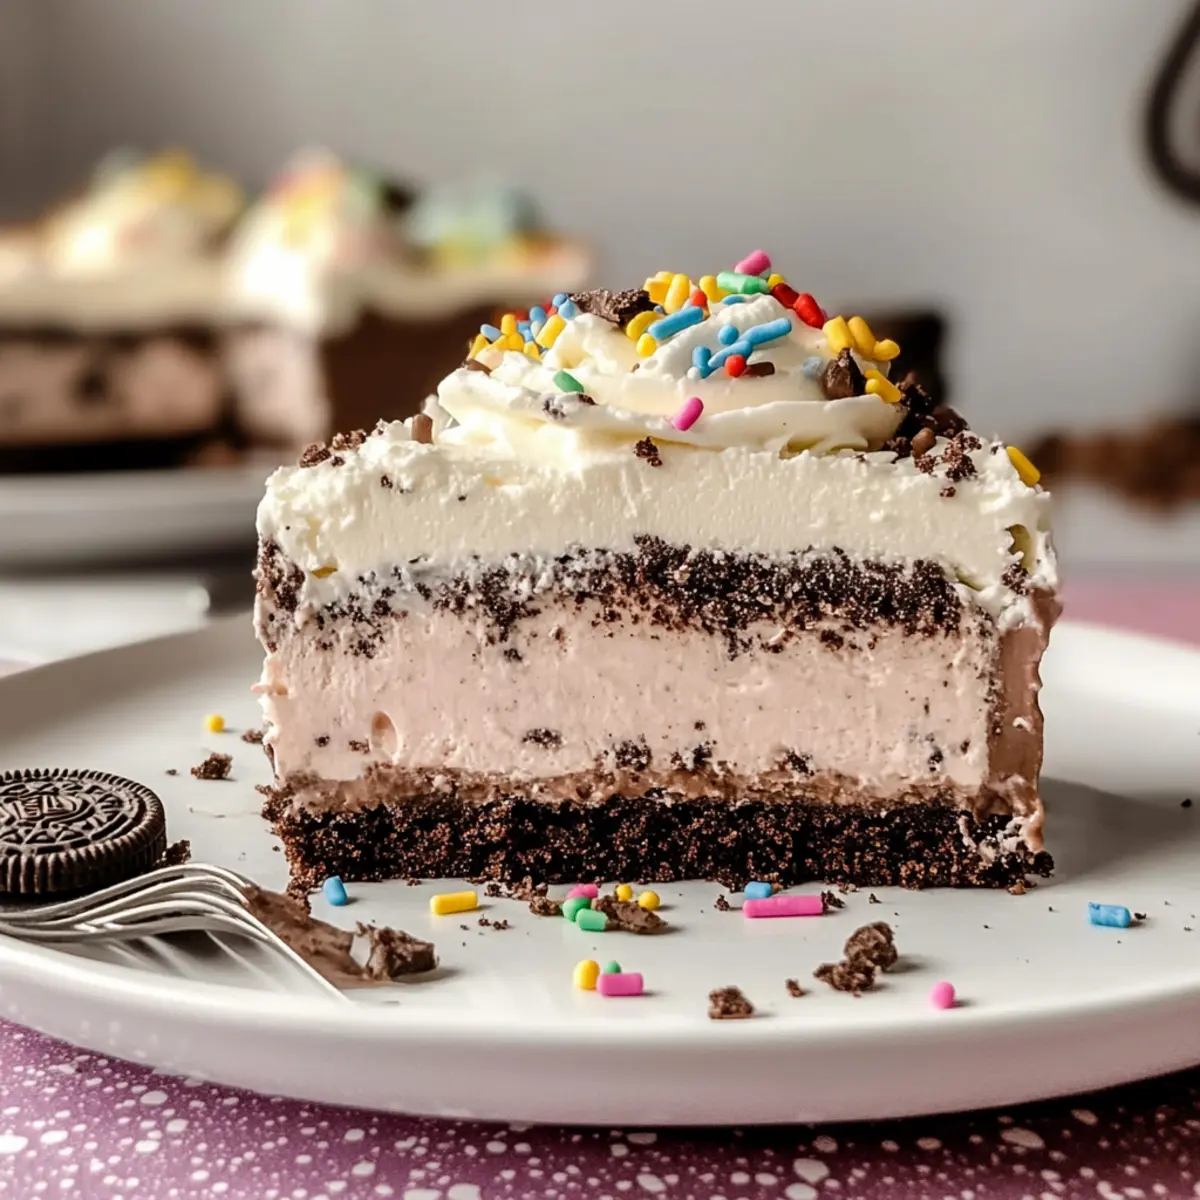
As the summer sun warms up, there’s a magical nostalgia that fills the air—a time for ice cream and laughter. Picture a slice of my delicious no-bake Ice Cream Sheet Cake, perfect for those sunny get-togethers, where creamy, dreamy flavors collide with a satisfying crunch of Oreo goodness. This easy-to-make dessert allows you to be the star of any gathering, as it’s not just a treat; it’s a showstopper that can be prepped in advance, giving you more time to savor those special moments with friends and family. With the freedom to mix and match your favorite ice cream flavors, each bite is a delightful surprise waiting to happen. Are you ready to dive into this fabulous creation and impress your loved ones with your culinary skills?
Why is this Ice Cream Sheet Cake a Must-Try?
No-Bake Convenience: This delightful treat comes together without turning on the oven, making it a perfect choice for hot summer days.
Customizable Flavors: Mix and match your favorite ice cream flavors, whether you’re a fan of classic vanilla and chocolate or want to try something adventurous like mint chocolate chip!
Crowd-Pleasing Dessert: With its eye-catching layers and vibrant toppings, this cake is sure to impress guests at any gathering, making it ideal for parties or family celebrations.
Quick Preparation: Prep it ahead of time and simply freeze; this dessert saves you from last-minute stress. Don’t forget to check out my Honey Peach Cream for another make-ahead treat!
Decadent Textures: The smooth ice cream paired with crunchy Oreos creates a fantastic contrast that will keep everyone coming back for seconds!
Ice Cream Sheet Cake Ingredients
• Ready to indulge in creamy layers?
For the Ice Cream Layers
- Vanilla Ice Cream – This classic flavor serves as the creamy base of your cake, and you can opt for any variant you love.
- Chocolate Ice Cream – This rich contrast pairs beautifully with vanilla; feel free to substitute your favorite flavor for a twist.
For the Crunch Layer
- Oreos – These will add the satisfying crunch; you can use regular or flavored Oreos, just adjust the quantity if using Double Stuf!
- Magic Shell – This glossy coating offers that irresistible crunch—homemade or store-bought both work wonders!
For the Whipped Cream Topping
- Heavy Cream – Essential for making luscious whipped cream; heavy whipping cream is a great alternative if needed.
- Sugar – Sweetens the whipped cream; granulated or powdered sugar is ideal for adding just the right touch.
- Vanilla Extract – This optional ingredient elevates your whipped cream’s flavor and complements the ice cream nicely.
Prepare for a delightful experience as you combine these ingredients to craft your very own Ice Cream Sheet Cake!
Step‑by‑Step Instructions for Ice Cream Sheet Cake
Step 1: Prepare Freezer
Begin by ensuring there’s enough space in your freezer for a 9″ x 13″ baking dish. Clear any items that may obstruct the dish, as proper freezing is essential for the layers of your Ice Cream Sheet Cake to set evenly. Take a moment to gather your ingredients: vanilla and chocolate ice creams, Oreos, and other essentials.
Step 2: Prep Ice Creams
Remove your chosen vanilla ice cream from the freezer and allow it to sit at room temperature for about 15 minutes to soften. This step is vital for easy spreading and creates a smooth layer when assembling your Ice Cream Sheet Cake. Keep an eye on it, ensuring it doesn’t melt too much—it should be creamy, not soupy.
Step 3: Crush Oreos
While the vanilla ice cream softens, take a package of Oreos and crush them into fine crumbs. You can use a food processor for a fine consistency, or place them in a zip-top bag and crush them using a rolling pin. Mix the crumbs with Magic Shell until they’re well-coated, which will add an irresistible crunch to your cake.
Step 4: Layer Vanilla Ice Cream
Spoon the softened vanilla ice cream into the bottom of your prepared baking dish. Use a spatula to spread it evenly, making sure it reaches all corners. Aim for a smooth, flat layer, about an inch thick. Once done, pop the dish into the freezer for about 20 minutes to allow this layer to set solidly.
Step 5: Add Cookie Layer
Once the vanilla ice cream layer is firm, evenly sprinkle the Oreo mixture over it. Press down lightly to ensure the cookie crunch adheres to the ice cream. This delightful layer is crucial for the texture contrast in your Ice Cream Sheet Cake. Return the baking dish to the freezer for an additional 20 minutes to allow it to firm up.
Step 6: Layer Chocolate Ice Cream
Next, take out the chocolate ice cream and allow it to soften for a brief 15-minute spell, just like the vanilla. Once softened, spread the chocolate ice cream over the Oreo layer using a spatula, creating a smooth, even layer. This dual-flavor treat is what makes the Ice Cream Sheet Cake so special; freeze it again for another 20 minutes to solidify.
Step 7: Make Whipped Cream
While the chocolate layer sets, prepare the whipped cream topping. In a mixing bowl, beat together heavy cream, sugar, and optional vanilla extract until stiff peaks form, which takes about 3-5 minutes on medium-high speed. This fluffy whipped cream will make your Ice Cream Sheet Cake even more delightful, adding a creamy finish.
Step 8: Top Cake
With your layers set and whipped cream ready, spread the fluffy mixture over the chocolate layer in an even coat. You can be generous with this step, as it not only enhances the taste but also creates a beautiful topping. If desired, sprinkle colorful sprinkles over the whipped cream for a finishing touch that adds festive flair!
Step 9: Final Freeze
Cover the Ice Cream Sheet Cake with plastic wrap or aluminum foil to prevent freezer burn. Let it freeze for at least 12 hours, ideally a full day, to ensure the cake is solid and slices beautifully. This patience pays off, as your dessert will be perfect for serving at any gathering!
Expert Tips for Ice Cream Sheet Cake
-
Layer Integrity: Ensure ice cream isn’t overly melted while spreading. If too soft, the layers may blend instead of staying distinct.
-
Proper Freezing Time: Allow each layer to freeze for 20 minutes before adding the next. This helps maintain a clean separation and structure in your Ice Cream Sheet Cake.
-
Serving Ease: Let the cake sit at room temperature for about 5 minutes before slicing. This makes serving easier without compromising the texture.
-
Hot Knife Trick: Use hot water to warm your knife before cutting slices. This helps achieve a smooth, professional-looking cut for your Ice Cream Sheet Cake.
-
Whipped Cream Tips: While homemade whipped cream is preferred for best flavor, CoolWhip can save time when you’re in a rush—just allow it to thaw completely before use.
How to Store and Freeze Ice Cream Sheet Cake
-
Fridge: Store leftovers in the fridge for up to 3 days, tightly covered with plastic wrap or in an airtight container to prevent freezer burn.
-
Freezer: Keep the Ice Cream Sheet Cake frozen for up to one month. Ensure it’s well-covered to maintain its delicious flavor and creamy texture without picking up any unwanted odors.
-
Reheating: This dessert is best enjoyed straight from the freezer but let it sit at room temperature for about 5 minutes before serving to make slicing easier.
-
Serving Size Reminder: If you plan to serve multiple guests, consider slicing it into individual portions before freezing; this makes serving convenient and keeps the cake fresh longer.
Ice Cream Sheet Cake Variations
Feel free to sprinkle some creativity on your Ice Cream Sheet Cake for a truly personalized dessert experience!
-
Dairy-Free: Swap traditional ice cream for almond milk or coconut milk-based ice cream for a delicious dairy-free option. This change retains the creaminess while being gentle on the tummy.
-
Fruity Layers: Change up the ice cream flavors to fruity alternatives like strawberry or mango, creating a light and refreshing take. This transformation makes your cake a summer favorite!
-
Nutty Crunch: Add crushed nuts, like almonds or walnuts, to the Oreo layer for an extra crunch and a delightful surprise in each bite. The nutty flavor complements the sweetness beautifully!
-
Chocolate Ganache Drizzle: Drizzle a rich chocolate ganache over the whipped cream topping for an added layer of decadence. This luxurious touch is sure to enchant chocolate lovers!
-
Festive Frozen Fruits: Toss in some frozen berries or chopped bananas between the ice cream layers for a burst of flavor and added texture. They introduce a delicious contrast that pairs wonderfully with creamy ice cream.
-
Minty Freshness: For a refreshing change, swap one layer for mint chocolate chip ice cream and sprinkle with crushed peppermint candies on top. This variation adds a holiday cheer to your dessert!
-
Caramel Swirl: Incorporate a layer of caramel sauce between the ice cream layers for a sweet, gooey surprise. The richness of the caramel mingling with the ice cream is pure bliss!
-
Serve with Style: Serve each slice with a side of chocolate sauce or homemade Oreo Ice Cream for dipping to allow guests to customize their experience. It’s a charming way to invite everyone to enjoy their slice!
These variations ensure each creation remains distinctive, as every party deserves a cake as unique as its celebration. Enhance your Ice Cream Sheet Cake with surprises that’ll leave everyone smiling!
What to Serve with Delicious No-Bake Ice Cream Sheet Cake?
This decadent dessert isn’t just a treat on its own; it opens the door to a world of delightful accompaniments!
-
Crunchy Fruit Salad: Bright, juicy fruits add a refreshing contrast to the creamy cake, making each bite even more enjoyable. A mix of berries, melon, and citrus will sing in summer harmony!
-
Chocolate Drizzle: A wrap of rich chocolate sauce drizzled on top enhances the cake’s flavor complexity, delivering an extra touch of indulgence. Drizzle it warm for a beautiful presentation!
-
Mini Brownie Bites: These fudgy morsels provide an incredible textural contrast, complementing the smoothness of the Ice Cream Sheet Cake. Pair them on a platter for an enticing spread your guests won’t resist.
-
Coffee or Espresso: A cup of bold coffee or a shot of espresso serves as the perfect counterbalance, enhancing the dessert’s sweetness while providing a cozy finish to your meal.
-
Ice Cream Sundae Bar: Set up a fun DIY sundae station with toppings like chopped nuts, chocolate chips, and whipped cream. This interactive touch invites creativity, letting guests customize their Ice Cream Sheet Cake slices!
-
Chocolate Chip Cookies: Soft and chewy, these cookies deliver a nostalgic touch that pairs beautifully with the icy layers of the cake. Their comforting flavor invites everyone to share stories around the table.
-
Sparkling Lemonade: The bubbly citrus refreshment acts as a palate cleanser, letting the rich, creamy flavors of the dessert stand out. Serve it ice-cold for a delightful contrast to every sugary bite!
Make Ahead Options
These Ice Cream Sheet Cakes are a dream for busy home cooks! You can prepare the layers of ice cream and Oreo crunch up to 24 hours in advance, simply layering and freezing each step as you go. The cookie layer can also be made ahead; just store it in an airtight container and sprinkle it over the ice cream shortly before serving to maintain its crunch. When it’s time to impress your guests, spread the whipped cream topping just before serving to ensure it stays fluffy. Just remember to cover the cake tightly to keep it delicious and fresh—this way, your Ice Cream Sheet Cake will be just as delightful as when you first made it!
Ice Cream Sheet Cake Recipe FAQs
What type of ice cream should I use for the layers?
Absolutely! For the layers of your Ice Cream Sheet Cake, you can use any ice cream flavor you love. I recommend a classic vanilla and a rich chocolate for a delightful contrast. But don’t hesitate to experiment! Flavors like mint chocolate chip or cookies and cream also make fantastic choices.
How long can I store the Ice Cream Sheet Cake in the freezer?
You can store your Ice Cream Sheet Cake in the freezer for up to one month. Just make sure to cover it tightly with plastic wrap or aluminum foil to avoid freezer burn. If you’re feeling resourceful, slice it into individual portions before freezing; this makes for easy serving later!
Can I freeze leftover Ice Cream Sheet Cake?
Definitely! You can freeze any leftovers. Make sure the slices are well-covered to keep their flavor intact. Just let them sit at room temperature for about 5 minutes before serving so that they’re easier to slice and enjoy.
What should I do if my ice cream is too soft to layer?
If your ice cream softens too much, it could blend instead of stay layered. If this happens, simply return it to the freezer for 10-15 minutes, and it will firm up, making it easier to spread. The key here is to work quickly and keep things cold!
Can I make the Ice Cream Sheet Cake ahead of time?
Yes, indeed! This cake is perfect for make-ahead prep. You can assemble it a day or even two before your event—just be sure to freeze it overnight for the best results. It’s a real time-saver, letting you enjoy the celebration instead of spending it in the kitchen!
Is it safe for pets to eat the Ice Cream Sheet Cake?
No, it’s best to keep this Ice Cream Sheet Cake away from pets. Ice cream contains sugars and fats that can be harmful to dogs, and ingredients like chocolate can be toxic to them. Always stick to pet-friendly treats if you want to share something special with your furry companions.
Irresistibly Creamy Ice Cream Sheet Cake for Every Celebration
Ingredients
Equipment
Method
- Prepare freezer by ensuring ample space for the baking dish and gathering ingredients.
- Allow vanilla ice cream to soften at room temperature for about 15 minutes.
- Crush Oreos into fine crumbs and mix with Magic Shell.
- Spread softened vanilla ice cream into the baking dish and freeze for 20 minutes.
- Sprinkle the Oreo mixture over the vanilla layer and freeze for another 20 minutes.
- Allow chocolate ice cream to soften and spread over the Oreo layer, then freeze for 20 minutes.
- Beat heavy cream, sugar, and vanilla extract until stiff peaks form.
- Spread whipped cream over the chocolate layer and optionally add sprinkles.
- Cover tightly and freeze for at least 12 hours before serving.
Leave a Reply