
In the midst of autumn’s spooky charm, I stumbled upon the idea for a delightfully fun and healthy snack—my 20-Minute Skeleton Veggie Platter. This vibrant ensemble of crunchy vegetables brings together a medley of textures and flavors, making it a perfect centerpiece for any Halloween gathering. It’s a fantastic way to encourage everyone to munch on farm-fresh goodness while keeping the festive spirit alive, proving that snacks don’t have to be sugary to be enjoyable. Best of all, this platter is fully customizable, allowing you to tailor it to your tastes or dietary needs, all while maintaining that playful Halloween theme. Ready to create some edible art that’s as nutritious as it is fun? Let’s dive into the recipe!
What makes this veggie platter special?
Quick, Fun Preparation: This 20-Minute Skeleton Veggie Platter is super easy to whip up, making it a perfect last-minute addition to your Halloween celebration.
Eye-Catching Presentation: The playful skeleton design is not just fun; it’s also a fantastic conversation starter at any gathering.
Customizable Options: Feel free to mix and match your favorite veggies based on your family’s preferences, just like with my Spicy Crab Pasta for different flavor profiles!
Nutrient-Rich Snack: Packed with vitamins and fiber, it’s a guilt-free choice that keeps everyone satisfied without the sugar rush.
Perfect for All Ages: This platter appeals to both kids and adults, ensuring a healthy snacking option that keeps the festive spirits high!
Great for Leftovers: Any extras can easily be stored for up to two days, making it a practical and delicious option for post-Halloween munching!
20-Minute Skeleton Veggie Platter Ingredients
Get ready to create a spooky and healthy snack with these fresh ingredients!
For the Skeleton
- Carrots – Offers vibrant color and crunch for the skeleton’s limbs; great for dipping too!
- Celery – Crisp and refreshingly green, perfect for the arms and legs; swap with cucumbers for a twist.
- Cauliflower – Ideal for the skull due to its neutral flavor; decorate it creatively for a spooky touch!
- Broccoli – Provides a lively green for the ribcage and spine; break florets into smaller pieces for easy building.
- Cherry Tomatoes – Adds a bold color as the skeleton’s eyes; you can substitute with black olives for a different vibe.
- Olives – Perfect for those mischievous eyes and nose; consider raisins for a fun twist!
- Cucumber Slices – Offers crunch and freshness for the arms and legs; bell pepper strips can add a burst of color.
For the Dips
- Hummus – Adds a creamy texture packed with flavor; try a garlic or spicy variant for an extra kick.
- Ranch Dressing – A classic favorite that pairs well with veggies; opt for a yogurt-based one for a healthier option.
- Guacamole – Creamy avocado goodness; tantalizing flavor that everyone loves!
This 20-Minute Skeleton Veggie Platter is not just fun, it’s a creative way to enjoy healthy snacks!
Step‑by‑Step Instructions for 20-Minute Skeleton Veggie Platter
Step 1: Prepare the Vegetables
Begin by washing all your vegetables thoroughly under cold running water. Peel the carrots and slice them into sticks, cutting the cucumber into rounds. Next, chop the broccoli into smaller florets to make it easier to assemble your 20-Minute Skeleton Veggie Platter. Set everything aside on a clean cutting board as you move to the next step.
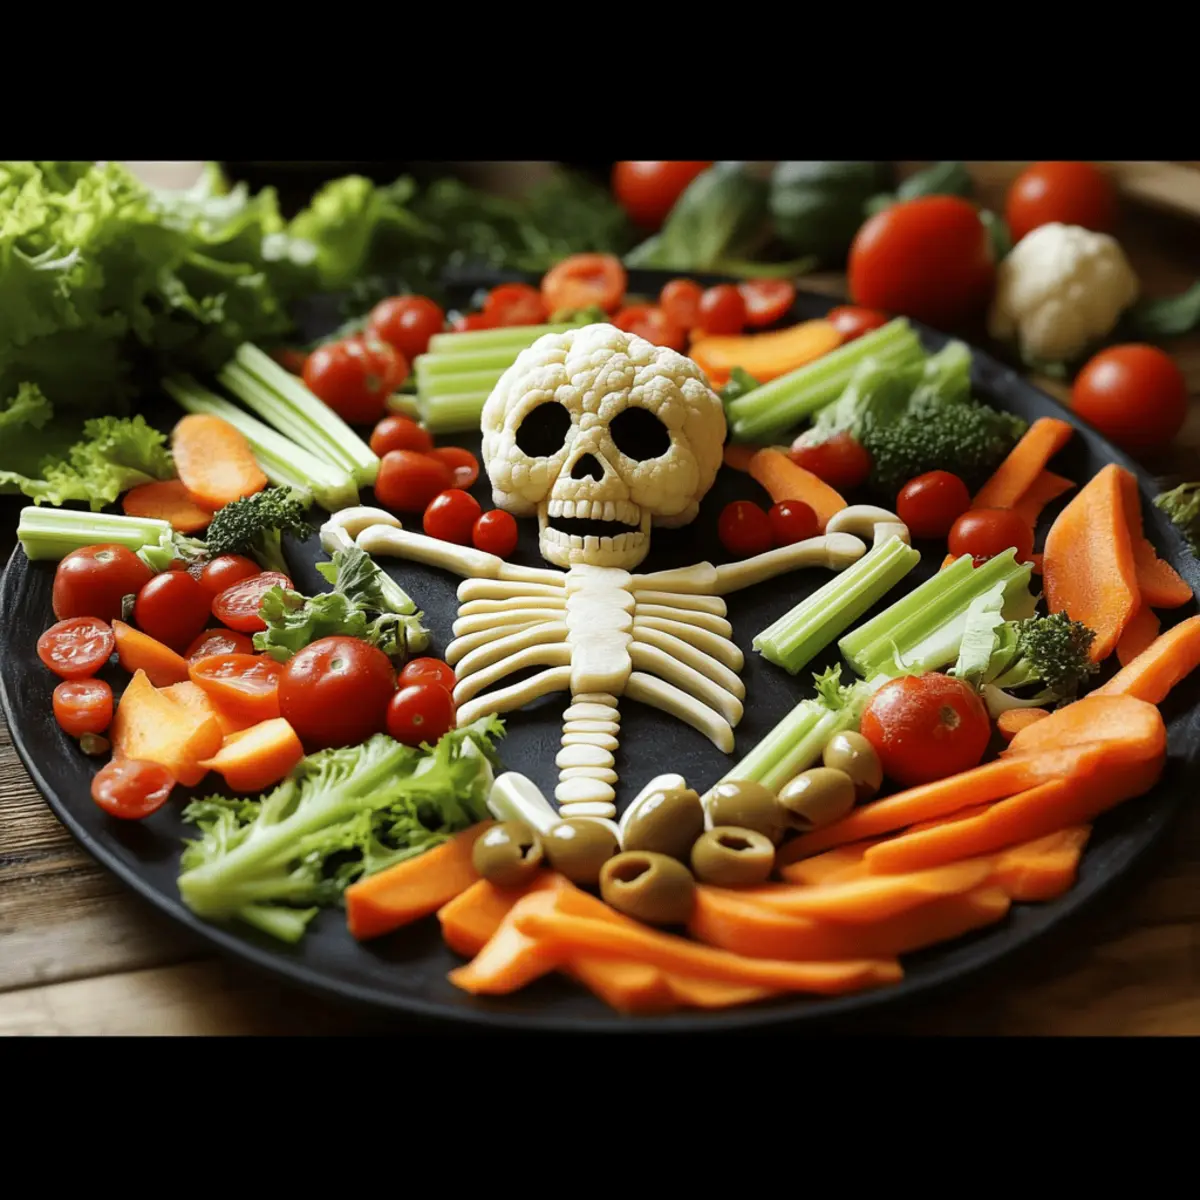
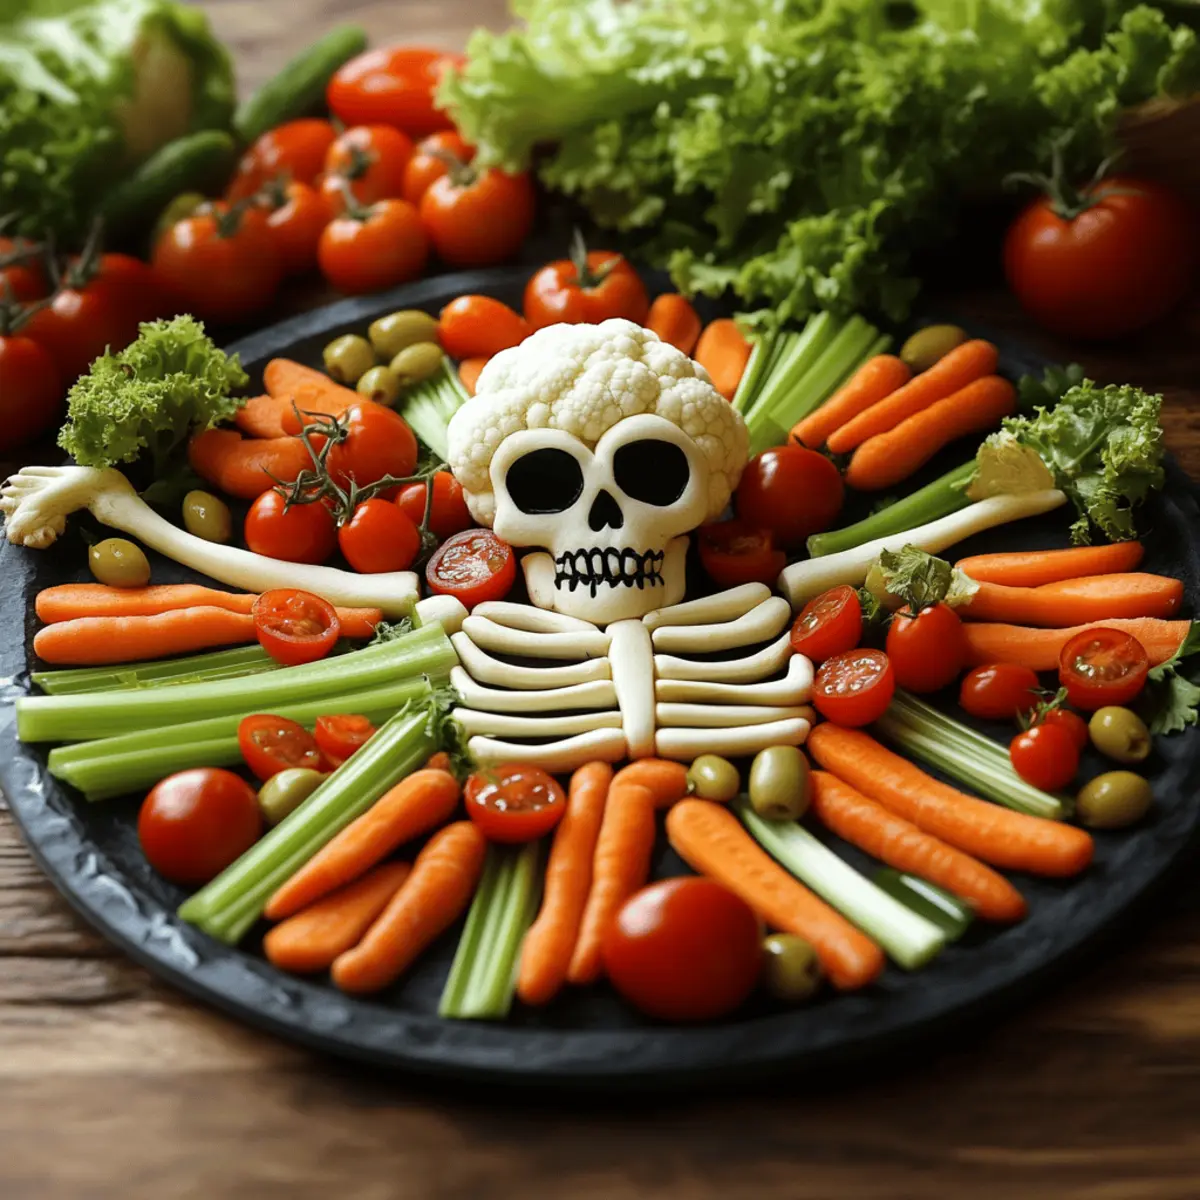
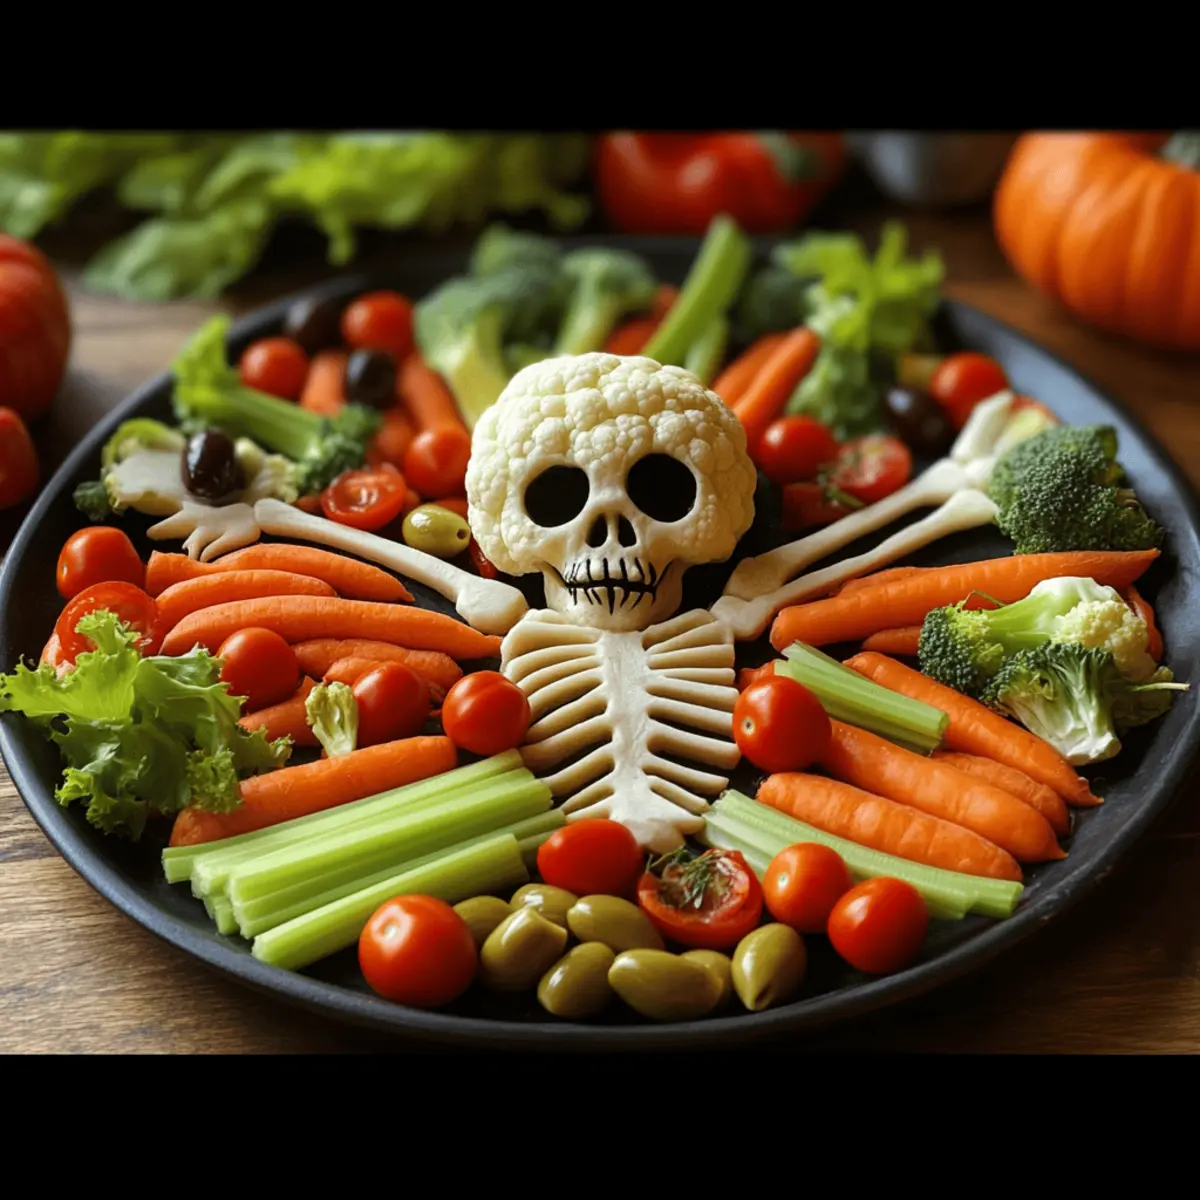
Step 2: Create the Skull
Take the cauliflower and arrange its florets in the center of your serving platter to form the skull shape for your skeleton. Leave enough space for the facial features. This central design will be the focal point of your Skeleton Veggie Platter, so make sure it looks appealing and somewhat whimsical.
Step 3: Assemble the Facial Features
Now, it’s time to give personality to your skeleton! Use cherry tomatoes or olives to create the eyes and the nose of the skull. Place them prominently on the cauliflower to add character and charm, ensuring they are securely placed so they don’t roll away.
Step 4: Form the Ribcage and Spine
Next, use broccoli florets to vertical stack them on both sides of the cauliflower skull, creating the ribcage and spine of your skeleton. Arrange them closely to give a more defined skeletal appearance. This step adds a delightful green contrast to your 20-Minute Skeleton Veggie Platter.
Step 5: Add the Arms and Legs
Arrange the celery sticks horizontally to form the arms extending from the ribs. For the legs, place cucumber slices vertically beneath the skeleton. You can creatively position them to look playful and spooky, adding to the festive charm of the platter.
Step 6: Enhance with Additional Details
Get creative with your Skeleton Veggie Platter by adding character to the arms and legs. Use small pieces of bell pepper or an extra cauliflower floret to mimic bones or joints. This playful touch not only enhances the visual appeal but also invites your guests to indulge in the healthy goodness.
Step 7: Serve with Dips
Finally, arrange small bowls of your chosen dips around the platter, such as hummus, ranch dressing, or guacamole. This not only enhances the flavors of the 20-Minute Skeleton Veggie Platter but also encourages everyone to dig in and enjoy the fresh veggies while maintaining that spooky Halloween spirit!
Make Ahead Options
These 20-Minute Skeleton Veggie Platters are perfect for busy home cooks looking to save time during Halloween festivities! You can wash and cut all your vegetables (like carrots, celery, and cucumbers) and store them in separate airtight containers in the refrigerator for up to 3 days. To maintain their crunch and freshness, consider placing a damp paper towel in each container. When it’s time to impress your guests, simply assemble the platter by arranging the prepped veggies, creating the skull with cauliflower, and adding the final touches such as olives for eyes. This way, you’ll have a striking, fun snack with minimal effort when you’re ready to serve!
Variations & Substitutions for Skeleton Veggie Platter
Feel free to get creative and personalize your 20-Minute Skeleton Veggie Platter to match your tastes and dietary needs!
- Colorful Twist: Add Purple Carrots for a fun color variation, enhancing visual appeal while keeping nutrition intact. Bright shades keep things exciting, especially for picky eaters!
- Zucchini Swap: Substitute Celery with Zucchini for a more neutral flavor and a delightful crunch. It’s a great way to enjoy the skeleton construction without altering much of the taste.
- Radish Surprise: Use Radishes for small bones or décor pieces; their peppery crunch adds a unique twist to the platter. Plus, they introduce a bit of zing to your healthy snack!
- Alternative Skull: Replace Cauliflower with a Cabbage Head to still achieve the skull shape but introduce a different flavor profile. How fun would a cabbage-covered skeletal figure be?
- Dippity-Do-Da: Experiment with a Spicy Hummus to amp up the heat level of your dips. It’s a great way to tantalize taste buds alongside fresh veggies!
- Fragrant Fennel: Use slices of Fennel for an herbaceous addition; its unique flavor gives an exciting twist to your vegetable arrangement. Fennel also pairs wonderfully with creamy dips!
- Fruit Fun: Consider adding Gummy Eyeballs as a cheeky treat on the platter. They add a whimsical touch that kids (and adults) will love, maintaining the Halloween spirit!
- Crunchy Nuts: Toss in a handful of Roasted Chickpeas for a crunchy snack that’s still healthy. They make for tasty little “bones” that are fun to nibble on alongside the veggies.
With these fun variations, your skeleton platter will not only be a delightful sight but also a delicious celebration of flavor! And while you’re at it, try pairing it with my delicious Tortellini Pasta Salad for a complete meal that will leave everyone smiling!
How to Store and Freeze 20-Minute Skeleton Veggie Platter
Fridge: Store any leftovers in an airtight container for up to 2 days to maintain freshness and crunchiness while keeping the flavors intact.
Room Temperature: It’s best to serve the 20-Minute Skeleton Veggie Platter immediately after preparation for optimal taste; if left out, consume within 2 hours for safety.
Reheating: Reheating is not recommended for this veggie platter to keep the vegetables crisp; instead, enjoy them chilled straight from the fridge.
Preparation Ahead: If you want to prepare in advance, chop veggies a few hours early, storing them in cold water to keep them fresh until assembly.
Expert Tips for 20-Minute Skeleton Veggie Platter
- Fresh Veggies Only: Always choose fresh vegetables for the best taste and crunch; wilted or soggy veggies detract from your fun presentation.
- Custom Shapes: Use cookie cutters to create fun shapes with your veggies; this adds a whimsical design to your Skeleton Veggie Platter!
- Color Variations: Incorporate a variety of colors—think purple carrots or yellow peppers— for a vibrant, eye-catching display that entices everyone.
- Make It Ahead: Prep your veggies in advance, but keep them covered in the fridge until assembly to maintain their crispness and prevent browning.
- Experiment with Dips: Try different dips based on personal preferences, such as spicy salsa or a yogurt-based dressing, to keep the flavors exciting.
- Kid-Friendly Involvement: Get children involved in the assembly; creating their own skeleton can make healthy eating fun and encourage them to snack on veggies!
What to Serve with 20-Minute Skeleton Veggie Platter?
Elevate your Halloween gathering with delightful accompaniments that inspire creativity and flavor in every bite.
- Creamy Hummus: Its smooth richness pairs beautifully with the crisp veggies, making each dip deliciously satisfying.
- Zesty Guacamole: The creamy avocado goodness adds a fresh zing that complements the crunch of the platter. Plus, everyone loves it!
- Savory Ranch Dressing: A classic favorite, its tangy flavor enhances each vegetable while offering kids a familiar taste they can’t resist.
- Crispy Tortilla Chips: For an added crunch, serve them alongside the platter, offering a playful dipper option for that extra fun.
- Fruit Skewers: Add colorful, sweet fruit to contrast the savory veggies, creating a balanced and refreshing bite that kids adore.
- Spooky Fruit Cups: Simple cups of Halloween-themed fruit salad keep the excitement going while providing a naturally sweet finish.
- Spiced Apple Cider: Warm or cold, this seasonal drink ties in the autumn theme while being a cozy complement to the veggie offerings.
- Pumpkin Spice Cookies: For a sweet ending, these treats resonate with the holiday spirit, adding a festive touch to your healthy spread.
- Cheese Platter: A selection of cheeses can add a luxurious touch, providing salty flavors that balance the refreshing taste of the veggie platter.
- Cranberry Mocktail: This refreshing drink adds a festive flair and pairs perfectly, helping to cleanse the palate after those crunchy bites.

20-Minute Skeleton Veggie Platter Recipe FAQs
Which vegetables should I choose for the skeleton?
Absolutely! When creating your 20-Minute Skeleton Veggie Platter, opt for fresh, vibrant vegetables. Look for carrots that are firm without dark spots, crisp celery, and a cauliflower head that feels heavy and has tight florets. Freshness is key; wilted veggies won’t present well or taste as good.
How should I store the leftover veggie platter?
Any leftovers can be stored in an airtight container in the fridge for up to 2 days. It’s best to keep the dips separate to prevent the vegetables from becoming soggy. If you have leftover veggie sticks that aren’t arranged on the platter, make sure they are covered well to maintain their crunchiness.
Can I freeze the vegetables for the platter?
Freezing is not recommended for this 20-Minute Skeleton Veggie Platter, as it will affect the texture of the vegetables. However, if you do have extra chopped veggies, you can freeze them in a single layer on a baking sheet before transferring to a freezer bag. Use them within 3 months for the best quality, but consider thawing them for soups or stews instead!
What if my veggies aren’t as crunchy as I expected?
Very! If your veggies seem soft or lacking crunch, try soaking them in a mixture of cold water and ice for about 20-30 minutes before assembly. This can help revive their crispiness. Additionally, always wash and trim them right before use for maximum freshness, ensuring they look and taste their best as they sit centerpiece on your table.
Are there any allergy considerations I should keep in mind?
When making your 20-Minute Skeleton Veggie Platter, ensure to check for allergies among your guests, especially regarding the dips. For nut allergies, avoid dips with tahini or nuts, and for dairy allergies, swap regular ranch for a dairy-free alternative. Inform guests about any potential allergens and consider providing labels for each dip for added safety.
Quick & Fun 20-Minute Skeleton Veggie Platter for Halloween
Ingredients
Equipment
Method
- Wash all vegetables thoroughly under cold running water and prepare by peeling and slicing as needed.
- Arrange cauliflower florets in the center of the serving platter to create the skull shape.
- Use cherry tomatoes or olives for the eyes and nose on the cauliflower.
- Stack broccoli florets vertically on both sides of the cauliflower to form the ribcage and spine.
- Arrange celery sticks horizontally for the arms and cucumber slices vertically for the legs.
- Add extra pieces of bell pepper or cauliflower to mimic bones or joints.
- Serve with small bowls of dips around the platter.
Leave a Reply