
As the sun sets and Halloween creeps closer, the air fills with whispers of creativity and the joy of baking. Enter my Guilt-Free Vampire Bread, a mesmerizing delight that will transform your gatherings into memorable experiences. It’s not just about the eye-catching red and black swirls; it’s also a wholesome choice, loaded with flavor yet low in fat! This delightful bread is perfect for everyone, offering simple adaptations for gluten-free and dairy-free lifestyles. Imagine serving it warm, paired with your favorite spread, or even as the centerpiece of a festive brunch—sounds tempting, right? So, are you ready to dive into a spooky cooking adventure that’s as delightful as it is delicious?
Why is Vampire Bread a Must-Try?
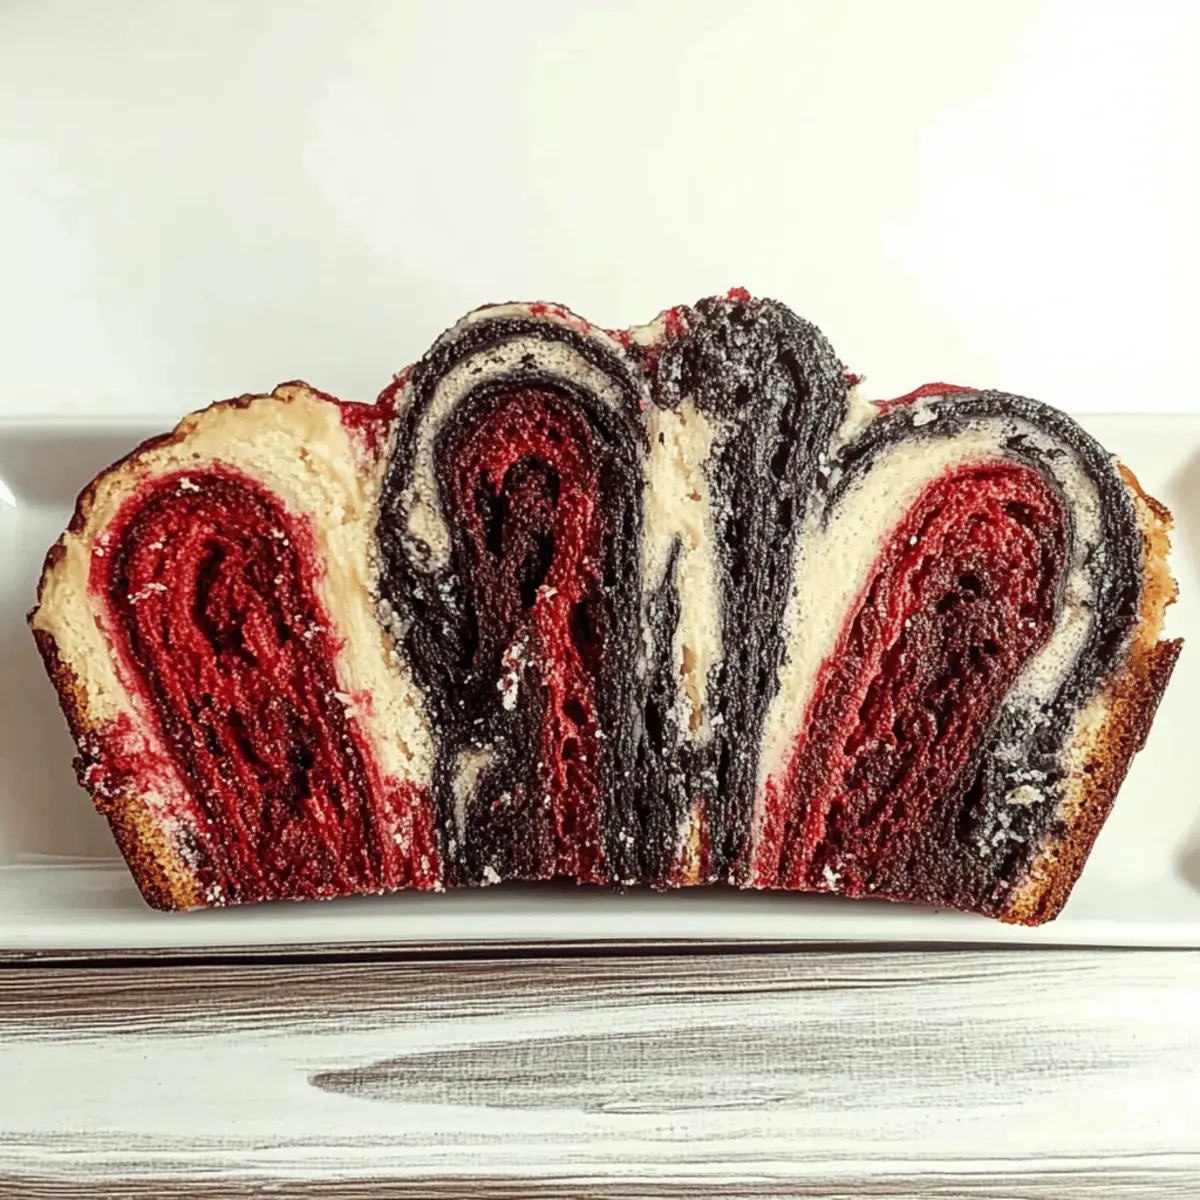
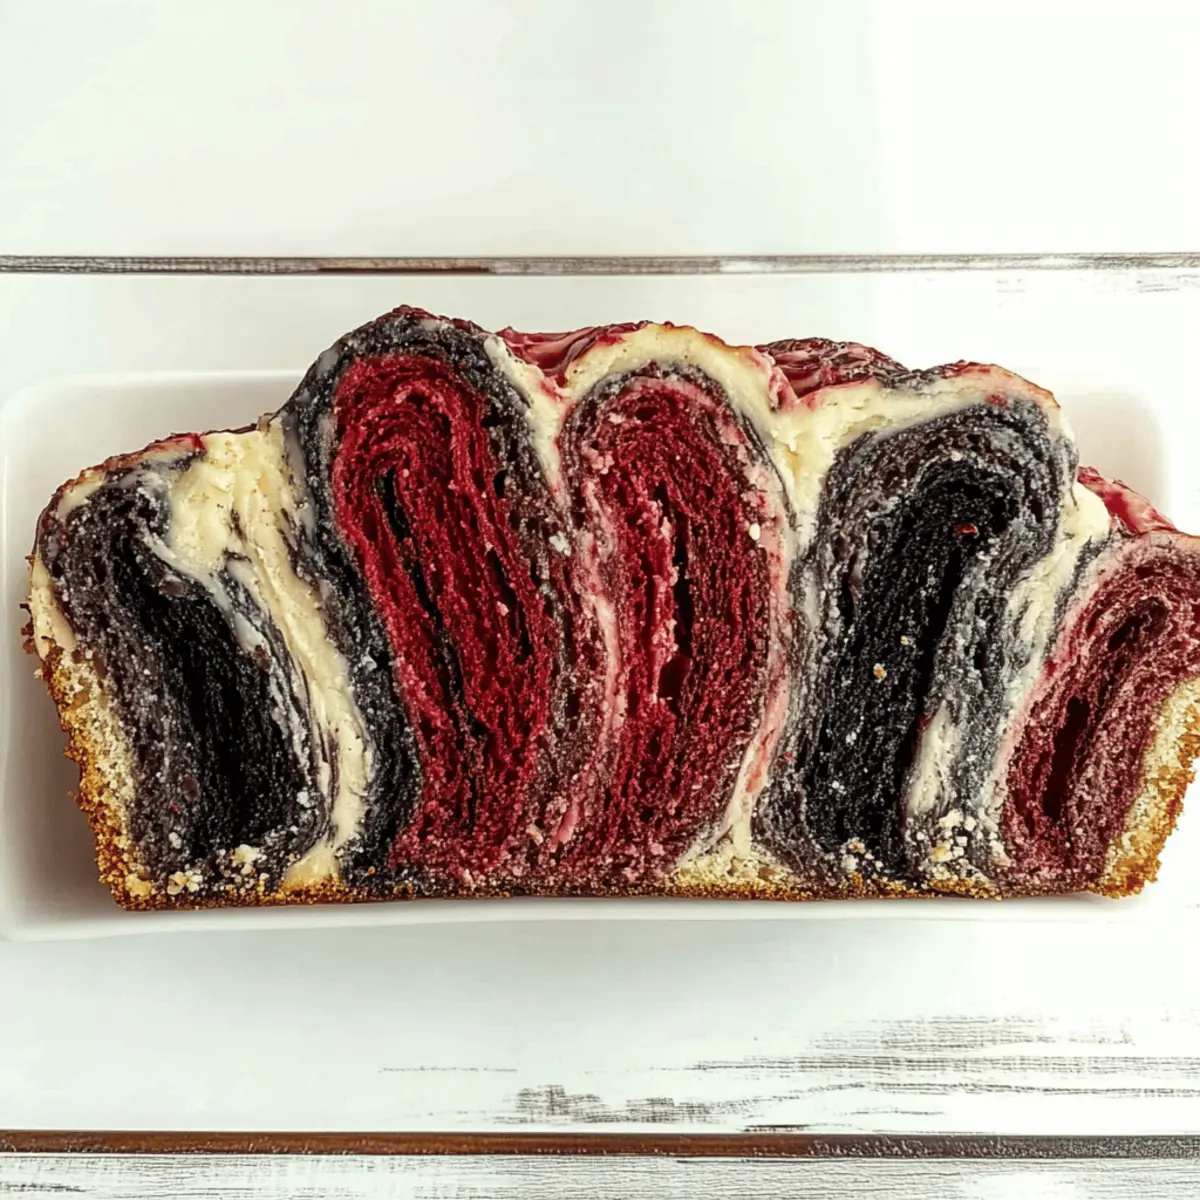
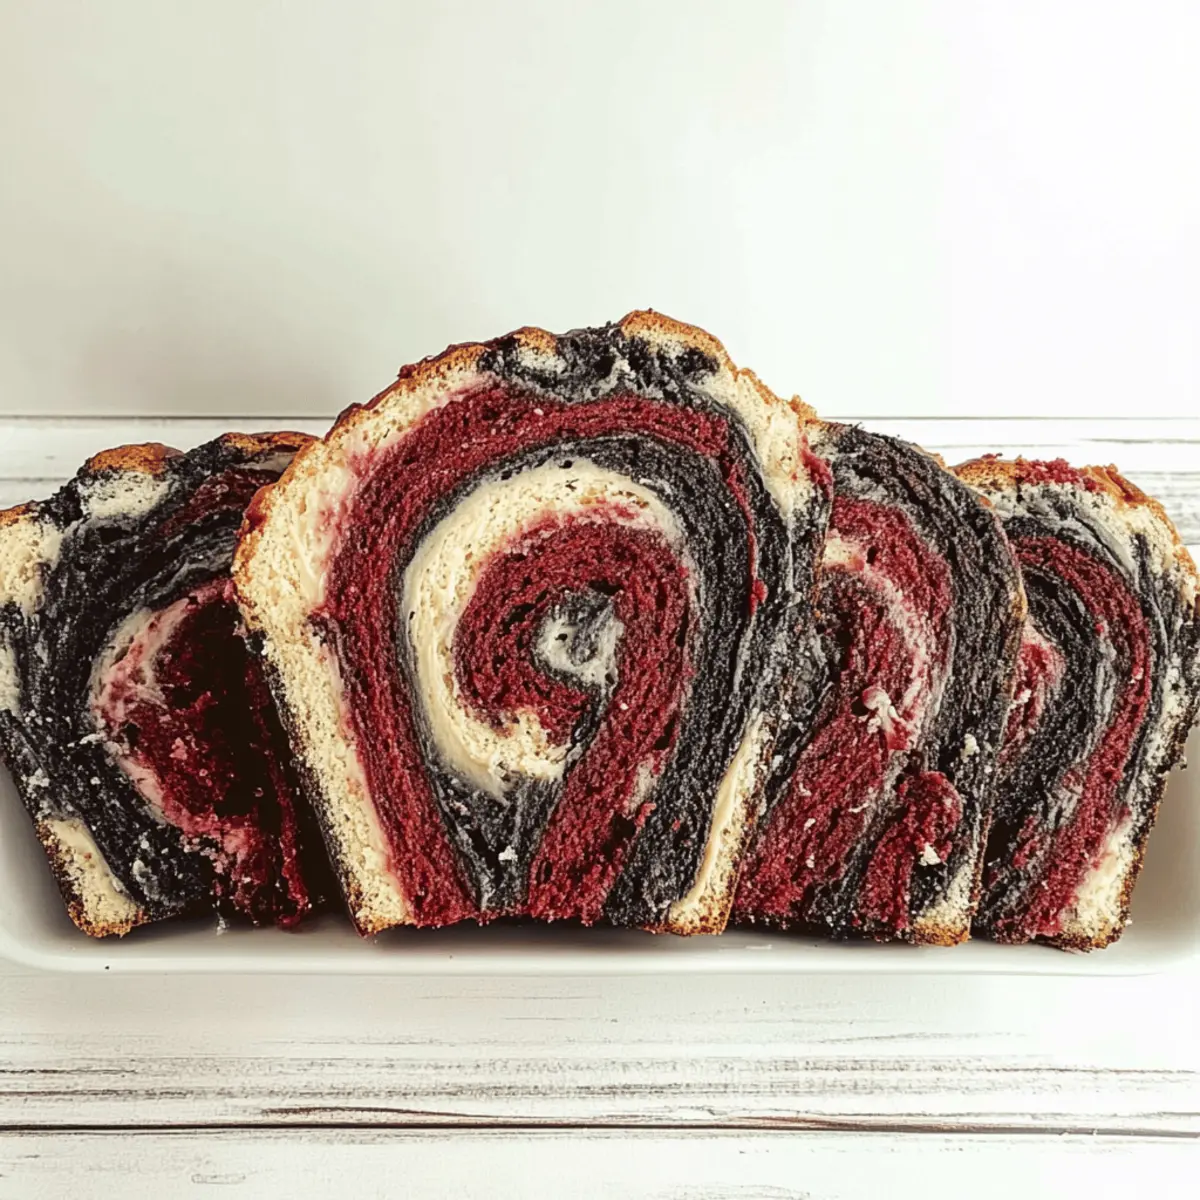
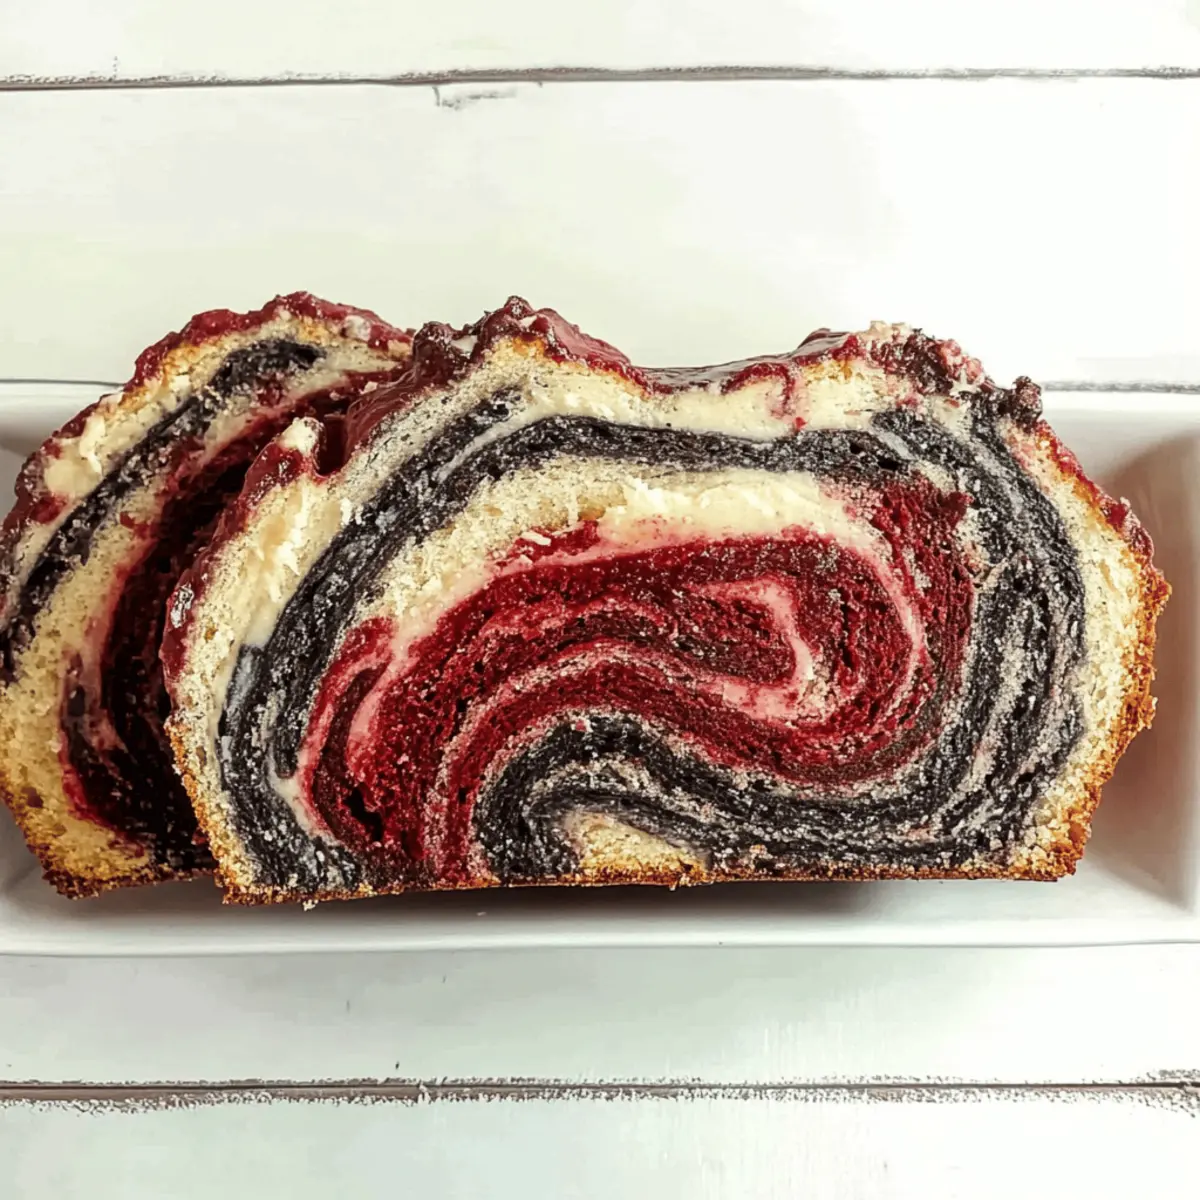
Visual Delight: The impressive red and black swirls make it stunningly unique, perfect for Halloween parties or festive gatherings.
Adaptable Options: Worried about dietary restrictions? This recipe is easily customizable, allowing for gluten-free and dairy-free alternatives without sacrificing flavor.
Flavor Packed: With a light sweetness and fluffy texture, it offers a delicious twist on traditional bread. Serve it warm with your favorite spread for a cozy treat!
Quick and Fun: Baking this bread is an enjoyable experience that’s simple and quick, making it great for both seasoned chefs and novice bakers. Try it alongside Alfredo Garlic Bread for a complete meal!
Perfect for Sharing: Whether at brunch or as a spooky snack, it’s sure to impress your guests and spark delightful conversations. Trust us, they’ll be asking for the recipe!
Vampire Bread Ingredients
-
For the Dough
• All-purpose flour – Provides structure and texture; substitute with gluten-free flour for a gluten-free version.
• Yeast – Acts as the leavening agent for lightness and rise; use active dry yeast or fresh yeast for best results.
• Sugar – Adds sweetness and enhances browning; reduce for less sweetness if desired.
• Salt – Enhances flavor and strengthens gluten; can be omitted for low-sodium diets.
• Water – Hydrates the dough; use warm water to effectively activate the yeast.
• Butter (or oil) – Adds richness and moisture; substitute with plant-based butter for a dairy-free option. -
For the Color
• Food coloring (red and black) – Creates a festive swirled effect; opt for natural dyes if preferred.
Enjoy creating your own Vampire Bread and delight in its unique flavors this Halloween!
Step‑by‑Step Instructions for Vampire Bread
Step 1: Prepare the Dough
In a large mixing bowl, combine 3 cups of all-purpose flour, 1 packet of active dry yeast, 2 tablespoons of sugar, and 1 teaspoon of salt. Gradually add in 1 cup of warm water, mixing with a wooden spoon until a sticky dough forms. Knead the dough on a floured surface for 8-10 minutes until it becomes smooth and elastic, feeling soft to the touch.
Step 2: First Rise
Once kneaded, shape the dough into a ball and place it in a greased bowl. Cover it with a clean kitchen towel and let it rise in a warm area for 1-2 hours, or until it has doubled in size. You’ll know it’s ready when you gently press it with your finger, and the indentation remains.
Step 3: Color the Dough
After the dough has risen, punch it down to release the air bubbles. Divide the dough into two equal portions. In separate bowls, knead black food coloring into one half and red food coloring into the other until each portion is vibrantly colored. Your Vampire Bread will have striking colorful swirls!
Step 4: Shape the Loaf
On a floured surface, roll out each colored dough portion into rectangles, approximately 1/2 inch thick. Layer the red dough on top of the black dough, then gently twist both layers together to create a spiral effect. Shape this twisted dough into a loaf form, tucking the ends under for a neat appearance.
Step 5: Second Rise
Place the shaped loaf onto a lined baking sheet. Cover it lightly with a kitchen towel and let it rise for about 30 minutes until it puffs slightly. This rise will enhance the lightness and fluffiness of your Vampire Bread, ensuring the perfect texture.
Step 6: Bake the Loaf
Preheat your oven to 350°F (175°C). Once the oven is ready, bake the loaf for approximately 30 minutes. You’ll know it’s done when the top turns golden brown, and it sounds hollow when tapped on the bottom.
Step 7: Cool Down
After baking, carefully remove the loaf from the oven and let it cool on a wire rack. Allow it to rest for at least 15 minutes before slicing. This cooling time improves the texture and makes it easier to cut into beautiful, colorful slices of your delightful Vampire Bread.
Expert Tips for Making Vampire Bread
-
Fresh Yeast: Always check your yeast’s freshness before use; if it doesn’t bubble in warm water, try a new batch for successful rising.
-
Color Consistency: For the best visual impact, opt for gel food coloring. It provides vibrant colors without affecting the dough’s moisture balance.
-
Kneading Technique: Knead the dough thoroughly until smooth and elastic; this ensures a fluffy texture in your Vampire Bread that everyone will love.
-
Temperature Awareness: Make sure your warm water isn’t too hot; excessively high temperatures can kill the yeast, preventing your bread from rising properly.
-
Storage Solution: If there are leftovers, store your Vampire Bread in an airtight container at room temperature for up to 3 days to maintain freshness.
Make Ahead Options
These delightful Vampire Bread loaves are perfect for meal prep enthusiasts! You can prepare the dough a day ahead of baking; after the first rise, simply shape it and refrigerate it covered in plastic wrap to maintain moisture. This will keep the dough fresh and allow the flavors to develop further. When you’re ready to bake, let it sit out for about 30 minutes to come to room temperature before proceeding with the second rise. Additionally, the finished bread can be stored in an airtight container at room temperature for up to 3 days or frozen for up to 3 months. Enjoy the ease of having this spooktacular treat ready for your Halloween gatherings!
How to Store and Freeze Vampire Bread
-
Room Temperature: Store Vampire Bread in an airtight container at room temperature for up to 3 days to keep it fresh and enjoyable.
-
Fridge: If you need to prolong the shelf life, refrigerate it for up to a week, ensuring it’s wrapped tightly to prevent drying out.
-
Freezer: For long-term storage, wrap the bread tightly in plastic wrap and aluminum foil or place in a freezer-safe bag. It can be frozen for up to 3 months.
-
Reheating: To enjoy frozen Vampire Bread, thaw overnight in the fridge, then reheat in a preheated oven at 350°F (175°C) for about 10 minutes until warmed through.
What to Serve with Vampire Bread
Vampire Bread is not just a treat to behold; it’s a versatile addition to a delightful meal setting, ready to tantalize your senses.
-
Savory Garlic Butter: This rich, aromatic spread enhances the soft texture of the bread, creating a mouthwatering combination that beckons for seconds. Just imagine the warmth melting into the swirls!
-
Creamy Cheese Spread: The smoothness of a cheese spread complements the sweet notes of the bread, offering a lovely balance. It’s perfect for those who appreciate a both savory and sweet experience.
-
Pumpkin Soup: A comforting bowl of pumpkin soup pairs beautifully, adding a homemade touch to your Halloween celebration. The creamy texture and spiced flavors will make your heart sing.
-
Berry Jam: Sweet and slightly tart, a lovely berry jam brings out the loaf’s indulgent side, making it a delightful breakfast option or afternoon snack. It’s like a little taste of autumn!
-
Herbed Olive Oil: Dipping Vampire Bread in herbed olive oil introduces a fresh and zesty element, ideal for adventurous palates. The infusion of flavors will elevate any dining experience.
-
Warm Apple Cider: Sip on warm apple cider while enjoying a slice of Vampire Bread. The comforting spices of cinnamon and cloves create a delightful atmosphere for Halloween gatherings.
-
Mixed Green Salad: A light salad with fresh herbs and a tangy dressing provides a beautiful contrast to the sweetness of the bread, making for a refreshing side option.
-
Chocolate Mousse: For dessert, a rich chocolate mousse adds a decadent finish to your meal. The contrast of flavors will leave everyone craving another slice of bread!
Vampire Bread Variations & Substitutions
Explore the wonderful world of customizations for your Vampire Bread! The enticing aroma and vibrant colors allow for endless creative possibilities.
- Gluten-Free: Substitute all-purpose flour with a gluten-free flour blend to enjoy this treat without worry.
- Dairy-Free: Replace butter with plant-based alternatives like coconut or olive oil for a delicious dairy-free option.
- Less Sugar: Decrease sugar quantity or use natural sweeteners like stevia for a lower-sugar loaf that still tastes great.
- Herb-Infused: Add dried herbs like rosemary or thyme for a delightful savory twist that complements the sweetness perfectly.
- Natural Colors: Use beet juice or activated charcoal for coloring if you prefer to stick with natural ingredients without artificial dyes.
- Savory Add-ins: Incorporate olives or sun-dried tomatoes for a unique taste experience; they add a wonderful punch of flavor to the dough.
- Sweet Spices: Mix in a touch of cinnamon or nutmeg to complement the sweetness, transforming it into a delightful seasonal treat.
- Serve with Spread: Try pairing your Vampire Bread with a rich garlic butter, or for a sweeter touch, serve alongside your favorite jam or Chimichurri Garlic Bread for a delicious combination!
Vampire Bread Recipe FAQs
What type of flour should I use for Vampire Bread?
For traditional Vampire Bread, all-purpose flour is ideal as it provides necessary structure and texture. If you’re looking for a gluten-free version, simply substitute it with a gluten-free flour blend, ensuring it has a suitable binding agent like xanthan gum for the best results.
How should I store Vampire Bread after baking?
Absolutely! To keep your Vampire Bread fresh, store it in an airtight container at room temperature for up to 3 days. If you want to prolong its shelf life, you can refrigerate it for about a week, but be sure to wrap it tightly to prevent it from drying out.
Can I freeze Vampire Bread, and how do I do it?
Yes, you can freeze Vampire Bread! Wrap the bread tightly in plastic wrap and then in aluminum foil, or place it in a freezer-safe bag. It can be kept frozen for up to 3 months. When you’re ready to enjoy it, just thaw it overnight in the refrigerator and reheat in a preheated oven at 350°F (175°C) for about 10 minutes until warm.
What do I do if my dough isn’t rising?
If your dough isn’t rising, first check if your yeast is fresh. To test, mix a packet of yeast with 1/4 cup of warm water (between 100°F and 110°F) and a pinch of sugar. If it bubbles after 5-10 minutes, your yeast is good to use! If not, you might need to start again with fresh yeast. Also, ensure your dough is in a warm, draft-free area; try putting it in an oven that’s been turned off but still warm.
Can I make Vampire Bread dairy-free?
Very! Just replace the butter with a plant-based butter or oil for a dairy-free option. This way, you can enjoy the same delicious flavors without any dairy ingredients. It’s a perfect alternative for those with lactose intolerance or anyone following a dairy-free lifestyle.
Vampire Bread: Spooky, Delicious, and Guilt-Free Indulgence
Ingredients
Equipment
Method
- In a large mixing bowl, combine 3 cups of all-purpose flour, 1 packet of active dry yeast, 2 tablespoons of sugar, and 1 teaspoon of salt. Gradually add in 1 cup of warm water, mixing with a wooden spoon until a sticky dough forms. Knead the dough on a floured surface for 8-10 minutes until it becomes smooth and elastic.
- Once kneaded, shape the dough into a ball and place it in a greased bowl. Cover it with a clean kitchen towel and let it rise in a warm area for 1-2 hours, or until it has doubled in size.
- After the dough has risen, punch it down to release the air bubbles. Divide the dough into two equal portions. In separate bowls, knead black food coloring into one half and red food coloring into the other until each portion is vibrantly colored.
- On a floured surface, roll out each colored dough portion into rectangles, approximately 1/2 inch thick. Layer the red dough on top of the black dough, then gently twist both layers together to create a spiral effect.
- Place the shaped loaf onto a lined baking sheet. Cover it lightly with a kitchen towel and let it rise for about 30 minutes.
- Preheat your oven to 350°F (175°C). Once the oven is ready, bake the loaf for approximately 30 minutes until the top turns golden brown.
- After baking, carefully remove the loaf from the oven and let it cool on a wire rack for at least 15 minutes before slicing.
Leave a Reply