
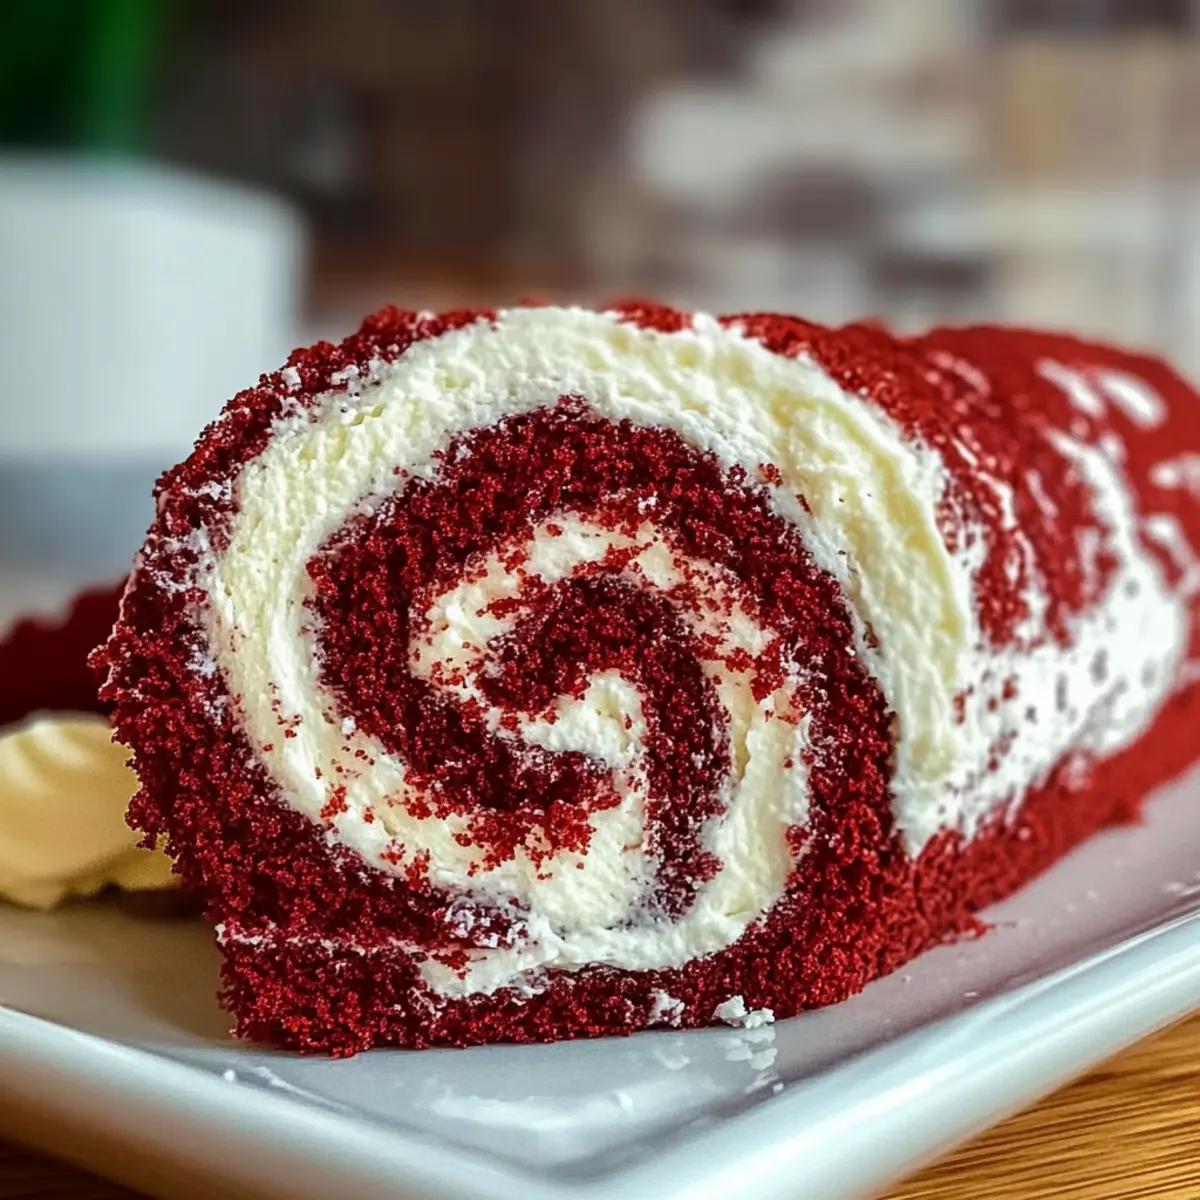
It’s amazing how a roll can become the star of your dessert table! With its vibrant red hue and delightful swirls, this Easy Red Velvet Cake Roll dazzles at every occasion. What I love most about this recipe is how it marries the rich taste of chocolate and vanilla into a soft, airy cake while delivering a sophisticated presentation that’s surprisingly simple to make. Whether it’s for a festive gathering or a cozy family dinner, this vegetarian delight turns ordinary moments into memorable celebrations. Plus, it’s easy to prepare ahead of time, ensuring you can spend less time in the kitchen and more time with loved ones. Curious about how to create this show-stopping dessert? Let’s dive in!
Why Is This Cake Roll a Must-Try?
Elevated presentation: The stunning red color and elegant swirls will impress your guests at any event.
Delightfully easy: This recipe simplifies the baking process, making it accessible for cooks of all skill levels.
Irresistibly tasty: The combination of sweet cream cheese filling and rich chocolate flavor creates a flavor explosion in every bite.
Versatile delight: Perfect for any gathering, whether a birthday party or a casual family dinner, this dessert fits right in.
Make-ahead magic: Prepare it in advance, allowing you to spend more time enjoying your celebrations rather than stressing in the kitchen. With similar crowd-pleasers like our Biscoff Cookie Roll or the classic Italian Lemon Cake, your dessert table will be the talk of the party!
Red Velvet Cake Roll Ingredients
• Discover the essential ingredients for a perfect Red Velvet Cake Roll.
For the Cake
- Large Eggs – Provide structure and moisture; using room temperature eggs ensures better blending.
- Granulated Sugar – Adds sweetness and helps aerate the batter when beaten with eggs; this ingredient is irreplaceable for this recipe.
- Vegetable Oil – Contributes moisture; for a richer flavor, consider substituting with melted butter.
- Baking Powder – Acts as a leavening agent, giving the cake its delightful rise.
- Salt – Enhances the overall flavor of the cake.
- Vanilla Extract – Provides depth to the flavor; opting for pure vanilla will yield the best results.
- Unsweetened Cocoa Powder – Infuses a chocolate flavor; using Dutch-processed cocoa enhances color and taste.
- All-Purpose Flour – This main structure component can be swapped with a gluten-free flour blend for a different dietary need.
For the Filling
- Powdered Sugar – Sweetness is essential for the cream cheese filling.
- Cream Cheese – Gives a rich and tangy flavor to the filling, making it a standout.
- Unsalted Butter – Adds creaminess; using room temperature butter ensures easy mixing and smooth consistency.
Step‑by‑Step Instructions for Easy Red Velvet Cake Roll
Step 1: Prepare for Baking
Preheat your oven to 350°F (175°C) and gather a 10×15” baking pan. Line it with foil, ensuring it overhangs the edges, then lightly spray the surface with floured cooking spray. This creates an easy release when you turn out your Red Velvet Cake Roll after baking, and helps achieve a beautiful, intact cake.
Step 2: Mix the Batter
In a large mixing bowl, beat 4 large eggs for 3-5 minutes until they transform into a pale, frothy mixture. Gradually add granulated sugar and continue to mix for another 2 minutes until well blended. This frothy egg-sugar mixture creates structure and moisture in your cake, essential for that light, airy texture.
Step 3: Incorporate Dry Ingredients
Gently pour in the vegetable oil, baking powder, salt, vanilla extract, and unsweetened cocoa powder to your egg mixture. Mix until just combined, avoiding overmixing to keep your batter light. Gradually fold in the all-purpose flour until no dry spots remain. This careful incorporation ensures a smooth, rich batter that is critical for your Red Velvet Cake Roll.
Step 4: Bake the Cake
Spread the batter evenly in the prepared baking pan and place it in the preheated oven. Bake for 10-15 minutes, or until the cake is set, lightly browned, and springs back when touched. Keep an eye on the color; it should develop a lovely reddish hue, characteristic of a Red Velvet Cake Roll.
Step 5: Cool and Roll
Once baked, immediately transfer the cake to a clean kitchen towel dusted with powdered sugar. Carefully roll the cake up with the towel, starting from the shorter end. This rolling process helps maintain the shape and prevents cracking as it cools. Allow it to cool completely in this rolled form to set.
Step 6: Prepare the Filling
While the cake cools, make the creamy filling by beating room temperature cream cheese and unsalted butter together until creamy and smooth. Gradually add powdered sugar and a splash of vanilla extract, mixing until fully combined. This rich filling will balance perfectly with the delicate flavors of the Red Velvet Cake Roll.
Step 7: Assemble the Cake Roll
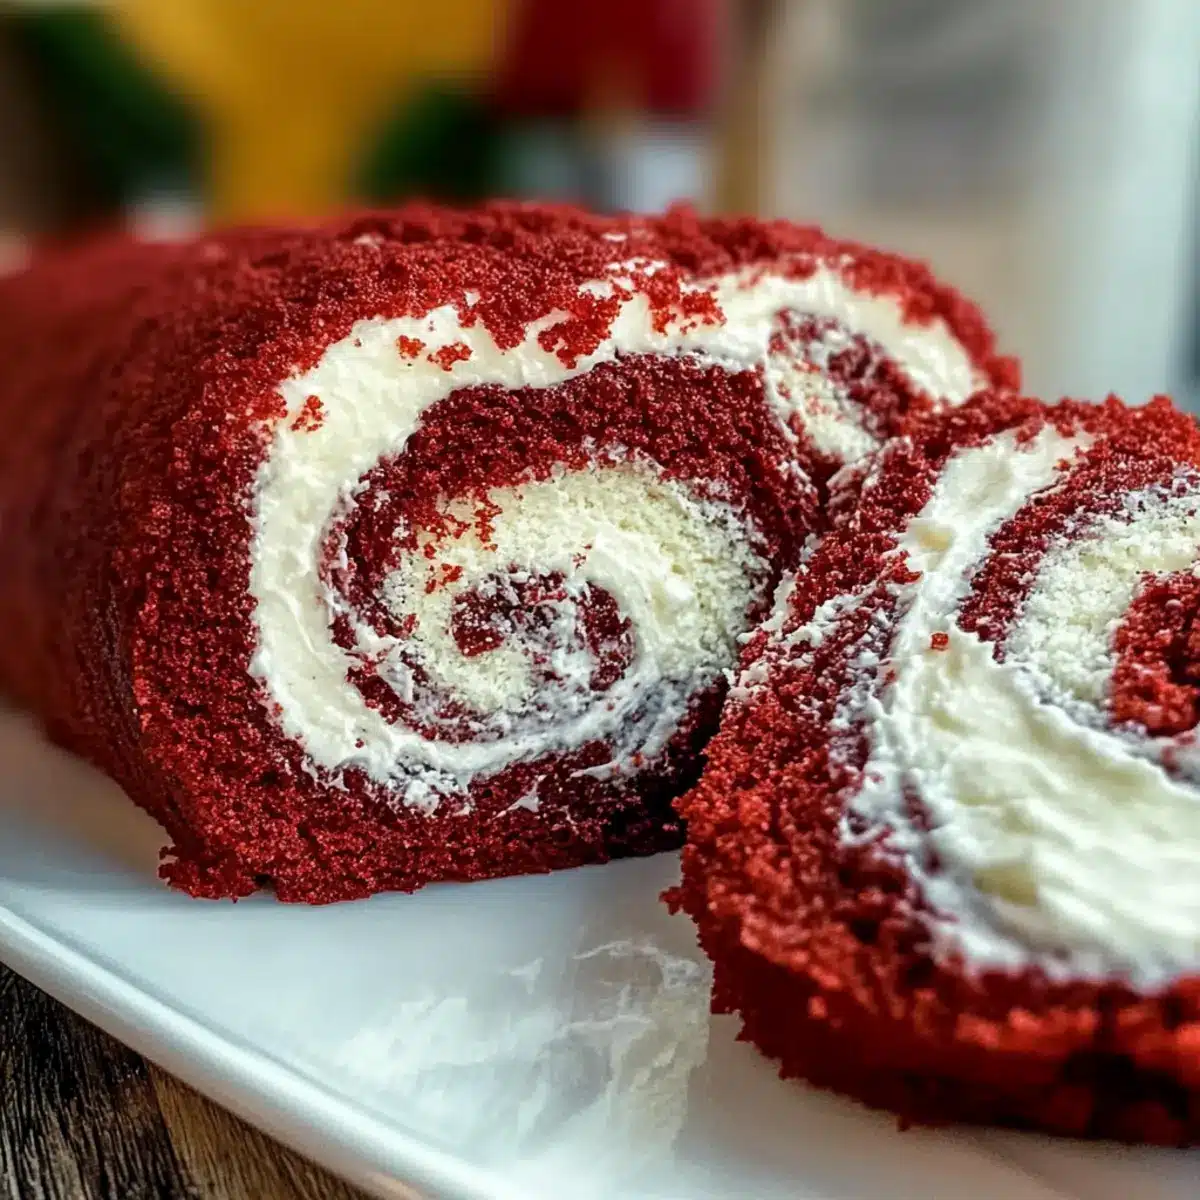
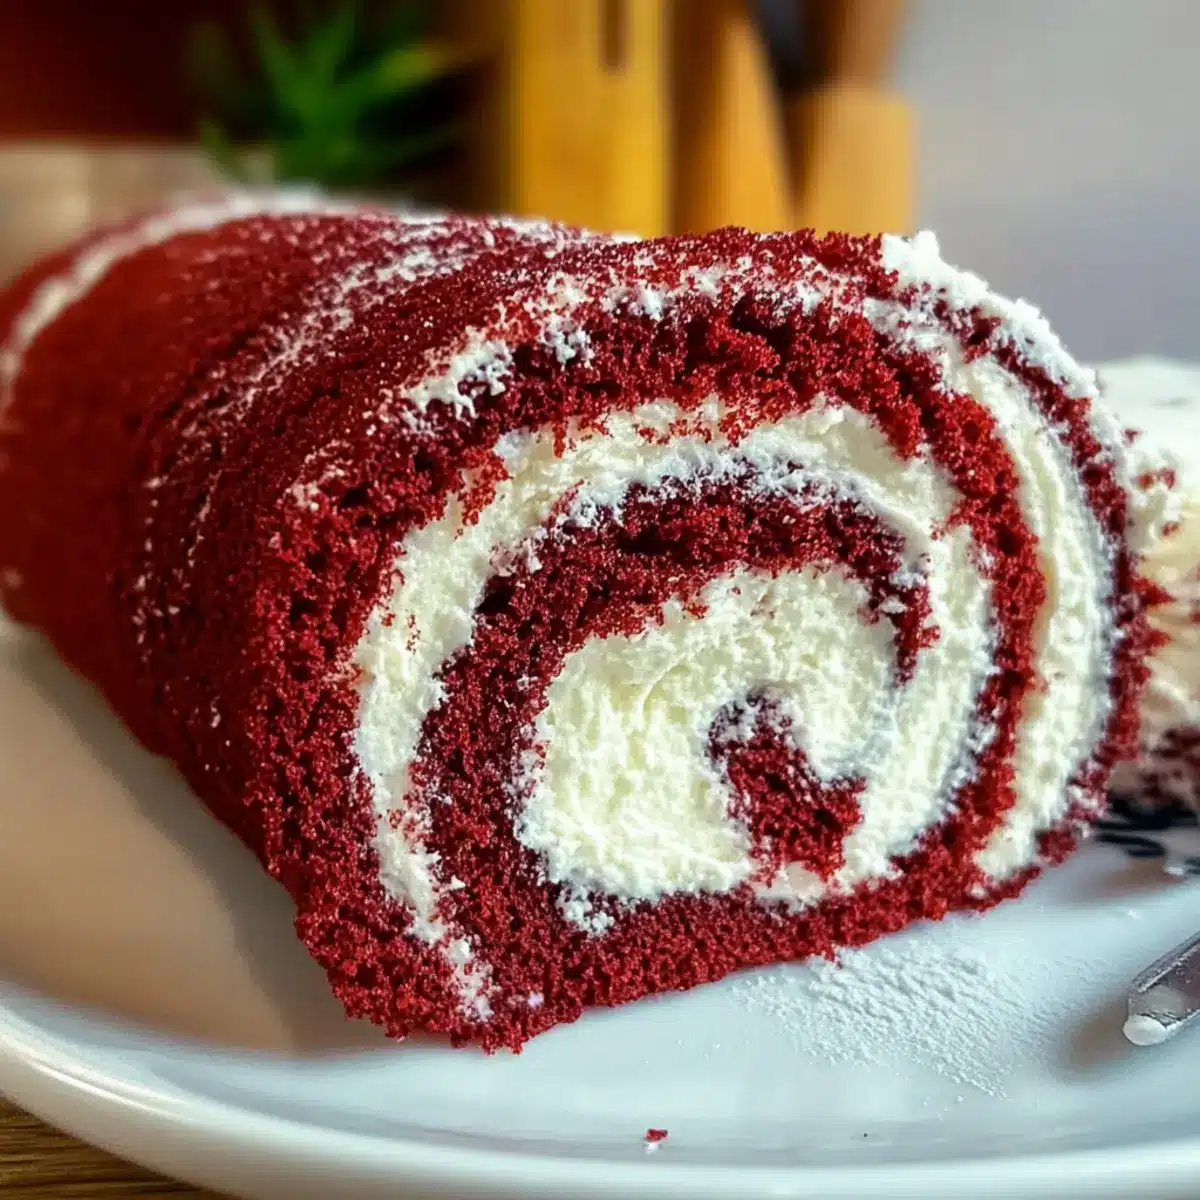
Once cooled, gently unroll the cake from the towel. Spread the cream cheese filling evenly over the surface, ensuring it reaches the edges for every slice. Carefully roll the cake back up without the towel, creating a tight swirl and beautiful layer of filling throughout your Red Velvet Cake Roll.
Step 8: Chill and Serve
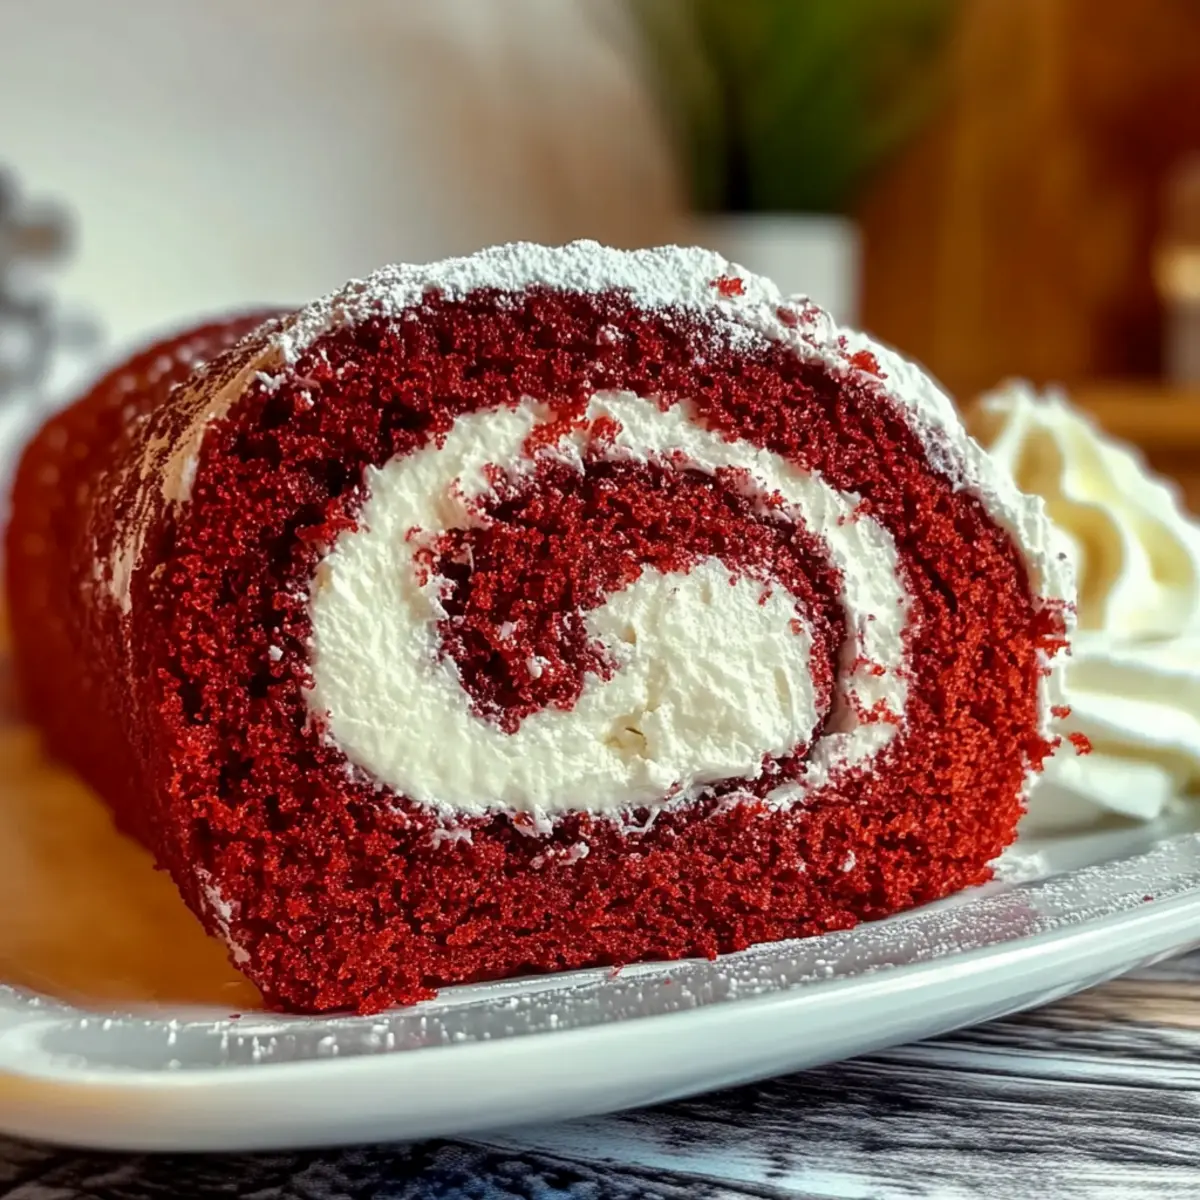
Wrap the rolled cake tightly in plastic wrap and chill it in the refrigerator for at least an hour before slicing. This helps the flavors meld together and makes slicing easier. Before serving, dust the top with additional powdered sugar for that beautiful finishing touch that showcases the elegance of this Easy Red Velvet Cake Roll.
What to Serve with Easy Red Velvet Cake Roll
Imagine the festive atmosphere as your Easy Red Velvet Cake Roll takes center stage, ready to delight every palate.
-
Whipped Cream: Adds a luscious, creamy texture that balances the sweet tang of the cream cheese filling effectively.
-
Fresh Berries: Juicy strawberries or raspberries provide a tart contrast, enhancing the dessert’s flavors with vibrant freshness.
-
Chocolate Ganache: A rich, smooth drizzle elevates the indulgent experience, blending beautifully with the cake’s lightness.
-
Mint Chocolate Chip Ice Cream: Creamy mint pairs nicely with the rich flavors of red velvet, creating a refreshing twist on each bite.
-
Spiced Chai Latte: The warm spices in this drink complement the cake’s cocoa and vanilla notes, perfect for cozy gatherings.
-
Lemon Sorbet: Its zingy brightness cleanses the palate and adds a zesty touch against the cake’s sweetness.
-
Toasted Coconut Flakes: Sprinkle these on top as a crunchy topping, enhancing both flavor and visual appeal—perfect for tropical vibes.
-
Salted Caramel Sauce: Drizzled over the cake, this sauce adds a decadent sweet-salty contrast that enhances the overall flavor profile.
How to Store and Freeze Red Velvet Cake Roll
Room Temperature: Store the Red Velvet Cake Roll at room temperature for up to 1 day to maintain its moist texture, but it’s best kept in the fridge for longer freshness.
Fridge: Wrap leftovers tightly in plastic wrap or aluminum foil and refrigerate for up to 3 days; this keeps the cake from drying out while preserving the cream cheese filling’s flavor.
Freezer: For longer storage, freeze the rolled cake, well-wrapped in plastic wrap and then aluminum foil, for up to 2 months. Thaw it in the fridge before serving.
Reheating: While best enjoyed chilled, if desired, you can enjoy slices of the Red Velvet Cake Roll at room temperature, or gently warm in the microwave for a few seconds—just be careful not to overheat!
Expert Tips for Perfect Red Velvet Cake Roll
-
Egg Preparation: Ensure that your eggs are beaten until they’re frothy and pale yellow. This step is crucial for achieving a light and airy Red Velvet Cake Roll.
-
Avoid Cracking: If your cake cracks when rolling, don’t fret! Use extra cream cheese filling to cover any imperfections—imperfections can be delicious too!
-
Chill Before Slicing: For cleaner cuts and a more flavorful combination, allow the rolled cake to chill in the refrigerator for at least an hour before serving.
-
Choose Quality Ingredients: Opt for pure vanilla extract and high-quality cocoa powder; these ensure a richer, more indulgent flavor in your dessert.
-
Save the Surplus: If you have leftover cream cheese filling, it makes a delightful dip for fruit or crackers—waste not, want not!
Make Ahead Options
These Easy Red Velvet Cake Rolls are perfect for busy cooks looking to save time without sacrificing flavor! You can bake the cake and roll it up up to 24 hours in advance, allowing it to cool completely before refrigerating while tightly wrapped in plastic wrap. The cream cheese filling can also be prepared ahead and stored in an airtight container in the refrigerator for up to 3 days. When you’re ready to serve, simply unroll the cake, spread the prepared filling, and roll it back up. Chill briefly before slicing for a refreshing treat that dazzles your guests with minimal day-of effort. Enjoy the convenience and deliciousness of this make-ahead dessert!
Red Velvet Cake Roll Variations
Feel free to explore these exciting twists on your delectable Red Velvet Cake Roll! Each option adds a unique flavor and flair to make your dessert even more special.
- Natural Food Coloring: Substitute equal parts of beet juice for food coloring for a vibrant, natural hue without compromising taste.
- Chocolate Ganache Filling: Swap the cream cheese filling for rich chocolate ganache for a luxurious indulgence that chocolate lovers will adore.
- Berry Cream Filling: Try a fruity twist by mixing fresh berries into your cream cheese filling for a refreshing burst of flavor.
- Nutty Crunch: Fold in crushed walnuts or pecans into the filling for an exciting textural contrast in every slice.
- Coconut Bliss: Add shredded coconut to the cream cheese filling for a tropical flair that pairs beautifully with the cake’s richness.
- Spicy Kick: Spice things up by incorporating a pinch of cayenne pepper into the batter or filling for a surprising heat that balances the sweetness.
- Dairy-Free Version: Replace cream cheese and butter with coconut cream for a dairy-free filling that still delivers creaminess.
- Flavor Infusions: Swap vanilla extract for almond or hazelnut extract for a different aroma and flavor profile, adding an unexpected twist.
With these variations, you can keep impressing your family and friends with a new take on this classic dessert while also exploring other recipes like our Coconut Cloud Cake or the light and zesty Italian Lemon Cake. Enjoy your culinary adventure!
Red Velvet Cake Roll Recipe FAQs
What type of cocoa powder should I use for the Red Velvet Cake Roll?
For the richest flavor and deepest color in your Red Velvet Cake Roll, opt for Dutch-processed cocoa powder. This type of cocoa has been treated to neutralize its acidity, resulting in a smoother, more intense chocolate taste that complements the cake’s vibrant hue beautifully.
How should I store leftovers of the Red Velvet Cake Roll?
After enjoying your delightfully soft Red Velvet Cake Roll, wrap any leftovers tightly in plastic wrap or aluminum foil and store them in the refrigerator. This will keep the cake fresh for up to 3 days while maintaining its moisture and the cream cheese filling’s flavor. When you’re ready to indulge again, simply slice and serve!
Can I freeze the Red Velvet Cake Roll?
Absolutely! To freeze your Red Velvet Cake Roll, make sure it’s well-wrapped in plastic wrap and then in aluminum foil to prevent freezer burn. It can be stored in the freezer for up to 2 months. When you’re ready to enjoy it, thaw the cake in the refrigerator overnight before serving for the best texture and flavor.
What should I do if my cake cracks while rolling?
If your Red Velvet Cake cracks during the rolling process, don’t worry—these things happen! Simply use some of the extra cream cheese filling as a “glue” to patch up the cracks. Spread the filling over the cracks for a delicious disguise. This way, your roll will look just as appealing and taste exquisite!
Is this recipe safe for individuals with nut allergies?
Yes! This Red Velvet Cake Roll is completely nut-free, making it a great choice for those with nut allergies. Always check the labels of your ingredients, especially the baking powder and cocoa powder, to ensure they haven’t been cross-contaminated. Enjoy this delicious and safe dessert worry-free!
Irresistible Red Velvet Cake Roll for Easy Celebrations
Ingredients
Equipment
Method
- Preheat your oven to 350°F (175°C) and prepare a baking pan by lining it with foil and spraying with cooking spray.
- In a mixing bowl, beat the eggs for 3-5 minutes until frothy. Gradually add sugar and mix for another 2 minutes.
- Gently add oil, baking powder, salt, vanilla extract, and cocoa powder to the egg mixture. Mix until just combined, then fold in flour.
- Spread the batter in the baking pan and bake for 10-15 minutes until set and lightly browned.
- Transfer the baked cake to a powdered sugar-dusted towel and roll it up, then cool completely.
- Beat cream cheese and butter together, then add powdered sugar and vanilla for the filling.
- Unroll the cooled cake, spread the filling evenly, then roll it back up without the towel.
- Wrap the rolled cake in plastic wrap and chill for at least an hour before serving.
Leave a Reply