
As the leaves turn and the air grows crisp, I find myself craving festive bites that reflect the magic of autumn. Enter my Pumpkin Patch Deviled Eggs, an easy appetizer that not only delights the eye but also warms the heart. These eggs are filled with a creamy, flavorful mixture, shaped into adorable pumpkins that are sure to spark joy at your next gathering. Not only are they a crowd-pleaser, but they also come together in a snap, making them a perfect solution for your fall festivities. So, are you ready to impress friends and family with this whimsical take on a classic dish? Let’s dive into this delightful recipe together!
Why Are Pumpkin Patch Deviled Eggs Perfect?
Visual Appeal: These adorable deviled eggs are shaped like pumpkins, instantly adding festive charm to your autumn gatherings.
Quick and Easy: With a straightforward process, you can whip up these delightful appetizers in no time, making them an effortless choice for busy cooks.
Crowd-Pleaser: Their unique look and rich flavor ensure they’ll be the star of any fall party or Thanksgiving table, captivating both kids and adults alike.
Versatile Ingredients: Feel free to customize the filling with your favorite spices or herbs to suit your taste. You can even use alternative ingredients like Greek yogurt for a lighter option!
Make-Ahead Friendly: With tips for preparing the eggs and filling in advance, you can enjoy stress-free entertaining! For additional inspiration, check out our simple appetizers.
Pumpkin Patch Deviled Eggs Ingredients
For the Filling
- Large Eggs – The base of these deviled eggs; choose fresh ones for easy peeling.
- Mayonnaise – Adds creaminess and binds the yolk filling; substitute with Greek yogurt for a lighter taste.
- Yellow Mustard – Balances the filling’s richness with tang; Dijon can replace for a bolder flavor.
- Salt – Enhances overall flavor; adjust according to your preference.
- Black Pepper – Adds a subtle kick, use freshly cracked for the best taste.
- Paprika – Offers warmth and color; smoked paprika provides a unique twist.
- Orange Food Coloring (optional) – Enhances the pumpkin hue for a festive look; use sparingly for best results.
- Fresh Chives – Great for garnish and forming pumpkin “stems”; can be swapped with parsley or dill if desired.
For the Garnish
- Extra Paprika – A final sprinkling for added flavor and color on the finished eggs.
- Chopped Roasted Red Pepper – For creativity, use small pieces as decorative pumpkin stems for an extra visual touch.
With these Pumpkin Patch Deviled Eggs ingredients at hand, you’re ready to put together a delightful and festive appetizer that will leave your guests gobbling for more!
Step‑by‑Step Instructions for Pumpkin Patch Deviled Eggs
Step 1: Boil Eggs
Begin by arranging large eggs in a single layer in a medium saucepan, then cover them completely with cold water. Bring the water to a rapid boil over medium-high heat, and as soon as it reaches a rolling boil, remove the saucepan from the heat. Cover it with a lid and let the eggs sit for 10 minutes, allowing them to cook gently in the residual heat.
Step 2: Ice Bath
While the eggs are sitting, prepare a large bowl filled with ice and cold water. After 10 minutes, carefully transfer the hot eggs into the ice bath to stop the cooking process. Let them cool for at least 5 minutes, which will help make peeling the eggs a breeze and ensure they won’t continue to cook.
Step 3: Peel Eggs
Once the eggs are cool, gently crack each shell by rolling them on a countertop. Begin peeling under cool running water to help loosen the shell and to make the process easier. Aim to remove the shells in larger pieces to minimize any damage to the egg whites, keeping them intact for your delightful Pumpkin Patch Deviled Eggs.
Step 4: Mix Filling
Slice each peeled egg in half lengthwise and gently scoop the yolks into a mixing bowl. Add mayonnaise, yellow mustard, salt, black pepper, paprika, and optional orange food coloring to the yolks. Mash the mixture with a fork until it’s flawlessly smooth and creamy, adjusting the seasonings to taste. This flavorful filling will become the heart of your charming deviled eggs.
Step 5: Pipe Filling
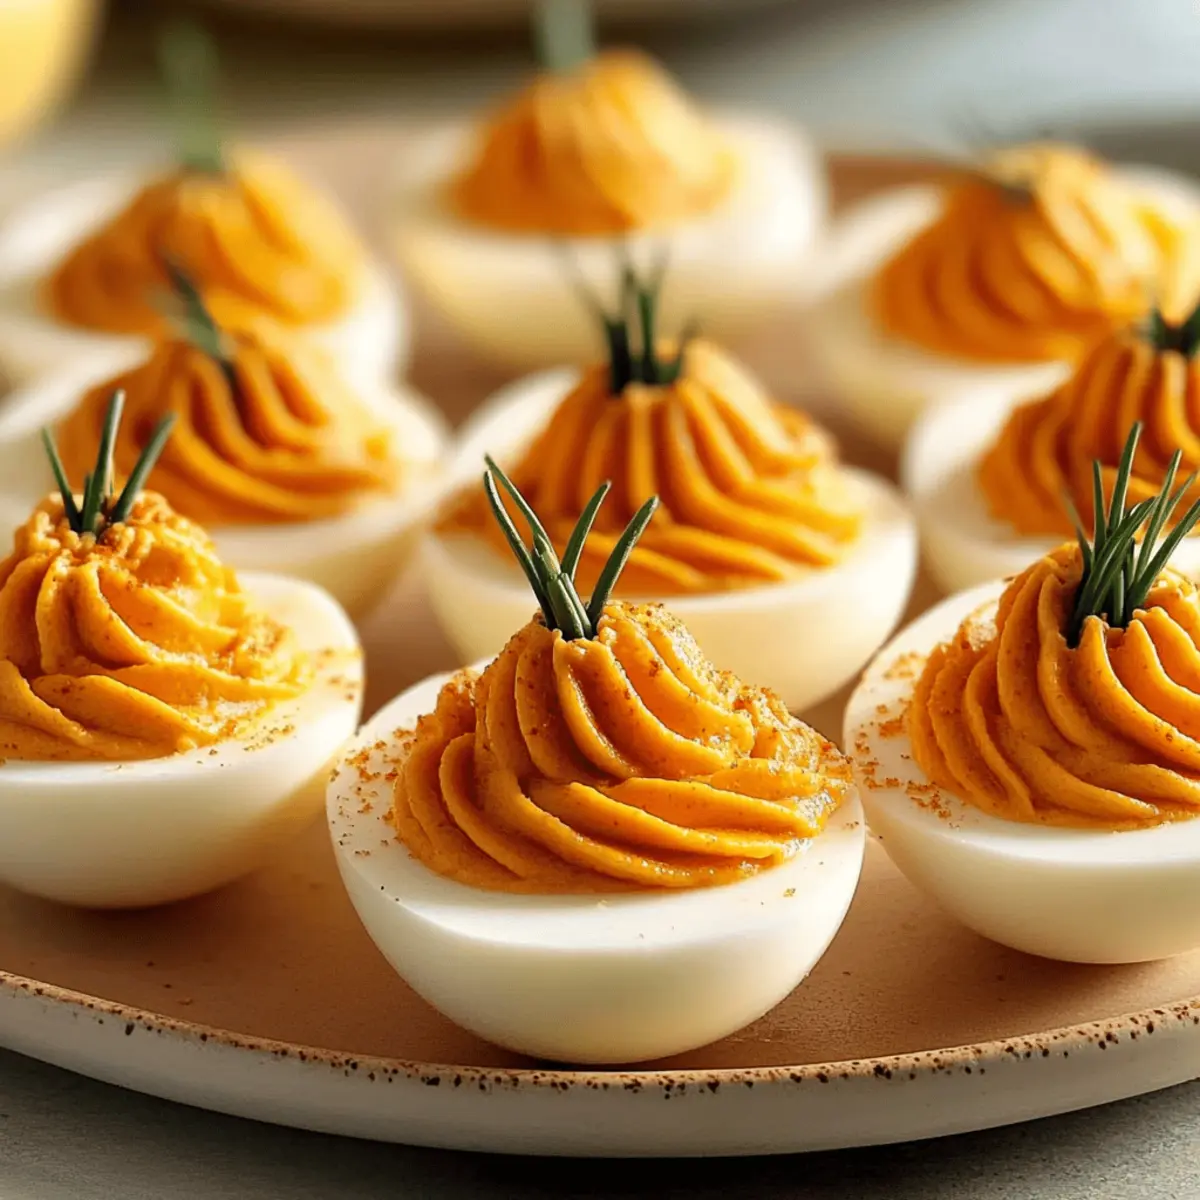
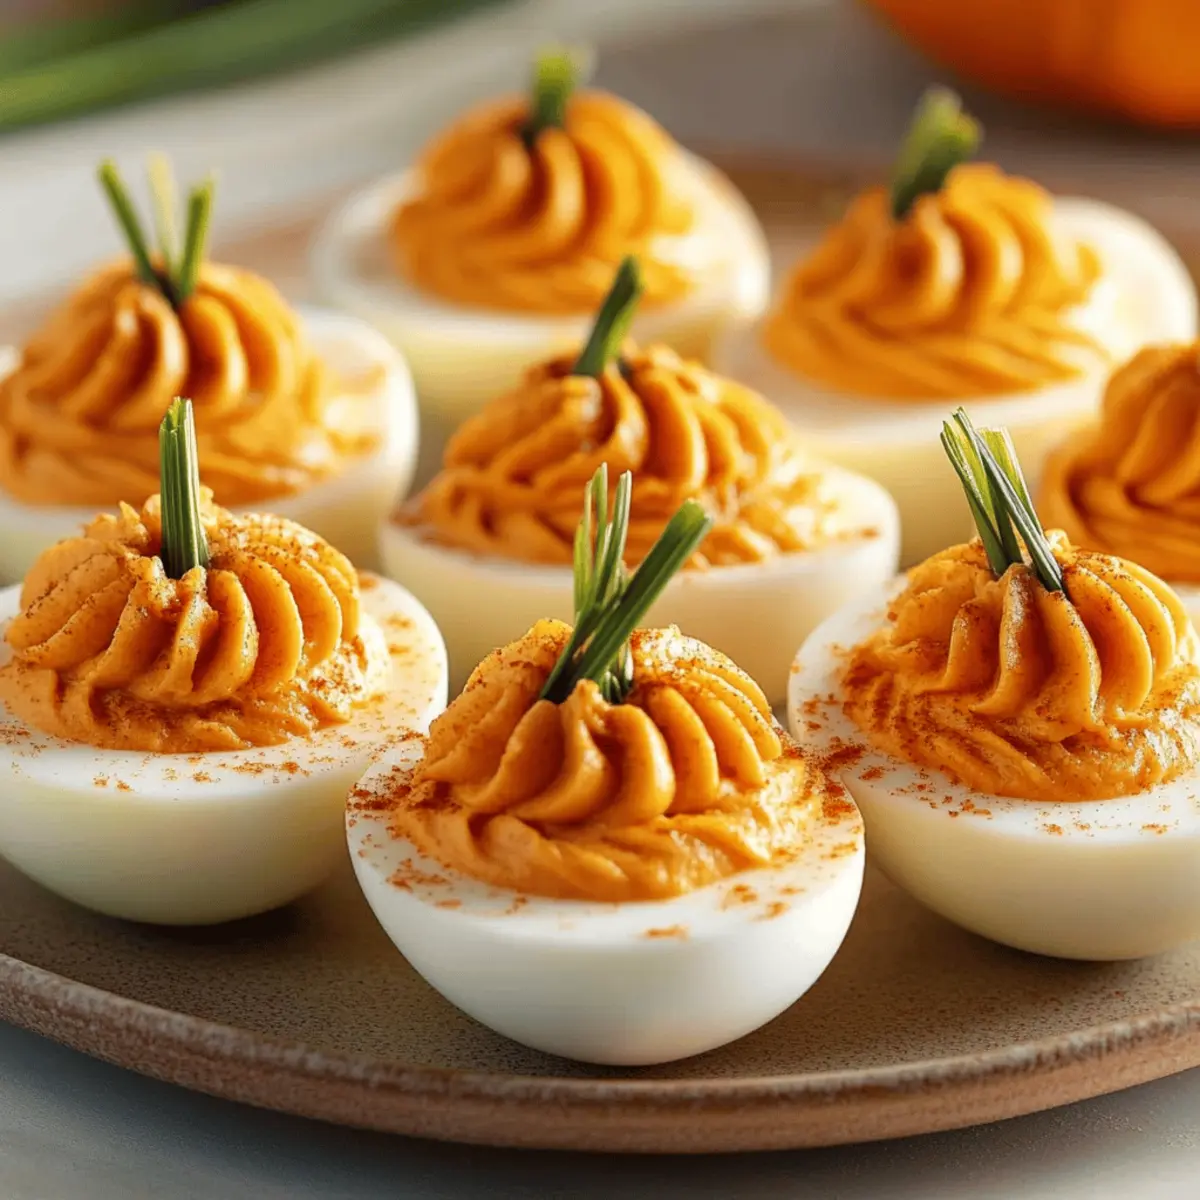
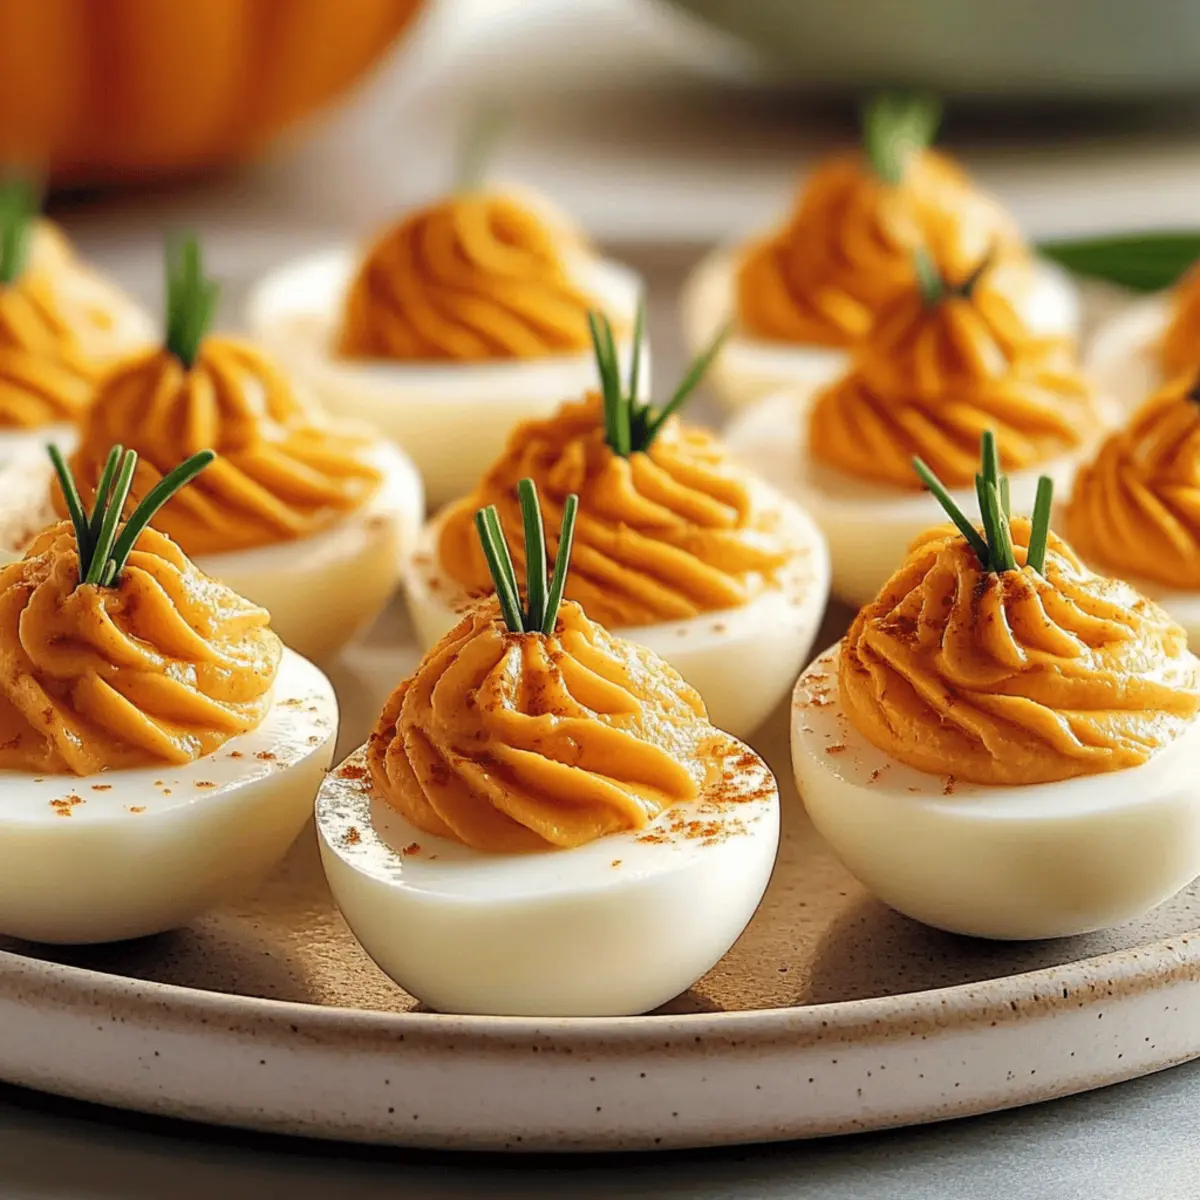
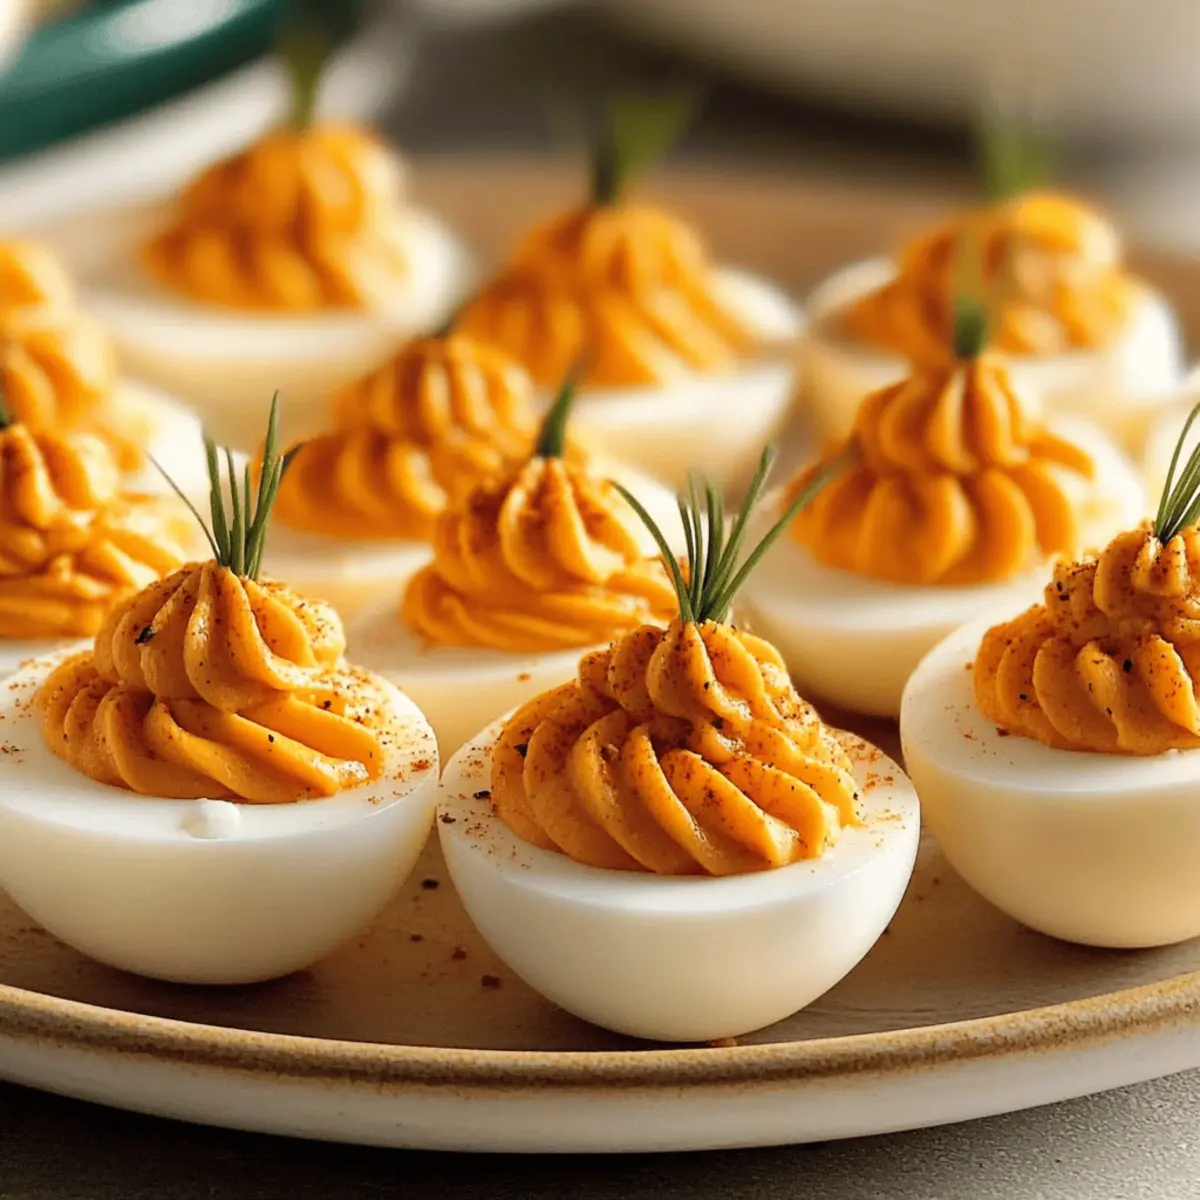
Transfer the luscious yolk mixture into a piping bag fitted with a star tip. Carefully pipe the mixture into the hollowed egg whites, creating generous and charming mounds that resemble miniature pumpkins. Use a steady hand to achieve a beautiful shape for your Pumpkin Patch Deviled Eggs, ensuring each one looks inviting.
Step 6: Create Texture
To enhance the pumpkin-like appearance, use a knife or a toothpick to gently create ridges in the piped filling. Make sure to run the tool vertically and evenly around the filling to mimic the texture of a pumpkin, adding a playful touch to your dazzling appetizer that will catch the eye of guests.
Step 7: Garnish
Lastly, to finish your Pumpkin Patch Deviled Eggs, insert small pieces of chives into the tops of each “pumpkin” to serve as the stems. Lightly sprinkle the eggs with extra paprika for an added touch of warmth and color, then chill the completed eggs for at least 30 minutes before serving, allowing the flavors to meld beautifully.
Expert Tips for Pumpkin Patch Deviled Eggs
- Fresh Eggs: Use eggs that are 7-10 days old for easier peeling; overly fresh eggs can stick to the shell and become a messy challenge.
- Ice Bath Importance: Don’t skip the ice bath! It halts cooking and makes peeling much simpler, resulting in perfectly intact egg whites.
- Smooth Filling: For a velvety texture, push the yolk mixture through a fine-mesh sieve. This helps eliminate any lumps and elevates your Pumpkin Patch Deviled Eggs.
- Piping Technique: Apply consistent pressure while piping the filling to create inviting shapes; gradually build the height for a more attractive presentation.
- Seasoning Adjustments: Taste as you go. Start with less salt and pepper, adding more until your personalized flavor shines through in every bite.
Storage Tips for Pumpkin Patch Deviled Eggs
Fridge: Store leftover Pumpkin Patch Deviled Eggs in an airtight container for up to 2 days to maintain freshness and flavor. Avoid stacking to prevent damage.
Make-Ahead: Prepare the eggs and filling in advance; boiled eggs can be stored in the fridge for up to 3 days before assembly.
Serving Temperature: Serve the deviled eggs chilled for the best taste, enhancing their creamy texture and delightful visual appeal.
Reheating: These deviled eggs are best enjoyed cold; avoid reheating to maintain their lovely presentation and creamy filling.
Pumpkin Patch Deviled Eggs Variations
Unleash your creativity in the kitchen with these delightful twists on Pumpkin Patch Deviled Eggs!
- Spicy Twist: Add cayenne pepper or a dash of hot sauce to the yolk mixture for a fiery kick that will excite your taste buds.
- Herb-Infused: Swap chives with fresh basil or dill for a fragrant herb infusion that adds a unique flavor profile to each bite.
- Smoky Flavor: Use smoked paprika instead of regular for a rich, smoky depth that complements the creamy filling beautifully.
- Creamy Variant: For a lighter touch, substitute mayonnaise with Greek yogurt; it offers a tangy flavor plus lower calories!
- Flavorful Add-ins: Fold in finely chopped roasted red peppers into the yolk filling for added texture and color, creating an eye-catching feature.
- Vegan Alternative: Substitute eggs with avocado for a creamy, plant-based filling that still captures that rich taste, perfect for vegans and health-conscious diners. Check out our easy vegan appetizers for more inspiration!
- Sweet and Savory: Incorporate a hint of maple syrup into the yolk filling for a delightful contrast that dances on your palate.
- Nutty Crunch: Add crushed pecans or walnuts to the filling for a delightful crunch that enhances the texture and provides an unexpected surprise.
Enjoy mixing up these variations for a Pumpkin Patch Deviled Egg experience that’s truly one-of-a-kind!
Make Ahead Options
These Pumpkin Patch Deviled Eggs are perfect for busy home cooks looking to save time without sacrificing flavor! You can boil and peel the eggs up to 3 days in advance; simply store the cooled eggs in an airtight container in the refrigerator. For the filling, prepare the yolk mixture up to 24 hours ahead and keep it in the fridge, wrapped tightly to prevent drying. When you’re ready to serve, just pipe the filling into the egg whites and create the charming pumpkin shapes right before your guests arrive. This way, you ensure each bite is just as delicious and fresh as if they were made that day!
What to Serve with Pumpkin Patch Deviled Eggs
Create a cozy autumn feast with delightful pairings that complement the charming flavors of your deviled eggs.
-
Creamy Tomato Soup: The rich flavors of creamy tomato soup bring warmth and balance, enhancing the taste of the deviled eggs.
-
Crunchy Vegetable Platter: Fresh, crisp veggies add a satisfying crunch and contrast, making each bite of deviled eggs feel even more special.
-
Soft, Fluffy Biscuits: Buttery biscuits provide a delightful base to scoop up the manly flavors of deviled eggs, creating a harmonious bite.
-
Spiced Apple Cider: Sweet and spiced, this drink elevates the festivity of your gathering while echoing the autumnal theme perfectly.
-
Mini Quiches: These savory bites pair beautifully with the creamy richness of deviled eggs, providing an elegant, indulgent touch to your table.
-
Fall Harvest Salad: Combining fresh greens with apples and pecans adds a refreshing, crunchy element that brightens up your meal and creates a beautiful contrast in textures.
-
Pumpkin Spice Bread: A slice of this sweet bread offers a seasonal dessert that ties in beautifully with the pumpkin theme, rounding out your meal with a taste of fall.
Pumpkin Patch Deviled Eggs Recipe FAQs
What type of eggs should I use for Pumpkin Patch Deviled Eggs?
Absolutely! Using large eggs that are about 7-10 days old is ideal, as slightly older eggs peel more easily. Fresh eggs tend to stick to the shell, making the peeling process a bit daunting. For the best results, try to use eggs that have been in your refrigerator for just over a week.
How can I store leftover Pumpkin Patch Deviled Eggs?
Store your leftover Pumpkin Patch Deviled Eggs in an airtight container in the refrigerator, where they will stay fresh for up to 2 days. Be careful not to stack them, as this can cause the delicate fillings to get squished and may ruin their appearance.
Can I make the filling ahead of time?
Absolutely! You can prepare the yolk filling a day ahead of time. Just mix the ingredients as directed, place the mixture in an airtight container, and store it in the fridge. When you’re ready to assemble, simply pipe the filling into your egg whites for a quick, stress-free assembly!
How do I freeze Pumpkin Patch Deviled Eggs?
While it’s not recommended to freeze the fully assembled deviled eggs due to their delicate texture, you can freeze the egg whites and yolk filling separately. Store the cooked egg whites in a freezer-safe container for up to 3 months, and freeze the yolk filling in small portions, in a sealed bag or container. Thaw overnight in the fridge before assembly for the best freshness.
What should I do if my filling is too thick?
If you find the filling for your Pumpkin Patch Deviled Eggs is too thick, simply add a bit more mayonnaise or Greek yogurt until you achieve your desired consistency. Mix thoroughly and taste as you go—it should be creamy and pipeable without being runny!
Can I change the garnish for the deviled eggs?
Very! If chives aren’t your thing, feel free to substitute with fresh parsley or dill for a different flavor profile. You could also use finely diced roasted red pepper pieces for a creative twist as pumpkin stems, or experiment with other herbs that pair well with your yolk mixture.
Pumpkin Patch Deviled Eggs: A Whimsical Fall Treat
Ingredients
Equipment
Method
- Boil eggs by arranging them in a medium saucepan and covering with cold water. Bring to a boil, then remove from heat and let sit covered for 10 minutes.
- Prepare an ice bath while the eggs sit. After 10 minutes, transfer hot eggs to the ice bath for 5 minutes.
- Peel the eggs under cool running water for easier shell removal, aiming to keep the whites intact.
- Mix filling by scooping yolks into a mixing bowl and adding mayo, mustard, salt, pepper, paprika, and food coloring. Mash until smooth.
- Transfer filling to a piping bag fitted with a star tip and pipe into egg whites.
- Create texture with a toothpick or knife to mimic pumpkin ridges.
- Garnish with chives as stems and sprinkle with paprika. Chill for at least 30 minutes before serving.
Leave a Reply