
As the chill of autumn settles in, the excitement of Halloween creeps closer, bringing with it the perfect excuse to indulge in some playful cooking! I’m thrilled to share my recipe for Halloween Mini Pizzas that will turn your kitchen into a whimsical feast. Not only are these individual-sized delights adaptable to your taste, but they’re also fun to make—a fantastic activity for families or a spooky gathering with friends. These pizzas are ready in just 25 minutes and packed with cheesy goodness, making them a delightful and easy alternative to the usual fast food frenzy. Can you already picture the smiles on your loved ones’ faces as they build their own ghostly creations? Let’s dive into the magic of Halloween and create some delicious memories together!
Why Love Halloween Mini Pizzas?
Customizable Fun: These mini pizzas are a canvas for creativity! With various toppings, your imagination can run wild as you create ghostly faces or spooky mummy bandages.
Quick and Easy: In just 25 minutes, you can whip up this festive treat, perfect for busy weeknights or last-minute gatherings.
Family-Friendly Activity: Involve the kids in assembling their own Halloween mini pizzas, ensuring happy smiles and lasting memories.
Crowd Pleaser: With their colorful designs and cheesy flavors, these pizzas are sure to impress guests at any Halloween party—just like my tasty Mini Lemon Blueberry Cheesecakes!
Versatile Options: Use different sauces and toppings, such as pumpkin puree or even BBQ, for a unique twist. Your little ghouls will love the variety!
Deliciously Spooky: The combination of gooey cheese and crunchy crust makes each bite a delight, adding a festive touch to your autumn celebrations!
Halloween Mini Pizzas Ingredients
Get ready to create some deliciously spooky bites!
For the Crust
• Mini Pizza Crusts – Opt for store-bought convenience or impress with homemade dough for a personal touch.
For the Sauce
• Pizza Sauce – A classic base; switch it up with garlic butter or pesto for a twist that everyone will enjoy.
For the Cheese
• Shredded Mozzarella Cheese – The melt-in-your-mouth star of this dish; try cheddar or vegan cheese if you prefer!
• Mozzarella Cheese Slices – Perfect for crafting ghost shapes; cookie cutters work wonders for fun designs.
For the Toppings
• Pepperoni Slices – Adds flavor and personality; substitute with turkey pepperoni or diced vegetables for a veggie-packed variation!
• Black Olives – Ideal for creating spooky eyes; sliced jalapeños can spice things up if you’re feeling adventurous.
• Orange Bell Pepper – Use it for jack-o’-lantern faces; carrots or zucchini can add a unique twist to your pizza designs.
Let the fun begin with these Halloween mini pizzas, perfect for crafting delightful and delicious memories!
Step‑by‑Step Instructions for Halloween Mini Pizzas
Step 1: Preheat the Oven
Begin by preheating your oven to 400°F (200°C). While the oven warms up, line a baking sheet with parchment paper to prevent sticking. This step ensures that your Halloween Mini Pizzas will cook evenly, resulting in a crispy crust that you’ll love.
Step 2: Assemble the Pizzas
Once the oven is ready, place the mini pizza crusts on the prepared baking sheet. Spread a generous layer of pizza sauce evenly across each crust, allowing it to reach the edges for a flavorful bite. This flavor base will complement all the delightful toppings, setting the stage for your spooky creation.
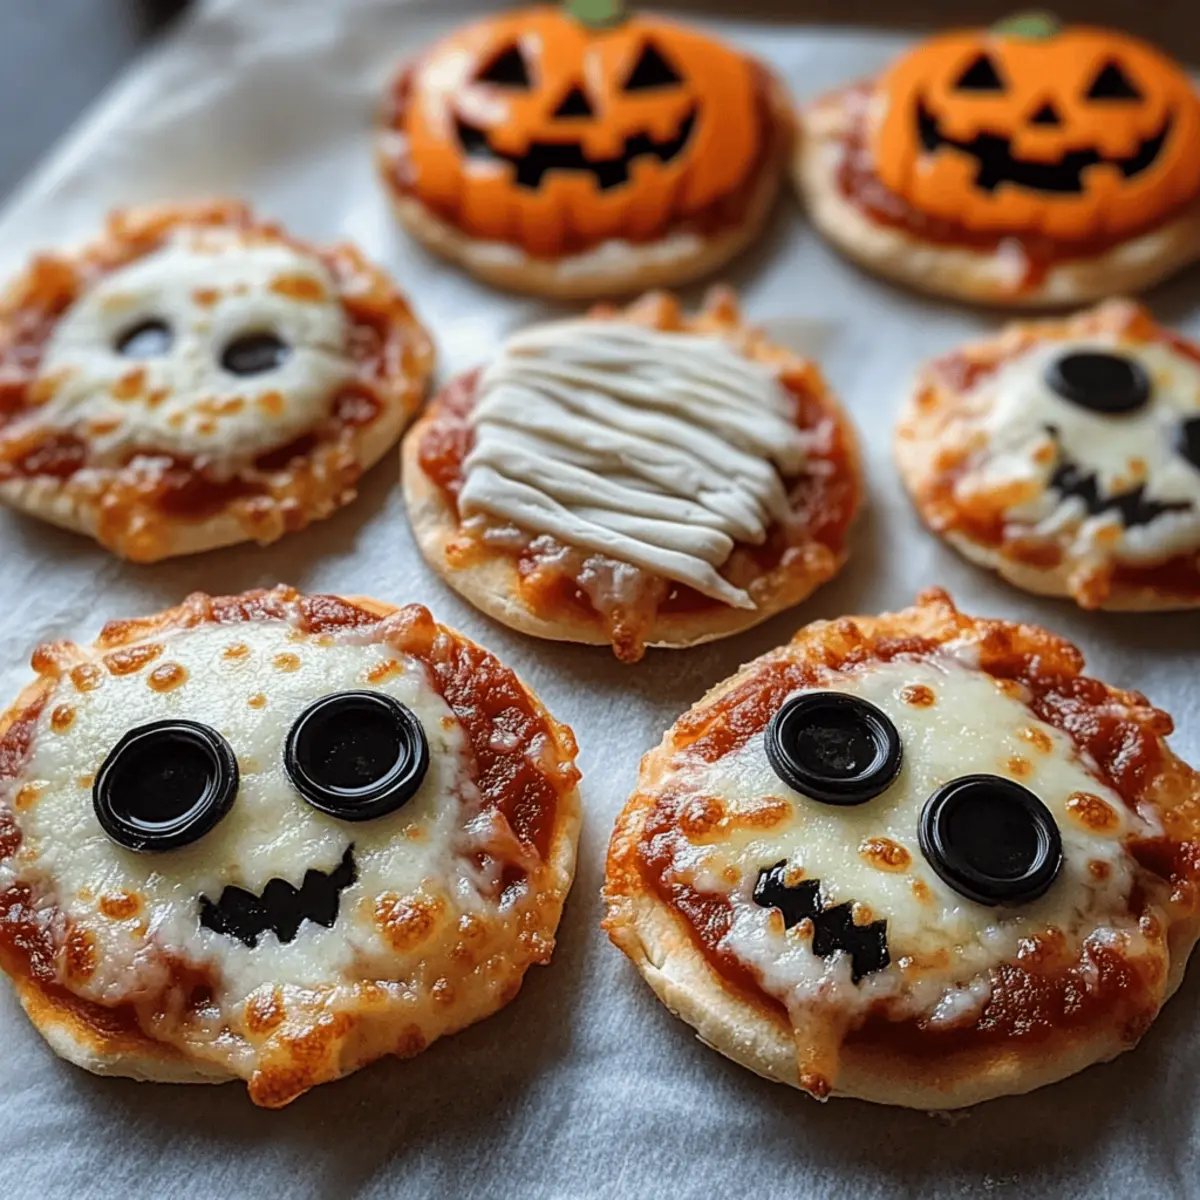
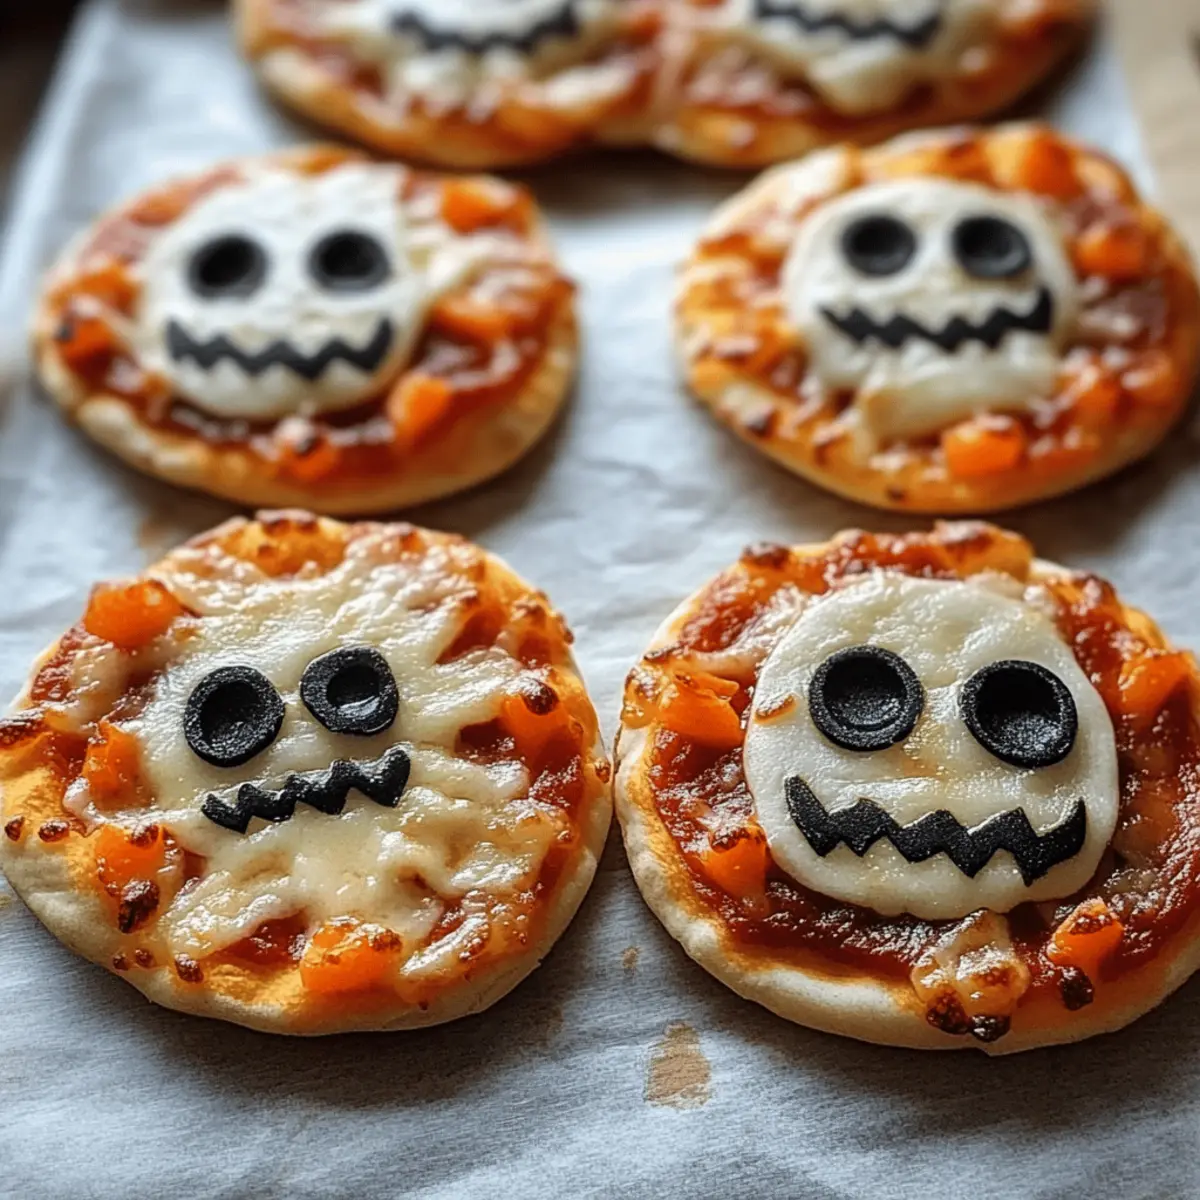
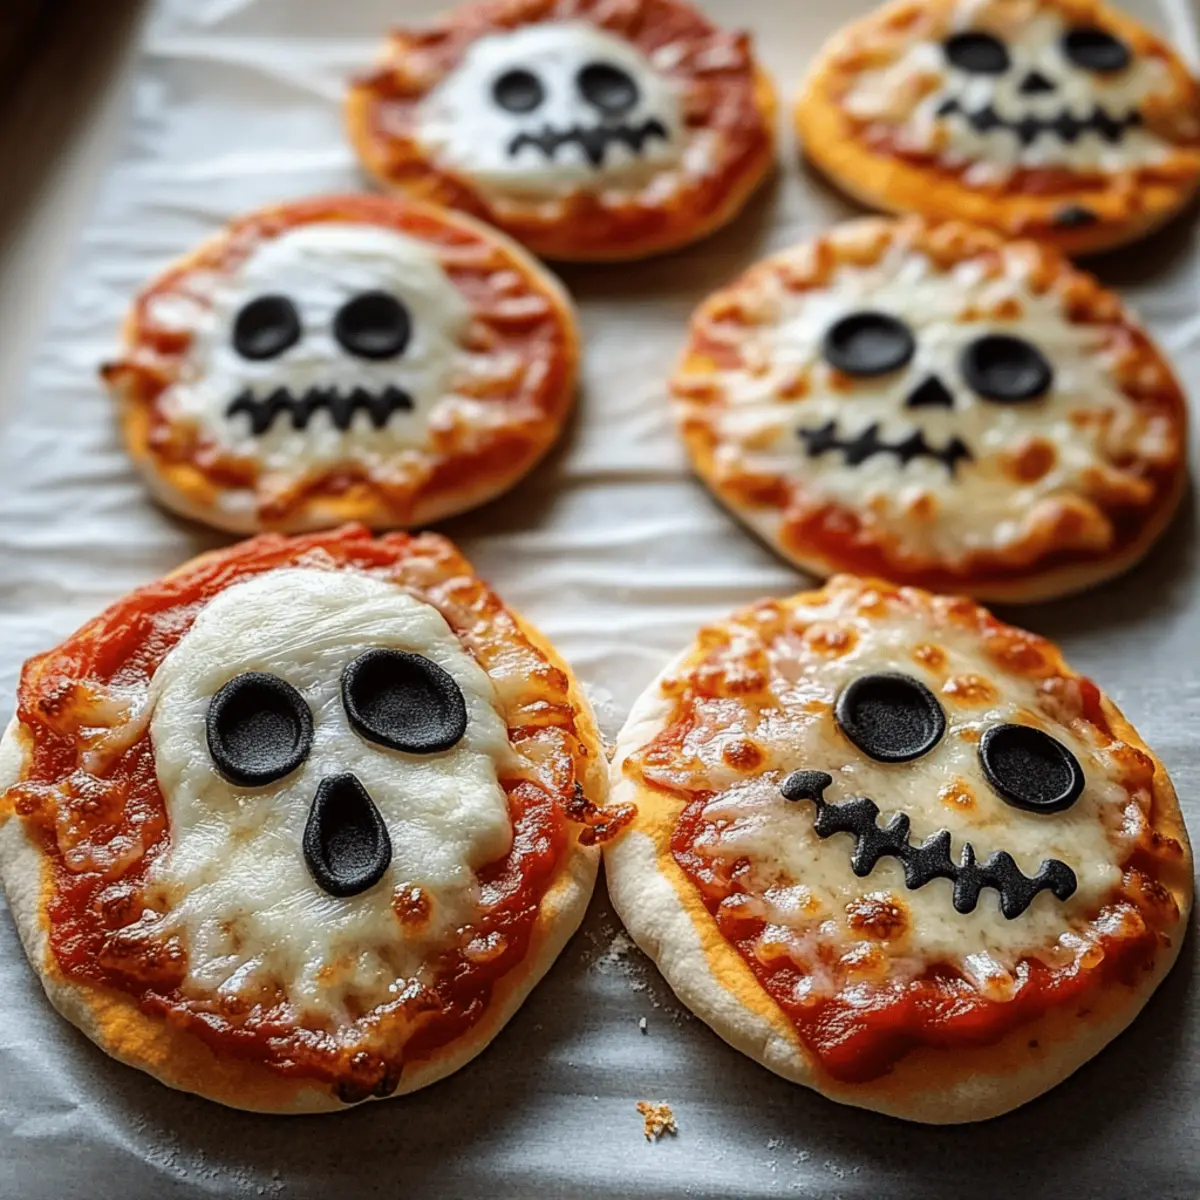
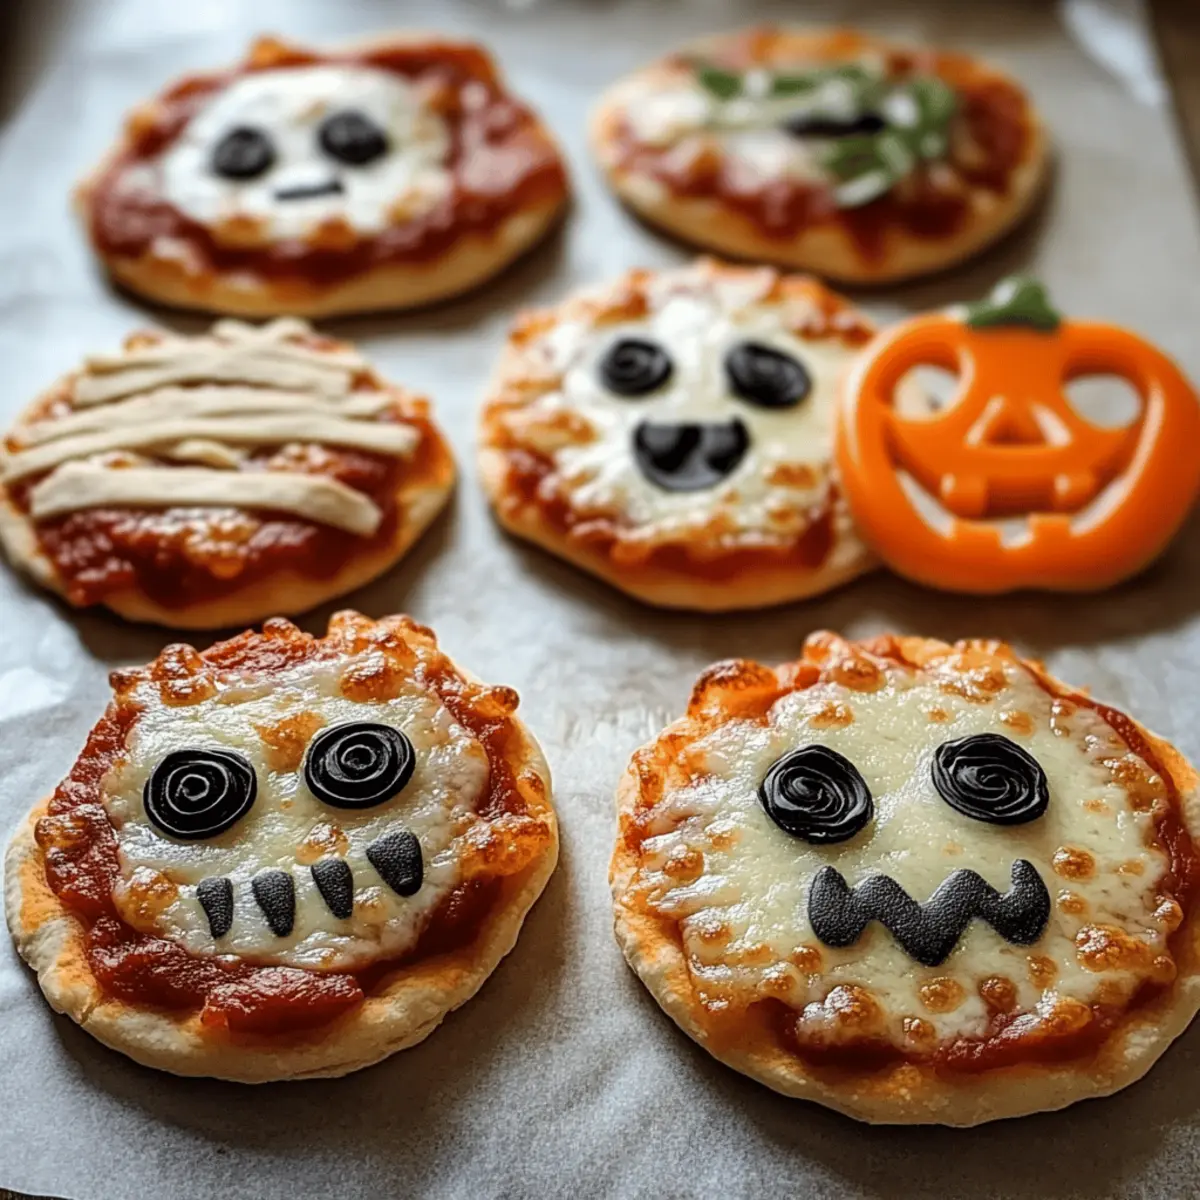
Step 3: Create Your Spooky Designs
Now it’s time to get creative! For ghost pizzas, cut ghost shapes from mozzarella slices and place them atop the sauce, adding black olive slices for creepy eyes. For mummy pizzas, layer mozzarella strips in a criss-cross manner over the sauce, leaving gaps for lively olive eyes. Finally, for jack-o’-lantern pizzas, sprinkle shredded cheese and arrange bell pepper slices to form a cute pumpkin face.
Step 4: Bake the Pizzas
Carefully place your baking sheet in the preheated oven and bake for 8-10 minutes. Keep an eye on them! The cheese should melt and become bubbly, while the crust turns a delightful golden brown. This visual cue indicates they’re ready to come out for some delicious spooky fun!
Step 5: Serve and Enjoy
After baking, let the Halloween Mini Pizzas cool slightly on the baking sheet. Serve them warm, inviting everyone to dive into their fun creations. These pizzas are perfect for sharing, sparking joy and laughter at your Halloween gathering. Enjoy the smiles as they indulge in these festive bites!
What to Serve with Mini Halloween Pizzas?
As you gather around for a spooktacular feast, the perfect accompaniments will elevate your festive celebration!
- Witch’s Brew Lemonade: This refreshing drink adds a fun twist with its vibrant green hue and hints of zesty lemon flavor. Perfect for quenching thirst while enjoying your creepy creations!
- Crispy Apple Slices: Pair your pizzas with crunchy apple slices. The natural sweetness of apples acts as a delightful contrast to the savory pizzas, making for a refreshing bite.
- Halloween Veggie Platter: Create a colorful spread of seasonal veggies, such as carrots, bell peppers, and cucumbers, served with a dip. This adds a healthy crunch to your meal!
- Spooky Fruit Salad: Combine seasonal fruits like oranges and pomegranates; the colors will remind you of Halloween. A sweet, juicy salad to balance the savory pizzas.
- Pumpkin Spice Hot Chocolate: Warm up your gathering with this rich, creamy beverage topped with whipped cream. It’s a cozy way to celebrate the season while enhancing those spooky vibes!
- Ghostly Meringue Cookies: For a sweet finale, these light and airy meringue cookies shaped like ghosts are an irresistibly cute dessert that finishes your meal on a fun note.
Expert Tips for Halloween Mini Pizzas
-
Fresh Ingredients: Use fresh toppings whenever possible to enhance flavor. Pre-packaged items may lack the zest of fresh produce, making your Halloween mini pizzas taste even better.
-
Don’t Overload: Avoid piling too many toppings on your pizzas, which can make them soggy. A balanced amount ensures the crust stays crispy and the flavors shine.
-
Cookie Cutters: Get creative with cookie cutters to shape your mozzarella slices! This fun tool adds an extra layer of spookiness and excitement to your Halloween mini pizzas.
-
Keep an Eye on Bake Time: Ovens can vary, so check your pizzas a minute or two early to prevent overcooking. You want golden-brown cheese, not burnt edges!
-
Engage the Kids: Let the children design their own Halloween mini pizzas. It turns cooking into a fun activity and allows for individual creativity while ensuring everyone gets their favorite toppings.
Make Ahead Options
These Halloween Mini Pizzas are perfect for busy home cooks looking to save time on festive occasions! You can prepare the mini pizza crusts with sauce and toppings up to 24 hours in advance. To do this, assemble each pizza by spreading sauce on the crust and adding your chosen toppings, then cover them tightly with plastic wrap and refrigerate. This keeps everything fresh and prevents the crust from getting soggy. When you’re ready to serve, simply bake the assembled pizzas for about 8-10 minutes in a preheated oven until the cheese is bubbly and golden. This way, you can enjoy delightful, spooky flavors without the last-minute rush!
Storage Tips for Halloween Mini Pizzas
-
Fridge: Store leftover Halloween mini pizzas in an airtight container for up to 3 days. This keeps them fresh while preserving that gooey cheese and crunchy crust.
-
Freezer: You can freeze these mini pizzas for up to 2 months. Wrap them tightly in plastic wrap or foil before placing them in a freezer-safe bag to maintain quality.
-
Reheating: To reheat, place the pizzas in a preheated oven at 350°F (175°C) for about 10 minutes until heated through, ensuring that crispiness returns without making them soggy.
-
Room Temperature: If serving at a gathering, these pizzas can sit out for up to 2 hours safely. If leftovers remain, make sure to refrigerate to enjoy later.
Halloween Mini Pizzas Variations & Substitutions
Feel free to unleash your creativity by adding personal twists to these festive mini pizzas!
-
Vegetarian Delight: Swap out pepperoni for your favorite veggies like mushrooms, bell peppers, or spinach for a fresh, colorful topping selection. Kids love to get hands-on with greens when they’re part of a fun design!
-
Gluten-Free Crust: Use gluten-free mini pizza crusts or cauliflower crusts to cater to dietary preferences. This option keeps the fun without compromising taste.
-
Spicy Kick: Sprinkle red pepper flakes or drizzle hot sauce over the cheese for an added zing. A dash of spice can transform the entire pizza experience!
-
Sweet Treats: Turn one of your mini pizzas into a dessert by using nut butter, banana slices, and a sprinkle of chocolate chips for a bewitching sweet treat. It’s a great way to balance savory with sweet after the main course.
-
Dairy-Free Option: Substitute traditional cheeses with a dairy-free alternative like cashew cheese or almond cheese for a vegan-friendly version. Everyone can join in on the deliciousness!
-
Unique Sauces: Get adventurous with sauces! Try a barbecue sauce base or a spicy hummus spread for a flavorful twist. Pairing different sauces will take your pizza experience to new heights.
-
Themed Faces: Use different toppings to create fun faces, like cherry tomatoes for noses or cucumber slices for hats. Each pizza can be an individual character, sure to spark smiles.
-
Snackable Versions: For a bite-sized treat, cut the mini pizzas into pinwheel shapes or small squares after baking. Perfect for serving at parties or as finger foods during your Halloween festivities!
These variations not only add flair but also accommodate everyone’s tastes, making your Halloween gathering truly spooktacular! Don’t forget to try them alongside my delicious Mini Lemon Cheesecakes or a refreshing Witch’s Brew Lemonade for a complete festive experience!
Halloween Mini Pizzas Recipe FAQs
What is the best way to select ingredients for Halloween Mini Pizzas?
Absolutely! For the freshest flavors, choose ripe and vibrant vegetables. When selecting mozzarella cheese, look for a smooth texture and avoid packages with dark spots. If using store-bought mini pizza crusts, ensure they’re within the expiration date for optimal taste.
How long can I store leftover Halloween Mini Pizzas?
Leftover pizzas can be stored in an airtight container in the fridge for up to 3 days. To keep them tasting fresh, reheat in the oven at 350°F (175°C) for about 10 minutes or until crispy!
Can I freeze Halloween Mini Pizzas?
Yes, you can freeze these delightful mini pizzas for up to 2 months! Wrap each pizza tightly in plastic wrap or foil before placing them in a freezer-safe bag. When ready to enjoy, bake them straight from the freezer at 400°F (200°C) for about 12-15 minutes until heated through.
What if my Halloween Mini Pizzas come out soggy?
Very! If you find your pizzas are soggy, ensure you’re not overloading them with toppings. Stick to a balanced amount to maintain a crispy crust. Also, pre-baking the crust for 2-3 minutes before adding sauce and toppings can help avoid this issue.
Are there any dietary considerations for Halloween Mini Pizzas?
Of course! If you’re catering to dietary preferences, opt for gluten-free mini pizza crusts or use cauliflower crust. For cheese substitutes, try dairy-free mozzarella alternatives. Remember to check for allergies when selecting toppings, especially with items like pepperoni or olives, as some may contain preservatives.
Festive Halloween Mini Pizzas That Delight and Dazzle
Ingredients
Equipment
Method
- Preheat your oven to 400°F (200°C) and line a baking sheet with parchment paper.
- Assemble the pizzas by placing the mini pizza crusts on the baking sheet and spreading pizza sauce over each crust.
- Create spooky designs using the mozzarella slices and toppings as desired.
- Bake pizzas in the oven for 8-10 minutes until the cheese is bubbly and the crust is golden.
- Serve warm and enjoy your Halloween Mini Pizzas!
Leave a Reply