
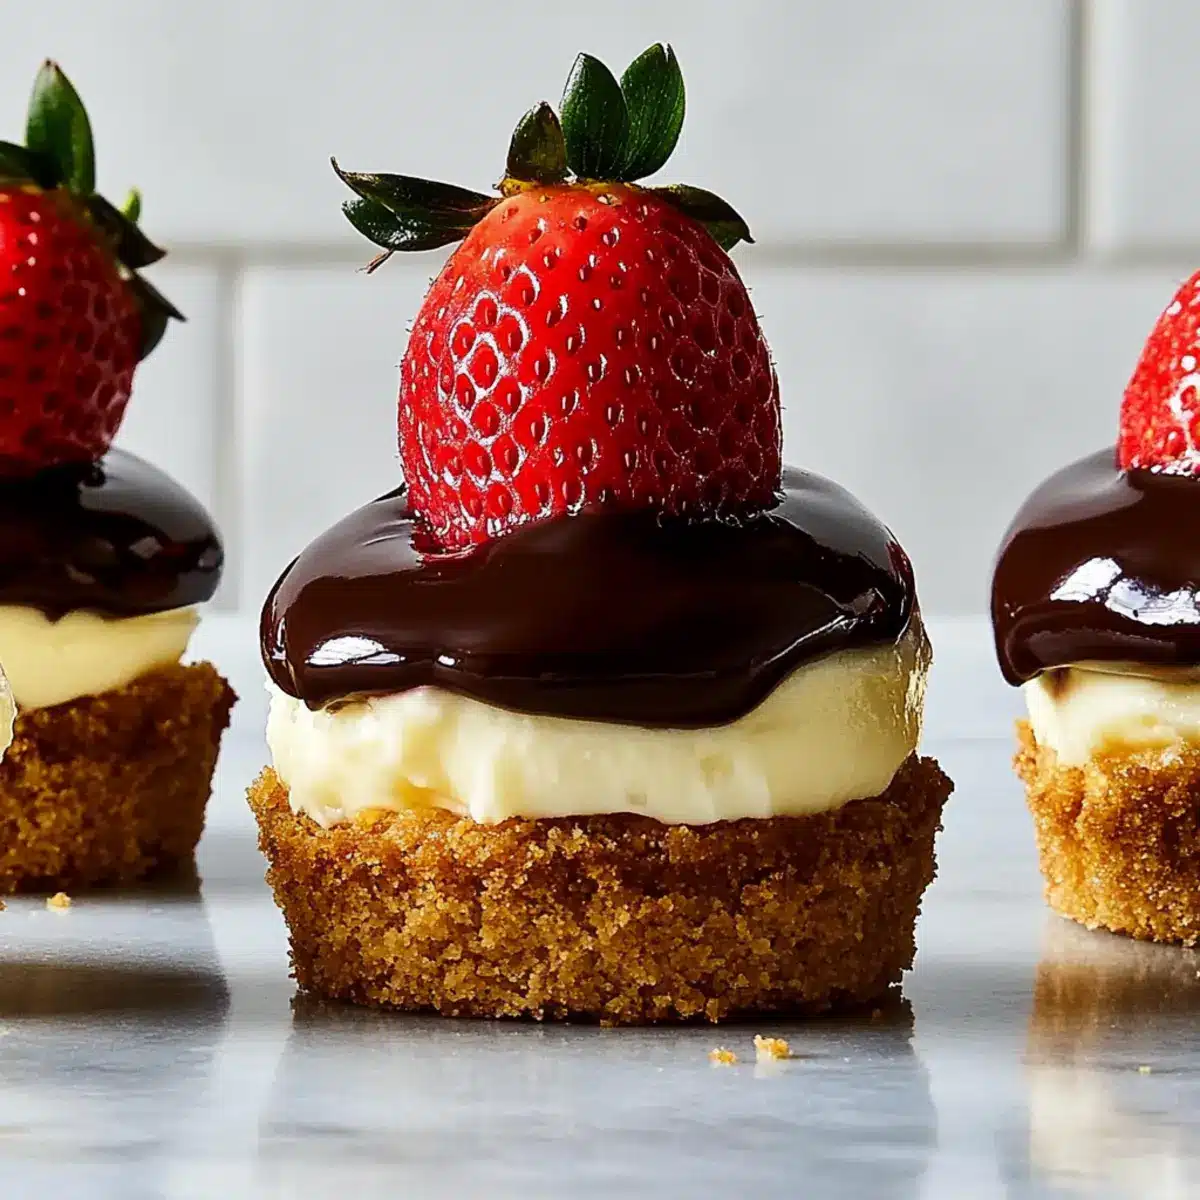
As I stirred the creamy filling for these mini chocolate-covered strawberry cheesecakes, a wave of nostalgia washed over me. It’s amazing how something so simple can evoke sweet memories—like sharing desserts after a long week, or celebrating little victories with family. These delightful cheesecakes are not only a high-protein treat that you can whip up in no time, but they’re also a guaranteed crowd-pleaser, perfect for impressing your guests or treating yourself. Combining the velvety texture of cheesecake with the richness of chocolate and the freshness of strawberries creates a dreamy bite-sized dessert that’s sure to become a favorite. Are you ready to indulge in a delicious adventure that’s just a few steps away?

Why are these cheesecakes a must-try?
Irresistible Flavor: Each mini chocolate-covered strawberry cheesecake delivers a harmonious blend of silky creaminess and decadent chocolate, with the fresh burst of strawberries setting it all apart.
High-Protein Delight: Perfect for health-conscious dessert lovers, these cheesecakes are easy to customize, ensuring you enjoy a treat without the guilt.
Quick and Easy: Rushing to prepare for guests? This recipe requires minimal time and effort, so you can focus on enjoying the moment, leaving you plenty of time for Strawberry Swirl Cheesecake or other delicious options.
No-Bake Option: Want to skip the oven? You can easily transform this into a delightful no-bake dessert, using whipped cream cheese for a light, airy texture.
Crowd-Pleasing Appeal: Whether it’s a romantic dinner or a family gathering, these mini cheesecakes are sure to wow your audience and leave them asking for more!
Chocolate-Covered Strawberry Cheesecake Ingredients
-
For the Crust
• Graham Crackers – The base structure for the cheesecake; provides crunch and texture. Substitute with gluten-free graham crackers for a gluten-free option.
• Melted Butter – Binds the crust together, adding richness; coconut oil works as a dairy-free alternative.
• Kosher Salt – Enhances the flavor profile of the crust; table salt can be used if needed. -
For the Filling
• Cream Cheese – Provides creaminess and tanginess to the cheesecake; make sure it’s softened for easy mixing. Neufchâtel can be used for a lighter option.
• Large Eggs – Essential for structure and setting the filling.
• Sour Cream – Adds creaminess and moisture; swap with Greek yogurt for a lower-fat alternative.
• Sugar – Sweetens the filling; adjust to taste or try a sugar alternative for a low-sugar version.
• Vanilla Extract – Enhances the overall flavor; almond extract can lend an interesting twist.
• Pinch of Salt – Balances sweetness in the cheesecake filling and enhances flavor. -
For the Topping
• Melted Semisweet Chocolate – Coats the strawberries and adds a rich flavor; use dark chocolate if you prefer a more intense chocolate taste.
• Strawberries – Fresh fruit that provides a sweet and vibrant contrast to the cheesecake.
These delightful chocolate-covered strawberry cheesecakes promise an unforgettable treat that’s easy to prepare and full of delicious flavor!
Step‑by‑Step Instructions for Chocolate-Covered Strawberry Cheesecakes
Step 1: Prepare the Crust
Begin by preheating your oven to 350°F (175°C). In a food processor, crush the graham crackers until finely ground. Combine the crumbs with melted butter and a pinch of kosher salt in a mixing bowl, stirring until well-mixed. Firmly press this mixture into the bottom of mini cheesecake molds to create an even crust, ensuring it’s packed down nicely so it holds together during baking.
Step 2: Mix Filling
In a large mixing bowl, add softened cream cheese, large eggs, sour cream, sugar, vanilla extract, and a pinch of salt. Using an electric mixer, beat the mixture on medium speed until it becomes smooth and creamy, which should take about 2-3 minutes. Be careful not to overmix, as this can lead to cracks in your chocolate-covered strawberry cheesecakes after baking.
Step 3: Fill Molds
Once your filling is ready, pour it evenly over the prepared crusts in each mold. Use a spatula to smooth the tops of the filling for an even finish. This will make your mini cheesecakes look neat and appetizing. Make sure not to overfill, leaving a bit of space for the cheesecakes to rise slightly during baking.
Step 4: Bake
Carefully place the filled molds in your preheated oven. Bake the chocolate-covered strawberry cheesecakes for 30 to 35 minutes, or until the edges are set and the centers have a slight jiggle. Keep an eye on them toward the end of baking to catch the perfect moment when the edges start to turn a light golden color.
Step 5: Cool and Chill
After baking, remove the mini cheesecakes from the oven and let them cool for about 10 minutes at room temperature. Once they’ve cooled a bit, transfer them to the refrigerator and chill for at least 2 hours. This chilling time is essential for the filling to set perfectly, creating that smooth, creamy texture that pairs beautifully with the chocolate-covered strawberries on top.
Step 6: Coat Strawberries
While the cheesecakes chill, prepare your strawberries. Melt semisweet chocolate in a microwave-safe bowl, heating in 30-second intervals until fully melted and smooth, about 1-2 minutes total. Once melted, dip each strawberry into the chocolate, ensuring it’s fully coated, and then place them on a piece of parchment paper to cool. Allow the chocolate to set completely before topping the cheesecakes.
Step 7: Assemble and Serve
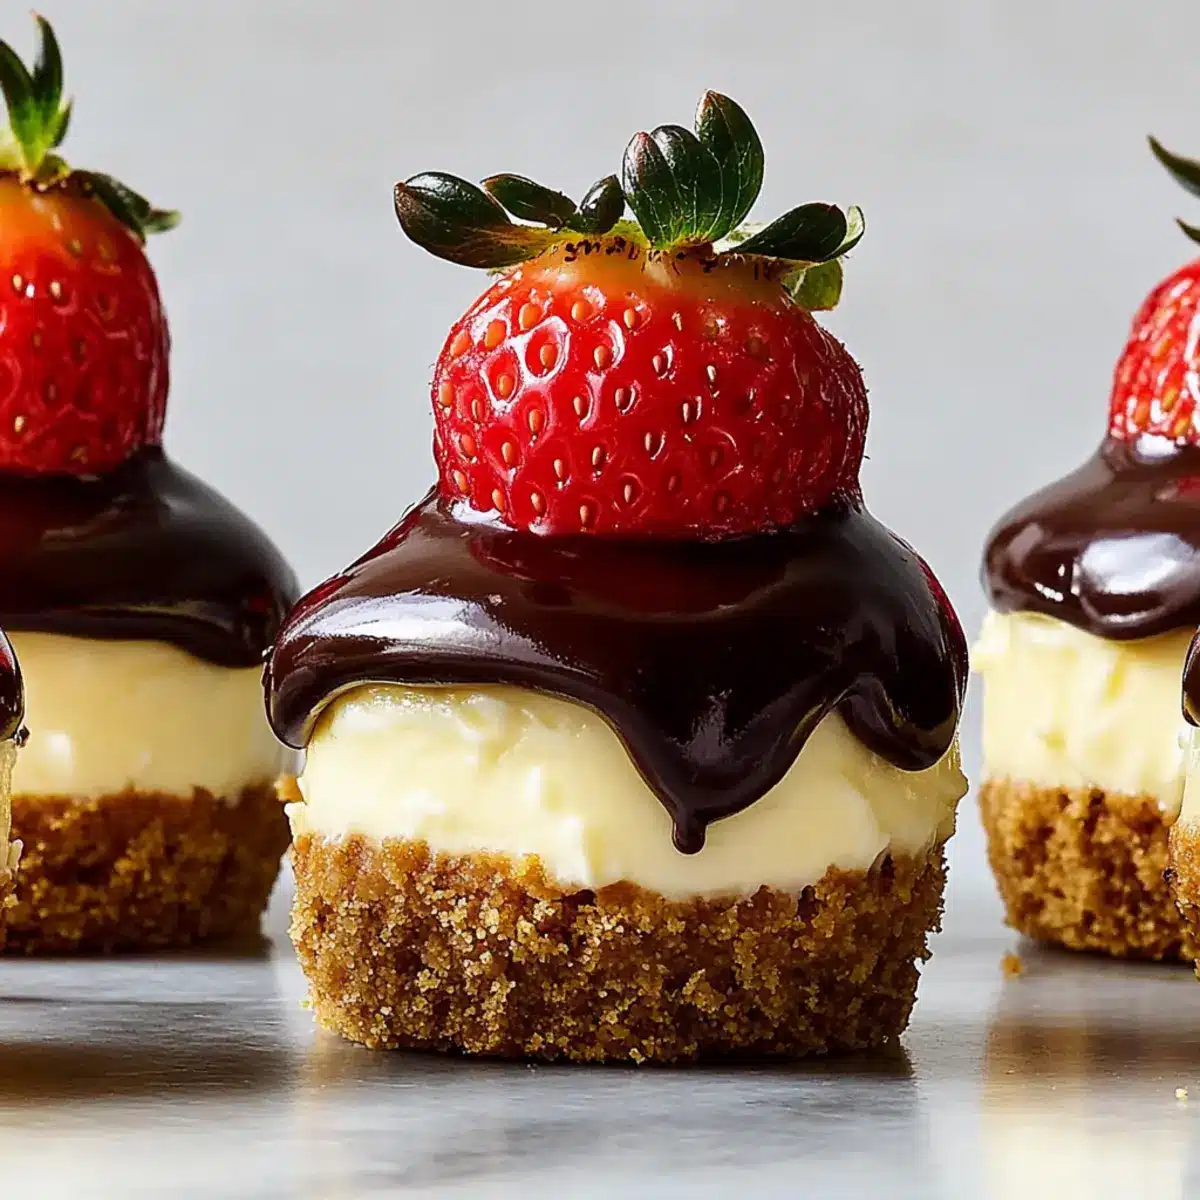
Once the chocolate has hardened on the strawberries and the cheesecakes are fully chilled, carefully place a chocolate-coated strawberry on top of each mini cheesecake. This not only adds a stunning visual appeal but also infuses each bite with vibrant flavor. Serve these delightful chocolate-covered strawberry cheesecakes to family and friends, and watch as they indulge in this decadent treat!
Make Ahead Options
These chocolate-covered strawberry cheesecakes are perfect for meal prep enthusiasts! You can prepare the crust and filling up to 3 days in advance, storing them separately in airtight containers in the refrigerator. Simply mix your graham cracker crust and creamy filling, then press the crust into the molds and refrigerate. When you’re ready to serve, bake the cheesecakes, cool them, and let them chill for at least 2 hours. For the chocolate-covered strawberries, dip them in melted chocolate right before serving to ensure they remain fresh and vibrant. This way, you’ll have a luxurious dessert ready with minimal effort on the day of your gathering!
Expert Tips for Chocolate-Covered Strawberry Cheesecakes
-
Room Temperature Cream Cheese: Ensure your cream cheese is at room temperature for a smoother filling without lumps. This will elevate your chocolate-covered strawberry cheesecakes’ texture.
-
Avoid Overmixing: Gently mix your filling just until combined. Overmixing can introduce air, leading to cracks during baking.
-
Grease Molds Well: To prevent sticking, make sure to grease your mini cheesecake molds thoroughly. Consider using parchment paper for extra security.
-
Chill Time Is Key: Don’t rush the chilling stage after baking. Allow the cheesecakes to set in the fridge for at least 2 hours, achieving that creamy perfection.
-
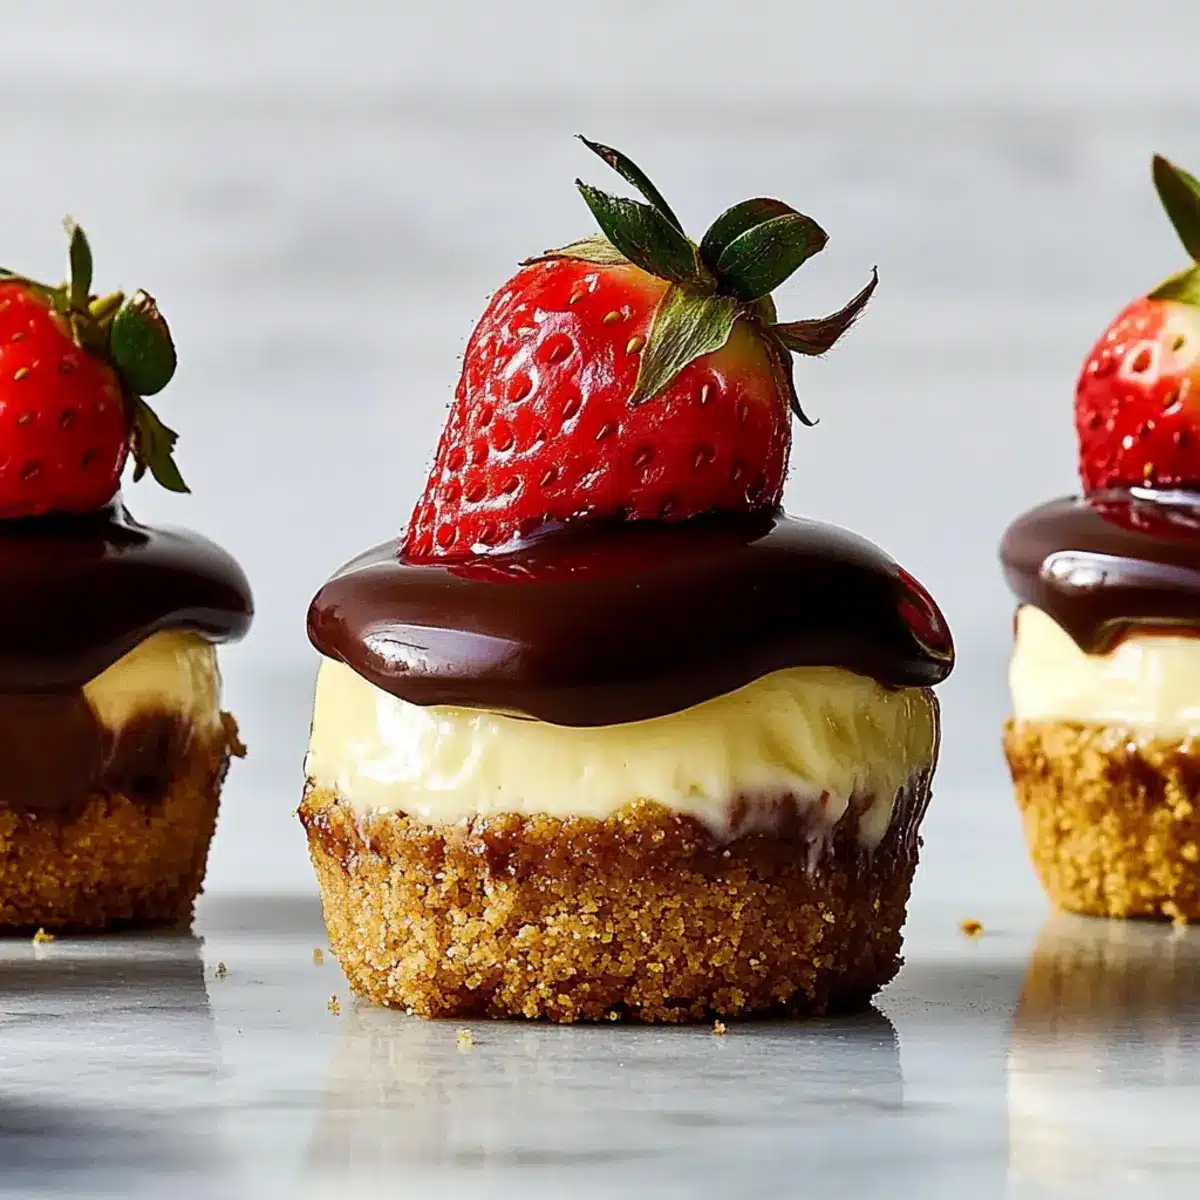
Fresh Strawberries Only: Use the freshest strawberries available to top your cheesecakes. They add a burst of flavor that beautifully complements the decadent chocolate and cheesecake.
Chocolate-Covered Strawberry Cheesecake Variations
Feel free to let your creativity shine as you customize these delightful cheesecakes to suit your taste preferences!
-
Berry Medley: Swap strawberries for juicy raspberries or blueberries for a vibrant berry mix. Each bite will surprise you with new flavors!
-
Nutty Crunch: Incorporate crushed nuts, such as almonds or hazelnuts, into your crust for an added crunch. It brings a beautiful texture contrast to the creamy filling.
-
White Chocolate Drizzle: Top your cheesecakes with a white chocolate drizzle for a stunning presentation and a sweet, creamy finish. It’s a delightful twist that adds elegance!
-
No-Bake Variation: Use whipped cream cheese instead of baked filling for an airy, no-bake option. This version is light and perfect for hot summer days!
-
Caramel Swirl: Drizzle caramel sauce through the cheesecake filling before baking for a deliciously gooey surprise. The sweetness pairs wonderfully with the tangy strawberries.
-
Dairy-Free Delight: Substitute cream cheese with a plant-based alternative and coconut yogurt for the filling to create a dairy-free treat that anyone can enjoy.
-
Add a Dash of Spice: Fold in a pinch of cinnamon or nutmeg to add warmth and depth to your cheesecake filling. It transforms your dessert into a cozy indulgence.
These mini cheesecake variations beckon you to explore further delicious adventures, maybe even pairing them with treats like Strawberry Brownies Resist or Mini Lemon Cheesecakes. Enjoy!
How to Store and Freeze Chocolate-Covered Strawberry Cheesecakes
Fridge: Store your chocolate-covered strawberry cheesecakes in an airtight container in the refrigerator for up to 3 days to keep them fresh and prevent odor absorption.
Freezer: If you want to make them ahead of time, freeze the cheesecakes (without the strawberries) for up to 2 months. Wrap each cheesecake tightly in plastic wrap and place in a freezer-safe container.
Defrosting: To enjoy frozen cheesecakes, transfer them to the fridge to thaw overnight. Add chocolate-covered strawberries just before serving for the best freshness.
Reheating: These cheesecakes are best served cold or at room temperature, so no reheating is necessary! Enjoy the creamy texture and burst of flavor as is.
What to Serve with Mini Chocolate-Covered Strawberry Cheesecakes?
Elevate your dessert experience by pairing these delightful mini cheesecakes with complementary sides and refreshing beverages.
-
Whipped Cream: A dollop of lightly sweetened whipped cream adds a cloud-like texture that enhances the cheesecakes’ creaminess while balancing the chocolate’s richness.
-
Fresh Mint Leaves: Bright, aromatic mint leaves bring a burst of freshness. They create a lovely contrast against the sweetness of the cheesecakes, making every bite memorable.
-
Sparkling Lemonade: The citrusy zing of sparkling lemonade provides a refreshing contrast, lifting the rich chocolate flavors while also cleansing the palate.
-
Chocolate Drizzled Fruit Salad: A medley of colorful fruit drizzled with extra chocolate harmonizes beautifully with the mini cheesecakes, amplifying their chocolatey goodness while adding vibrant textures.
-
Coffee or Espresso: A cup of well-brewed coffee complements the sweet, rich flavors of the cheesecakes, enhancing their taste while offering a comforting warmth to the dessert experience.
-
Mini Cheesecake Bites: Pairing with an assortment of other cheesecake bites lets guests enjoy different flavors while keeping the same creamy texture, making for an exciting dessert table.
-
Vanilla Ice Cream: A scoop of rich vanilla ice cream provides a creamy contrast to the chocolate and strawberry flavors, creating a delightful indulgence that’s sure to please.
-
Red Wine: For a sophisticated touch, serve these cheesecakes with a glass of red wine. The pairing creates a lovely blend of flavors, perfect for a romantic evening.
Chocolate-Covered Strawberry Cheesecakes Recipe FAQs
How do I choose ripe strawberries for my cheesecakes?
Absolutely! Look for strawberries that are firm, vibrant red, and free from dark spots. The larger the strawberries, the more luscious they will look atop your cheesecakes. I recommend looking for berries that are glossy and smell sweet—those are usually the freshest!
How should I store leftover cheesecakes?
Very simple! Store your chocolate-covered strawberry cheesecakes in an airtight container in the refrigerator for up to 3 days. This helps maintain their freshness while preventing them from absorbing any unwanted odors from your fridge. Just make sure not to stack the cheesecakes to preserve their topped strawberries.
Can I freeze chocolate-covered strawberry cheesecakes?
Yes, you can! To freeze, make sure to wrap each cheesecake tightly in plastic wrap after they have cooled completely, but before adding the strawberries. They can last in the freezer for up to 2 months. When you are ready to enjoy, simply transfer them to the fridge to thaw overnight. Coat with fresh chocolate-covered strawberries right before serving for optimal taste.
What if my cheesecake filling cracks during baking?
If you find that your filling cracks, don’t worry! This can happen if the mixture is overmixed or baked at too high a temperature. Keep your mixing gentle and once baked, let them cool gradually in the oven with the door slightly ajar for a few minutes before transferring them to the fridge. This can help minimize cracking!
Are these cheesecakes suitable for anyone with dairy allergies?
To cater to those with dairy allergies, you can use dairy-free products such as coconut cream for the filling instead of cream cheese and a dairy-free butter for the crust. Additionally, ensure that any chocolate you use is dairy-free to accommodate those dietary restrictions. It’s always nice to adapt recipes so everyone can indulge!
Can I make these cheesecakes gluten-free?
Absolutely! Simply substitute the graham crackers with gluten-free alternatives, like gluten-free graham cracker crumbs or almond flour for the crust. This way, everyone can enjoy these delicious chocolate-covered strawberry cheesecakes without a worry!
Decadent Chocolate-Covered Strawberry Cheesecakes You’ll Love
Ingredients
Equipment
Method
- Preheat your oven to 350°F (175°C). In a food processor, crush the graham crackers until finely ground. Combine with melted butter and kosher salt, then press into the bottom of mini cheesecake molds to create an even crust.
- In a mixing bowl, add softened cream cheese, large eggs, sour cream, sugar, vanilla extract, and a pinch of salt. Beat with an electric mixer on medium speed for 2-3 minutes until smooth and creamy.
- Pour the filling evenly over the prepared crusts in each mold. Smooth the tops with a spatula.
- Place the filled molds in the preheated oven. Bake for 30-35 minutes, until the edges are set and the centers jiggle slightly.
- Let the mini cheesecakes cool for 10 minutes, then transfer to the refrigerator and chill for at least 2 hours.
- Melt the semisweet chocolate in a microwave-safe bowl in 30-second intervals. Dip strawberries into the chocolate until fully coated, then place on parchment paper to cool.
- Once the chocolate has hardened and the cheesecakes are chilled, place a chocolate-coated strawberry on top of each mini cheesecake. Serve and enjoy!
Leave a Reply