
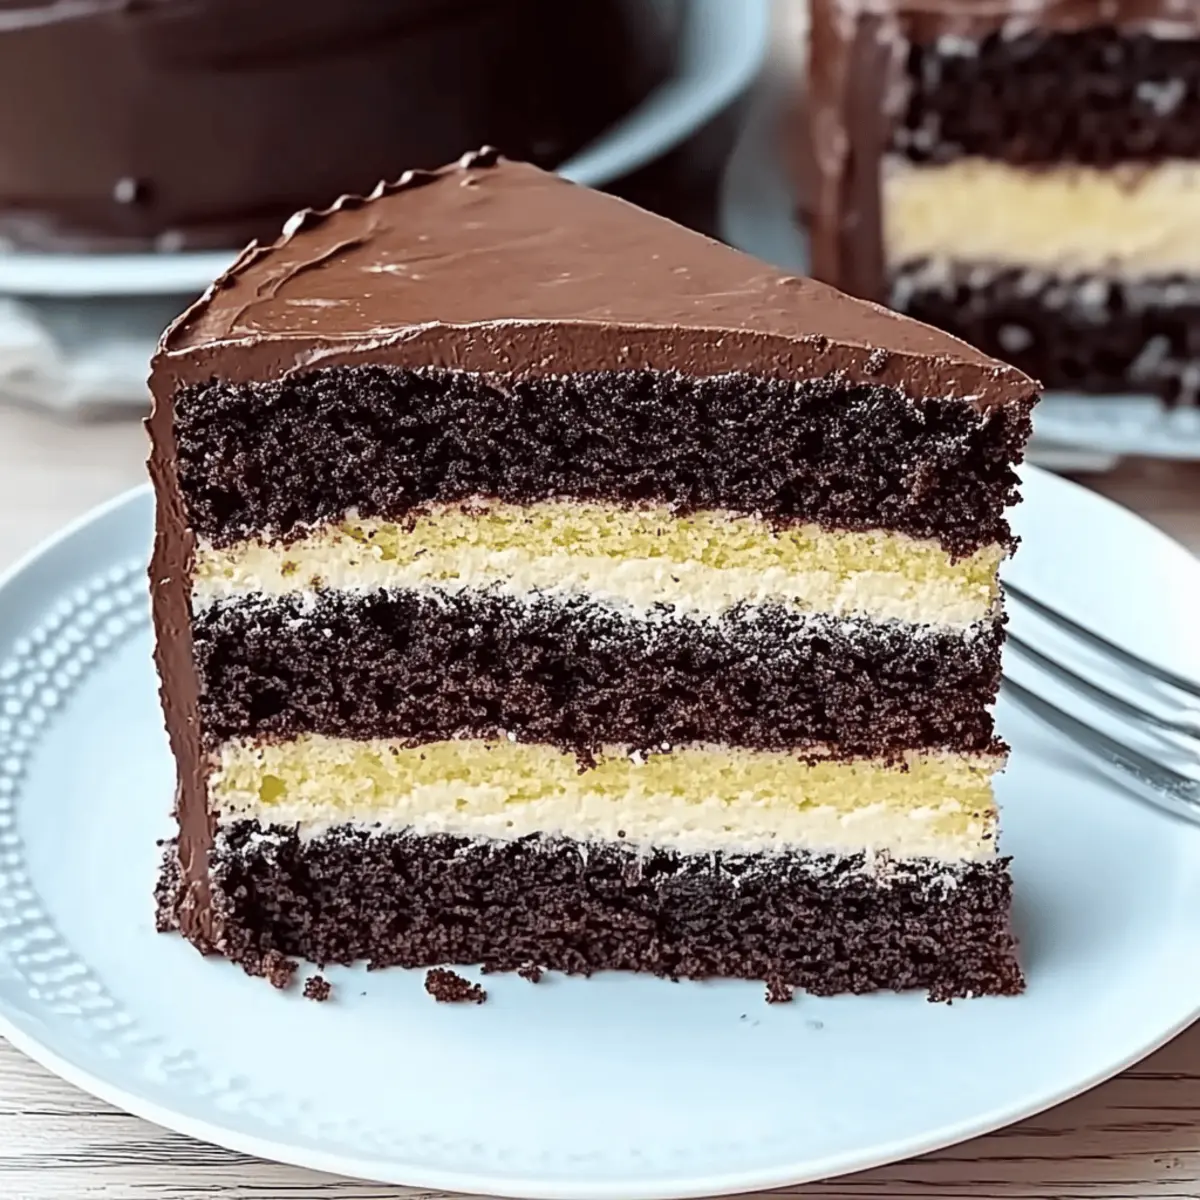
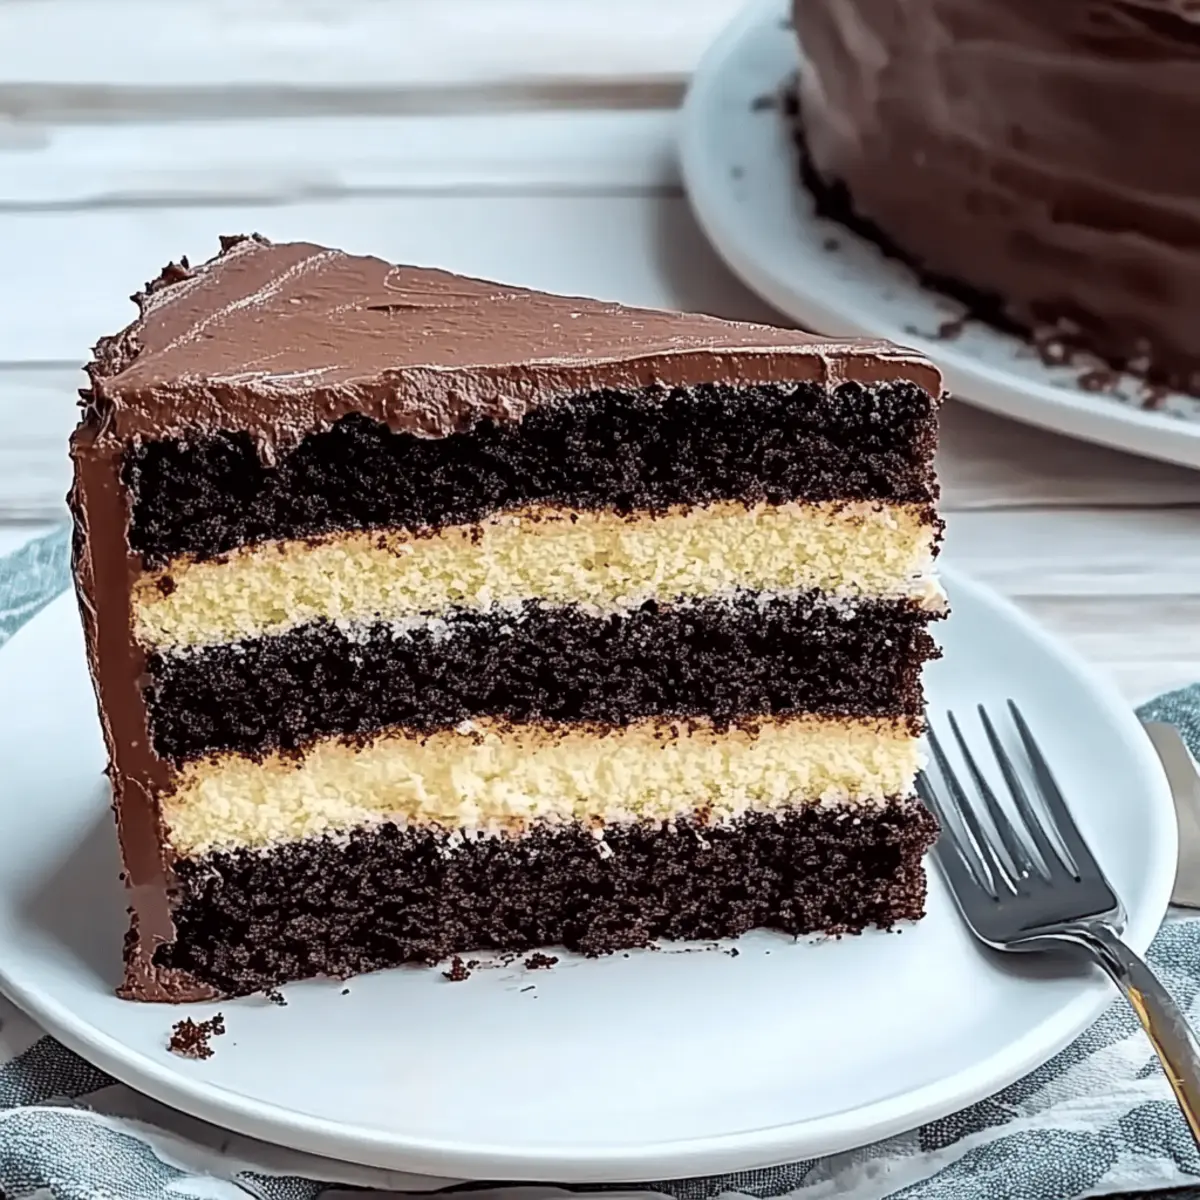
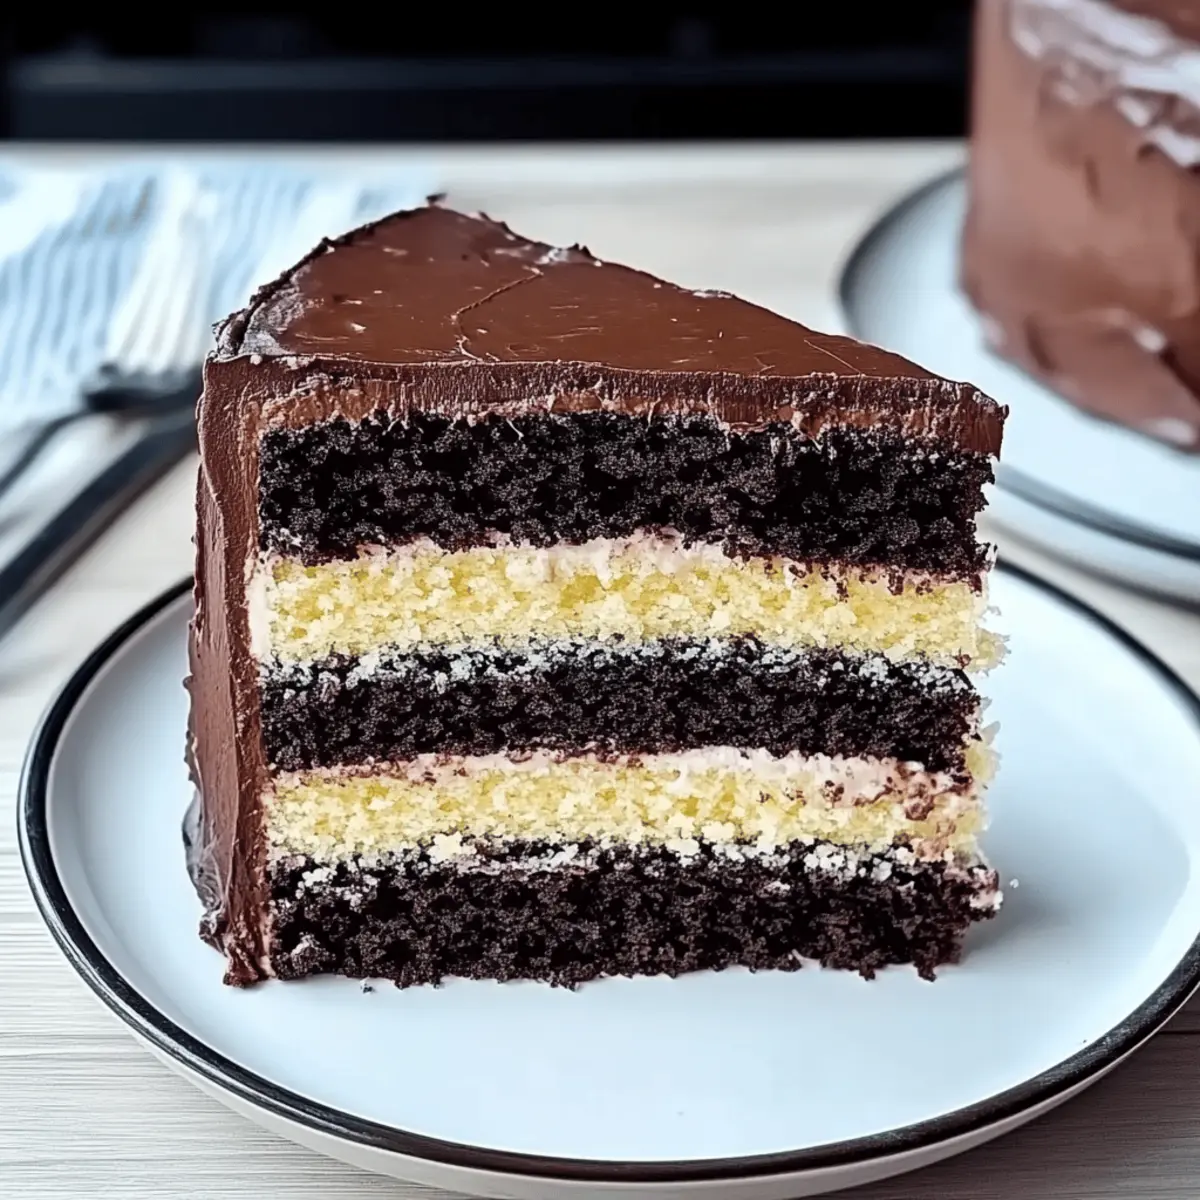
As I held a slice of Choco-nilla Cake in my hand, I couldn’t help but marvel at the beautiful layers of rich chocolate and airy vanilla, perfectly harmonized into a single slice of delight. This cake is not just a dessert; it’s a celebration waiting to happen, whether it’s for a birthday, family gathering, or an ordinary Tuesday that deserves a sweet boost. With only a handful of ingredients, it combines ease of preparation with crowd-pleasing appeal, making it the perfect choice for both novice and experienced bakers alike. And if you’re navigating dietary restrictions, I’ve got you covered with gluten-free and dairy-free options to ensure everyone gets to savor this layered masterpiece. Are you ready to dive into a world of flavor and bring a little joy to your kitchen? Let’s get started!
Why is Choco-nilla Cake so irresistible?
Decadent, the Choco-nilla Cake brilliantly combines rich chocolate and fluffy vanilla for a perfect finish that is hard to resist. Versatile, you can easily adapt this recipe to be gluten-free and dairy-free, ensuring everyone can enjoy a slice of heaven. Eye-catching, its gorgeous layers make it a stunning centerpiece for any occasion. Simple to make, with just a handful of ingredients, it’s perfect for bakers of all skill levels – even those just starting out. Pair it with a scoop of ice cream or fresh berries for a delightful treat that will leave your guests asking for more, just like the Coconut Cloud Cake or the Italian Lemon Cake.
Choco-nilla Cake Ingredients
For the Vanilla Cake
- Eggs – Provide structure and moisture; use large eggs at room temperature for best results.
- Sugar – Adds sweetness and promotes browning for a beautiful crust.
- Vegetable Oil – Keeps the cake moist; substitute with melted butter if desired.
- Salt – Enhances overall flavor, balancing the sweetness perfectly.
- Baking Powder – A critical leavening agent that helps the cake rise.
- Vanilla Extract – Infuses flavors; opt for pure for the richest taste.
- All-Purpose Flour – Main structure ingredient; can be replaced with cake flour for an even lighter texture.
- Heavy Cream – Adds richness; buttermilk can be a great substitute.
For the Chocolate Cake
- Cocoa Powder – Provides deep chocolate flavor; the key to your Choco-nilla Cake’s indulgence.
- Eggs – Offer structural support, ensuring the cake rises beautifully.
- Vegetable Oil – Maintains moisture throughout the baking process.
- Sugar – Sweetens the batter to balance the bitterness of cocoa.
- Salt – Balances sweetness and enhances all flavors.
- All-Purpose Flour – Main building block; substitute with cake flour for a lighter, fluffier texture.
- Baking Powder & Baking Soda – Both essential leavening agents for perfect rise.
- Water – Adds moisture, creating a rich chocolate batter.
For the Filling
- Butter – Creates a smooth and creamy filling; use unsalted for better control of sweetness.
- Confectioners’ Sugar – Sweetens and thickens the filling for a luscious consistency.
- Milk – Adjusts consistency for desired fluffiness; choose almond or coconut milk for dairy-free options.
- Vanilla Extract – Enhances flavor and richness of the filling.
For the Icing
- Chocolate Chips – Adds rich flavor; semi-sweet is recommended for a well-rounded taste.
- Heavy Cream – Helps achieve a smooth icing texture that drapes beautifully over the cake.
Step‑by‑Step Instructions for Choco Nilla Cake
Step 1: Preheat and Prepare Baking Pans
Begin by preheating your oven to 350°F (175°C). While it warms up, generously grease two 9″ round cake pans with butter or cooking spray and line the bottoms with parchment paper for easy removal. This ensures your Choco Nilla Cake layers come out perfectly intact and ready for assembly later.
Step 2: Make the Vanilla Cake Batter
In a large mixing bowl, beat together eggs and sugar using an electric mixer on medium speed until the mixture is light and fluffy, about 3–5 minutes. Gradually mix in the vegetable oil, followed by the salt, baking powder, vanilla extract, flour, and heavy cream in alternating additions. Once smooth, pour the batter into one of the prepared pans and spread evenly.
Step 3: Bake the Vanilla Cake Layer
Place the pan into the preheated oven and bake for 30-35 minutes. You’ll know the vanilla cake layer is done when it turns a lovely golden brown and a toothpick inserted in the center comes out clean. Allow it to cool in the pan for about 10 minutes before transferring it to a wire rack to cool completely.
Step 4: Make the Chocolate Cake Batter
In another bowl, whisk together the dry ingredients: cocoa powder, flour, baking powder, and baking soda. Add eggs and vegetable oil to this mixture and mix until well combined. Gradually add water, stirring until you have a smooth, rich chocolate batter. Pour this into the second prepared pan, smoothing the top for even baking.
Step 5: Bake the Chocolate Cake Layer
Place the chocolate cake layer in the oven and let it bake for 35 minutes. Keep an eye out for a dark, rich hue and a toothpick test that comes out clean, indicating it’s perfectly baked. Once ready, allow it to cool in the pan briefly before flipping it onto a wire rack to finish cooling completely.
Step 6: Prepare the Filling
For the filling, use a mixer to beat unsalted butter in a bowl until creamy. Gradually add confectioners’ sugar, mixing on low speed, then drizzle in milk until you reach the desired fluffiness. Finally, blend in vanilla extract to enhance the filling’s flavor, making it smooth and luscious for your Choco Nilla Cake.
Step 7: Slice the Cake Layers
Once your cakes are completely cooled, carefully slice each layer in half horizontally, resulting in four layers total—two vanilla and two chocolate. This step will allow for beautiful alternating layers of flavor when you assemble the cake, ensuring everyone enjoys the delightful contrast of the Choco Nilla Cake.
Step 8: Assemble the Cake
Begin stacking the layers by placing a vanilla layer on a serving plate. Spread a generous amount of filling on top, then add a chocolate layer and repeat this process, alternating until all layers are stacked. Make sure to apply filling between each layer to heighten the cake’s indulgent flavor with every bite.
Step 9: Make the Icing
To create a silky icing, gently warm chocolate chips and heavy cream in a saucepan over low heat. Stir continuously until the chocolate is melted and the mixture is smooth and glossy. Pour this rich icing over the assembled Choco Nilla Cake, allowing it to drip down the sides for an elegant finish that enhances its beauty.
What to Serve with Choco-nilla Cake
Indulging in a slice of Choco-nilla Cake is a delight, but pairing it with the right accompaniments elevates your dessert experience to heavenly heights.
-
Vanilla Ice Cream: The creamy richness of vanilla ice cream beautifully complements the layered cake, creating a delightful temperature contrast with every bite. It also adds an extra touch of nostalgia to your dessert.
-
Fresh Berries: A medley of juicy strawberries, raspberries, or blueberries offers a refreshing burst of flavor that balances the cake’s sweetness while adding a pop of color to your plate. They create a fruity freshness that is absolutely irresistible.
-
Chocolate Ganache: Drizzling warm chocolate ganache over your Choco-nilla Cake amplifies the chocolate experience while adding moisture and decadence. This glossy topping makes each slice look even more tempting.
-
Whipped Cream: Light and airy whipped cream adds a velvety texture that enhances the cake’s fluffy vanilla layers. It’s an easy way to elevate the presentation and add an extra layer of indulgence.
-
Coffee or Espresso: A steaming cup of coffee or a shot of espresso enhances the flavors of the cake, creating a delightful pairing that brings out the richness of the chocolate. The warmth of the drink contrasts well with the cold ice cream.
-
Caramel Sauce: A drizzle of caramel sauce adds an extra layer of sweetness and a hint of buttery richness that pairs perfectly with the chocolate and vanilla notes. It’s a luxurious touch that will have your guests swooning.
-
Nutty Biscotti: For a crunch factor, serve with almond or hazelnut biscotti. The contrasting texture provides a delightful crunch that enhances the cake’s softness while deepening the flavor experience.
-
Lemon Sorbet: For a lighter touch, a scoop of lemon sorbet brightens the palate and cleanses the taste buds after each rich bite. It adds a refreshing element that is sure to delight!
Choco Nilla Cake Variations & Substitutions
Feel free to explore your creative side with these delightful variations to make your Choco-nilla Cake truly yours!
-
Gluten-Free: Use a gluten-free flour blend to ensure everyone can indulge without worry. This should keep the cake’s structure intact while catering to dietary needs.
-
Dairy-Free: Substitute milk with almond or coconut milk and use dairy-free margarine for the filling. This way, every bite remains creamy without any dairy ingredients!
-
Fruit-Infused: Incorporate fruit purées like raspberry or strawberry into the filling for a refreshing twist. The fruity flavor will brighten up each slice beautifully, making it even more enticing.
-
Chocolate Lovers: Add chocolate chips directly into the batter for added chocolatey goodness inside every layer. The extra bursts of chocolate will take this cake over the top!
-
Spiced Up: Sprinkle warm spices, like cinnamon or nutmeg, into the batter for a warm, inviting flavor twist. The subtle warmth of spice can turn your cake into a comforting favorite!
-
Nutty Additions: Fold in chopped nuts like walnuts or pecans in either batter for a crunchy texture. This variation not only enhances flavor but also adds an exciting crunch that surprises with every bite.
-
Coffee Flavored: For a mocha-inspired cake, mix instant coffee granules into the chocolate batter. The coffee enhances the chocolate flavor, creating a rich depth that’s irresistible.
-
Layered with Pastry Cream: Use a light pastry cream instead of filling for a creamy and luxurious texture. This custard-like filling brings an elegant touch, perfect for special occasions.
These options add variety and keep your Choco-nilla Cake exciting. So go ahead, mix and match to create a version that suits your taste or dietary needs! And if you want to explore other delectable desserts, try the irresistible Choco Cheesecake Cookie Bites or a slice of the fluffy Tres Leches Cake. Happy baking!
Make Ahead Options
The Choco-nilla Cake is perfect for meal prep enthusiasts looking to save time during busy weeks! You can prepare the cake layers up to 24 hours in advance. Simply bake and cool both the vanilla and chocolate layers, then wrap them tightly in plastic wrap and refrigerate. The filling can also be made ahead and stored in an airtight container for up to 3 days; just give it a quick whip before spreading. When you’re ready to serve, slice the cake layers in half, assemble them with the filling, and pour the icing over. This way, you’ll enjoy a stunning homemade dessert without the last-minute rush, and it will taste just as delicious as when freshly baked!
Storage Tips for Choco Nilla Cake
- Room Temperature: Store leftover Choco Nilla Cake in an airtight container at room temperature for up to 3 days to maintain its freshness and flavor.
- Fridge: If you need to keep it longer, refrigerate the cake for up to 5 days. Just make sure it’s covered to prevent it from drying out.
- Freezer: For longer storage, freeze individual slices of Choco Nilla Cake in airtight containers or wrapped tightly in plastic wrap for up to 3 months. Thaw in the refrigerator overnight before serving.
- Reheating: If desired, enjoy a slice warmed slightly in the microwave for 10-15 seconds to bring out the cake’s rich flavors before indulging.
Helpful Tricks for Choco Nilla Cake
-
Room Temperature Ingredients: Ensure all ingredients, especially eggs and heavy cream, are at room temperature for better blending and rise.
-
Leveling Layers: If your cake layers dome while baking, use a serrated knife to level them out after cooling. This keeps the Choco Nilla Cake evenly stacked.
-
Moisture Control: Avoid overmixing the batters as it may lead to dry cake layers; mix just until combined for a tender texture.
-
Flour Substitutions: For a gluten-free Choco Nilla Cake, simply substitute the all-purpose flour with a 1:1 gluten-free blend for delicious results.
-
Chill Before Icing: Chill your assembled cake for about 30 minutes before icing; this helps the filling set and reduces sliding during icing application.

Choco-nilla Cake Recipe FAQs
What type of eggs should I use for the Choco-nilla Cake?
I recommend using large eggs at room temperature for the best results. This helps the eggs whip up better and creates a light, fluffy cake texture. If your eggs are cold, you can place them in a bowl of warm water for about 10-15 minutes to bring them to room temperature quickly.
How should I store leftover Choco-nilla Cake?
To keep your Choco-nilla Cake fresh, store it in an airtight container at room temperature for up to 3 days. If you prefer to keep it longer, you can refrigerate it for up to 5 days. Just be sure it’s well covered to prevent it from drying out. For best results, enjoy the cake within these timeframes.
Can I freeze Choco-nilla Cake, and how do I do it?
Absolutely! You can freeze your Choco-nilla Cake slices for up to 3 months. Here’s how:
- Once completely cooled, slice the cake and place each slice on a baking sheet lined with parchment paper.
- Freezing the slices on the sheet for about 1–2 hours will prevent them from sticking together.
- Afterward, wrap each slice tightly in plastic wrap or place them in airtight containers.
- Label with the date and return them to the freezer. When you’re ready to enjoy, simply thaw overnight in the refrigerator.
Can I make this Choco-nilla Cake dairy-free?
Yes, you can! For a dairy-free version, substitute the heavy cream with almond or coconut milk, and use dairy-free margarine instead of butter in both the filling and cake batter. It maintains the delicious flavor while ensuring that everyone can partake in this delightful dessert.
What should I do if my cake layers domed while baking?
If your Choco-nilla Cake layers dome instead of baking flat, it’s no problem! Once the cakes are cooled, you can level them out using a serrated knife. Gently slice off the domed portion to create an even surface before assembling your cake. This will help with stacking and presentation, making your dessert look stunning.
Are there any allergy considerations for this recipe?
Definitely be mindful! This recipe includes common allergens such as eggs, flour (which contains gluten), and dairy. For a gluten-free option, simply replace all-purpose flour with a 1:1 gluten-free blend. Be sure to check labels on your baking ingredients, especially for dairy-free alternatives, to avoid any cross-contamination if someone has severe allergies.
Delightful Choco Nilla Cake: A Sweet Escape at Home
Ingredients
Equipment
Method
- Preheat your oven to 350°F (175°C) and prepare two 9" round cake pans by greasing them and lining the bottoms with parchment paper.
- In a large mixing bowl, beat together eggs and sugar until light and fluffy, then mix in oil, salt, baking powder, vanilla, flour, and cream.
- Bake the vanilla cake layer for 30-35 minutes until golden brown and a toothpick comes out clean. Cool for 10 minutes before transferring to a wire rack.
- In another bowl, whisk together cocoa powder, flour, baking powder, and baking soda. Add eggs and oil, mix, then gradually add water to form a smooth batter.
- Bake the chocolate cake layer for 35 minutes until a toothpick comes out clean. Cool briefly before flipping onto a wire rack.
- Beat butter until creamy, gradually mix in confectioners' sugar, then add milk until desired fluffiness, finishing with vanilla extract.
- Carefully slice each cooled cake layer in half horizontally to create a total of four layers.
- Stack the layers by alternating vanilla and chocolate, spreading filling between each layer.
- Warm chocolate chips and heavy cream in a saucepan; stir until melted and smooth, then pour over the assembled cake.
Leave a Reply