
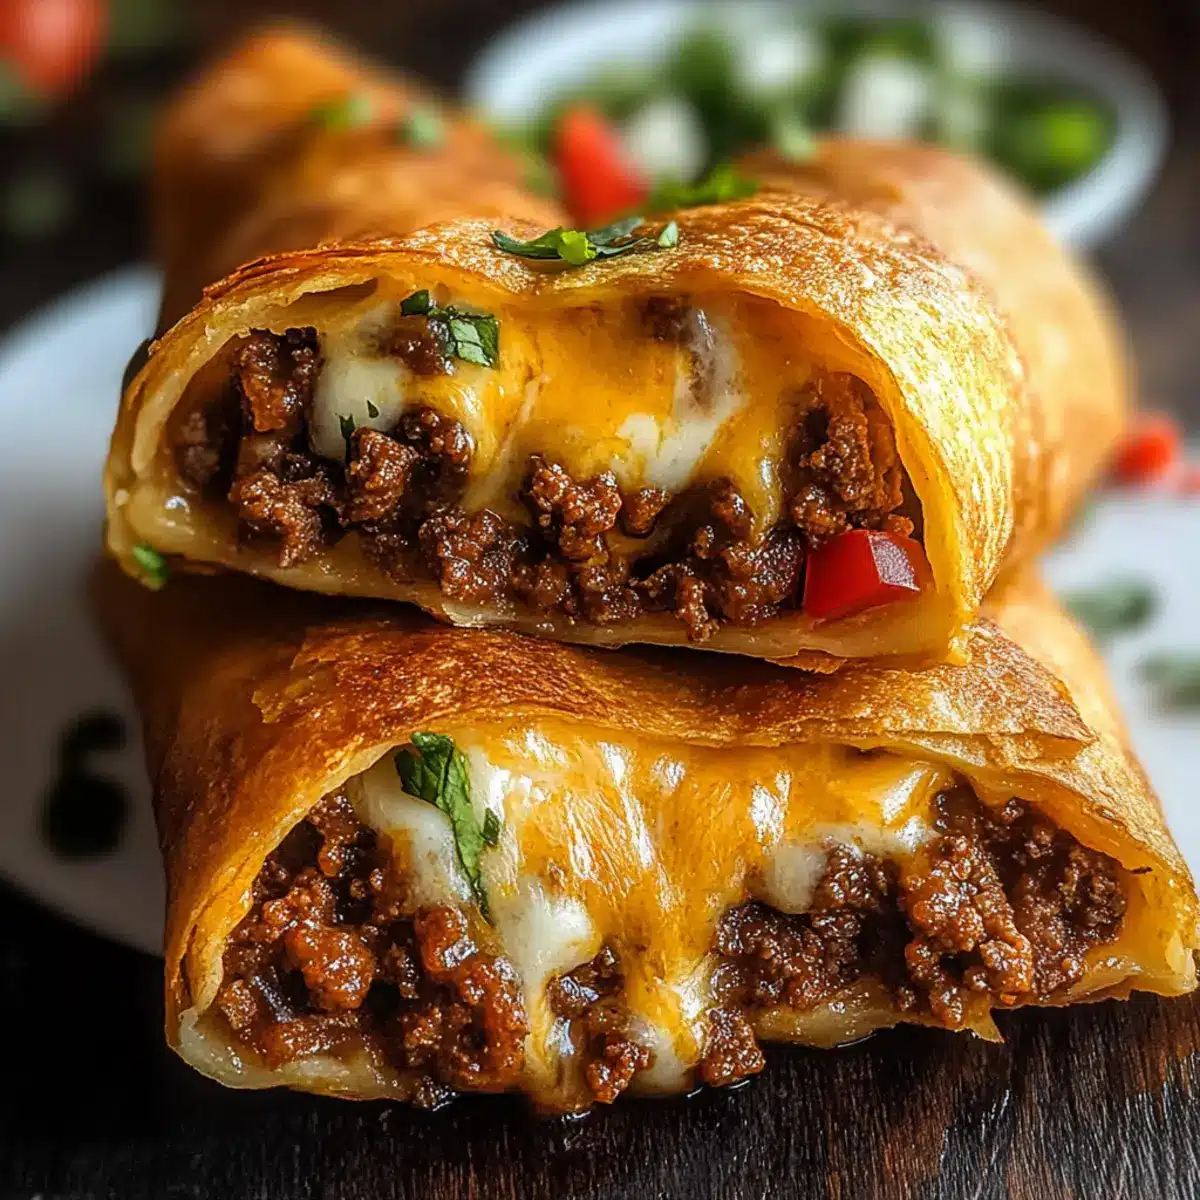
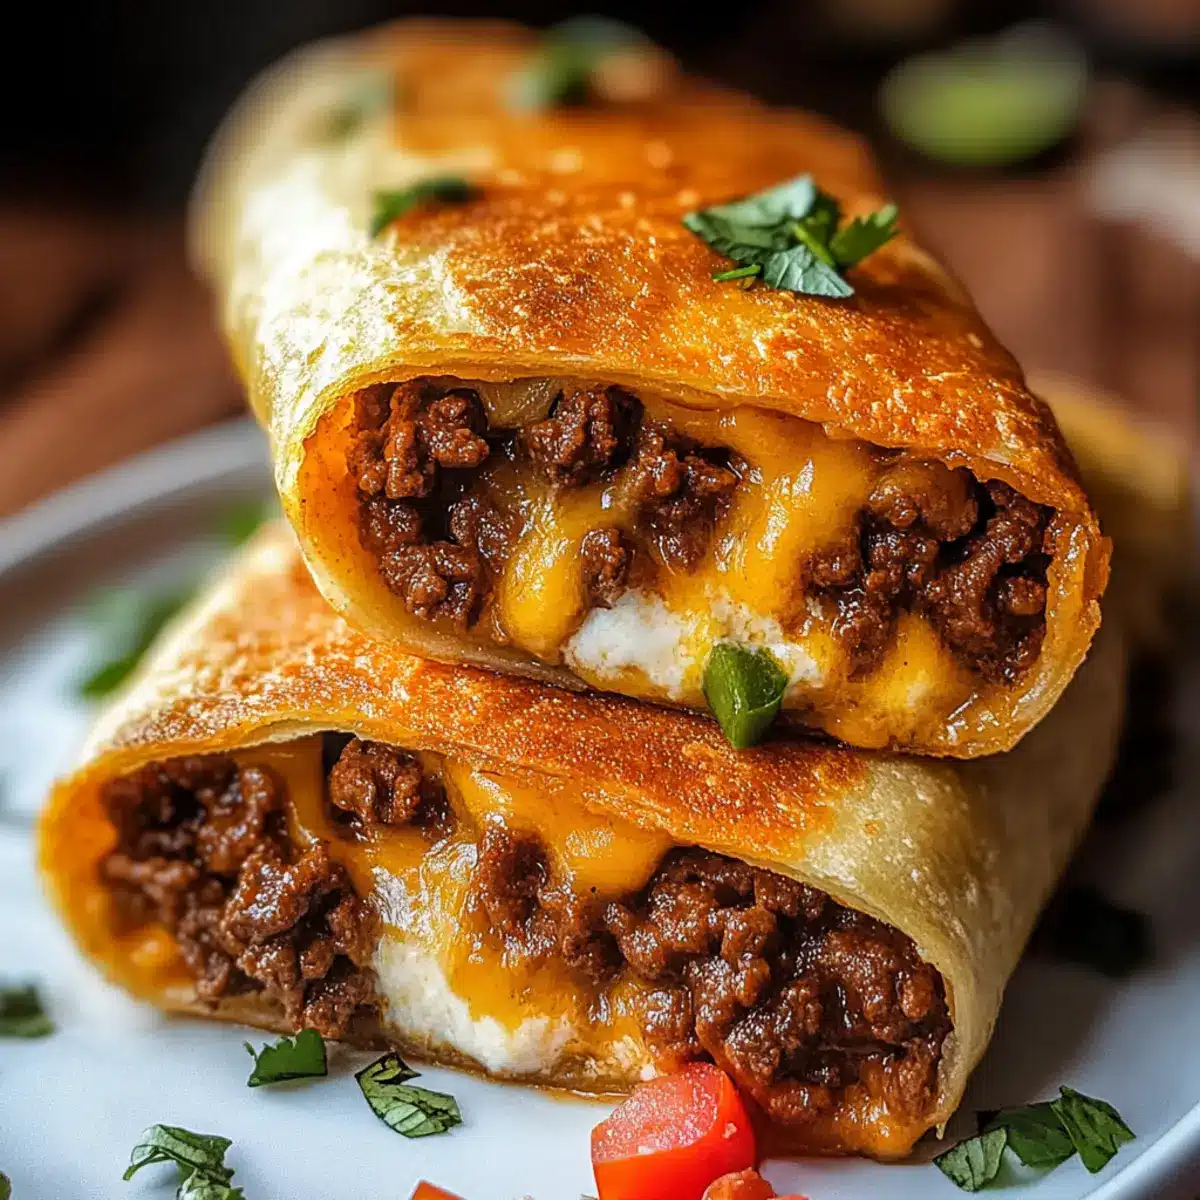
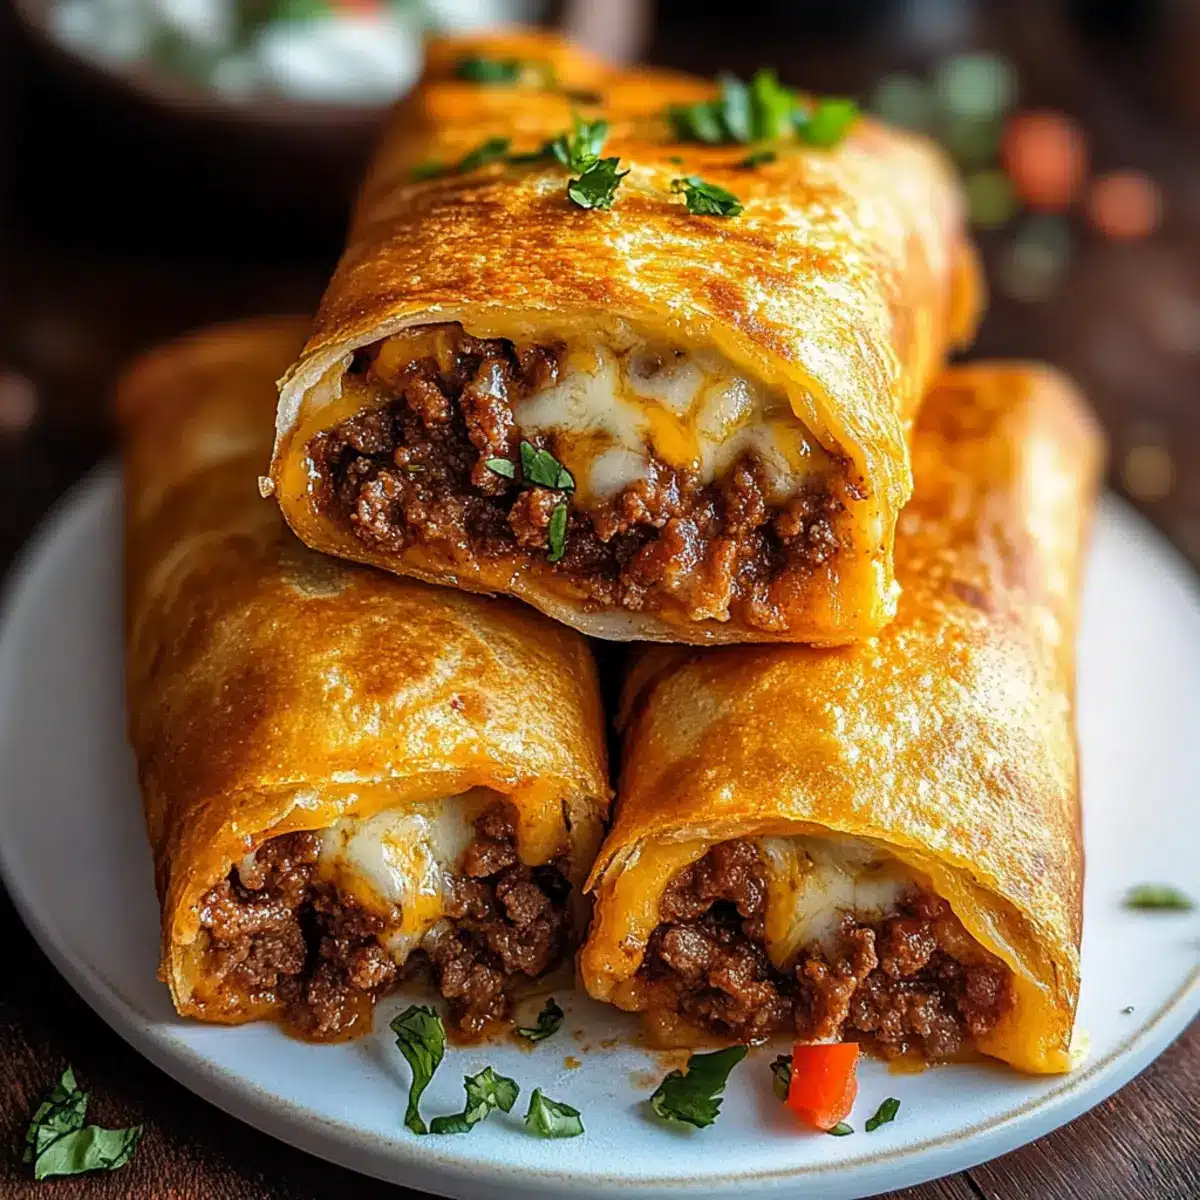
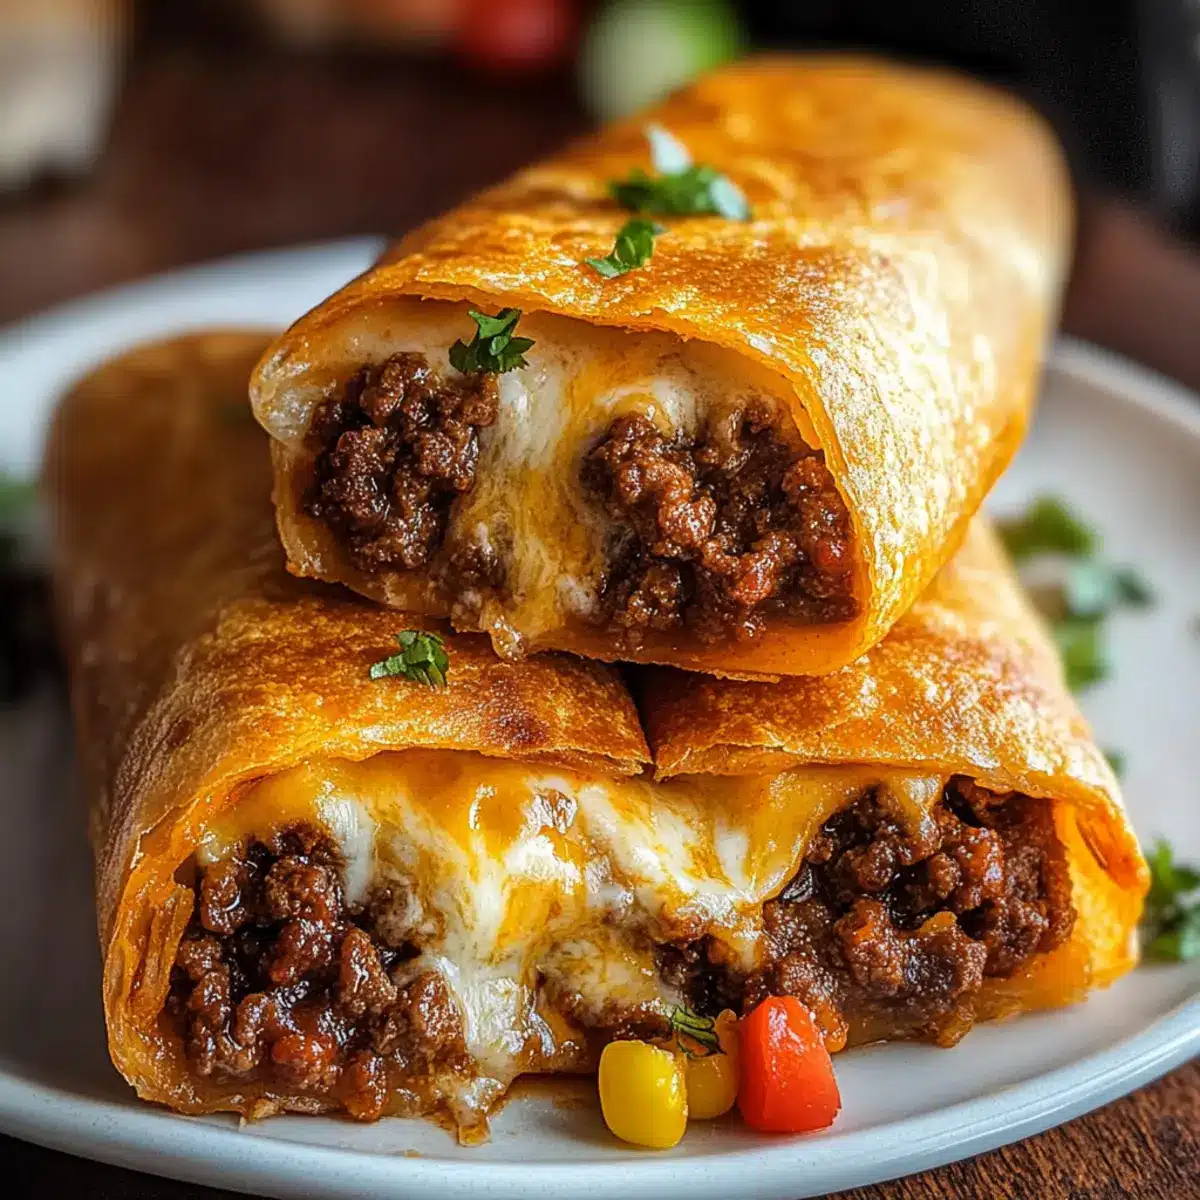
As I stood in my kitchen, the sizzle of frying tortillas filled the air, instantly transporting me to a bustling Tex-Mex eatery. There’s something truly magical about the satisfying crunch of crispy Beef and Cheese Chimichangas, and the best part? This Beef and Cheese Chimichangas recipe is as easy as it is customizable! Whether you’re craving a classic stuffed with seasoned ground beef and gooey cheese or feeling adventurous with a mix of beans and peppers, these delights can adapt to your taste. Plus, they make for a perfect make-ahead meal; just assemble and freeze for later. With the ability to choose between frying or baking, these chimichangas offer something for everyone at the dinner table. What are you waiting for? Let’s dive into this irresistible culinary journey!
Why are Chimichangas So Irresistible?
Crispy, Golden Texture: Each bite of these chimichangas offers a satisfying crunch, making them a delightful treat for any Tex-Mex lover.
Customizable Fillings: Whether you prefer classic beef, a spicy twist, or even a vegetarian version with sautéed peppers, these chimichangas cater to all tastes.
Quick and Easy Prep: The straightforward assembly means you can have a delicious meal ready in no time, perfect for busy weeknights.
Freezer-Friendly: Prep ahead by assembling chimichangas to freeze; simply cook them when you’re ready for a tasty treat.
Crowd-Pleasing Dish: Whether it’s a casual family dinner or a festive gathering, these chimichangas are sure to impress guests and family alike—serve them with sides like Mexican rice or fresh salad for a complete meal!
Beef and Cheese Chimichangas Ingredients
• Discover the essential flavors that make Beef and Cheese Chimichangas a true delight!
For the Filling
- Ground Beef – Adds savory protein; use lean ground beef and drain excess grease after cooking.
- Onion – Provides natural sweetness; finely dice for even cooking and enhanced flavor.
- Garlic – Elevates the overall taste; fresh minced garlic is recommended for the best results.
- Taco Seasoning – Imparts that signature Tex-Mex flair; a store-bought packet works wonders or make your own!
- Salsa – Moisten the filling while adding zest; tomato sauce is a great alternative if you prefer.
- Refried Beans – Contributes creaminess and body; omit for a meatier filling if desired.
- Shredded Cheese – Offers a gooey, melty texture; options like cheddar, Monterey Jack, or a Mexican blend are perfect.
For Wrapping
- Flour Tortillas – Encapsulate the tasty filling; 10-inch tortillas are ideal for easy folding.
For Cooking
- Vegetable Oil – Used for frying; can substitute with canola oil for a lighter option.
Feel free to mix and match these ingredients to create the perfect Beef and Cheese Chimichangas recipe that matches your family’s cravings!
Step‑by‑Step Instructions for Beef and Cheese Chimichangas Recipe
Step 1: Cook Beef Filling
Begin by browning 1 pound of lean ground beef in a large skillet over medium heat for about 5–7 minutes. Stir in 1 finely diced onion and cook until translucent, approximately 3 minutes. Drain any excess grease, then add 2 minced garlic cloves, 1 packet of taco seasoning, and ½ cup of salsa. Let this mixture simmer for 2–3 minutes until thickened and fragrant.
Step 2: Assemble Chimichangas
Warm your 10-inch flour tortillas in a microwave or on a skillet to make them pliable. Spread about 2 tablespoons of refried beans on the center of each tortilla, then spoon in the beef mixture and top with ½ cup of shredded cheese. Fold the sides of the tortilla inward, then roll it tightly from the bottom up like a burrito, ensuring the filling is completely enclosed.
Step 3: Prepare for Cooking
Choose your cooking method: for frying, heat vegetable oil in a large skillet over medium-high heat until it reaches 350°F (175°C). If baking, preheat your oven to 400°F (200°C). Lightly grease a baking sheet with cooking spray or oil to prevent sticking. Gather all your assembled chimichangas, ready for the next step.
Step 4: Cook Chimichangas (Frying Method)
Place the chimichangas seam-side down into the hot oil, ensuring not to overcrowd the skillet. Fry for about 2–3 minutes on each side, or until they are golden brown and crispy. Use tongs to carefully flip them over, checking for that beautiful golden color. Once cooked, transfer to a plate lined with paper towels to absorb excess oil.
Step 5: Cook Chimichangas (Baking Method)
Lay the assembled chimichangas seam-side down on your greased baking sheet. Brush the tops lightly with oil to encourage browning and crispiness. Bake for 20–25 minutes, flipping them halfway through for even browning. The chimichangas are done when they look golden and crispy, inviting you in with their delicious aroma.
Step 6: Serve
Once cooked, allow the chimichangas to rest on a wire rack for a few minutes to stabilize. Serve them warm with your favorite sides, such as sour cream, guacamole, or pico de gallo. These Beef and Cheese Chimichangas are perfect for sharing, bringing lively Tex-Mex flavors to your dining table!
Beef and Cheese Chimichangas Recipe Variations
Feel free to explore these tantalizing variations that invite you to add your personal touch to your chimichangas!
- Bean & Beef Chimichangas: Mix refried beans with ground beef for an extra creamy filling that’s hard to resist. The combination of flavors enhances the texture, making every bite indulgent.
- Spicy Chimichangas: For those seeking an extra kick, toss in some jalapeños or swap regular cheese with pepper jack. You’ll love the delightful warmth that elevates the classic taste!
- Vegetarian Option: Ditch the beef and use sautéed vegetables along with black beans for a hearty vegetarian option. This version bursts with fresh flavors while still satisfying your craving.
- Breakfast Version: Switch things up by stuffing your chimichangas with scrambled eggs, crispy bacon, and cheese for a delicious breakfast twist. They’re not just for dinner anymore!
- Sauced Chimichangas: Drizzle your favorite queso dip or enchilada sauce on top for an indulgent, smothered experience that enhances flavor and adds a lovely creaminess.
- Freezer-Friendly Preview: Assemble chimichangas but skip cooking; instead, freeze them for a quick weeknight meal later on. It’s such a lifesaver on busy days!
- Rice & Bean Combination: Try adding cooked rice to your beef mixture. This helps stretch the filling and gives a heartiness that keeps you feeling full longer. It’s a budget-friendly twist!
- Zesty Citrus Infusion: Add a splash of lime juice to the filling for a refreshing zing. This simple addition pairs beautifully with chimichangas, bringing a bright note to every bite.
And if you’re looking for more culinary inspiration, check out our delightful Brownie Cheesecake or the refreshing Lemon Cheesecake. Enjoy playing with these variations!
What to Serve with Crispy Beef and Cheese Chimichangas?
Elevate your dining experience by pairing these delightful chimichangas with accompaniments that bring out their Tex-Mex flair and maximizes flavor harmony.
- Mexican Rice: A comforting classic that adds a fluffy base, soaking up the rich flavors from the chimichangas and balancing out the meal.
- Fresh Guacamole: Creamy and cool, it complements the crispy texture of the chimichangas, enhancing each bite with a burst of flavor.
- Pico de Gallo: This fresh salsa adds a zesty punch to every mouthful, introducing vibrant flavors that brighten the entire dish.
- Black Bean Salad: A refreshing side that features protein-packed beans; it adds a bit of crunch and a fresh twist that beautifully contrasts the rich filling.
- Corn on the Cob: Sweet and buttery corn offers a delightful texture; grill it for a smoky flavor that pairs wonderfully with chimichangas.
- Chili Con Queso: A warm, cheesy dip that’s great for drizzling over your chimichangas or serving on the side—perfect for cheese lovers!
- Watermelon Mint Salad: Refreshing and juicy, the sweetness of watermelon helps cleanse the palate, making it a lovely counterpoint to the hearty chimichangas.
- Margaritas or Horchata: Sip on these traditional beverages; margaritas add a refreshing zest, while horchata provides a sweet, creamy contrast that pleases the crowd.
Indulge in a delightful meal that’s sure to impress your family and friends while keeping it light and enjoyable!
How to Store and Freeze Beef and Cheese Chimichangas
Fridge: Keep assembled chimichangas in an airtight container in the fridge for up to 2 days. If cooked, store leftovers in the same way for a quick reheat.
Freezer: Ready-to-cook chimichangas can be frozen for up to 2 months. Assemble and wrap them securely in plastic wrap, then place them in a freezer bag for best results.
Reheating: For the best texture, reheat cooked chimichangas in the oven or air fryer until crispy instead of using a microwave, which can make them soggy.
Defrosting: If frozen, thaw in the refrigerator overnight before cooking or directly heat from frozen, just adding a few extra minutes to the cooking time.
Make Ahead Options
These Beef and Cheese Chimichangas are perfect for busy home cooks looking to save time during the week! You can assemble the chimichangas up to 24 hours in advance, simply wrapping them tightly in plastic wrap and refrigerating to maintain freshness. Alternatively, for longer storage, freeze the assembled chimichangas for up to 2 months—just make sure to place parchment paper between them to prevent sticking. When you’re ready to enjoy, cook them from frozen; simply fry them for an extra minute on each side, or bake for 10-15 minutes longer until they’re crispy and heated through. This way, you’ll enjoy the same comforting flavors with minimal effort!
Expert Tips for Beef and Cheese Chimichangas
- Oil Temperature: Test your oil by dropping a small piece of tortilla in; if it sizzles immediately, you’re good to go! This ensures even frying for your chimichangas.
- Secure Seams: Use toothpicks to secure the seams when frying to prevent openings during cooking, keeping all the delicious filling intact.
- Customize Smartly: Don’t hesitate to mix fillings! Incorporate beans or peppers for added flavor while ensuring the total filling doesn’t exceed what fits comfortably in the tortilla.
- Baking Benefits: If opting for the baked method, brush chimichangas lightly with oil for that golden, crunchy texture, and flip halfway through for even cooking.
- Make Ahead: Assemble chimichangas in advance and refrigerate for up to 2 days or freeze up to 2 months to enjoy a quick and satisfying meal later!
Feel confident in your Beef and Cheese Chimichangas recipe with these helpful tips to make your cooking experience delightful!
Beef and Cheese Chimichangas Recipe FAQs
How do I choose the best ingredients for my chimichangas?
Absolutely! For the best flavor in your Beef and Cheese Chimichangas, choose lean ground beef to minimize grease and ensure a savory filling. When selecting onions, go for firm ones without dark spots, and use fresh minced garlic for the best taste. As for cheese, a blend of cheddar and Monterey Jack melts beautifully, creating that gooey texture we all love.
What is the best way to store leftover chimichangas?
Very! Store cooked chimichangas in an airtight container in your refrigerator for up to 3 to 4 days. If you have assembled raw chimichangas, keep them in the fridge for up to 2 days before cooking them. This allows you to enjoy fresh Tex-Mex flavors without the fuss later on.
Can I freeze my chimichangas? If so, how?
Absolutely! To freeze your uncooked Beef and Cheese Chimichangas, wrap each one tightly in plastic wrap and place them in a freezer bag, expelling as much air as possible. You can freeze them for up to 2 months. When you’re ready to enjoy, simply bake them straight from the freezer—just add a few extra minutes to the cooking time and they’ll come out crispy and delicious!
What should I do if my chimichangas burst open while cooking?
Oh no! If your chimichangas burst open, it likely means they were overstuffed or the sealing wasn’t tight enough. In the future, use a toothpick to secure the seams, especially if frying. If they still open, don’t stress! The filling will be a generous and tasty mess, so serve it with salsa or sour cream on the side to enjoy with your crispy chimichangas.
Are there any dietary restrictions I should consider when making chimichangas?
Very! If you’re catering to dietary needs, you can easily customize the Beef and Cheese Chimichangas. For gluten-free options, replace regular flour tortillas with gluten-free ones. If you’re making a vegetarian version, simply swap the beef for sautéed vegetables or black beans. Always check for allergies, especially with cheese and spices, to ensure everyone can enjoy this Tex-Mex treat!
Irresistibly Crispy Beef and Cheese Chimichangas Recipe
Ingredients
Equipment
Method
- Brown 1 pound of lean ground beef in a large skillet over medium heat for about 5–7 minutes. Stir in 1 finely diced onion and cook until translucent, approximately 3 minutes. Drain excess grease, then add 2 minced garlic cloves, 1 packet of taco seasoning, and ½ cup of salsa. Let this mixture simmer for 2–3 minutes until thickened and fragrant.
- Warm 10-inch flour tortillas in a microwave or on a skillet. Spread 2 tablespoons of refried beans on the center of each tortilla, then spoon in the beef mixture and top with ½ cup of shredded cheese. Fold the sides of the tortilla inward, then roll tightly from the bottom up.
- For frying, heat vegetable oil in a large skillet over medium-high heat until it reaches 350°F (175°C). If baking, preheat the oven to 400°F (200°C). Lightly grease a baking sheet with cooking spray or oil.
- Place chimichangas seam-side down into the hot oil. Fry for about 2–3 minutes on each side or until golden brown and crispy. Transfer to a plate lined with paper towels to absorb excess oil.
- Lay assembled chimichangas seam-side down on a greased baking sheet. Brush tops lightly with oil and bake for 20–25 minutes, flipping halfway through for even browning.
- Allow chimichangas to rest for a few minutes. Serve warm with sides like sour cream, guacamole, or pico de gallo.
Leave a Reply