
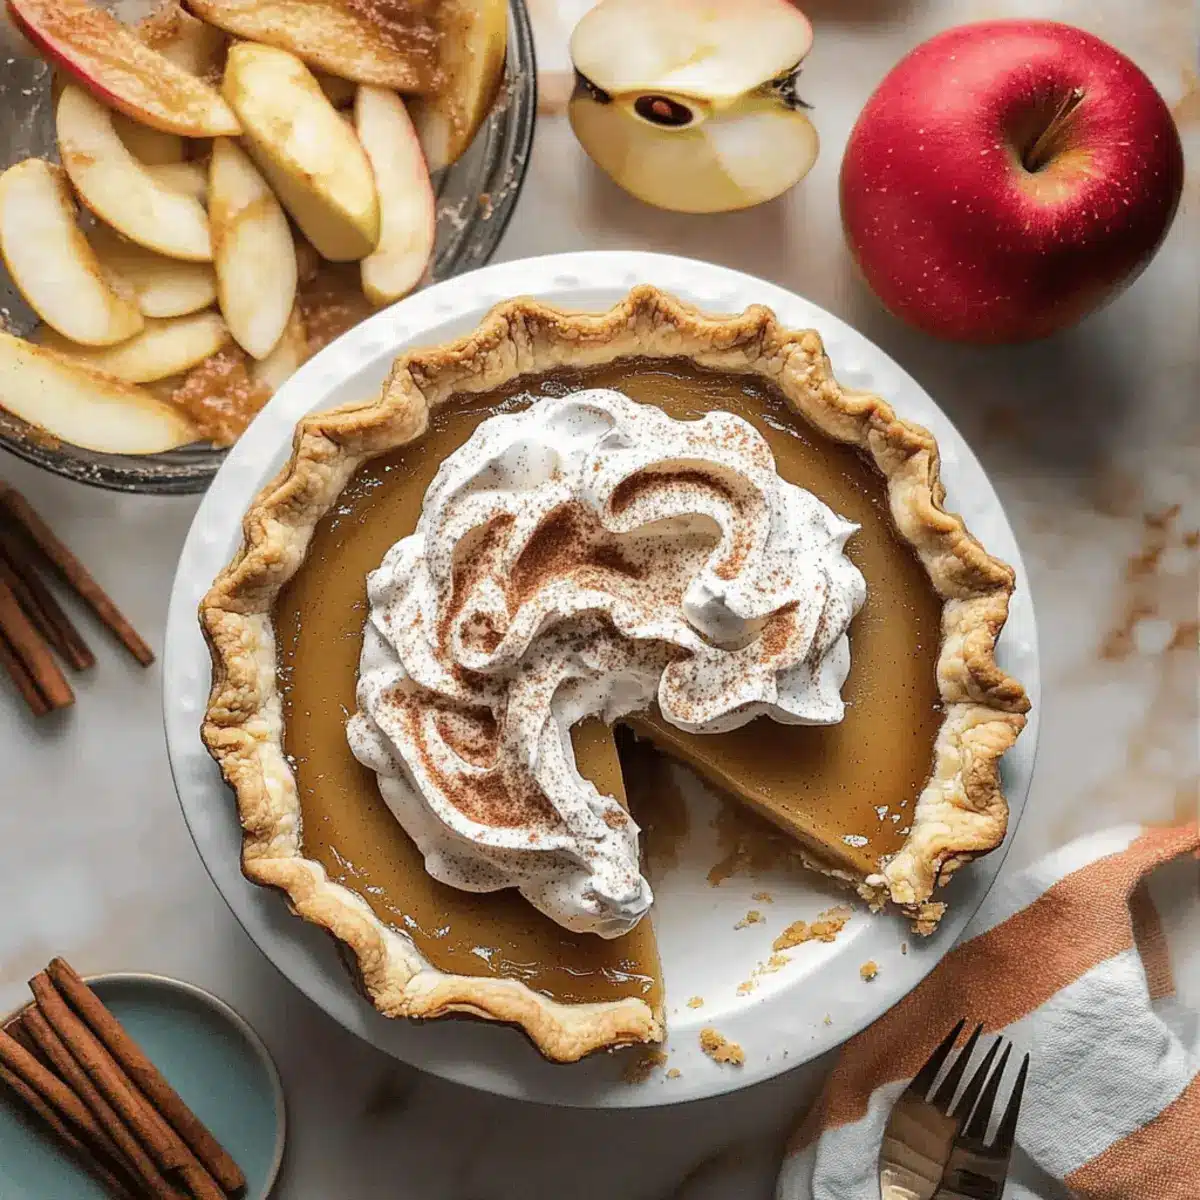
The aroma of spiced apples wafting through the kitchen is an instant comfort, a gentle reminder of cozy autumn afternoons. Today, I’m excited to share a cherished recipe for Apple Butter Pie with Cinnamon Whipped Cream. This creamy pie is a delightful twist on traditional desserts, featuring a luscious custard that’s perfect for Thanksgiving gatherings or any fall celebration. The best part? It uses simple ingredients and can be made in a flash, making it a go-to for both novice and seasoned bakers alike. Plus, the silky filling pairs beautifully with a crispy crust and the warm notes of cinnamon whipped cream, turning your dessert into a showstopper. Are you ready to create a slice of heaven that will have everyone asking for seconds? Let’s dive in!

Why is Apple Butter Pie special?
Uniqueness: This Apple Butter Pie combines the rich sweetness of apple butter with the creaminess of custard, offering a refreshing twist on traditional desserts.
Simplicity: With simple ingredients and straightforward steps, even novice bakers can achieve a delicious pie that impresses family and friends.
Perfect for Gatherings: Ideal for Thanksgiving and autumn celebrations, this pie makes a stunning centerpiece that will leave guests raving long after the meal is over.
Comforting Flavors: The cinnamon whipped cream adds a warm, cozy touch, perfectly complementing the pie’s flavors—evoking those nostalgic fall afternoons.
Versatile Options: Want to switch things up? You can easily swap apple butter for pumpkin or sweet potato puree for a seasonal variation, just like with my Boston Cream Pie.
Apple Butter Pie Ingredients
• Discover the key components for a delightful Apple Butter Pie with Cinnamon Whipped Cream.
For the Pie Crust
- All-purpose flour – Essential for structure; consider whole wheat flour as a healthy alternative.
- Unsalted butter – Provides a rich, flaky texture; remember to keep it cold for the best results.
- Kosher salt – Enhances flavor; sea salt works as a great substitute.
- Ice cold water – Crucial for binding; ensure it’s very cold to maintain the butter’s integrity.
For the Pie Filling
- Apple butter – The star ingredient, imparting sweetness and depth; homemade is best, but store-bought will suffice.
- Large eggs – Binds the filling for a stable custard; use room temperature eggs for improved mixing.
- Dark brown sugar – Adds moisture and rich flavor; light brown sugar can be used if necessary.
- Vanilla extract – Enhances the overall flavor; swap with vanilla paste for a more intense aroma.
- Sweetened condensed milk – Imparts creaminess and sweetness; choose evaporated milk for a lighter option.
- All-purpose flour – Thickens the filling; if using a thicker apple butter, you may omit this ingredient.
For the Cinnamon Whipped Cream
- Heavy whipping cream – Forms the base for a luscious topping; use whipped coconut cream for a dairy-free delight.
- Powdered sugar – Sweetens the whipped cream effortlessly; granulated sugar can be used but won’t dissolve as well.
- Ground cinnamon – Adds a warm spice to the whipped cream; try vanilla or nutmeg as fun variations.
Step‑by‑Step Instructions for Apple Butter Pie with Cinnamon Whipped Cream
Step 1: Prepare the Pie Crust
In a food processor, combine all-purpose flour and kosher salt, pulsing until mixed. Add cold, cubed unsalted butter and pulse until the mixture resembles wet sand. Gradually pour in ice cold water, one tablespoon at a time, until a shaggy dough forms. Divide the dough into two discs, wrap in plastic, and refrigerate for 1-2 hours.
Step 2: Par-Bake the Crust
Preheat your oven to 375°F (190°C). Roll out one chilled dough disc on a floured surface to fit a 9-inch pie plate. Place it in the dish, crimp the edges, and dock the bottom with a fork. Line with parchment paper, fill with pie weights, and bake for 15 minutes. Remove the weights and parchment, then bake for another 5 minutes until lightly golden.
Step 3: Make the Filling
Lower the oven temperature to 325°F (163°C). In a large mixing bowl, whisk together the apple butter, large eggs, dark brown sugar, all-purpose flour, and vanilla extract until smooth. Slowly stir in sweetened condensed milk to create a creamy filling. Pour this mixture into the warm, par-baked crust, ensuring an even distribution.
Step 4: Bake the Pie
Place the pie in the oven and bake for 30 minutes. After this time, shift the pie to the bottom third of the oven and continue baking for an additional 10-15 minutes. The filling should be set but slightly jiggly in the center—avoid overbaking, as that can lead to a dry texture.
Step 5: Cool the Pie
Once baked, remove the pie from the oven and let it cool on a wire rack for at least 3 hours. This cooling step is essential for allowing the filling to set properly. For quicker cooling, refrigerate the pie to expedite the process while the colors deepen and flavors meld beautifully.
Step 6: Prepare Cinnamon Whipped Cream
While the pie cools, make the whipped cream. In a mixing bowl, whip the heavy cream until it begins to thicken. Gradually add powdered sugar, ground cinnamon, and a splash of vanilla extract. Continue whipping until soft-stiff peaks form, creating a fluffy topping that will contrast perfectly with the creamy filling of your Apple Butter Pie.
Step 7: Assemble and Serve
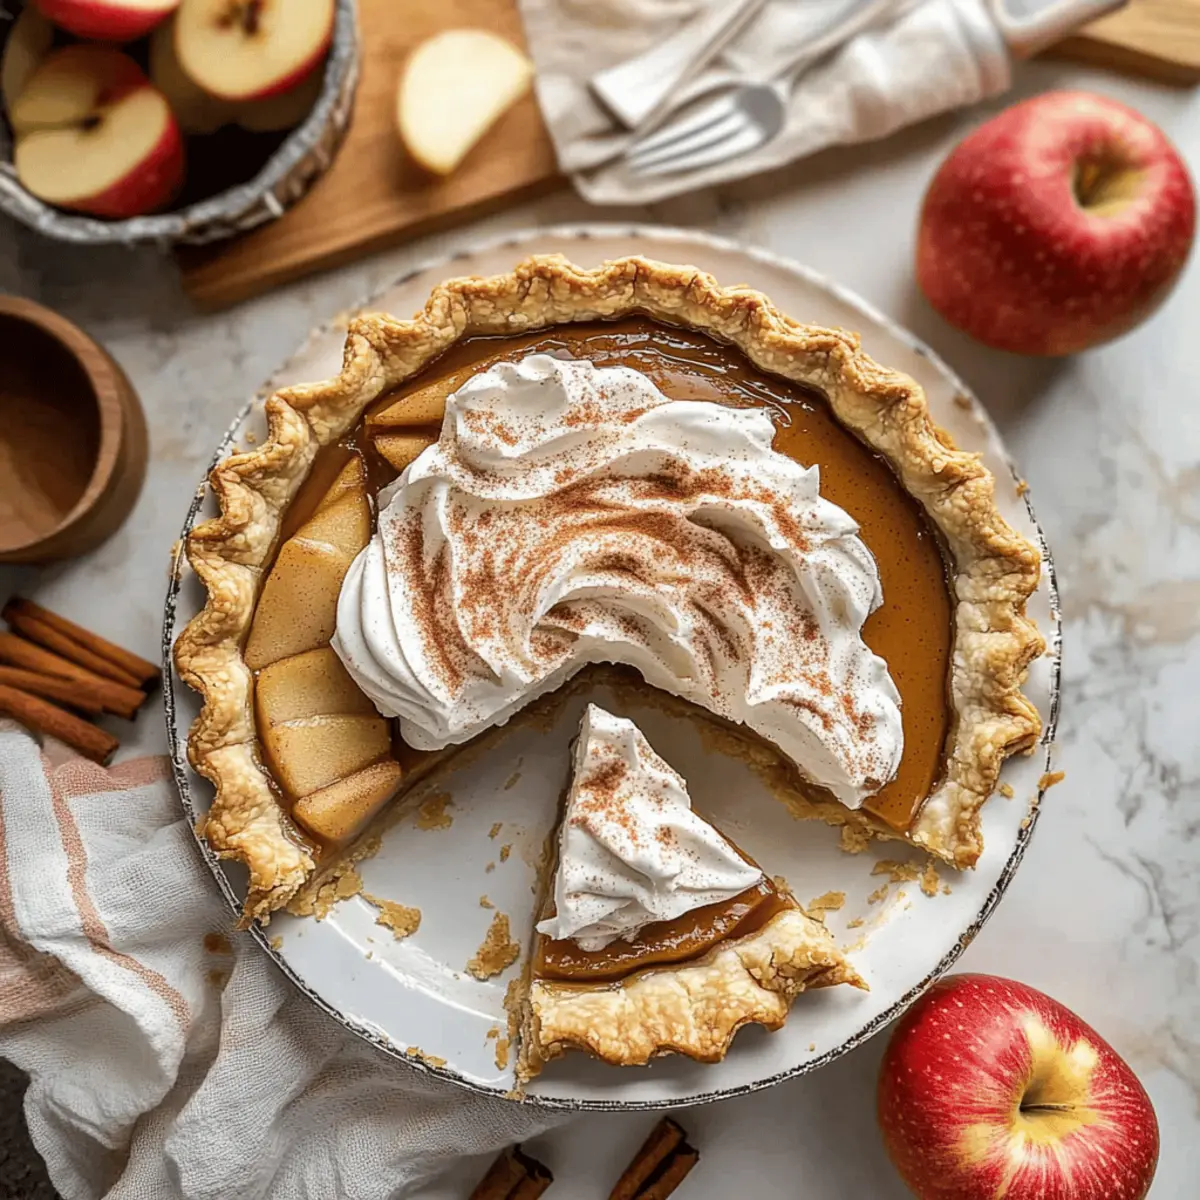
Once the pie has cooled completely, generously top it with the cinnamon whipped cream, ensuring every slice will have a dollop of that delightful mixture. For an extra flourish, consider adding dollops of additional apple butter on top. Your Apple Butter Pie with Cinnamon Whipped Cream is now ready to be savored!
How to Store and Freeze Apple Butter Pie
Room Temperature: Store loosely covered at room temperature for up to 2-3 days to maintain its delicious flavor and creamy texture.
Fridge: If you’re not serving the pie immediately, refrigerate it for up to 5 days. Ensure it’s loosely covered to prevent it from drying out.
Freezer: The pie freezes beautifully! Wrap it tightly in plastic wrap and then in aluminum foil for up to 4 months. Thaw in the fridge overnight before serving.
Reheating: To enjoy the Apple Butter Pie warm, reheat in a 350°F (175°C) oven for 10-15 minutes, just until warmed through, and then top with fresh cinnamon whipped cream.
What to Serve with Apple Butter Pie with Cinnamon Whipped Cream
The cozy charm of this dessert can be elevated even further with the right accompaniments that bring out its delightful flavors.
-
Creamy Mashed Potatoes: Their buttery smoothness adds savory comfort to balance the pie’s sweetness, creating a well-rounded meal.
-
Roasted Brussels Sprouts: The slight bitterness of these veggies, accented with balsamic glaze, offers a fantastic contrast to the rich and sweet pie.
-
Cranberry Sauce: A bright, tart counterpoint that cuts through the pie’s sweetness, making every bite more satisfying and refreshing.
-
Chai Tea: This spiced beverage enhances the fall flavors in the pie and offers a warm note that envelops you in comfort.
-
Vanilla Ice Cream: A classic pairing! The cold creaminess sets off the warm spices of the pie, creating a delightful temperature contrast.
Savoring each bite of your Apple Butter Pie with Cinnamon Whipped Cream alongside these thoughtful pairings will not only please your palate but make for a truly memorable feast. Each option enhances the existing flavors while adding their special touch!
Make Ahead Options
Busy home cooks will love how easy it is to make this Apple Butter Pie with Cinnamon Whipped Cream ahead of time! You can prepare the pie filling and bake the pie up to 24 hours in advance. Just cool it completely and then cover it tightly with plastic wrap or store it in an airtight container to keep it fresh. For the best texture, wait to add the cinnamon whipped cream until just before serving; this ensures it stays fluffy and light. If desired, you can also prepare the crust and filling components up to 3 days ahead, refrigerating them separately (the crust can be frozen too), so all you need to do is bake and assemble for a stunning, homemade dessert that tastes just as delicious!
Apple Butter Pie with Cinnamon Whipped Cream Variations
Feel free to let your creativity shine with these delightful twists on the traditional Apple Butter Pie!
- Pumpkin Swap: Substitute apple butter with pumpkin puree for a festive fall variation. The spicy flavor pairs beautifully with cinnamon cream.
- Nutty Surprise: Add chopped walnuts or pecans to the filling for a delightful crunch that complements the creamy texture. A little nutty goodness can elevate the whole experience!
- Dairy-Free Delight: Use coconut cream in place of heavy whipping cream for a lightened, dairy-free version of the cinnamon whipped cream. Perfect for those with dietary restrictions!
- Spice It Up: Experiment with different spices in the whipped cream, like nutmeg or allspice, for a unique flavor twist that enhances the autumn vibe.
- Maple Infusion: Swap vanilla extract in the filling for maple syrup to infuse a rich, sweet flavor. This will create a warm hug in every bite!
- Add Fruits: Mix in some finely chopped fresh apples or pears into the filling for additional texture and bursts of fresh fruit flavor—ask anyone, fresh always makes a difference!
- Chocolate Drizzle: For a touch of indulgence, drizzle melted chocolate over the cinnamon whipped cream before serving. Your guests will be thrilled with this twist!
- Layered Treats: Transform your pie into individual dessert cups by layering pie filling and whipped cream in small glasses, topped with grated chocolate or crushed cookies!
Don’t forget, each variation can reflect your unique taste! And if you’re looking for more comforting recipes, you might enjoy the delicious Cookie Butter Cinnamon and the indulgent Honey Peach Cream for more delightful family favorites. Enjoy your baking adventure!
Expert Tips for Apple Butter Pie
-
Ingredient Readiness: Ensure that eggs and apple butter are at room temperature, which helps create a smoother filling and better emulsification.
-
Avoiding Crust Collapse: Use pie weights during par-baking to prevent the crust from puffing up and collapsing. This keeps your Apple Butter Pie perfectly shaped.
-
Golden Crust Trick: Brush the edges of the crust with an egg wash before baking to achieve a beautiful golden-brown color that enhances presentation.
-
Managing Browning: If the edges of your pie brown too quickly, gently cover them with foil during the latter part of baking. This protects your pie while the filling finishes setting.
-
Perfect Slices: For clean cuts, use a sharp knife and wipe it between slices. This keeps the presentation beautiful and makes your Apple Butter Pie inviting!
Apple Butter Pie with Cinnamon Whipped Cream Recipe FAQs
How do I choose the best apple butter for the pie?
Absolutely! When selecting apple butter, look for one that is rich and dark, indicating a deep, caramelized flavor. If possible, I recommend opting for homemade apple butter as it typically has fewer additives and a fresher taste. If store-bought is your choice, aim for brands with natural ingredients and lower sugar content for a balanced flavor.
What is the best way to store leftover pie?
To maintain the deliciousness of your Apple Butter Pie, store it loosely covered at room temperature for up to 2-3 days if you plan to enjoy it right away. For extended freshness, refrigerate for up to 5 days. You’ll want to make sure it’s covered to prevent it from drying out—using plastic wrap or a pie keeper works great!
Can I freeze the Apple Butter Pie?
Absolutely! To freeze, wrap the cooled pie tightly in plastic wrap to prevent freezer burn, then cover it with aluminum foil. It will keep well for up to 4 months. When you’re ready to enjoy it, simply thaw in the refrigerator overnight. If you prefer it warm, reheat it in a 350°F (175°C) oven for about 10-15 minutes before serving.
Why did my pie filling turn out watery?
If your filling is watery, it may be due to undercooking or using an excessive amount of apple butter that wasn’t thick enough. Make sure to bake the custard until it’s just set with a slight jiggle in the center. If you’re using store-bought apple butter and have had issues with thickness, you might try adding a bit more flour or reducing it in the saucepan to concentrate its flavors before mixing it into your filling.
Is this pie safe for people with nut allergies?
Yes! The Apple Butter Pie with Cinnamon Whipped Cream is naturally nut-free, making it a good option for those with nut allergies. However, if you prepare this dessert in a kitchen where nuts are present, be sure to clean all utensils and equipment thoroughly to avoid cross-contamination. Always check the labels of your ingredients, especially for morning mix-ins like flavored extracts or crusts, just to be safe!
How can I enhance the flavor of the whipped cream?
To really elevate your cinnamon whipped cream, consider adding a splash of maple syrup or a dash of nutmeg along with the ground cinnamon. This complements the familiar autumn flavors and gives a delightful twist to your topping. And if you’re in the mood for something adventurous, a hint of almond extract could add a wonderfully warm and nutty undertone.

Delightful Apple Butter Pie with Cinnamon Whipped Cream
Ingredients
Equipment
Method
- In a food processor, combine all-purpose flour and kosher salt, pulsing until mixed. Add cold, cubed unsalted butter and pulse until the mixture resembles wet sand. Gradually pour in ice cold water, one tablespoon at a time, until a shaggy dough forms. Divide the dough into two discs, wrap in plastic, and refrigerate for 1-2 hours.
- Preheat your oven to 375°F (190°C). Roll out one chilled dough disc on a floured surface to fit a 9-inch pie plate. Place it in the dish, crimp the edges, and dock the bottom with a fork. Line with parchment paper, fill with pie weights, and bake for 15 minutes. Remove the weights and parchment, then bake for another 5 minutes until lightly golden.
- Lower the oven temperature to 325°F (163°C). In a large mixing bowl, whisk together the apple butter, large eggs, dark brown sugar, all-purpose flour, and vanilla extract until smooth. Slowly stir in sweetened condensed milk to create a creamy filling. Pour this mixture into the warm, par-baked crust, ensuring an even distribution.
- Place the pie in the oven and bake for 30 minutes. After this time, shift the pie to the bottom third of the oven and continue baking for an additional 10-15 minutes. The filling should be set but slightly jiggly in the center—avoid overbaking.
- Once baked, remove the pie from the oven and let it cool on a wire rack for at least 3 hours. For quicker cooling, refrigerate the pie.
- While the pie cools, make the whipped cream. In a mixing bowl, whip the heavy cream until it begins to thicken. Gradually add powdered sugar, ground cinnamon, and a splash of vanilla extract. Continue whipping until soft-stiff peaks form.
- Once the pie has cooled completely, generously top it with the cinnamon whipped cream. Optionally add dollops of apple butter on top before serving.
Leave a Reply