
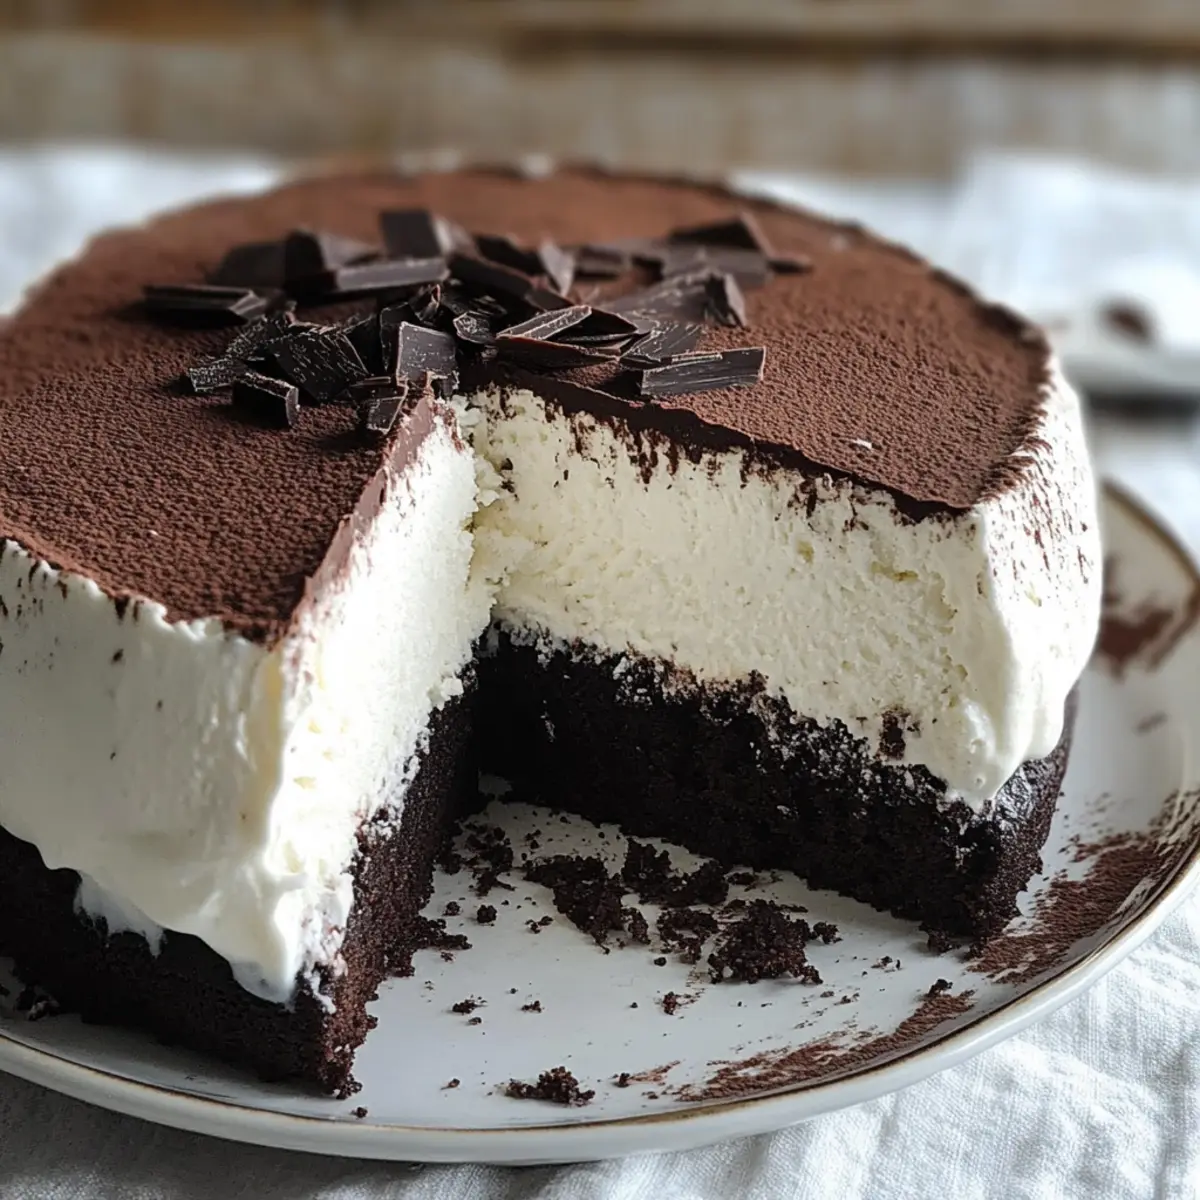
As I rummaged through my freezer one hot summer afternoon, I stumbled upon a delightful surprise: a stash of rich, creamy vanilla ice cream just waiting to join a celebration. That’s when I was struck with the idea for my Homemade Ice Cream Sandwich Cake, a show-stopping dessert that combines soft chocolate layers and the coolness of vanilla ice cream. With only a handful of pantry staples, you can create a sweet indulgence that’s not just easy to whip up, but also a guaranteed crowd-pleaser. Perfect for backyard barbecues or birthday parties, this cake is all about layered joy that brings smiles to both kids and adults alike. So, are you ready to elevate your summer dessert game? Let’s dive into the deliciousness!
Why is this Ice Cream Sandwich Cake special?
Irresistible flavor combination: The fusion of moist chocolate cake and creamy vanilla ice cream will have your taste buds dancing.
Easy to make: No advanced baking skills required! You’ll find that this recipe is simple enough for beginners yet impressive enough for seasoned bakers.
Versatile: Whether you prefer a round cake for celebrations or individual squares for casual get-togethers, this recipe adapts perfectly to your needs.
Crowd-pleaser: Kids and adults alike will rave about this dessert at your next summer barbecue, just like they do for my Lemon Cream Puffs or Oreo Icebox Cake.
Make-ahead: With the option to freeze the cake, you can prepare it in advance and enjoy a stress-free dessert on the big day.
Ice Cream Sandwich Cake Ingredients
• Dive into deliciousness with these essential ingredients!
For the Cake Layers
- Cake Flour – Provides a tender texture for the cake layers; you can substitute with all-purpose flour, but it may alter the texture slightly.
- Fine Sea Salt – Enhances the flavor of the cake; don’t skip this crucial ingredient for a well-balanced taste.
- Baking Soda & Baking Powder – Essential leavening agents to help the cake rise perfectly.
- Dutch Process Cocoa Powder – Delivers that rich chocolate flavor; feel free to swap with unsweetened cocoa powder, though the taste may vary.
- Brown Sugar – Adds moisture and deep flavor; white sugar can be used, but it may lead to a drier cake.
- Flavorless Oil (canola, grapeseed, avocado) – Keeps the cake moist; avoid using oils with strong flavors.
- Whole Milk – Ensures a smooth batter and moisture in the cake; almond milk works as a dairy-free alternative.
- Large Egg – Binds the ingredients and adds structure to the cake layers.
For the Ice Cream Layer
- Vanilla Ice Cream – A quart is needed, either store-bought or homemade; this is what makes the Ice Cream Sandwich Cake so delightful!
With these ingredients on hand, you’re already a step closer to creating a blissful Ice Cream Sandwich Cake that will surely become a summer favorite!
Step‑by‑Step Instructions for Ice Cream Sandwich Cake
Step 1: Prep the Pans
Begin by greasing, flouring, and lining two 8-inch round cake pans with parchment paper to prevent sticking. This step is crucial for ensuring your moist chocolate cake layers come out easily. Set your oven to preheat at 325°F (163°C) while you prepare the pans.
Step 2: Whisk Dry Ingredients
In a mixing bowl, combine the cake flour, fine sea salt, baking soda, baking powder, and Dutch process cocoa powder. Whisk together until well incorporated, ensuring there are no clumps. This blend forms the foundation of the rich chocolate flavor in your Ice Cream Sandwich Cake.
Step 3: Combine Wet Ingredients
In the bowl of dry ingredients, add the brown sugar, flavorless oil, and milk, whisking until the mixture is smooth. Next, add a large egg to the bowl and continue whisking until the batter becomes thick and glossy, showcasing that decadent chocolate color full of promise.
Step 4: Divide & Bake
Pour the chocolate batter equally into the prepared pans, smoothing the tops with a spatula. Place the pans in the preheated oven and bake for about 12 minutes, or until a toothpick inserted comes out clean. Once baked, allow the layers to cool completely in the pans on a wire rack.
Step 5: Prepare Ice Cream Layer
While the cake layers cool, prepare the vanilla ice cream layer. If using store-bought, let it sit at room temperature for about 10 minutes to soften. Alternatively, if you’re making homemade no-churn vanilla ice cream, ensure it is ready to layer when the cake has cooled.
Step 6: Assemble the Cake
In a clean 8-inch cake pan lined with plastic wrap, place one chocolate cake layer face down. Spread the softened vanilla ice cream evenly over this layer, ensuring a thick layer of creaminess. Then, place the second cake layer face up on top of the ice cream, pressing gently for a snug fit.
Step 7: Freeze Overnight
Cover the assembled Ice Cream Sandwich Cake tightly with plastic wrap, then place it in the freezer overnight. This allows the flavors to meld beautifully and ensures your cake holds together when sliced, creating that desirable cross-section of cake and ice cream.
Step 8: Serve
When you’re ready to serve, gently invert the frozen cake onto a serving plate. Carefully remove the plastic wrap, revealing the delightful layers of chocolate and ice cream. Slice into portions and watch as smiles appear while enjoying this indulgent Ice Cream Sandwich Cake!
Ice Cream Sandwich Cake Variations
Feel free to get creative with this delightful dessert and customize it to suit your taste!
-
Vanilla Swap:
Use vanilla cake instead of chocolate for a lighter flavor that pairs beautifully with the ice cream. This twist is perfect for those who prefer classic flavors. -
Flavor Boost:
Incorporate peanut butter or Nutella as a spread between the cake layers for added richness. The creamy texture of these spreads elevates the chocolate experience! -
Fruit Fusion:
Layer in fresh fruit like strawberries or bananas for a fruity twist. The combination of chocolate, ice cream, and fresh fruit will tantalize your taste buds! -
Crunch Factor:
Add crushed cookies or candy bars to the ice cream layer for a delightful crunch. My personal favorite is crumbled Oreos, which adds a fun texture. -
Dairy-Free Delight:
Swap traditional ice cream with coconut or almond milk ice cream for a dairy-free version. This option keeps the dessert creamy while catering to dietary needs. -
Coffee Infusion:
Add a touch of espresso powder to the cake batter for a rich coffee flavor that pairs wonderfully with the vanilla ice cream. It’s a grown-up twist that coffee lovers will adore! -
Spicy Heat:
For a surprising kick, toss in a pinch of cayenne pepper or chili powder to the chocolate batter. It adds a warming heat that beautifully contrasts with the cool ice cream. -
Personal Portions:
Create individual square ice cream sandwiches instead of a large cake. This allows for easy serving and makes for a fun presentation at gatherings, like birthdays or picnics!
No matter how you choose to customize your Ice Cream Sandwich Cake, each variation promises to create delightful experiences reminiscent of summer treats. Enjoy crafting your version, and be sure to try pairing it with delightful desserts like Decadent Boston Cream or a refreshing slice of Honey Peach Cream.
How to Store and Freeze Ice Cream Sandwich Cake
- Fridge: Store leftovers covered with plastic wrap in the fridge for up to 3 days. This keeps the cake fresh, while the ice cream stays creamy and enjoyable.
- Freezer: For longer storage, wrap the Ice Cream Sandwich Cake tightly in plastic wrap and place it in the freezer for up to 2 weeks. Ensure it’s airtight to prevent freezer burn.
- Reheating: When ready to serve from the freezer, allow the cake to sit at room temperature for about 10 minutes to soften slightly before slicing. Enjoy that perfect blend of chocolate and ice cream!
Make Ahead Options
These Ice Cream Sandwich Cakes are a lifesaver for busy home cooks! You can prepare the chocolate cake layers up to 3 days in advance — simply bake, let them cool completely, and then wrap tightly in plastic wrap before refrigerating. To maintain their moist texture, it’s best to keep them in an airtight container. When you’re ready to assemble, just soften the vanilla ice cream (if using store-bought) for about 10 minutes, layer it between the cake, and freeze the whole creation overnight. This way, you’ll have a stunning dessert with minimal effort when it’s time to serve, ensuring your Ice Cream Sandwich Cake is just as delightful and ready to impress!
Expert Tips for Ice Cream Sandwich Cake
- Cool Completely: Ensure that your cake layers are entirely cool before assembling; warm layers can cause the ice cream to melt and create a messy dessert.
- Use Parchment Paper: Lining your pans with parchment paper helps prevent sticking, making it easier to remove the cake layers without damaging them.
- Freeze Cake Layers: If you’re aiming for a firmer cake, freeze the individual cake layers for a couple of hours before adding the ice cream for better structure in your Ice Cream Sandwich Cake.
- Soften Ice Cream: Let your vanilla ice cream sit out for about 10 minutes before spreading it on the cake; this ensures easier spreading and a smoother finish.
- Customize Flavors: Don’t hesitate to experiment with different flavors for the cake or ice cream; unique combinations can elevate your Ice Cream Sandwich Cake into a signature dessert!
What to Serve with Ice Cream Sandwich Cake
As you plan your perfect summer gathering, consider delightful accompaniments that enhance each slice of this indulgent dessert.
- Fresh Berries: Bright, juicy berries like strawberries or raspberries add a vibrant pop of color and a refreshing tartness that beautifully contrasts the richness of the cake.
- Whipped Cream: Light and airy whipped cream adds a luscious touch, making each bite of the Ice Cream Sandwich Cake feel even more luxurious.
- Chocolate Sauce: Drizzle warm chocolate sauce over the slices for an extra layer of indulgence that intensifies the cake’s chocolate flavor.
- Mint Leaves: Garnish each slice with fresh mint leaves for a touch of aromatic freshness that elevates the dessert’s presentation and taste.
- Iced Coffee: A chilled, creamy iced coffee pairs wonderfully with the sweetness of the cake, providing a delightful caffeine kick that balances the dessert’s richness.
- Vanilla Ice Cream: Serve extra scoops of vanilla ice cream on the side for those who crave an even creamier experience alongside the fluffy chocolate layers of the cake.
- Lemon Sorbet: The zesty brightness of lemon sorbet cleanses the palate and offers a refreshing counterpoint to the chocolate and ice cream, perfect for hot days.
- Sparkling Lemonade: This fizzy drink adds a refreshing burst of flavor, making it a delightful accompaniment that complements the sweetness of the Ice Cream Sandwich Cake while keeping things light.
- Chocolate Chip Cookies: For a playful twist, serve a few soft chocolate chip cookies on the side, creating a nostalgic pairing that takes everyone back to their childhood.
Ice Cream Sandwich Cake Recipe FAQs
What type of cocoa powder is best for this ice cream sandwich cake?
I recommend using Dutch process cocoa powder for a rich chocolate flavor, as it creates a deeper taste compared to regular unsweetened cocoa powder. If you only have unsweetened cocoa on hand, you can substitute it, but keep in mind it may alter the overall flavor.
How should I store leftovers of the ice cream sandwich cake?
Leftovers can be stored wrapped in plastic wrap in the fridge for up to 3 days, keeping the cake fresh while preserving the creaminess of the ice cream. If you want to store it for a longer duration, wrap it tightly in plastic wrap and place it in the freezer for up to 2 weeks to avoid freezer burn.
Can I freeze the ice cream sandwich cake? How do I do it?
Absolutely! To freeze your ice cream sandwich cake, follow these steps:
- Once assembled and covered with plastic wrap, place the cake in the freezer for at least overnight.
- For longer storage, ensure it is tightly wrapped in an airtight manner to prevent freezer burn.
- When you’re ready to enjoy, let it sit at room temperature for about 10 minutes before slicing to achieve that perfect texture.
What can I do if my cake layers are too dry?
If your cake layers turn out too dry, try serving the cake with a drizzle of chocolate sauce or whipped cream on top to add moisture. In the future, be sure to check that you’re measuring flour correctly and not overbaking the layers. Use a toothpick inserted into the center — it should come out clean but not dry.
Are there any dietary considerations I should be aware of?
Yes, if you’re serving this dessert to guests with dietary restrictions, you can make it dairy-free by substituting whole milk with almond milk and using a dairy-free ice cream. Always double-check ingredient labels for any allergens, especially if you’re using store-bought products.
Irresistible Ice Cream Sandwich Cake: Your New Summer Favorite
Ingredients
Equipment
Method
- Begin by greasing, flouring, and lining two 8-inch round cake pans with parchment paper to prevent sticking. Set your oven to preheat at 325°F (163°C).
- In a mixing bowl, combine the cake flour, fine sea salt, baking soda, baking powder, and Dutch process cocoa powder. Whisk until well incorporated.
- Add the brown sugar, flavorless oil, and milk to the dry ingredients, whisking until smooth. Then add the large egg and whisk until the batter is thick and glossy.
- Pour the chocolate batter into the prepared pans, smoothing the tops. Bake for about 12 minutes or until a toothpick inserted comes out clean. Let cool in pans.
- Prepare the vanilla ice cream layer by letting it sit at room temperature for about 10 minutes to soften.
- In a clean 8-inch cake pan lined with plastic wrap, place one chocolate cake layer face down. Spread the softened vanilla ice cream evenly over this layer.
- Place the second cake layer face up on top of the ice cream, pressing gently for a snug fit.
- Cover the assembled cake tightly with plastic wrap and freeze overnight.
- When ready to serve, invert the frozen cake onto a serving plate, remove plastic wrap, slice, and enjoy.
Leave a Reply