
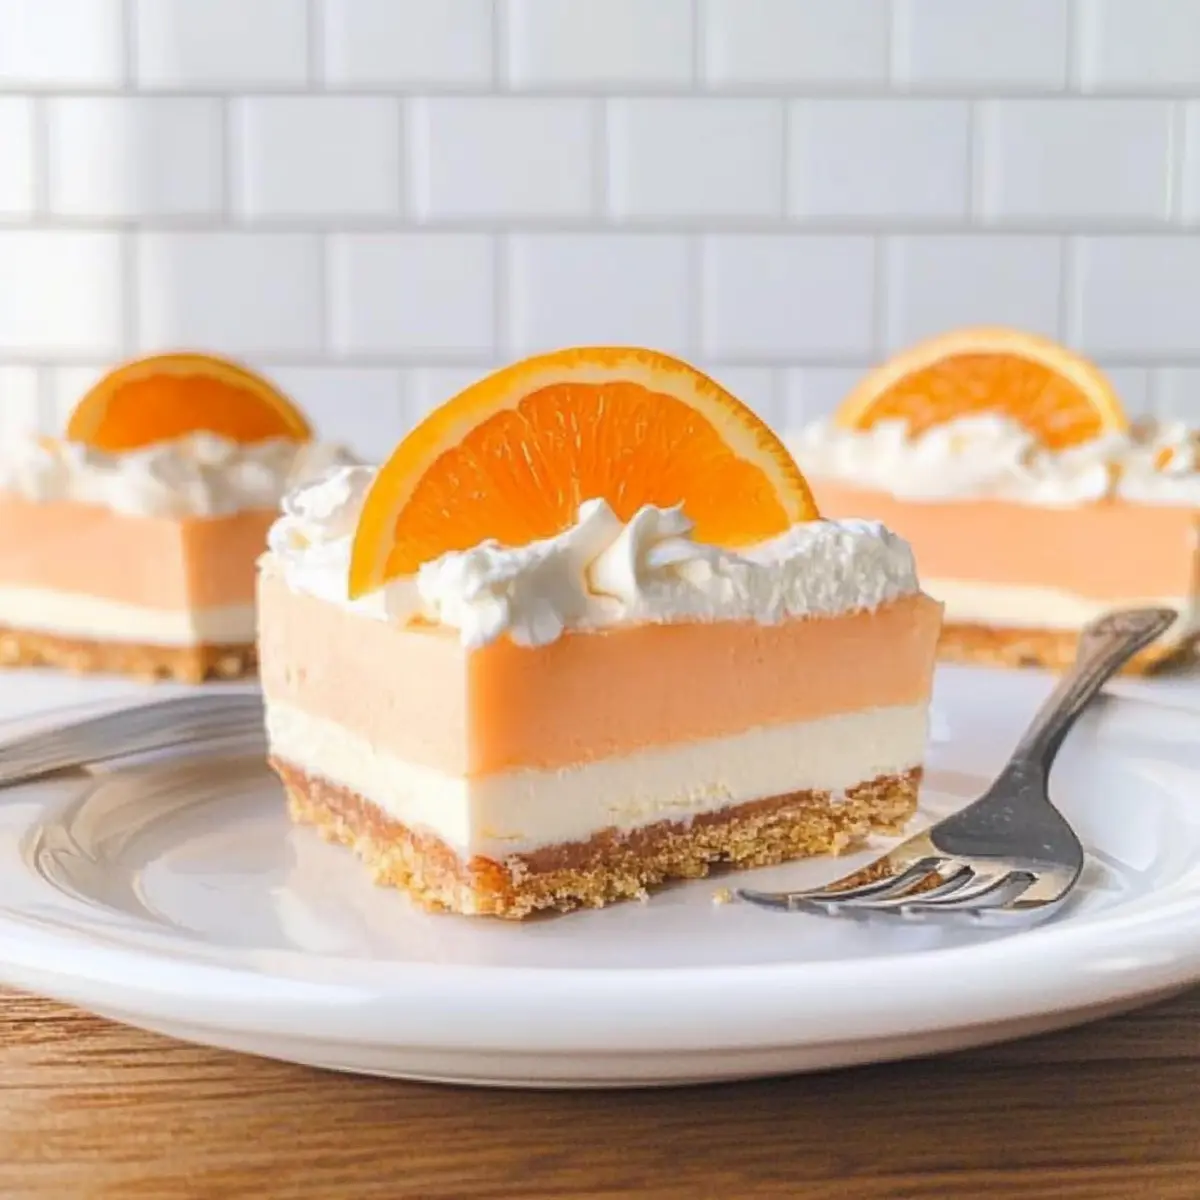
You won’t believe how a simple dessert can transport you back to sun-soaked summer days! These No-Bake Orange Creamsicle Dream Bars are my homage to the classic frozen treat that we all cherished as kids. The crunchy Nilla Wafer crust beautifully contrasts with the creamy cheesecake layer and vibrant orange topping, making it a delightful family-friendly dessert. Not only are these bars a breeze to whip up—no oven needed—but they’re also perfect for gatherings, swiftly disappearing from any table. So why not treat your loved ones to a taste of nostalgia with this easy recipe? Ready to dive into a world of creamy orange bliss?
Why are No-Bake Bars So Amazing?
Ease of Preparation: No need for an oven! These Orange Creamsicle Dream Bars are a cinch to whip up, making them perfect for even the busiest of home cooks.
Nostalgic Treat: Each bite brings back the joy of summer past, reminding us of classic frozen treats that delighted our childhood.
Versatile Variations: Whether you stick with the Nilla Wafers or try out graham crackers or sugar cones, the flavor possibilities are endless!
Perfect for Gatherings: This crowd-pleaser is a surefire hit at family barbecues, potlucks, and parties, leaving everyone craving more.
Quick Chill Time: Designed to be ready in just a few hours, you can easily prep these bars the night before for a hassle-free dessert experience.
Why wait? Dive into a creamy orange bliss today with these delightful bars, and don’t forget to check out our tips on serving suggestions for an eye-catching presentation!
Orange Creamsicle Dream Bars Ingredients
For the Crust
• Nilla Wafer Cookie Crumbs – A sweet, crunchy base that perfectly complements the creamy layers; graham cracker crumbs make a great alternative.
• Unsalted Butter – Binds the crust ingredients together; it’s crucial to melt it for proper mixing.
For the Orange Layer
• Cool Whip – Provides a light, airy texture; you can use Stabilized Whipped Cream for a homemade option instead.
• Orange Gelatin – Adds vibrant color and a burst of orange flavor; follow the recipe’s water measurements to ensure stability.
• Cream Cheese – Forms the creamy layers; make sure to use room temperature for easier blending.
• Powdered Sugar – Sweetens the cream cheese mixture and helps stabilize it.
• Orange Extract – Enhances the orange flavor; feel free to adjust to taste.
• Orange Wilton Gel Food Color – Optional for a vibrant appearance; can be left out if you prefer natural coloring.
With these simple ingredients, you’ll be on your way to making the most delicious Orange Creamsicle Dream Bars that are sure to delight your family and friends! Enjoy the nostalgia of a classic treat in a no-bake, easy-to-make dessert!
Step‑by‑Step Instructions for Orange Creamsicle Dream Bars
Step 1: Prepare the Crust
Begin by lining an 8×8-inch pan with parchment paper for easy removal. Melt the unsalted butter in a microwave-safe bowl until it’s completely liquid, about 30 seconds. In a mixing bowl, combine the melted butter with Nilla Wafer cookie crumbs until well combined. Press this mixture firmly into the bottom of the prepared pan, creating an even layer. Place the crust in the freezer for 30 minutes to set.
Step 2: Make the Orange Gelatin Layer
While the crust chills, bring 1 cup of water to a boil. Once boiling, remove from heat and whisk in the orange gelatin until fully dissolved. Add 1 cup of cold water to the mixture. Allow the gelatin mixture to cool in the refrigerator for about 20 minutes, ensuring it thickens slightly but does not set completely. This orange gelatin layer is essential for the flavorful topping of your Orange Creamsicle Dream Bars.
Step 3: Mix Orange Cream
In a large mixing bowl, beat the room-temperature cream cheese and powdered sugar together until smooth and creamy, about 2 minutes. Gradually add the orange extract and a few drops of food coloring, if using, mixing until completely incorporated. Carefully fold in the chilled orange gelatin, blending until the orange cream is smooth and free of lumps. Refrigerate this mixture for 1 hour to allow it to firm up slightly before layering.
Step 4: Prepare Cheesecake Layer
In a separate mixing bowl, combine the cream cheese and confectioners’ sugar. Beat until smooth and creamy, which should take around 2-3 minutes. Gradually fold in 1 cup of Cool Whip until the mixture is well combined and fluffy. This cheesecake layer adds a luscious depth to your Orange Creamsicle Dream Bars, contrasting beautifully with the vibrant, fruity top.
Step 5: Assemble Layers
Once the crust is set, spread the cheesecake mixture evenly over the chilled crust, using a spatula to create a smooth layer. Carefully spoon the chilled orange cream mixture on top of the cheesecake layer, gently spreading it out to cover evenly. This beautiful layering builds the heart of your Orange Creamsicle Dream Bars, ensuring every slice is a delightful blend of flavors.
Step 6: Chill
Cover the assembled bars with plastic wrap or aluminum foil and place them in the refrigerator. Chill for a minimum of 6 hours or, preferably, overnight. This extended chilling time allows the layers to set perfectly, making it easier to slice into bars. Once set, the creamy texture and vibrant orange color will make these bars a stunning addition to your dessert table.
What to Serve with Orange Creamsicle Dream Bars
Elevate your summer dessert experience with these delightful pairings that perfectly complement the creamy, citrusy bliss of your no-bake treat.
-
Fresh Fruit Salad: A mix of seasonal fruits adds a refreshing crunch, balancing the creamy texture of the bars with vibrant flavors.
-
Minty Iced Tea: Cooling herbal iced tea with a splash of citrus ties in beautifully with the orange theme, refreshing the palate between bites.
-
Shortbread Cookies: Buttery, crumbly shortbread adds a delightful contrast in texture and is a perfect accompaniment for enjoying with a scoop of ice cream.
-
Chocolate Drizzle: A drizzle of rich chocolate sauce creates an elegant touch, adding a hint of bitterness that enhances the sweetness of the bars.
-
Whipped Cream Topping: Serve each slice with a dollop of extra Cool Whip and a sprinkle of orange zest—it’s a lovely way to showcase the dessert.
-
Pineapple Sorbet: The tropical sweetness of pineapple sorbet offers a delightful contrast to the tangy flavors of the bars, making for a refreshing duo.
With these perfect pairings, your Orange Creamsicle Dream Bars will shine even brighter at any gathering!
Make Ahead Options
These No-Bake Orange Creamsicle Dream Bars are perfect for meal prep, allowing you to enjoy a delicious dessert without the last-minute rush! You can prepare the crust and layers up to 24 hours in advance. Simply make the crust and freeze it, then store the orange cream and cheesecake layers separately in the refrigerator (to keep everything fresh and delicious). When you’re ready to serve, assemble the layers on the crust, chill the assembled dessert for a bit, and voilà! You’ll have a delightful and creamy treat ready to impress without spending all day in the kitchen. So go ahead, prep in advance, and watch your loved ones savor every bite!
Expert Tips for Orange Creamsicle Dream Bars
-
Gelatin Cooling: Ensure that the orange gelatin is cooled but not set; this keeps your orange cream smooth and easy to mix.
-
Layering Techniques: Use an offset spatula for even spreading when layering the cheesecake and orange cream to avoid any mixing of the flavors.
-
Chilling Time: Don’t rush the chilling process; ideally, let the bars set overnight for the best texture and flavor when served.
-
Parchment Paper: Line the baking pan with parchment paper for easy removal. This step makes slicing your Orange Creamsicle Dream Bars much simpler!
-
Flavor Adjustments: Feel free to adjust the amount of orange extract to enhance or lighten the orange flavor based on your preference.
Storage Tips for Orange Creamsicle Dream Bars
Refrigerator: Keep the Orange Creamsicle Dream Bars covered in the fridge for up to 3-4 days. Ensure they are sealed to maintain freshness and avoid absorption of other flavors.
Freezer: For longer storage, you can freeze the bars for up to 2 months. Wrap each piece in plastic wrap, then place them in an airtight container to prevent freezer burn.
Thawing: To enjoy frozen bars, transfer them to the fridge to thaw overnight before serving. This gentle thawing helps preserve texture and flavor.
Serving Suggestions: When ready to serve, garnish with additional Cool Whip or fresh orange slices for a beautiful presentation that will delight your family and friends!
Orange Creamsicle Dream Bars Variations
Feel free to get creative with these Orange Creamsicle Dream Bars, adding your own spin to this delightful dessert!
-
Graham Cracker Crust: Swap Nilla Wafers for graham cracker crumbs to give your crust a slight cinnamon twist. The flavors meld beautifully, enhancing the whole dessert experience.
-
Sugar Cone Crunch: Use crushed sugar cones for the crust! They add a fun, sweet crunch that perfectly complements the creamy filling.
-
Dairy-Free Delight: Substitute Cool Whip with your favorite dairy-free whipped topping for a creamy, plant-based treat that everyone can enjoy.
-
Fruit Explosion: Fold in some chopped mandarin oranges or fresh pineapple into the orange cream mixture. This adds an extra burst of tropical flavor that brightens up every bite.
-
Chocolate Drizzle: Finish your bars with a drizzle of melted chocolate for a decadent touch. The richness complements the orange flavor and creates a tempting balance.
-
Coconut Flair: Add shredded coconut to the cheesecake layer for an island-inspired twist. This addition elevates the texture while giving the bars an exotic flair.
-
Spicy Kick: For those who enjoy a bit of heat, mix a pinch of cayenne pepper or chili powder into the orange cream. This surprising twist will wow your taste buds!
-
Zesty Lemon Layer: Mix in some freshly squeezed lemon juice into both the orange cream and cheesecake layers. The citrus combo adds a delightful zing, making this dessert even more refreshing.
With so many options, your Orange Creamsicle Dream Bars can transform into a variety of treats to suit your taste! Don’t forget to check out our tips on serving suggestions for a stunning presentation.
Orange Creamsicle Dream Bars Recipe FAQs
How do I choose the right ripeness for the ingredients?
Absolutely! For the best flavor in your Orange Creamsicle Dream Bars, make sure your cream cheese is at room temperature. This ensures it blends smoothly without lumps. As for the orange extract, the fresher the better—opt for a high-quality pure extract if possible.
What is the best way to store leftover Orange Creamsicle Dream Bars?
The more the merrier with this dessert! Keep your bars covered in the refrigerator for up to 3-4 days to maintain their freshness. Store them in an airtight container or wrap them tightly in plastic wrap to prevent them from absorbing other odors in the fridge.
Can I freeze Orange Creamsicle Dream Bars?
Yes! To freeze the bars, first wrap each piece in plastic wrap. Then place them in an airtight container to protect against freezer burn. They can be frozen for up to 2 months. When you’re ready to enjoy them, simply transfer them to the fridge to thaw overnight—this will help retain their delightful texture.
What should I do if my orange gelatin layer doesn’t set properly?
No worries! If your orange gelatin layer doesn’t set well, double-check that you followed the water measurements accurately. If it’s too watery, you can gently heat it until it’s liquid again, then cool it down in the fridge again, ensuring it thickens without setting. Keep an eye on the chilling time—let it cool until it’s thick but still pourable.
Are Orange Creamsicle Dream Bars safe for those with allergies?
Great question! These bars contain dairy from cream cheese and Cool Whip, and they may include gluten from Nilla Wafers. If you’re catering to those with food allergies, I recommend using gluten-free cookie options and checking the labels on every ingredient. For a dairy-free version, you can substitute cream cheese with a plant-based alternative and use non-dairy whipped topping. Just be sure to adjust sweetness to taste!
Why are my bars too soft or hard?
If your bars turn out too soft, it might be because the chilling time wasn’t long enough—make sure to let them chill at least 6 hours or overnight for the best texture. Conversely, if they’re too hard, it could be a sign that the gelatin was overmixed or had too much cold water added. Make sure to follow the instructions carefully, and if needed, adapt the water measurements for a softer finish.
Delicious No-Bake Orange Creamsicle Dream Bars for Summer Bliss
Ingredients
Equipment
Method
- Prepare the crust by lining an 8x8-inch pan with parchment paper. Melt the unsalted butter and combine with Nilla Wafer crumbs. Press the mixture into the bottom of the pan and freeze for 30 minutes.
- While the crust chills, bring 1 cup of water to a boil, remove from heat, and whisk in the orange gelatin. Add 1 cup of cold water and let cool in the refrigerator for 20 minutes.
- In a mixing bowl, beat room-temperature cream cheese and powdered sugar until smooth. Gradually add orange extract and food coloring. Fold in the chilled gelatin until smooth and refrigerate for 1 hour.
- In another bowl, beat cream cheese and confectioners' sugar until smooth. Fold in Cool Whip until fluffy.
- Spread the cheesecake mixture on the set crust. Spoon the orange cream mixture on top carefully and spread evenly.
- Cover with plastic wrap and chill for at least 6 hours or overnight before serving.
Leave a Reply