
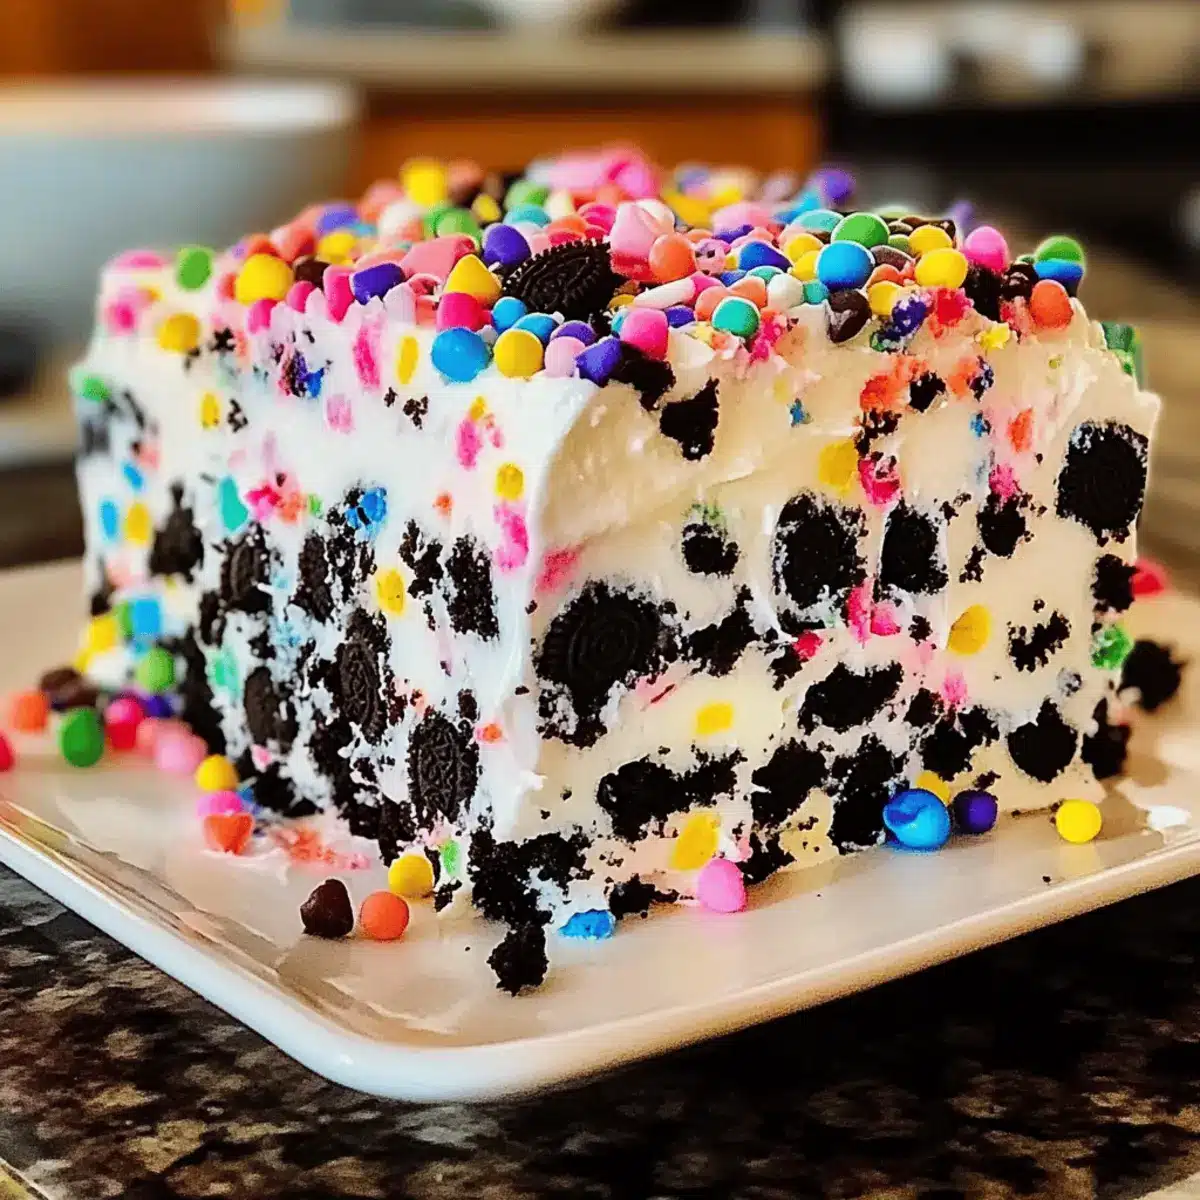
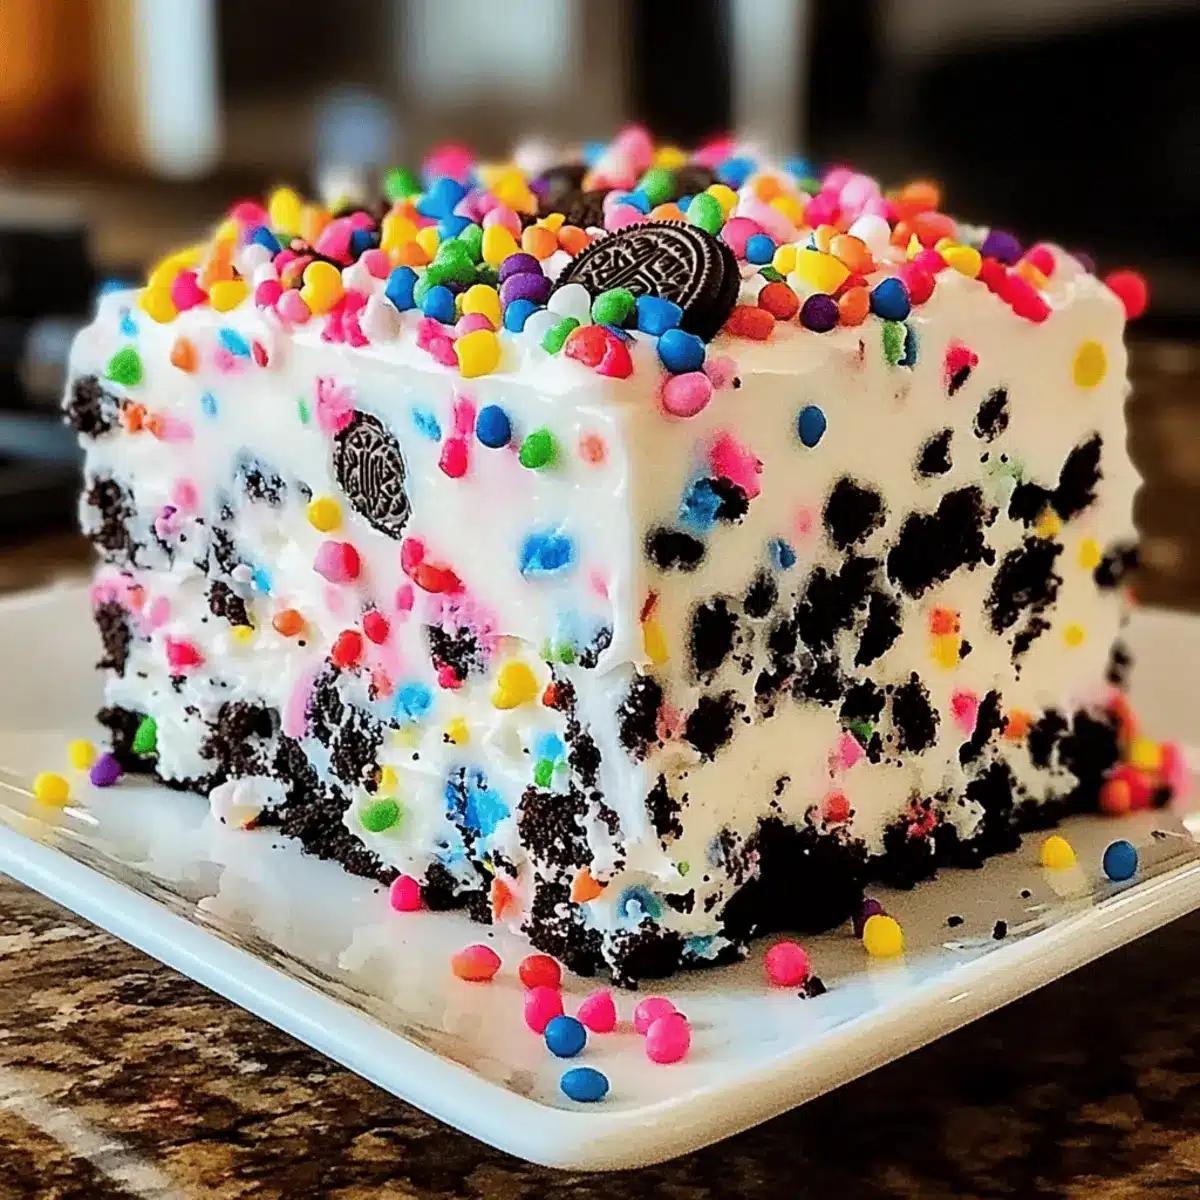
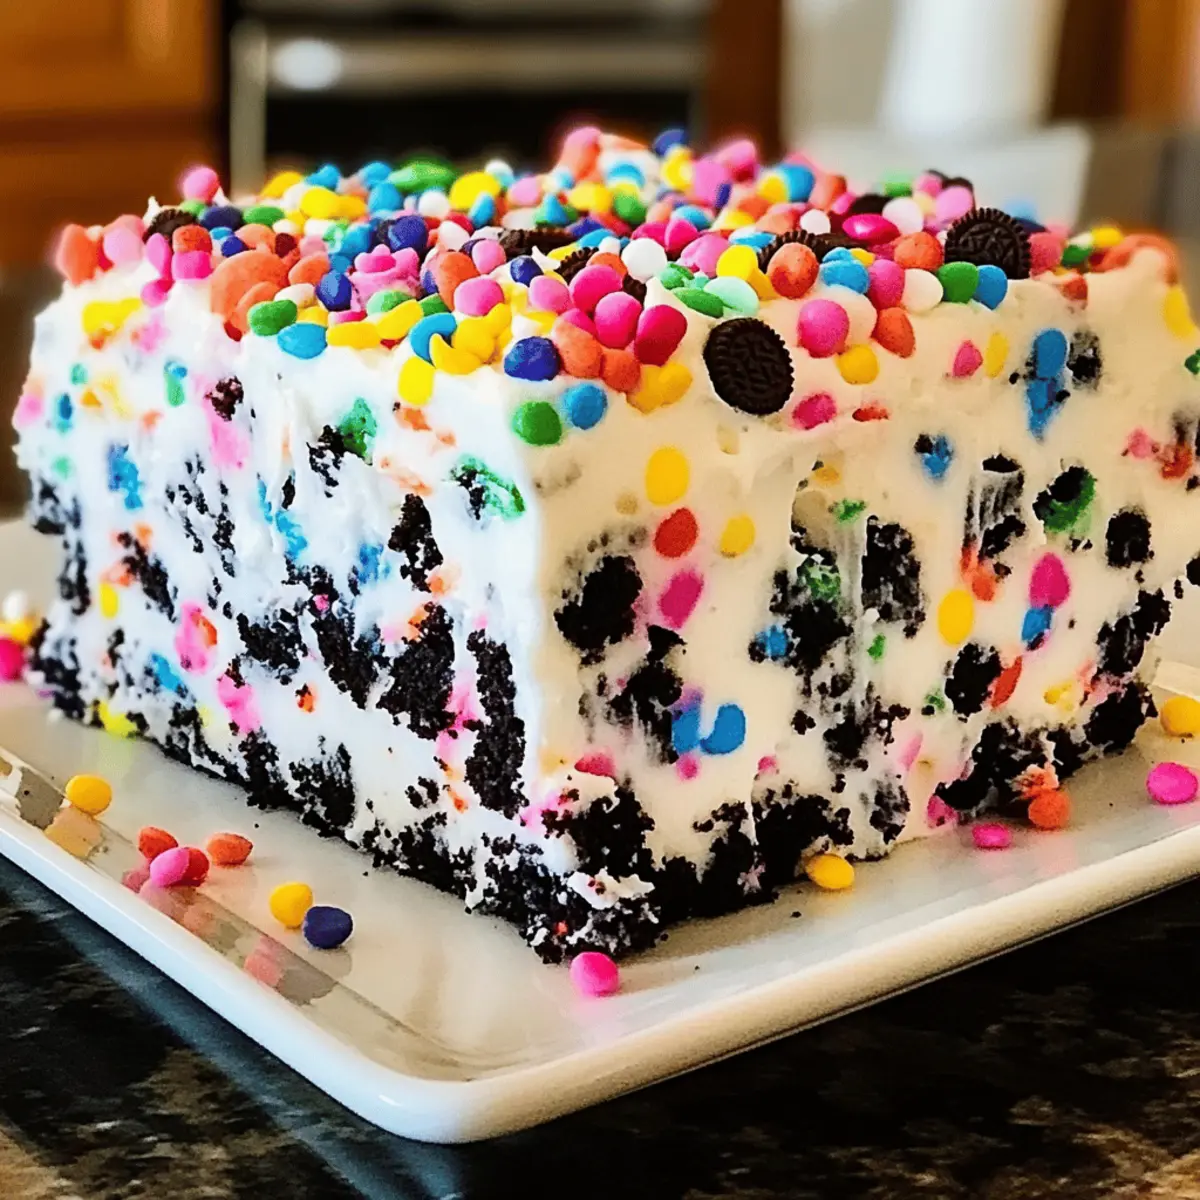
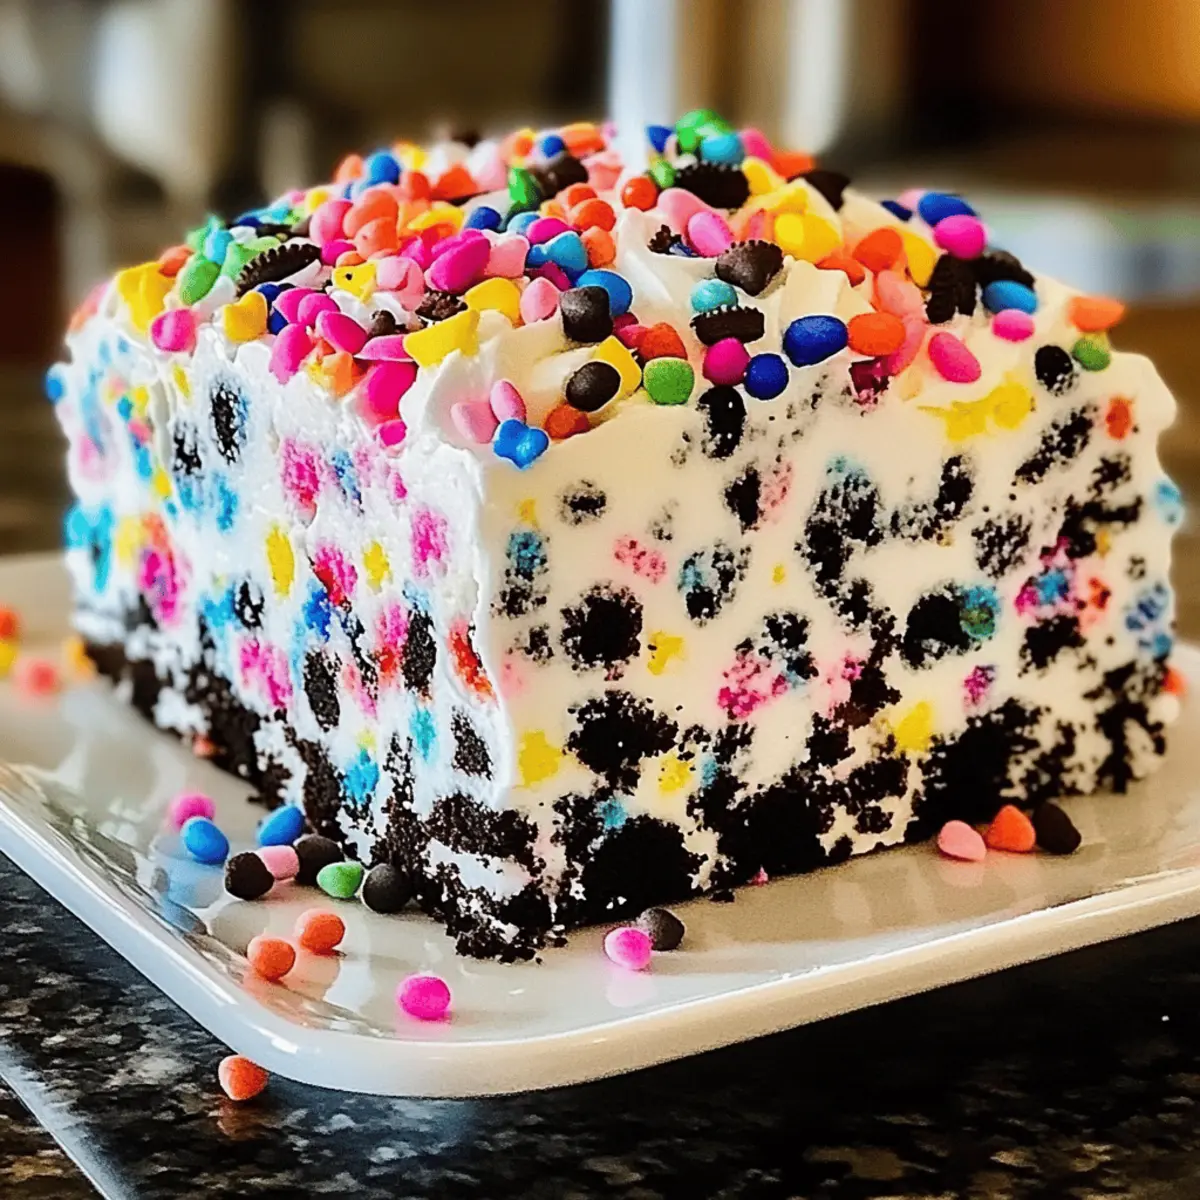
As I was rummaging through my pantry, I stumbled upon a colorful array of sprinkles and Birthday Cake Oreos, and an idea sparked. What if I could combine these joyful ingredients into a dessert that celebrates every occasion? Enter the No-Bake Funfetti Oreo Icebox Cake, an easy recipe that transforms simple elements into a stunning and festive treat. With crowd-pleasing layers of creamy goodness and crunchy cookies, this delightful dessert requires minimal effort and absolutely no baking! Whether you’re hosting a birthday bash or a cozy family gathering, this cake will shine as a centerpiece, bringing smiles to all. Are you ready to whip up this delicious showstopper? Let’s dive into the playful world of icebox desserts!
Why Is This Cake a Must-Try?
Simplicity at Its Finest: Creating this Funfetti Oreo Icebox Cake requires minimal cooking skills—just layer, whip, and chill!
Colorful Celebration: The vibrant sprinkles and whimsical layers make it a feast for the eyes, perfect for any festive occasion.
Crowd-Pleasing Delight: With a combination of creamy and crunchy textures, everyone—kids and adults alike—will be reaching for seconds!
Endless Variations: Feel free to swap in regular Oreos or even chocolate-flavored ones to cater to different tastes.
No Oven Required: Say goodbye to slaving over a hot oven; this no-bake recipe is perfect for those warm summer days.
Embrace the joy of homemade desserts and impress your guests with this easy, stunning treat! If you’re looking for more fun desserts, try our delightful Oreo Balls Bake or a delicious Brownie Cheesecake Sweet that will surely satisfy your sweet tooth!
Funfetti Oreo Icebox Cake Ingredients
• Get ready to create this delightful layer of joy with these simple elements!
For the Cake Layers
- Birthday Cake Oreos – Adds a fun, flavorful base to your Funfetti Oreo Icebox Cake; can substitute with regular Oreos for a classic twist.
- Cream Cheese (softened) – Contributes to the rich and creamy texture of the filling; for a lighter option, try using dairy-free cream cheese.
For the Cream Mixture
- Heavy Cream – Whipped to fluffy perfection, bringing an airy feel to the cake; remember to chill it well before whipping for best results.
- Powdered Sugar – Sweetens the cream mixture; regular sugar can also be used, but it may require more whipping to dissolve.
- Vanilla Extract – Elevates the flavors; while it’s optional, substituting with almond extract introduces a delightful twist.
For Decoration
- Colorful Sprinkles – Sprinkle joy on top for color and fun visual appeal; don’t hesitate to use your favorite edible decorations to match the occasion!
Step‑by‑Step Instructions for Funfetti Oreo Icebox Cake
Step 1: Whip the Cream
Start by chilling your mixing bowl and beaters in the freezer for about 10 minutes. Once cold, pour in the heavy cream and beat on medium-high speed until stiff peaks form, which should take about 3-5 minutes. You want it to look fluffy and hold its shape well. This whipped cream will give your Funfetti Oreo Icebox Cake a light texture.
Step 2: Prepare the Cream Cheese Mixture
In another bowl, combine the softened cream cheese and powdered sugar. Use a hand mixer or whisk to mix on medium speed until smooth and creamy, about 2-3 minutes. Don’t forget to scrape down the sides so everything is mixed evenly. Now, add in the vanilla extract and blend for an additional minute, enhancing the sweetness of your dessert’s filling.
Step 3: Combine the Mixtures
Gently fold the whipped cream into the cream cheese mixture using a spatula. Start with a small amount of the whipped cream, mixing it in to lighten the cream cheese, then gradually fold in the remaining whipped cream. The goal is to keep the mixture airy and light, as this will create an indulgent layer in your Funfetti Oreo Icebox Cake.
Step 4: Layer the Oreos
Take a 9×13 inch dish and create the first layer by placing one layer of Birthday Cake Oreos at the bottom. Make sure the Oreos are evenly distributed to create a solid base for your Funfetti Oreo Icebox Cake. Press them down gently to ensure they absorb the cream mixture later, adding to the texture of the dessert.
Step 5: Add the First Cream Layer
Spread half of the cream cheese mixture evenly over the layer of Oreos, using a spatula to smooth it out. Cover every corner well, ensuring the cookies are fully enveloped by this luscious layer. You want it to look inviting, with a nice sheen on top that hints at the delightful flavors inside your cake.
Step 6: Repeat with More Oreos
Place another layer of Birthday Cake Oreos on top of the cream mixture. This additional layer will enhance the crunchiness and provide a delightful bite every time. Again, make sure they are arranged evenly to contribute to the balanced texture of the Funfetti Oreo Icebox Cake you’re crafting.
Step 7: Finish with Cream and Sprinkles
Spread the remaining cream mixture over the second layer of Oreos, smoothing it out with a spatula. Ensure the top layer is thick and creamy, leading to a luscious finish. Finally, generously sprinkle colorful sprinkles over the top to add excitement and visual appeal, perfect for any celebration!
Step 8: Chill the Cake
Cover the dish with plastic wrap or a lid and refrigerate the Funfetti Oreo Icebox Cake for at least 4 hours, though overnight chilling is ideal. This allows the flavors to meld together beautifully while the cake firms up, making it easier to slice. The longer it chills, the more deliciously integrated the flavors will become.
Step 9: Serve and Enjoy
Once chilled, carefully cut the cake into squares. Each slice should show off the beautiful layers of Oreos and creamy filling. Serve the Funfetti Oreo Icebox Cake chilled, allowing each bite to be a perfect combination of crunchy and creamy, bringing joy to your gatherings.
Make Ahead Options
These Funfetti Oreo Icebox Cakes are a dream for meal prep! You can assemble the entire cake up to 24 hours in advance, making your busy life a little easier. Simply layer the Birthday Cake Oreos and cream mixture in the dish as instructed, then cover tightly with plastic wrap and refrigerate. To maintain quality, ensure your dish is sealed well to prevent drying out. When you’re ready to serve, just sprinkle the colorful decorations on top and slice into squares. This make-ahead option allows flavors to meld beautifully, so you can enjoy a deliciously festive dessert with minimal last-minute effort!
Expert Tips for Funfetti Oreo Icebox Cake
-
Chill for Flavor: Allow the cake to chill overnight for the best flavor integration and texture. It becomes even more delicious as it sets!
-
Cream at the Right Temperature: Ensure your heavy cream is cold before whipping. This is crucial for achieving stiff peaks and a light texture in your Funfetti Oreo Icebox Cake.
-
Gentle Folding Technique: When combining the whipped cream with the cream cheese mixture, fold gently to maintain that airy quality, preventing the loss of fluffiness.
-
Layer Evenly: For a balanced dessert, ensure your layers of Oreos and cream mixture are evenly distributed. This consistency enhances both texture and presentation.
-
Experiment Freely: Don’t hesitate to swap Oreo flavors or add fruit layers! It will give your Funfetti Oreo Icebox Cake a refreshing twist that satisfies different tastes.
How to Store and Freeze Funfetti Oreo Icebox Cake
Fridge: Store the Funfetti Oreo Icebox Cake in an airtight container in the refrigerator. It remains fresh for up to 5 days, allowing the flavors to meld beautifully.
Freezer: For long-term storage, wrap individual slices tightly in plastic wrap and then place them in a freezer-safe container. It can be frozen for up to 2 months without losing its delightful taste.
Thawing: To enjoy a frozen slice, transfer it to the fridge to thaw overnight. This gradual thaw helps preserve the creamy texture and flavor intact.
Reheating: This dessert is best served chilled; no reheating is necessary or recommended, as it may alter the delightful creaminess of the Funfetti Oreo Icebox Cake.
What to Serve with No-Bake Funfetti Oreo Icebox Cake
Brighten your dessert table with delightful accompaniments that play off the fun, creamy layers of your cake.
- Fresh Berries: Juicy strawberries, blueberries, or raspberries add a refreshing contrast to the rich cake, enhancing both flavor and presentation.
- Chocolate Sauce: Drizzling some warm chocolate sauce over a slice harmonizes the sweet notes, adding a touch of indulgence to every bite.
- Whipped Cream: A dollop of homemade whipped cream introduces an extra light, airy element, making each serving even more enticing.
- Ice Cream Sundaes: Pairing a slice with a scoop of vanilla or chocolate ice cream creates a delightful combination, perfect for sweet tooth cravings.
For a cozy touch at family gatherings, consider serving the cake alongside some spiced cider. The warm, fragrant spices create a comforting atmosphere that beautifully complements the chilled dessert.
- Sparkling Water: A bubbly drink offers a refreshing cleanse after each sweet bite, keeping your palate engaged and refreshed.
Before you serve, consider sprinkling extra colorful confetti sprinkles on top of plates for a festive touch that delights both kids and adults!
Funfetti Oreo Icebox Cake Variations
Feel free to play with flavors and textures to make this delightful treat truly your own!
- Regular Oreos: Swap out Birthday Cake Oreos for classic Oreos for a more traditional flavor profile that everyone loves.
- Chocolate Cake Base: Use chocolate-flavored Oreos for a richer chocolate taste that pairs beautifully with the creamy layers.
- Dairy-Free Option: Substitute cream cheese with dairy-free cream cheese to create a lighter version for lactose-intolerant friends.
- Seasonal Sprinkles: Customize with holiday-themed sprinkles to match any celebration, adding a festive touch to the visual appeal!
- Fresh Fruit Layers: Add sliced strawberries or bananas between layers for a burst of freshness that brightens each bite. You could even try this with a luscious Coconut Cloud Cake for a tropical twist!
- Jazz It Up: Enhance the flavor with a touch of almond extract in place of vanilla for a nutty surprise that elevates the overall taste.
- Whipped Topping: Use whipped topping instead of heavy cream for the filling to save time and create an even lighter texture.
- Spiced Addition: Sprinkle in a dash of cinnamon or nutmeg for an unexpected warmth that adds intrigue and depth to the flavor profile.
Embrace the joy of customization and make this cake uniquely yours! For more dessert inspiration you might enjoy, discover our rich Burnt Basque Cheesecake or our indulgent Coffee Cheesecake Luscious that are sure to delight!
Funfetti Oreo Icebox Cake Recipe FAQs
How do I pick the best Birthday Cake Oreos for my Funfetti Oreo Icebox Cake?
Absolutely! Look for Oreos that have no visible damage and have a vibrant color; this ensures they taste fresh and adds to the colorful presentation of your cake. If you notice dark spots all over the cookies, it’s best to avoid those, as they can affect the overall taste.
How should I store the Funfetti Oreo Icebox Cake?
You should store your Funfetti Oreo Icebox Cake in an airtight container in the refrigerator. It can stay fresh for up to 5 days, and during this time, the flavors will meld beautifully. If you plan to keep it longer, wrap individual slices tightly in plastic wrap and place them in a freezer-safe container.
Can I freeze the Funfetti Oreo Icebox Cake?
Yes, you can freeze this delightful dessert! Wrap it tightly in plastic wrap and then place it in a freezer-safe container. It can be stored for up to 2 months. When you’re ready to enjoy it, transfer slices to the fridge to thaw overnight. This method helps maintain the cake’s creamy texture and delicious flavor.
What if my whipped cream doesn’t form stiff peaks?
Very! If your whipped cream isn’t thickening, make sure your heavy cream is well-chilled; this is essential for whipping. If it still isn’t forming stiff peaks after several minutes, the cream might not have enough fat content. Try using heavy cream that has 36% or more fat. Just keep beating it gently on medium speed, but don’t worry; it can still be saved by adding another cold bowl and some more chilled cream to help stabilize it.
Is there a way to make this cake suitable for those with dairy allergies?
Absolutely! You can easily make this Funfetti Oreo Icebox Cake dairy-free. Substitute the cream cheese with a non-dairy cream cheese alternative and use coconut cream instead of heavy cream. Ensure you buy dairy-free Oreos, which are usually a safe choice. This way, everyone can enjoy this festive dessert!
Easy Funfetti Oreo Icebox Cake for Any Celebration
Ingredients
Equipment
Method
- Chill your mixing bowl and beaters in the freezer for about 10 minutes. Then, pour in the heavy cream and beat on medium-high speed until stiff peaks form, about 3-5 minutes.
- In another bowl, combine the softened cream cheese and powdered sugar. Mix on medium speed until smooth and creamy, about 2-3 minutes, then add vanilla extract and blend for an additional minute.
- Gently fold the whipped cream into the cream cheese mixture until fully combined, being careful to keep the mixture airy and light.
- In a 9x13 inch dish, place a layer of Birthday Cake Oreos at the bottom, pressing them down gently.
- Spread half of the cream cheese mixture evenly over the Oreos, smoothing it out with a spatula.
- Add another layer of Birthday Cake Oreos on top of the cream mixture.
- Spread the remaining cream mixture over the second layer of Oreos and smooth it out.
- Sprinkle colorful sprinkles generously on top.
- Cover the dish and refrigerate the cake for at least 4 hours, preferably overnight.
- Once chilled, cut the cake into squares and serve chilled.
Leave a Reply