
There’s something magical about waking up to the rich, inviting scent of Fluffy Red Velvet Pancakes with Cream Cheese Glaze wafting from the kitchen. Each bite bursts with a luxurious cocoa flavor, inviting you to indulge in a brunch experience that feels special—even on an ordinary day. These pancakes aren’t just visually stunning; they offer a quick and effortless way to make your mornings feel gourmet without the fuss of a lengthy prep. Perfect for sharing with loved ones or surprising yourself on the weekends, they’re also versatile enough to satisfy those cozy dessert cravings any time. Curious where to start on this delightful journey? Let’s dive into the recipe!
Why Are These Pancakes So Irresistible?
Culinary Delight: Each pancake is a fluffy masterpiece that mixes decadent flavors and stunning colors, turning your breakfast into a special occasion.
Quick Preparation: With simple ingredients and a fast prep time, you can whip these up even on busy mornings.
Visual Appeal: The vibrant red hue and creamy glaze create a feast for the eyes as well as the taste buds, perfect for impressing guests.
Versatile Treat: Serve alongside maple syrup, fresh berries, or whipped cream for a customizable brunch that satisfies all preferences. Enjoy leftovers or freeze them for quick breakfasts—these pancakes deliver happiness anytime!
Red Velvet Pancakes Ingredients
• Get ready to craft the perfect batch of Red Velvet Pancakes with Cream Cheese Glaze!
For the Pancakes
- All-Purpose Flour – Provides structure; substitute with gluten-free flour for a delicious gluten-free option.
- Unsweetened Cocoa Powder – Adds rich chocolate flavor; opt for high-quality cocoa for the best taste.
- Granulated Sugar – Sweetens the pancakes; feel free to use coconut sugar for a healthier twist.
- Baking Powder – A key leavening agent for fluffiness; always check for freshness for the best results.
- Baking Soda – Works alongside baking powder to support the rise.
- Salt – Enhances overall flavor, making each bite irresistible.
- Buttermilk – Contributes moisture and tanginess; mix regular milk with vinegar as a quick substitute.
- Eggs – Provide richness and bind the ingredients together.
- Unsalted Butter – Adds moisture and flavor; melted butter incorporates smoothly into the batter.
- Vanilla Extract – Delivers depth and sweetness; using pure vanilla extract is always recommended.
- White Vinegar – Reacts with baking soda for fluff; lemon juice can serve as a perfect substitute.
- Red Food Coloring – Delivers that signature vibrant color; opt for gel food coloring for better results.
For the Cream Cheese Glaze
- Cream Cheese – Base for the glaze; ensure it’s softened for easy mixing.
- Powdered Sugar – Sweetens the glaze; adjust to your taste for the perfect level of sweetness.
- Milk – Helps achieve the desired consistency of the glaze; add more if it’s too thick.
Prepare to enjoy a culinary experience with these delightful Red Velvet Pancakes that feel like dessert for breakfast!
Step‑by‑Step Instructions for Red Velvet Pancakes With Cream Cheese Glaze
Step 1: Prepare the Cream Cheese Glaze
In a medium bowl, beat 4 ounces of softened cream cheese and 2 tablespoons of unsalted butter together until smooth and creamy, about 2 minutes. Gradually mix in 1 cup of powdered sugar and 2 tablespoons of milk until the glaze reaches a pourable consistency. Set this aside while you move on to the pancakes, ensuring a luscious topping awaits.
Step 2: Mix Dry Ingredients
In a large mixing bowl, whisk together 1 cup of all-purpose flour, 2 tablespoons of unsweetened cocoa powder, 2 teaspoons of baking powder, 1 teaspoon of baking soda, and a pinch of salt. Mix the dry ingredients thoroughly for even distribution. This step is crucial for ensuring your Red Velvet Pancakes achieve a delightful fluffy texture once cooked.
Step 3: Whisk Wet Ingredients
In a separate bowl, combine 1 cup of buttermilk, 2 large eggs, 2 tablespoons of melted butter, 1 teaspoon of vanilla extract, 1 tablespoon of white vinegar, and 1 tablespoon of red food coloring. Whisk these ingredients together until fully incorporated, creating a vibrant mixture that will add moistness and flavor to your pancake batter.
Step 4: Combine Batter
Gently fold the wet ingredients into the dry mixture, careful not to overmix. The batter should remain slightly lumpy for optimal fluffiness. Allow the combined batter to rest for about 5 minutes. This resting time helps the ingredients meld together while enhancing the airy quality of your Red Velvet Pancakes.
Step 5: Preheat Griddle
Preheat your non-stick griddle or skillet to medium heat, around 350°F. Lightly grease the surface with a bit of cooking spray or a small amount of butter. Ensuring the right temperature is key, so test it with a drop of water; it should sizzle and evaporate immediately to confirm readiness for cooking pancakes.
Step 6: Cook Pancakes
Pour approximately ¼ cup of batter onto the preheated griddle for each pancake. Cook for 2-3 minutes, watching for bubbles to form on the surface. Once the edges appear set and the bubbles pop, flip the pancake and cook for an additional 1-2 minutes until golden brown. Repeat this process, adjusting the heat as needed to prevent burning.
Step 7: Keep Warm
Transfer the cooked pancakes to a covered dish to keep them warm as you finish cooking the remaining batter. This step ensures that your Fluffy Red Velvet Pancakes retain their delightful warmth and fluffy texture, making them perfect for serving all at once.
Step 8: Serve
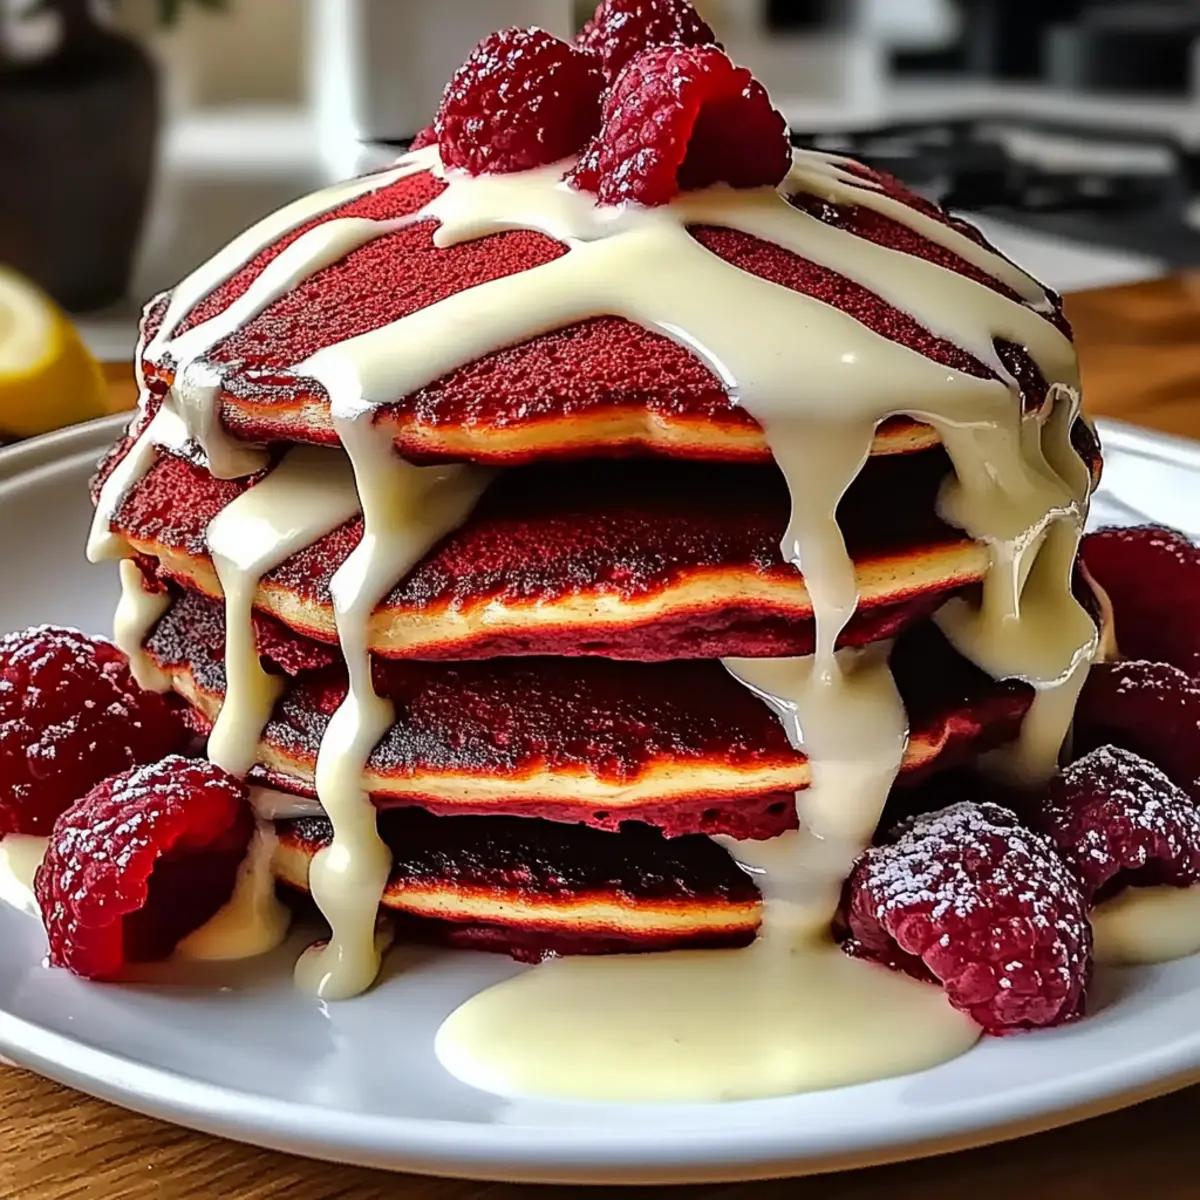
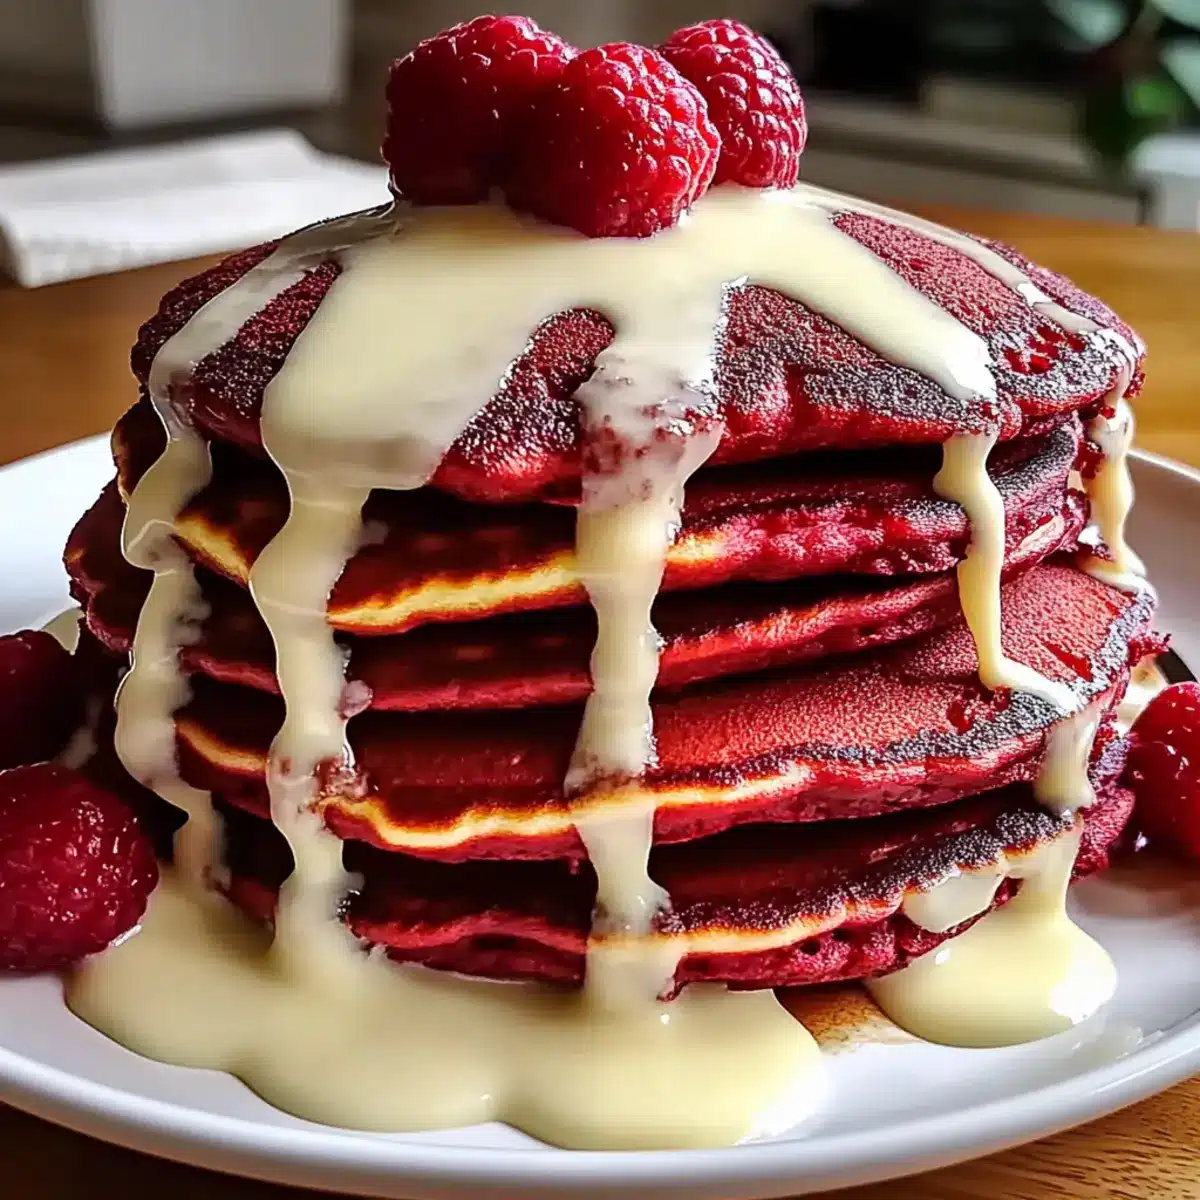
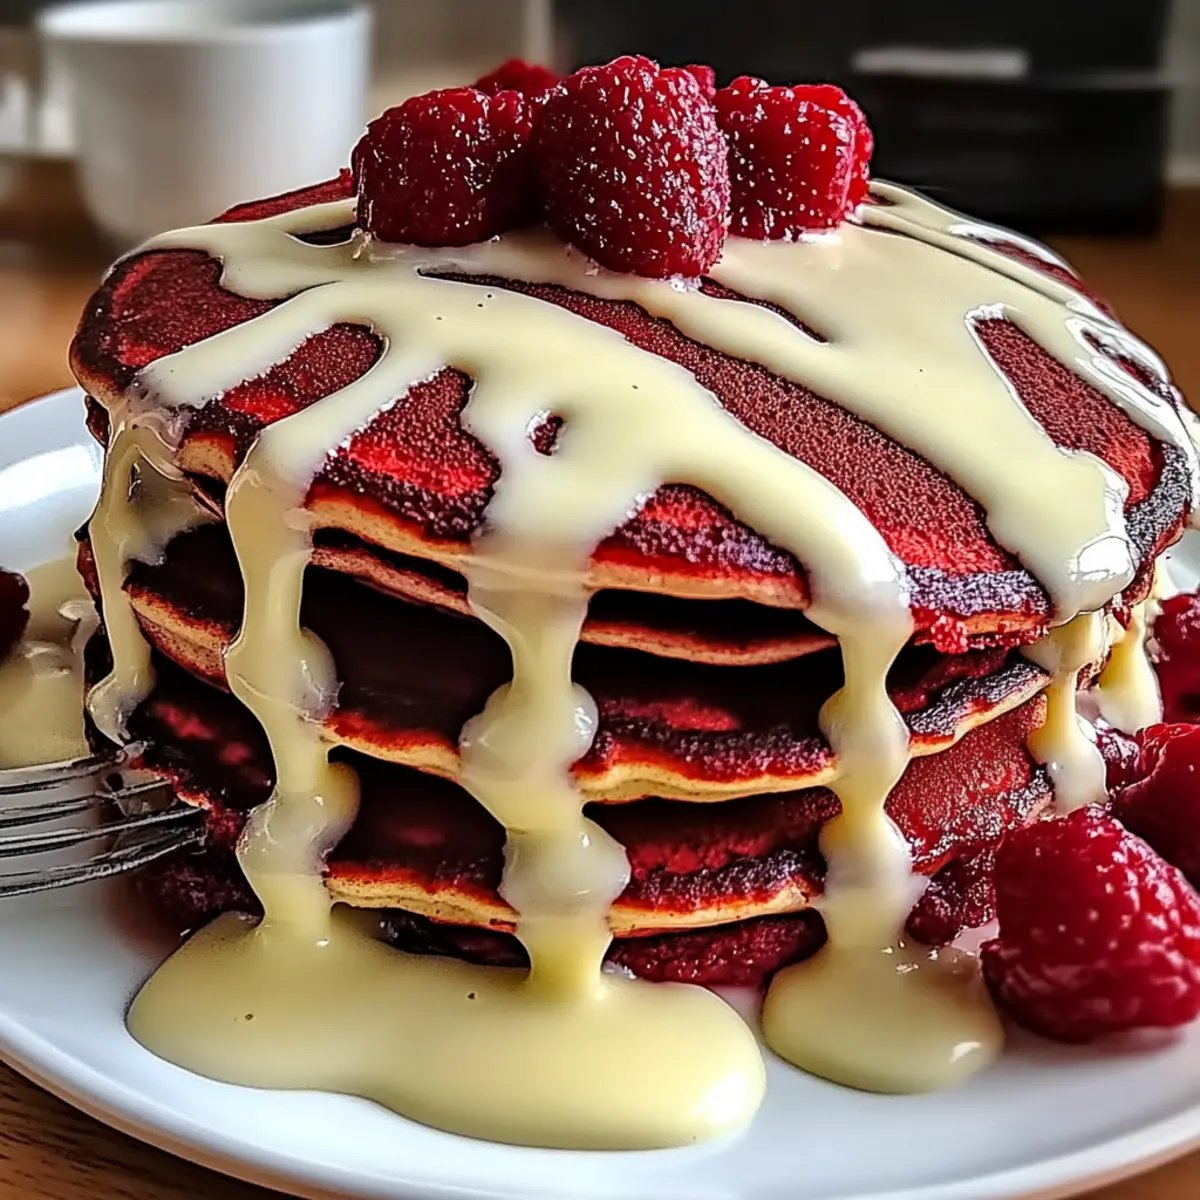
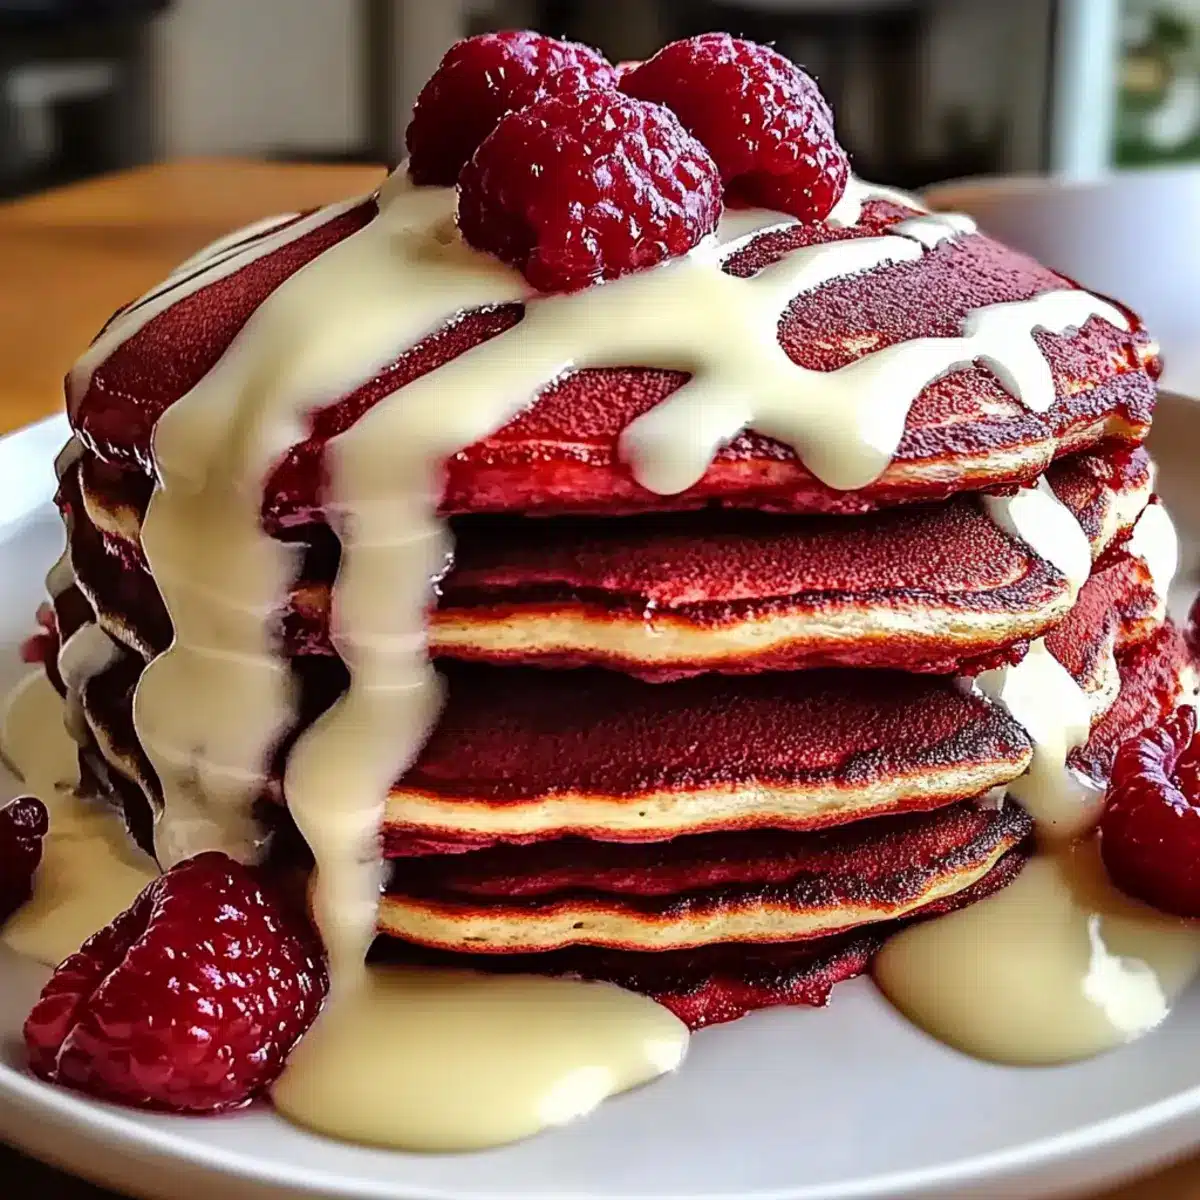
Stack the warm Red Velvet Pancakes on a serving plate. Generously drizzle the cream cheese glaze over the top, letting it cascade deliciously down the sides. For an added touch, consider topping with fresh berries or a dollop of whipped cream, transforming your brunch into a visually stunning culinary experience.
What to Serve With Red Velvet Pancakes With Cream Cheese Glaze
Indulging in Red Velvet Pancakes is just the beginning; elevate your breakfast experience by pairing them with delightful sides and drinks.
-
Fresh Berries: A burst of juicy strawberries, blueberries, or raspberries adds a refreshing contrast to the rich pancakes and enhances the dish’s vibrant presentation.
-
Whipped Cream: Light and airy, a dollop of whipped cream complements the fluffy texture of the pancakes while offering a sweet, creamy bite that makes each forkful even more decadent.
-
Maple Syrup: Classic maple syrup drizzled generously over your pancakes introduces a warm, sweet contrast that perfectly balances the cocoa flavor, making for a delightful morning treat.
-
Chocolate-Covered Strawberries: These elegant treats elevate your brunch, bridging the dessert and breakfast worlds. Their sweetness pairs beautifully with the red velvet theme, creating a dining experience that feels indulgent.
-
Nutty Granola: A sprinkle of crunchy granola introduces a delightful texture and nutty flavor that enhances the softness of the pancakes, providing an enjoyable contrast with each bite.
-
Coffee or Latte: A rich cup of coffee or a creamy latte offers a warm, comforting drink to sip alongside your meal. The bitterness complements the sweetness of the pancakes, creating a perfectly balanced breakfast moment.
-
Eggs Benedict: For a savory touch, pair pancakes with Eggs Benedict. The creamy hollandaise and poached eggs provide a delightful contrast to the sugary sweetness, making for a brunch that feels truly luxurious.
Expert Tips for Red Velvet Pancakes
- Batter Resting: Allow your pancake batter to rest for about 5 minutes. This crucial step ensures your Red Velvet Pancakes achieve optimal fluffiness and texture.
- Cook Temperature: Monitor the heat on your griddle. If the pancakes brown too quickly, lower the temperature to prevent burning while ensuring they cook through.
- Ingredient Quality: Use high-quality cocoa powder to enhance the rich chocolate flavor. A premium ingredient can make all the difference in taste and appearance.
- Gradual Coloring: When using gel food coloring, add it gradually to the batter. This helps you achieve the vibrant red shade without overpowering the flavor.
- Gluten-Free Swap: If you’re opting for a gluten-free version, pick a flour that retains moisture and fluffiness. Experiment with blends to find your ideal combination.
How to Store and Freeze Red Velvet Pancakes
- Room Temperature: It’s best to enjoy Red Velvet Pancakes fresh, but if you must keep them out, they can sit at room temperature for up to 2 hours before needing refrigeration.
- Fridge: Store leftover pancakes in an airtight container in the fridge for up to 3 days to maintain freshness. Reheat them in a microwave or toaster for a quick breakfast.
- Freezer: Freeze pancakes in a single layer on a baking sheet until firm, then transfer to a freezer bag for up to 2 months. Simply reheat in the microwave or toaster directly from the freezer.
- Glaze Storage: The cream cheese glaze can be prepared ahead of time and stored in the fridge for up to 3 days. Just give it a good stir before serving!
Red Velvet Pancakes Variations & Substitutions
Feel free to get creative and customize these delightful pancakes to suit your tastes and dietary preferences!
- Gluten-Free: Substitute all-purpose flour with a gluten-free flour blend to cater to gluten sensitivities without compromising fluffiness.
- Dairy-Free: Use almond milk and coconut oil instead of buttermilk and unsalted butter for a creamy yet dairy-free option.
- Natural Sweetener: Consider using coconut sugar instead of granulated sugar for a healthier sweetness with a hint of caramel flavor.
- Flavor Boost: Mix in seasonal berries or chocolate chips into the batter for bursts of flavor and texture in every bite.
- Lighter Cocoa: Adjust the amount of cocoa powder to create a milder cocoa flavor, making these pancakes perfect for those who prefer a subtler taste.
- Whipped Cream Topping: Swap the cream cheese glaze for fluffy whipped cream to create a lighter, airy topping that complements the pancakes beautifully.
- Nutty Taste: Incorporate finely chopped nuts like pecans or walnuts into the batter for added crunch and flavor.
- Spicy Kick: Add a dash of cayenne pepper or cinnamon to the batter to elevate your pancake experience with a hint of heat.
Discover even more delicious variations by checking out these delightful recipes for Red Velvet Strawberry, or for a fruity twist, try the Peach Cream Cheese cupcakes. You might also enjoy a rich Coffee Cheesecake Luscious or indulge in Decadent Boston Cream. Happy cooking!
Make Ahead Options
These Fluffy Red Velvet Pancakes with Cream Cheese Glaze are perfect for meal prep enthusiasts! You can prepare the pancake batter up to 24 hours in advance; just cover and refrigerate it to keep it fresh. Additionally, the cream cheese glaze can be made ahead and stored in the fridge for up to 3 days. To maintain the pancakes’ fluffiness, avoid overmixing the batter and let it rest for 5 minutes before cooking. When you’re ready to serve, simply cook the pancakes on a hot griddle and drizzle with the glaze for a breakfast that feels special without the morning rush!
Red Velvet Pancakes With Cream Cheese Glaze Recipe FAQs
What type of flour should I use for the best results?
For these Fluffy Red Velvet Pancakes with Cream Cheese Glaze, all-purpose flour is ideal for creating that perfect texture. If you’re looking for a gluten-free version, I recommend using a high-quality gluten-free flour blend that can retain moisture and fluffiness, ensuring each pancake remains deliciously tender.
How should I store leftover pancakes?
To keep your Red Velvet Pancakes nice and fresh, store any leftovers in an airtight container in the refrigerator for up to 3 days. When you’re ready for another fluffy bite, just pop them in the microwave or toaster for quick reheating.
Can I freeze these pancakes, and how?
Absolutely! To freeze your Red Velvet Pancakes, start by laying them out in a single layer on a baking sheet and place them in the freezer until they are firm—this usually takes about 1-2 hours. Once they are frozen, transfer them into a freezer bag, where they can stay good for up to 2 months. When you’re ready to enjoy them, you can heat them directly from the freezer, either in the microwave or toaster, for a quick breakfast treat.
Why did my pancakes turn out flat?
If your pancakes didn’t rise as expected, it could be due to several reasons. First, make sure your baking powder and baking soda are fresh, as expired leavening agents can affect fluffiness. Additionally, don’t overmix the batter; it should remain slightly lumpy for optimal texture. Allowing the batter to rest for about 5 minutes also plays a key role in achieving that desired airy quality!
Is there a substitution for buttermilk?
If you don’t have buttermilk on hand, no worries! You can easily make a substitute by mixing 1 cup of regular milk with 1 tablespoon of white vinegar or lemon juice. Let it sit for about 5-10 minutes to curdle before using it in your pancake batter. This option provides the similar tangy flavor and moisture that buttermilk brings to the recipe.
Can I make this recipe dairy-free?
Yes, you can! Simply substitute the buttermilk with almond milk and use coconut oil instead of unsalted butter. This allows you to enjoy the deliciously fluffy Red Velvet Pancakes while accommodating dairy-free dietary needs. Don’t forget to check your cream cheese glaze as well—there are excellent dairy-free cream cheese options available!
Red Velvet Pancakes With Cream Cheese Glaze for a Sweet Morning
Ingredients
Equipment
Method
- In a medium bowl, beat 4 ounces of softened cream cheese and 2 tablespoons of unsalted butter together until smooth and creamy, about 2 minutes. Gradually mix in 1 cup of powdered sugar and 2 tablespoons of milk until the glaze reaches a pourable consistency. Set aside.
- In a large mixing bowl, whisk together 1 cup of all-purpose flour, 2 tablespoons of unsweetened cocoa powder, 2 teaspoons of baking powder, 1 teaspoon of baking soda, and a pinch of salt until evenly mixed.
- In a separate bowl, combine 1 cup of buttermilk, 2 large eggs, 2 tablespoons of melted butter, 1 teaspoon of vanilla extract, 1 tablespoon of white vinegar, and 1 tablespoon of red food coloring. Whisk until fully incorporated.
- Fold the wet ingredients into the dry mixture carefully, ensuring not to overmix. Allow the batter to rest for about 5 minutes.
- Preheat a non-stick griddle to medium heat (around 350°F). Lightly grease the surface with cooking spray or butter.
- Pour approximately ¼ cup of batter onto the griddle for each pancake. Cook for 2-3 minutes until bubbles form. Flip and cook for another 1-2 minutes until golden brown.
- Transfer cooked pancakes to a covered dish to keep warm while cooking the remaining batter.
- Stack the pancakes on a serving plate and generously drizzle with the cream cheese glaze. Optional: Top with fresh berries or whipped cream.
Leave a Reply