
As I pulled open the pantry door, a rainbow of sprinkles and colorful candy caught my eye, sparking an exciting idea for a sweet Halloween celebration. Welcome to the world of Monster Fudge—a fun and spooky no-bake treat that blends creativity with flavor in a way that’s sure to delight both kids and adults. This easy-to-make indulgence not only takes just under two and a half hours from start to finish, but it also offers endless customization options for festive themes. You’ll love how versatile it is, making it the perfect addition to any Halloween gathering or cozy family night. Ready to create a sweet masterpiece that will be the star of your seasonal festivities? Let’s dive into making this delightful Monster Fudge together!
Why is Monster Fudge a Must-Try?
Colorful and Fun: Monster Fudge brings a vibrant splash of colors that excites all ages, making it a perfect dessert for Halloween parties or family gatherings.
No-Bake Convenience: With no baking required, this recipe is as easy as melting ingredients together, allowing you to enjoy homemade goodness without the fuss.
Kid-Friendly Fun: Whether you’re a parent, grandparent, or an adventurous cook, kids love getting involved in decorating this festive treat.
Customizable Flavors: Tailor the fudge to your taste! Swap in different chocolates or flavor extracts, and use various color combinations to match any holiday theme.
A Sweet Surprise: Each delightful bite features creamy texture and beloved candy decorations, making it a guaranteed crowd-pleaser that sparks joy.
Don’t miss out on trying this delicious treat; check out our guide on no-bake desserts for more inspiration!
Monster Fudge Ingredients
• Get ready to whip up a sweet creation!
For the Fudge Base
- Semi-sweet chocolate chips – Provides the base chocolate flavor; you can substitute with milk or dark chocolate for a different taste profile.
- Sweetened condensed milk – Adds creaminess and binds the fudge together; no substitutes recommended as it’s essential for texture.
- Butter – Contributes richness and a smooth mouthfeel; margarine can be used for a dairy-free version.
- Vanilla extract – Enhances overall flavor; consider using almond extract for a unique twist.
For Festive Colors
- Green food coloring – Used for festive coloring; omit for traditional fudge or swap with other colors for different themes.
For Decoration
- Orange and black decorating gel – Perfect for spooky designs; can be replaced with colored sprinkles for added fun.
- Candy eyeballs – Adds a creepy effect; try mini marshmallows with chocolate chips if you want an alternative.
- Mini marshmallows – Provides texture and playfulness; optional but adds a fun touch.
- Crushed chocolate cookies – For crunch and aesthetic appeal; use any crushed cookies like Oreos for different flavors.
- Halloween sprinkles – Decorative toppings for that festive finish; feel free to mix with other holiday-themed sprinkles.
Embrace your creativity with this Monster Fudge recipe—it’s bound to be a hit at any gathering!
Step‑by‑Step Instructions for Monster Fudge
Step 1: Prep the Fudge Base
In a medium saucepan, combine 2 cups of semi-sweet chocolate chips, 1 can of sweetened condensed milk, and 2 tablespoons of butter over low to medium heat. Stir the mixture continuously for about 5–7 minutes until everything is melted and smooth, ensuring it doesn’t stick or burn. Once it reaches a creamy consistency, remove the saucepan from the heat and let it cool slightly.
Step 2: Mix in Flavorings
After your fudge base has cooled for a couple of minutes, stir in 1 teaspoon of vanilla extract to enhance its flavor. Mix thoroughly until the vanilla is evenly distributed throughout the fudge. The warm mixture should remain smooth and glossy as it begins to set before you move on to creating colorful variations.
Step 3: Add Colors
Divide the fudge mixture into two or three separate bowls, depending on how many colors you want to use. Add green food coloring to one bowl and mix thoroughly until the desired shade is achieved. You can use a spatula to fold the coloring in, ensuring even color throughout the fudge. If desired, tint other bowls with different colors to create a vibrant mix of hues for your Monster Fudge.
Step 4: Set the Fudge
Prepare an 8×8-inch baking pan by lining it with parchment paper, allowing some overhang for easy removal. Spoon the colored fudge mixtures into the prepared pan, layering them for a fun and festive pattern. Spread the mixtures evenly using a spatula and smooth out the top. Place the pan in the fridge to allow the fudge to set for about 2 hours, or until it is firm to the touch.
Step 5: Decorate
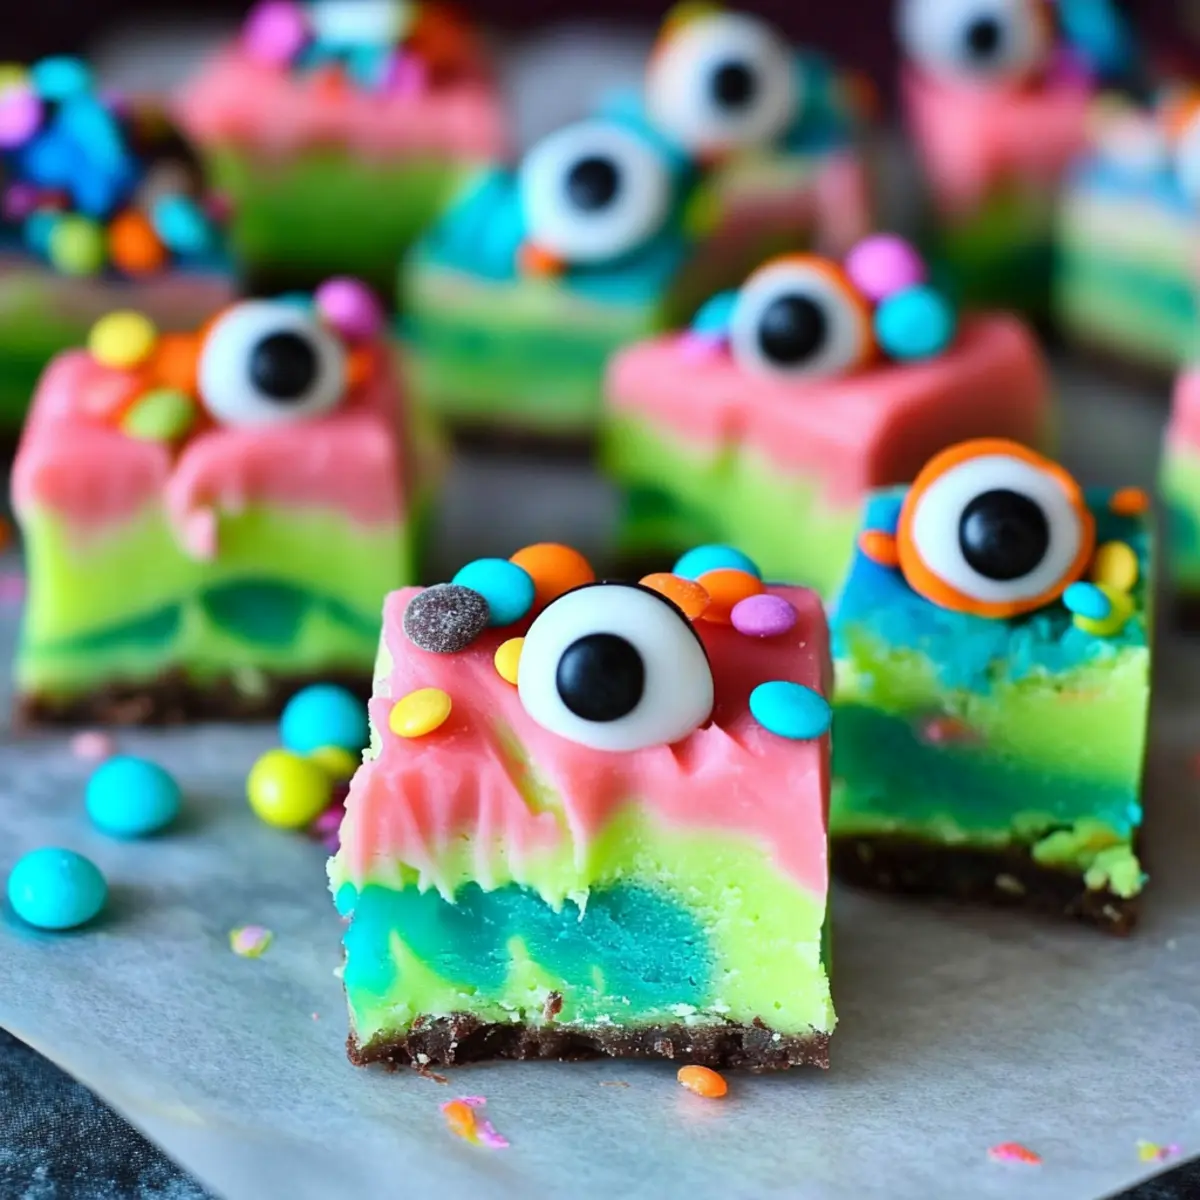
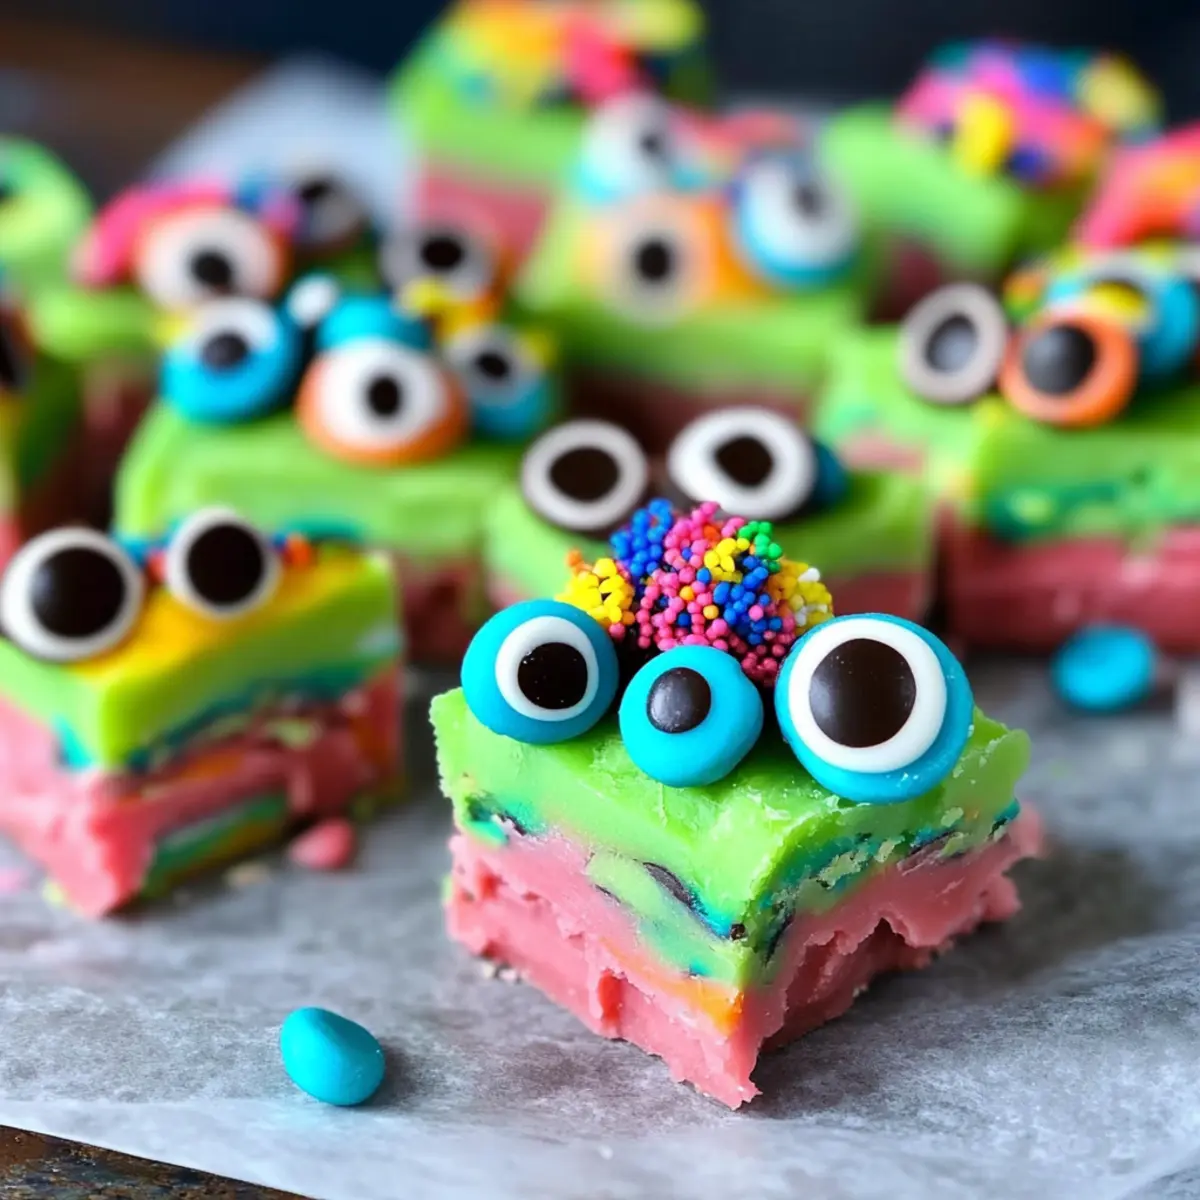
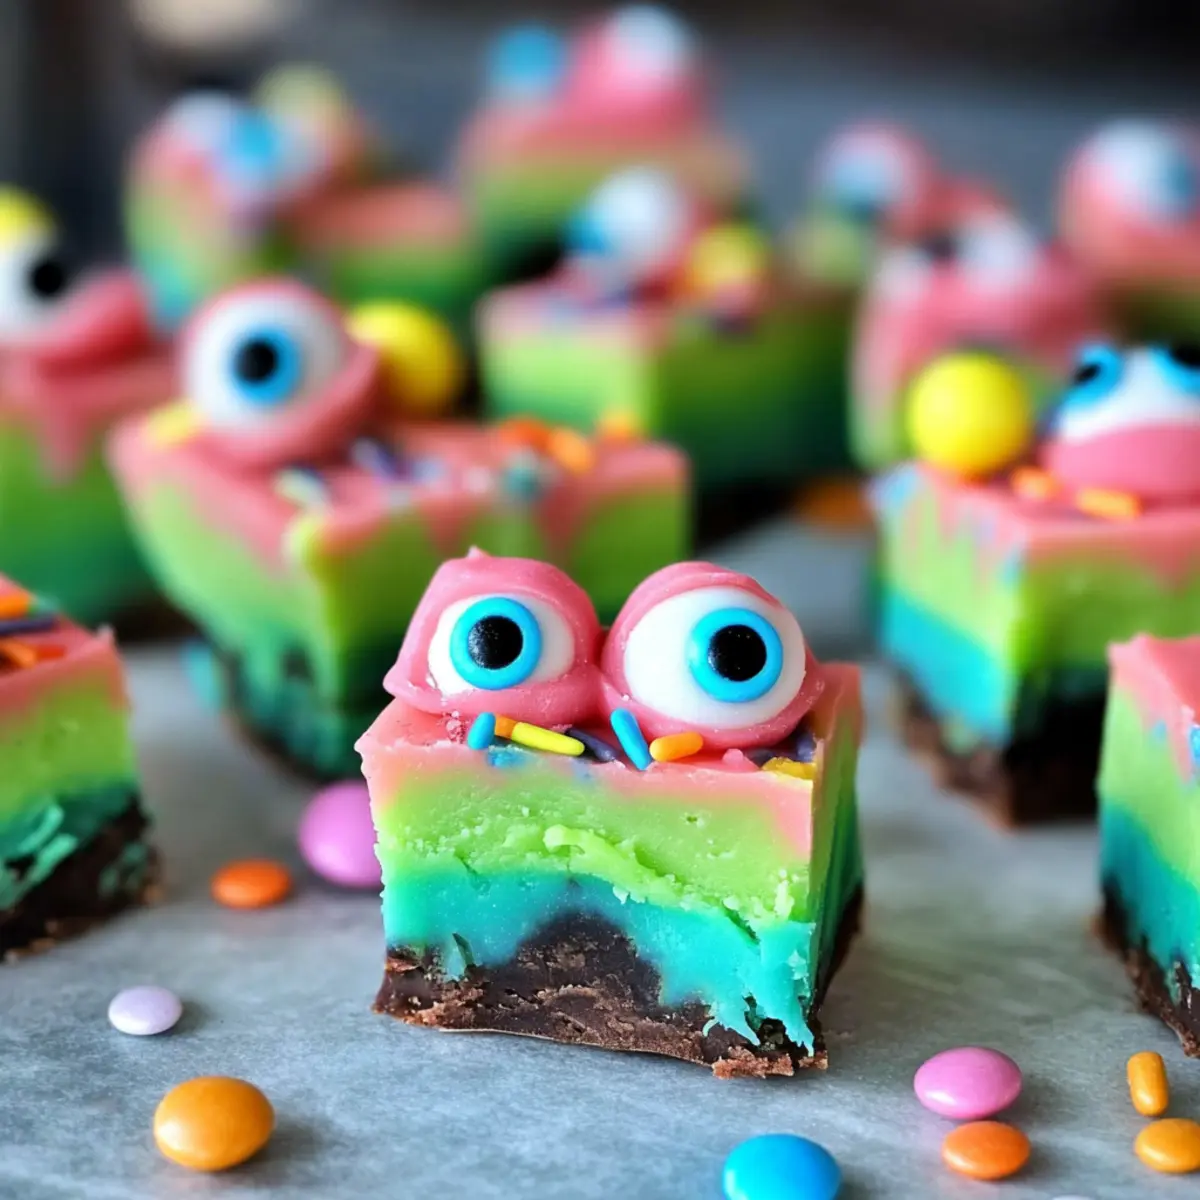
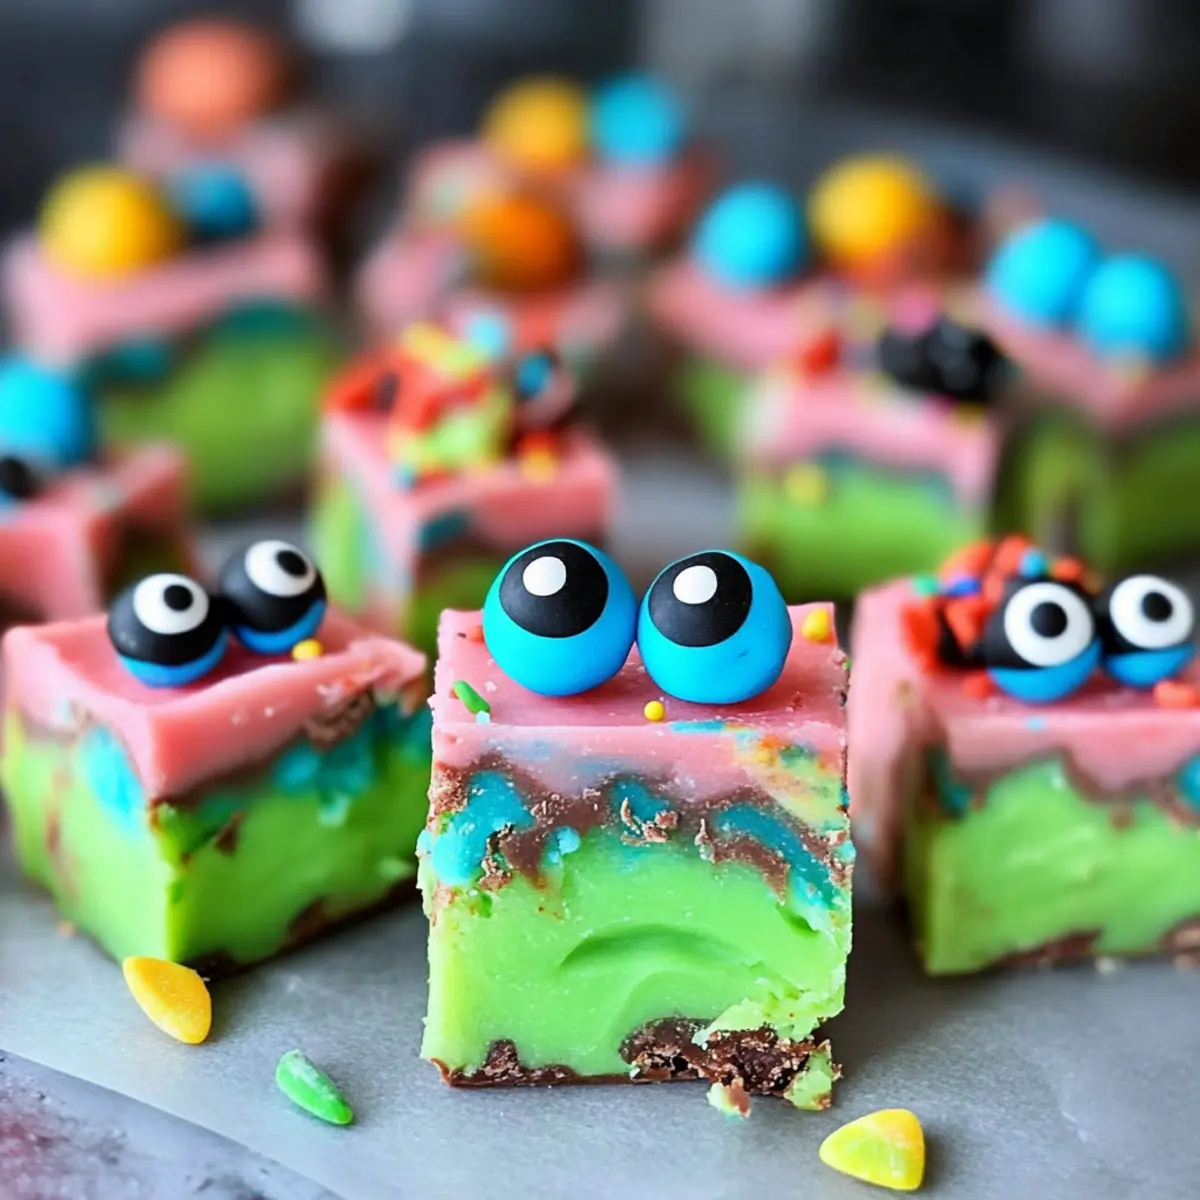
Once the Monster Fudge is set, remove it from the fridge and carefully lift it out of the pan using the parchment overhang. Place it on a cutting board and unleash your creativity as you decorate! Squeeze orange and black decorating gel across the top, and scatter candy eyeballs, Halloween sprinkles, and crushed chocolate cookies as fun additions.
Step 6: Cut and Serve
Use a sharp knife (preferably plastic for cleaner cuts) to slice the fudge into squares or rectangles, as desired. Each piece should showcase its colorful layers and playful decorations. Arrange the Monster Fudge on a festive platter and get ready to share this delightful treat with family and friends at your Halloween gatherings!
How to Store and Freeze Monster Fudge
Room Temperature: Store at room temperature for up to 3 days in an airtight container to maintain its deliciousness and soft texture.
Fridge: Keep the fudge in the refrigerator for up to a week. An airtight container ensures it stays fresh and flavors are preserved.
Freezer: For longer storage, freeze Monster Fudge in an airtight container or wrapped tightly in plastic wrap for up to 2 months. Thaw overnight in the fridge before enjoying.
Reheating: There’s no need to reheat, but if the fudge has softened, let it sit at room temperature for a few minutes before slicing for easier handling.
What to Serve with Halloween Monster Fudge?
As you embrace the spookiness of your Monster Fudge, let’s transform it into a complete Halloween feast that tantalizes taste buds and tickles imaginations!
- Ghostly Cupcakes: Sweet, fluffy cupcakes topped with cream cheese frosting and edible spooky decorations perfectly balance the richness of fudge.
- Pumpkin Spice Cookies: Soft, chewy cookies infused with pumpkin and spices add seasonal flavor, complimenting the chocolatey goodness of the fudge.
- Candy Corn Fruit Cups: Light and refreshing, these cups filled with fruits and candy corn offer a colorful, crunchy contrast to the creamy fudge.
- Witch’s Brew Hot Chocolate: A frothy mug of rich hot chocolate, topped with marshmallows, warms the soul while inviting sweetness alongside your fudge.
- Ghoulish Charcuterie Board: Fill a board with assorted cheeses, crackers, and themed fruits to create an engaging snack that pairs well with the sweetness of fudge.
- Fruity Goblin Punch: A fun, fruity punch, with a splash of soda for fizz, offers a refreshing drink option that keeps the party vibes alive.
- Marshmallow Ghosts: Use mini marshmallows decorated as ghosts for a whimsical touch, matching the fun aesthetic of your colorful Monster Fudge.
- Creepy Crawly Brownies: Fudgy brownies topped with gummy worms provide an exciting texture that pairs beautifully with the soft, chewy Monster Fudge.
- Chocolate-Dipped Strawberries: Perfectly sweet and slightly tart, these fruit treats add a lightness to your dessert table that complements the rich fudge.
By mixing in these delightful pairings, your Halloween celebration will be both thrilling and delicious, ensuring lasting memories for the whole family!
Monster Fudge Variations & Substitutions
Feel free to customize your Monster Fudge creation with these delightful twists that will add even more flavor and fun!
-
Dairy-Free: Swap butter with margarine and use dairy-free chocolate chips to make a delicious dairy-free version that everyone can enjoy.
-
Nutty Delight: Add a handful of chopped nuts, like walnuts or pecans, for an added crunch and depth of flavor. They’ll bring a pleasant surprise in texture!
-
Fruitful Fudge: Mix in dried fruits, such as cranberries or raisins, for a chewy contrast that pairs beautifully with the sweet chocolate.
-
Peppermint Twist: For a seasonal spin, use peppermint extract instead of vanilla and decorate with red and white sprinkles for a festive look during the holidays.
-
S’Mores Style: Top your fudge with mini marshmallows and crushed graham crackers for a delightful s’mores-inspired twist that will transport you to campfire nights.
-
Spicy Surprise: Incorporate a dash of chili powder or cayenne pepper into the fudge base for a spicy kick that contrasts beautifully with the sweetness.
-
Holiday Colors: Change the food coloring to red and blue for other festive occasions, like Independence Day, sparking joy for various celebrations.
-
Soft and Chewy: Add an extra can of sweetened condensed milk to make your fudge softer and chewier—perfect for those who love a gooey treat!
As you explore these variations, don’t forget to check out our ideas on custom desserts to keep your sweet creations fresh and exciting!
Expert Tips for Monster Fudge
-
Heat Control: Keep the heat low while melting chocolate and stirring continuously. This prevents burning and ensures a smooth fudge base.
-
Color Mixing: Experiment with different colors for seasonal themes. Just add food coloring slowly until you achieve the desired shade, keeping the fun alive!
-
Decoration Variations: Use themed sprinkles and decorations to match other holidays; this keeps the Monster Fudge versatile beyond Halloween.
-
Setting Time: Allow at least 2 hours in the fridge for the fudge to set properly. Rushing this step can lead to a softer fudge that’s harder to cut.
-
Cutting Technique: A plastic knife works wonders for cutting the soft fudge cleanly, providing you with neat, uniform pieces to serve.
With these tips in mind, you’ll create delicious Monster Fudge that looks as fantastic as it tastes!
Make Ahead Options
These Monster Fudge treats are perfect for busy home cooks looking to save time! You can prepare the fudge base up to 3 days in advance; simply follow the instructions to melt the chocolate, mix in the sweetened condensed milk and butter, and then let it cool. Once the fudge is poured into the baking pan and set (chill for around 2 hours), it can be stored in the refrigerator. To maintain its vibrant colors and creamy texture, wrap the pan securely or place it in an airtight container. When you’re ready to finish, just take the set fudge out, decorate with your candy eyeballs and sprinkles, slice it into pieces, and enjoy a delightful, homemade treat that’s just as delicious as if it was freshly made!
Monster Fudge Recipe FAQs
What chocolate should I use for Monster Fudge?
I recommend using semi-sweet chocolate chips as they provide the perfect balance of sweetness and chocolate flavor. If you prefer a different taste, feel free to substitute with milk or dark chocolate chips for a unique variation!
How should I store Monster Fudge?
To keep the fudge fresh, store it in an airtight container in the refrigerator for up to a week. If you want to enjoy it longer, you can keep it at room temperature for up to 3 days. Just ensure it’s stored somewhere cool and dry to maintain its delightful texture!
Can I freeze Monster Fudge?
Absolutely! For long-term storage, wrap the Monster Fudge tightly in plastic wrap or place it in an airtight container before freezing. It can last for up to 2 months. When ready to enjoy, simply thaw it in the refrigerator overnight for the best texture.
What if my fudge turned out too soft?
If your fudge is too soft, don’t fret! Make sure that you allowed it to set in the fridge for at least 2 hours to ensure it firms up properly. If it still seems too soft when you’re ready to cut it, pop it back into the fridge for another 30 minutes and try cutting again with a plastic knife for cleaner edges.
Is Monster Fudge suitable for people with allergies?
Great question! This recipe contains chocolate, butter, and condensed milk, which all include dairy. If you have dairy allergies, you could substitute the butter with margarine or a dairy-free alternative. Always check labels for hidden allergens in chocolate and other ingredients to ensure it’s safe for everyone.
Can I customize the decorations for different holidays?
Very much so! The beauty of Monster Fudge is its versatility. You can easily swap out colors and decorations to fit any occasion—think red and green for Christmas or pastel colors for spring celebrations. Get creative with themed sprinkles and toppings to make it your own!
Monster Fudge Recipe FAQs
Monster Fudge: A Colorful No-Bake Treat for Halloween Fun
Ingredients
Equipment
Method
- In a medium saucepan, combine 2 cups of semi-sweet chocolate chips, 1 can of sweetened condensed milk, and 2 tablespoons of butter over low to medium heat. Stir continuously for about 5–7 minutes until melted and smooth.
- Remove from heat and let cool slightly. Stir in 1 teaspoon of vanilla extract until evenly distributed.
- Divide the mixture into two or three bowls. Add green food coloring to one bowl and mix until desired shade is achieved.
- Prepare an 8x8-inch baking pan lined with parchment paper. Spoon the colored fudge into the pan, layering as desired. Smooth the top with a spatula.
- Place in the fridge to set for about 2 hours or until firm.
- After setting, lift the fudge from the pan and place on a cutting board. Decorate with orange and black gel, candy eyeballs, Halloween sprinkles, and crushed chocolate cookies.
- Cut the fudge into squares or rectangles and serve on a festive platter.
Leave a Reply