
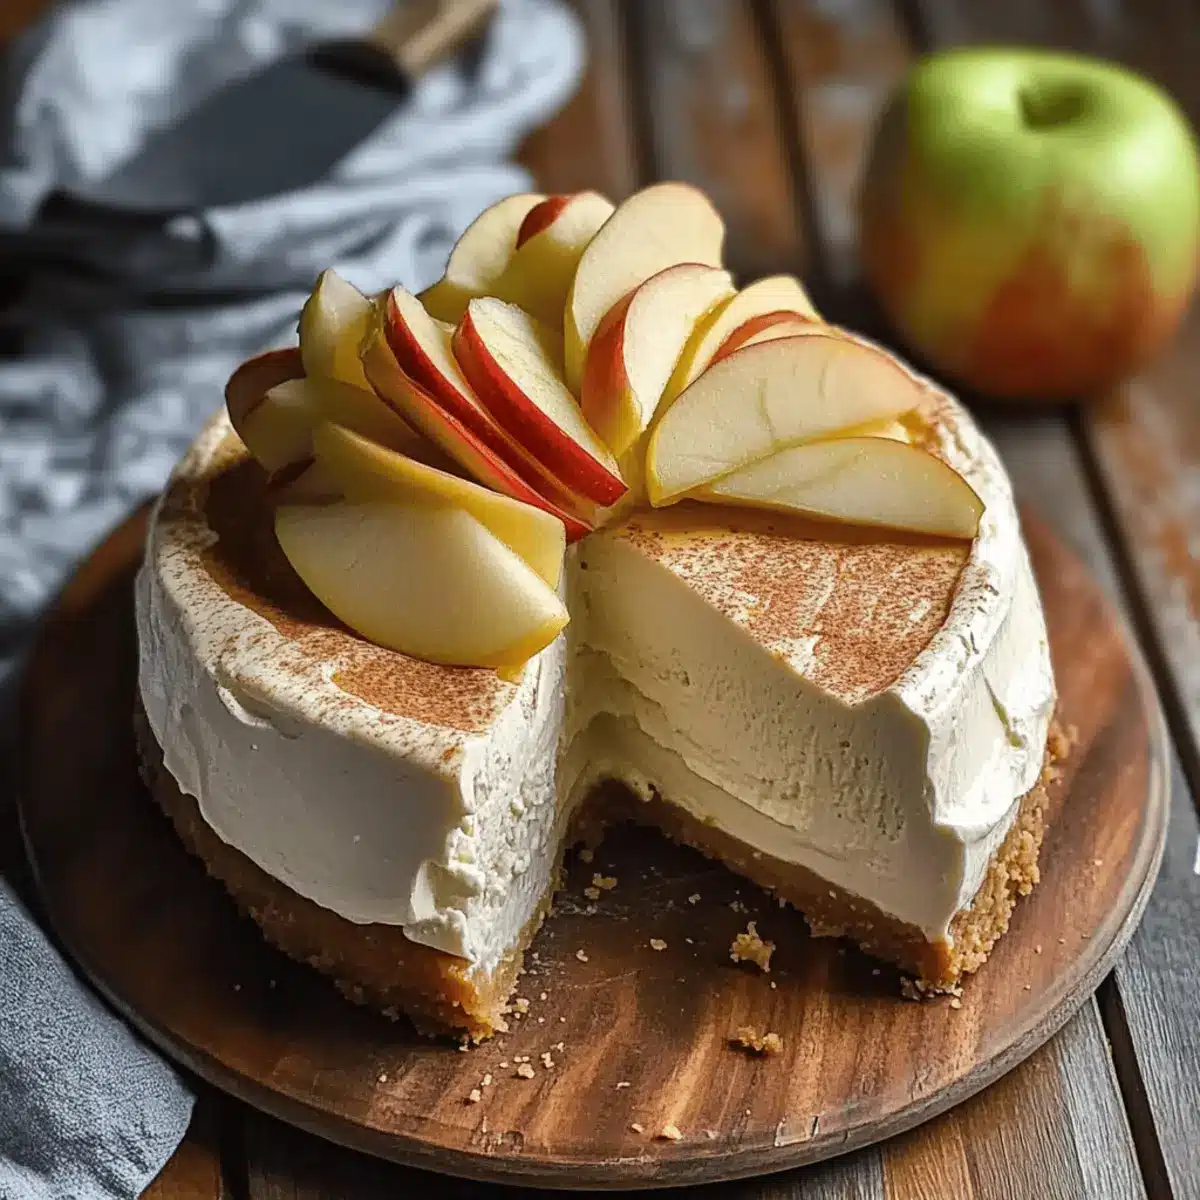
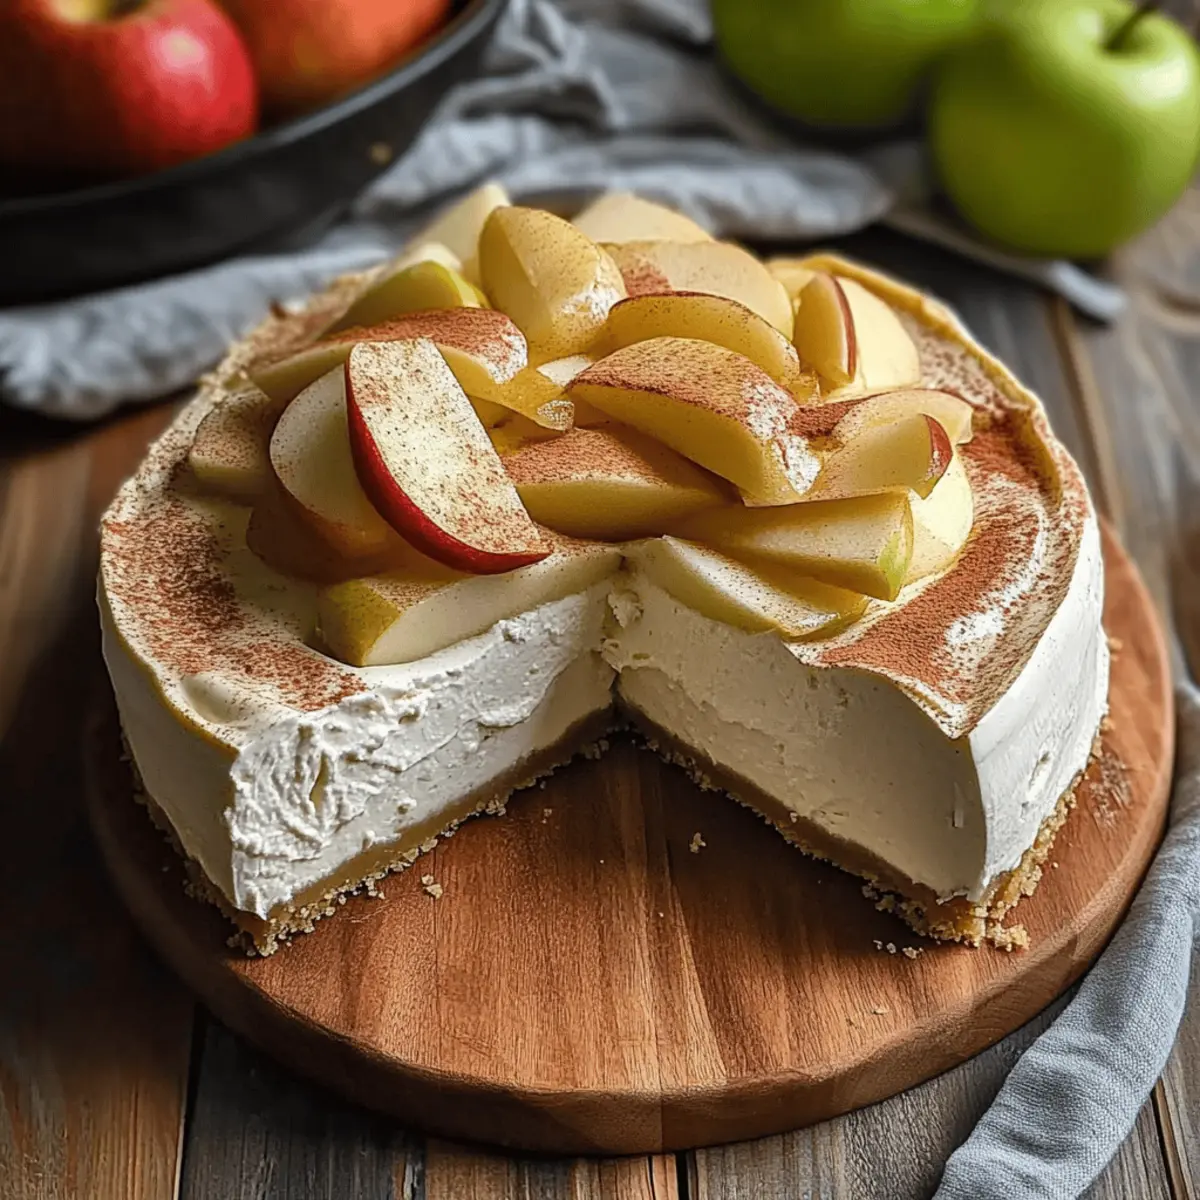
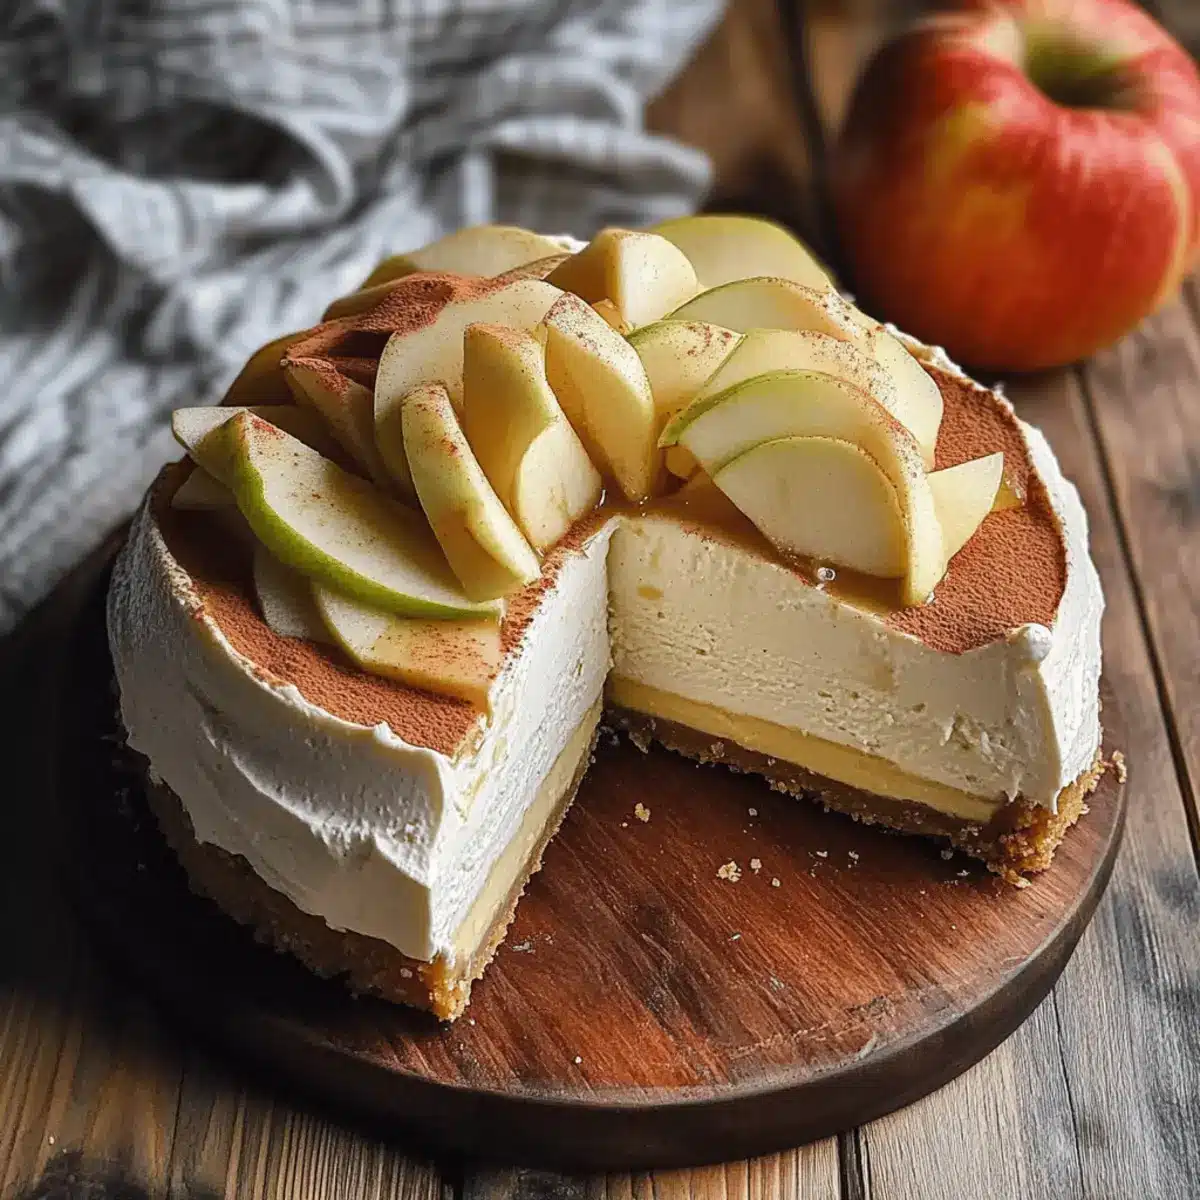
The kitchen filled with the cozy aroma of simmering spices transports me to crisp autumn days, and there’s nothing quite like it. Introducing my creamy apple cider cheesecake—a delightful twist on the traditional dessert that promises to elevate any fall gathering. This no-bake wonder crafts a luxuriously smooth experience, blending rich cream cheese with the tangy essence of apple cider and a hint of cinnamon. Not only is it a showstopper with its stunning layers, but it’s also incredibly easy to prepare, making it a perfect option for those of us who find joy in homemade delights. Whether you’re seeking a delightful finale to your Thanksgiving feast or an indulgent treat for a cozy night in, this apple cider cheesecake is bound to win hearts. Curious how to make it? Let’s dive in and start creating this autumn masterpiece!
Why is Apple Cider Cheesecake a Must-Try?
Fall Flavor Sensation: This cheesecake beautifully captures autumn’s essence with fresh apple cider and warm spices.
No-Bake Convenience: Enjoy a delicious dessert without the fuss of baking, perfect for busy schedules.
Crowd-Pleasing Delight: Whether at Thanksgiving or a cozy gathering, this stunning cake is sure to impress!
Versatile and Fun: Customize with graham cracker crusts or serve in mini form for a delightful twist.
Easy Preparation: Simplify your dessert-making with minimal steps, allowing more time to enjoy the season.
This creamy apple cider cheesecake isn’t just a treat; it’s an experience. For more fall-themed desserts, explore my Coffee Cheesecake Luscious or Lemon Cheesecake Refreshing options for flavorful variety!
Apple Cider Cheesecake Ingredients
Get ready to gather delightful ingredients for your apple cider cheesecake that will make your autumn gatherings extraordinary!
For the Crust
- Digestive Cookies (270g or 2 cups) – These create a buttery base; feel free to swap with graham crackers if you’d like.
- Butter (85g or 6 tablespoons, melted) – Binds the crust together; using unsalted gives you better control over the saltiness.
- Salt (¼ teaspoon) – Enhances the flavor of the crust.
- Powdered Sugar (2 tablespoons) – Adds just the right sweetness to the crust.
For the Filling
- Fresh Apple Cider (720g or 3 cups) – Gives that tangy apple flavor essential for the cheesecake; Honeycrisp cider is a top pick for its delicious tartness.
- Mulling Spices (optional) – These elevate the flavor of the cider; use whole spices and strain them after boiling for best results.
- Cream Cheese (3 bricks, 227g each, softened) – This creamy base is crucial; ensure it’s at room temperature for a smooth mixing experience.
- Brown Sugar (200g or 1 cup) – Sweetens the cheesecake beautifully.
- Salt (½ teaspoon) – Balances the flavors in the filling to perfection.
- Vanilla Extract (2 teaspoons) – Adds delightful depth to the flavor profile.
- Sour Cream (240g or 1 cup) – Provides creaminess and a slight tang; go for full-fat for the best texture.
- Reduced Apple Cider (⅓ cup) – Concentrated apple essence to enrich the filling.
- Cinnamon (1 teaspoon) – Infuses the cheesecake with cozy autumn warmth.
- Eggs (3 large) – Offers structure; make sure they’re at room temperature for even mixing.
- All-Purpose Flour (2 tablespoons) – Helps stabilize the cheesecake and prevents sinking.
With these ingredients in hand, you’re well on your way to creating a creamy apple cider cheesecake that will surely delight. Let’s get cooking!
Step‑by‑Step Instructions for Apple Cider Cheesecake
Step 1: Prepare Cider
In a medium saucepan, boil 3 cups of fresh apple cider over medium heat, optionally adding mulling spices for extra flavor. Let it simmer for about 20–30 minutes until reduced to approximately ⅓ cup. Stir occasionally and watch for a bubbling, thickened consistency. Once reduced, remove from heat and allow it to cool while you prep the crust.
Step 2: Preheat Oven
Preheat your oven to 350°F (175°C) to ensure it’s hot and ready for baking shortly. A well-preheated oven helps create a perfect texture for your cheesecake, so don’t skip this step! Make sure to give it a few moments to reach the right temperature before continuing with the preparation.
Step 3: Make Crust
In a food processor, grind 2 cups of digestive cookies into fine crumbs. In a bowl, combine these crumbs with 6 tablespoons of melted unsalted butter, ¼ teaspoon of salt, and 2 tablespoons of powdered sugar. Mix until the mixture resembles wet sand, then press it firmly into the bottom and up the sides of a lined 8-inch round cake pan. Bake for 10 minutes until lightly golden and set; then allow to cool.
Step 4: Prepare Filling
In a large mixing bowl, beat 3 softened bricks of cream cheese with 1 cup of brown sugar until smooth and creamy with no lumps. Gradually mix in 1 cup of sour cream, 2 teaspoons of vanilla extract, ½ teaspoon of salt, and 1 teaspoon of cinnamon until fully incorporated. Gently fold in the cooled reduced apple cider, ensuring a well-combined filling that embodies the essence of your apple cider cheesecake.
Step 5: Incorporate Eggs
Add 2 tablespoons of all-purpose flour to the mixture and stir to combine. Then, add the 3 large eggs, one at a time, mixing on low speed just until each egg is fully incorporated before adding the next. This will create a dense yet airy filling that holds together beautifully. Avoid overmixing; it’s ready when just combined.
Step 6: Assemble and Bake
Pour the creamy filling into your cooled crust, leveling it with a spatula for an even surface. Place the cake pan inside a larger pan filled with hot water to create a water bath, which prevents cracking. Bake in the preheated oven for about 90 minutes, or until the edges are set but the center still has a slight jiggle.
Step 7: Cool Slowly
Once baked, turn off the oven and crack the door ajar, allowing the cheesecake to slowly cool down for about 30 minutes. This gradual cooling prevents cracking and sinking. Afterward, transfer it to a wire rack to cool completely at room temperature, then refrigerate for at least 8 hours before serving to let the flavors meld beautifully.

Apple Cider Cheesecake Variations & Substitutions
Invite your creativity to shine as you customize this delectable apple cider cheesecake in delightful new ways!
-
Graham Cracker Crust: Swap the digestive cookies with graham crackers for a classic flavor that adds a touch of sweetness.
-
Oreo Crust: For a richer twist, try using crushed Oreos instead of cookies to create a dessert lovers’ dream!
-
Dairy-Free Cream Cheese: Use dairy-free cream cheese alternatives to make this cheesecake suitable for lactose-intolerant friends. It won’t affect the creamy feel, letting the cheesecake shine.
-
Mini Cheesecakes: Bake individual portions in muffin tins for a fun, shareable treat. Just adjust baking time to about 30-35 minutes for perfectly sized bites.
-
Flavor Boost: Infuse your cheesecake with additional mulling spices like cloves or nutmeg for an extra burst of autumn warmth and depth.
-
Maple Syrup Swirl: Add a ripple of pure maple syrup on top of the filling before baking for a sweet, delightful surprise in every slice!
-
Caramel Topping: Drizzle caramel sauce over the finished cheesecake for an indulgently sweet twist that pairs beautifully with the apple flavors.
-
Low-Sugar Variation: Substitute brown sugar with a sugar alternative like Stevia to keep sweetness in check without compromising on taste.
Explore these variations to make your apple cider cheesecake uniquely yours! If you’re curious for more incredible flavors, don’t forget to check out my Strawberry Crunch Cheesecake or the indulgently rich Burnt Basque Cheesecake. Happy baking!
What to Serve with Creamy Apple Cider Cheesecake?
Elevate your fall gatherings with delightful dishes that complement the luscious flavors of this seasonal treat.
- Whipped Cream: A dollop of freshly whipped cream adds creaminess, balancing the tang of the cheesecake perfectly.
- Apple Cider Caramel Drizzle: Pouring a warm drizzle over each slice enhances the apple flavors and brings a sweet richness.
- Sautéed Cinnamon Apples: The warm, spiced apples create a lovely texture contrast and echo the flavors found in the cheesecake.
- Ginger Snap Cookies: The spiciness of ginger snaps pairs beautifully, offering a crunchy texture alongside the creamy dessert.
- Pecan Pie: This classic dessert brings in nutty sweetness and pie-like comfort, creating a warm, inviting dessert spread.
- Coffee or Chai Tea: Both drinks enhance the apple cider cheesecake’s rich profile, creating a cozy, comforting ambiance.
- Spiced Nut Mix: A crunchy nut mixture with warming spices provides a savory contrast to the cheesecake’s rich texture.
- Pumpkin Spice Latte: This seasonal favorite captures the essence of fall, making it a perfect drink alongside the cheesecake.
- Vanilla Bean Ice Cream: A scoop of creamy vanilla ice cream complements the cheesecake’s flavors and adds a fun twist to each bite.
Make Ahead Options
These creamy apple cider cheesecake beauties are perfect for meal prep enthusiasts! You can prepare the crust and filling up to 24 hours in advance. Simply make the crust and store it in the refrigerator, well-covered to maintain freshness. For the filling, mix all ingredients except the eggs and refrigerate in an airtight container; just remember to bring it to room temperature before mixing in the eggs and baking. When you’re ready to serve, pour the filling over the crust and bake as directed. This method ensures your cheesecake is just as delicious, saving you precious time on busy days while still delivering a showstopper dessert for any fall gathering!
How to Store and Freeze Apple Cider Cheesecake
Fridge: Store your cheesecake covered in the refrigerator for up to 3-4 days. This helps maintain its creamy texture and delicious flavor.
Freezer: For longer storage, freeze slices wrapped tightly in plastic wrap and then in foil for up to 2 months. Thaw in the fridge overnight before serving.
Reheating: While this cheesecake is best enjoyed chilled, if you prefer it slightly warmed, allow it to sit at room temperature for 15-20 minutes before serving. This will enhance the flavors of the apple cider cheesecake.
Serving Suggestions: Feel free to top with whipped cream or a drizzle of apple cider caramel when you’re ready to serve!
Expert Tips for Apple Cider Cheesecake
-
Room Temperature Ingredients: Always ensure your cream cheese and eggs are at room temperature. This prevents lumps and results in a smoother filling for your apple cider cheesecake.
-
Avoid Overmixing: When incorporating the eggs, mix them in on low speed just until combined. Overmixing can cause the cheesecake to crack during baking.
-
Use a Water Bath: Baking your cheesecake in a water bath helps maintain moisture levels, preventing drying and cracking. This is key for achieving that creamy texture!
-
Cool Gradually: After baking, leave the cheesecake in the oven with the door cracked for about 30 minutes. This gradual cooling method helps prevent sinking in the center.
-
Chill Before Serving: Refrigerating your cheesecake for at least 8 hours (or overnight) allows the flavors to develop fully and helps achieve the best texture.
With these expert tips, you’re all set to create a memorable apple cider cheesecake that captures the essence of fall!
Apple Cider Cheesecake Recipe FAQs
What type of apple cider should I use?
For the best flavor, I recommend using fresh apple cider, particularly Honeycrisp cider due to its delightful tartness. Avoid using shelf-stable apple juice, as it will not replicate the rich taste necessary for this cheesecake.
How long can I store my apple cider cheesecake in the fridge?
Absolutely! You can store your apple cider cheesecake in the refrigerator for up to 3-4 days. Just be sure to cover it well to keep it fresh and preserve its creamy texture.
Can I freeze apple cider cheesecake, and how?
Yes, you can freeze apple cider cheesecake! First, wrap it tightly in plastic wrap followed by a layer of aluminum foil. It can be stored in the freezer for up to 2 months. When you’re ready to enjoy it, simply thaw it in the refrigerator overnight before serving.
Why is my cheesecake cracking on top, and how can I prevent this?
Very good question! Cracks can occur for a couple of reasons. Ensure the cream cheese is at room temperature when mixing to prevent lumps, as these will contribute to cracks. Always bake your cheesecake in a water bath to create steam and maintain moisture, which helps prevent drying. Lastly, allow the cheesecake to cool gradually in the oven with the door ajar.
Is this apple cider cheesecake suitable for people with dietary restrictions?
While this cheesecake contains cream cheese and sour cream, which isn’t suitable for a dairy-free diet, you could consider experimenting with dairy-free cream cheese and sour cream alternatives. Ensure to check labels for gluten-free options if you’re using graham crackers in the crust. Always be cautious about allergies and consult with your guests beforehand to ensure everyone’s safe and happy.
How can I enhance the flavor of my apple cider cheesecake?
For a more robust spice profile, sprinkle in extra mulling spices like cloves or allspice during the filling preparation. You can also serve it with a homemade apple cider caramel drizzle or a sprinkle of cinnamon for an added touch!
Creamy Apple Cider Cheesecake for Your Cozy Fall Celebrations
Ingredients
Equipment
Method
- In a medium saucepan, boil 3 cups of fresh apple cider over medium heat, optionally adding mulling spices. Let it simmer for about 20–30 minutes until reduced to approximately ⅓ cup. Allow to cool.
- Preheat your oven to 350°F (175°C).
- In a food processor, grind 2 cups of digestive cookies into fine crumbs. Mix with 6 tablespoons of melted unsalted butter, ¼ teaspoon of salt, and 2 tablespoons of powdered sugar. Press into a lined 8-inch round cake pan and bake for 10 minutes.
- In a large mixing bowl, beat 3 softened bricks of cream cheese with 1 cup of brown sugar until smooth. Gradually mix in 1 cup of sour cream, 2 teaspoons of vanilla extract, ½ teaspoon of salt, and 1 teaspoon of cinnamon. Fold in the cooled reduced apple cider.
- Add 2 tablespoons of all-purpose flour and 3 large eggs, mixing on low speed until just combined.
- Pour the filling into the cooled crust and bake in a water bath for about 90 minutes, until edges are set but the center jiggles slightly.
- Turn off the oven and crack the door ajar, allowing the cheesecake to cool slowly for about 30 minutes. Transfer to a wire rack to cool completely, then refrigerate for at least 8 hours before serving.
Leave a Reply