
As I sifted through my pantry, I stumbled across a bag of toasted hazelnuts that whispered promises of warmth and indulgence. This was the spark for my latest creation: a stunning Hazelnut and Chocolate Layer Cake that takes dessert to a whole new level. Each slice reveals delicate layers of nutty dacquoise and rich, velvety chocolate pastry cream, a glorious marriage of flavors that’s sure to impress. Not only is this cake an elegant centerpiece for any celebration, but it also caters to various dietary needs—it can easily be made gluten-free, nut-free, or even vegan! The best part? You can prepare this beauty in advance, allowing you to focus on making memories rather than stressing over dessert. Ready to whip up this showstopper? Let’s dive into the details that will make your next gathering truly unforgettable!
Why is This Cake a Must-Try?
Indulgence at Its Finest: This Hazelnut and Chocolate Layer Cake merges delectable flavors with visual appeal, drawing everyone’s attention at gatherings.
Dietary Versatility: Whether you’re gluten-free, nut-free, or vegan, this recipe has tailored options to accommodate everyone at the table.
Make-Ahead Delight: Prepare this elegant cake in advance, freeing you to enjoy precious moments without last-minute dessert stress.
Irresistible Textures: Experience a symphony of textures with the moist dacquoise layers and rich pastry cream that melt in your mouth.
Crowd-Pleasing Appeal: Its luxurious layers and stunning presentation guarantee that it impresses family and friends, ensuring it’ll be the center of attention.
Ready for more delightful desserts? Check out my Coconut Cloud Cake or treat yourself to some Ingredient Chewy Chocolate Oat Cookies.
Chocolate Hazelnut Cake Ingredients
• Discover the delightful components of this indulgent treat!
For the Pastry Cream
- Whole Milk – Provides creaminess and moisture for the pastry cream. Substitution: Use full-fat almond milk for a dairy-free version.
- Vanilla Bean Paste – Enhances flavor depth. Substitution: Pure vanilla extract can be used.
- Corn Starch – Acts as a thickening agent for the pastry cream. Substitution: Can replace with all-purpose flour but may alter texture.
- Caster Sugar – Sweetens both pastry cream and dacquoise layers. Substitution: Granulated sugar works as well.
- Dutch Processed Cocoa Powder – Adds rich chocolate flavor and color. Substitution: Unsweetened cocoa powder may be used.
- Fine Salt – Enhances overall flavor. Substitution: Can use kosher salt instead.
- Egg Yolks – Contributes richness to the custard. Substitution: For vegan, use 2 tablespoons cornstarch mixed with 2 tablespoons water.
- Unsalted Butter – Provides richness and smooth texture. Substitution: Plant-based butter can be used for a vegan option.
- Dark Cooking Chocolate – Forms the base for the pastry cream. Substitution: Semi-sweet chocolate can be used, adjusting sugar if needed.
For the Dacquoise
- Toasted Hazelnuts – Main flavor ingredient contributing crunch. Substitution: Walnuts can be substituted if preferred.
- Egg Whites – Essential for creating the meringue texture. Substitution: Use aquafaba (3 tablespoons for 1 egg white).
- All-Purpose Flour – Provides stability to dacquoise layers. Substitution: Use a gluten-free flour blend for gluten-free needs.
- Granulated Sugar & Bicarbonate Soda – Used in hazelnut praline for sweetness and texture. Substitution: Honey for glucose syrup can be considered.
Now that you have the delicious ingredients, let’s get ready to create a masterpiece that’s sure to impress with its rich layers and unforgettable flavors!
Step‑by‑Step Instructions for Chocolate Hazelnut Cake
Step 1: Preheat Oven
Begin by preheating your oven to 170°C (340°F). While the oven warms up, line two round cake pans with baking paper, ensuring they are well-coated to prevent sticking. A quick spritz of non-stick spray will do wonders for easy removal later.
Step 2: Toast Hazelnuts
Spread the toasted hazelnuts on a baking tray in a single layer and roast them for about 20 minutes, or until they’re golden and fragrant. Keep an eye on them to prevent burning, and once toasted, remove from the oven and let them cool completely before using.
Step 3: Prepare Pastry Cream
In a saucepan, whisk together the corn starch, caster sugar, and a pinch of salt. Gradually add in the warm whole milk while continuously whisking. Cook over medium heat until the mixture thickens and bubbles gently, about 5-7 minutes. Once thickened, stir in the butter and dark cooking chocolate until smooth and silky.
Step 4: Make Hazelnut Praline
In a small saucepan, combine sugar and water over medium heat until the sugar dissolves. Allow it to boil gently until it reaches a golden caramel color. Stir in the cooled toasted hazelnuts and a hint of glucose syrup, then spread the mixture on a baking sheet to cool before blending into a smooth paste.
Step 5: Create Dacquoise
Process half of the remaining toasted hazelnuts into a fine crumb using a food processor. In a mixing bowl, beat the egg whites until stiff peaks form. Gently fold the hazelnut crumbs and sugar into the beaten egg whites, taking care not to deflate the mixture. Spoon the mixture into the prepared pans and bake for 15 minutes until lightly golden.
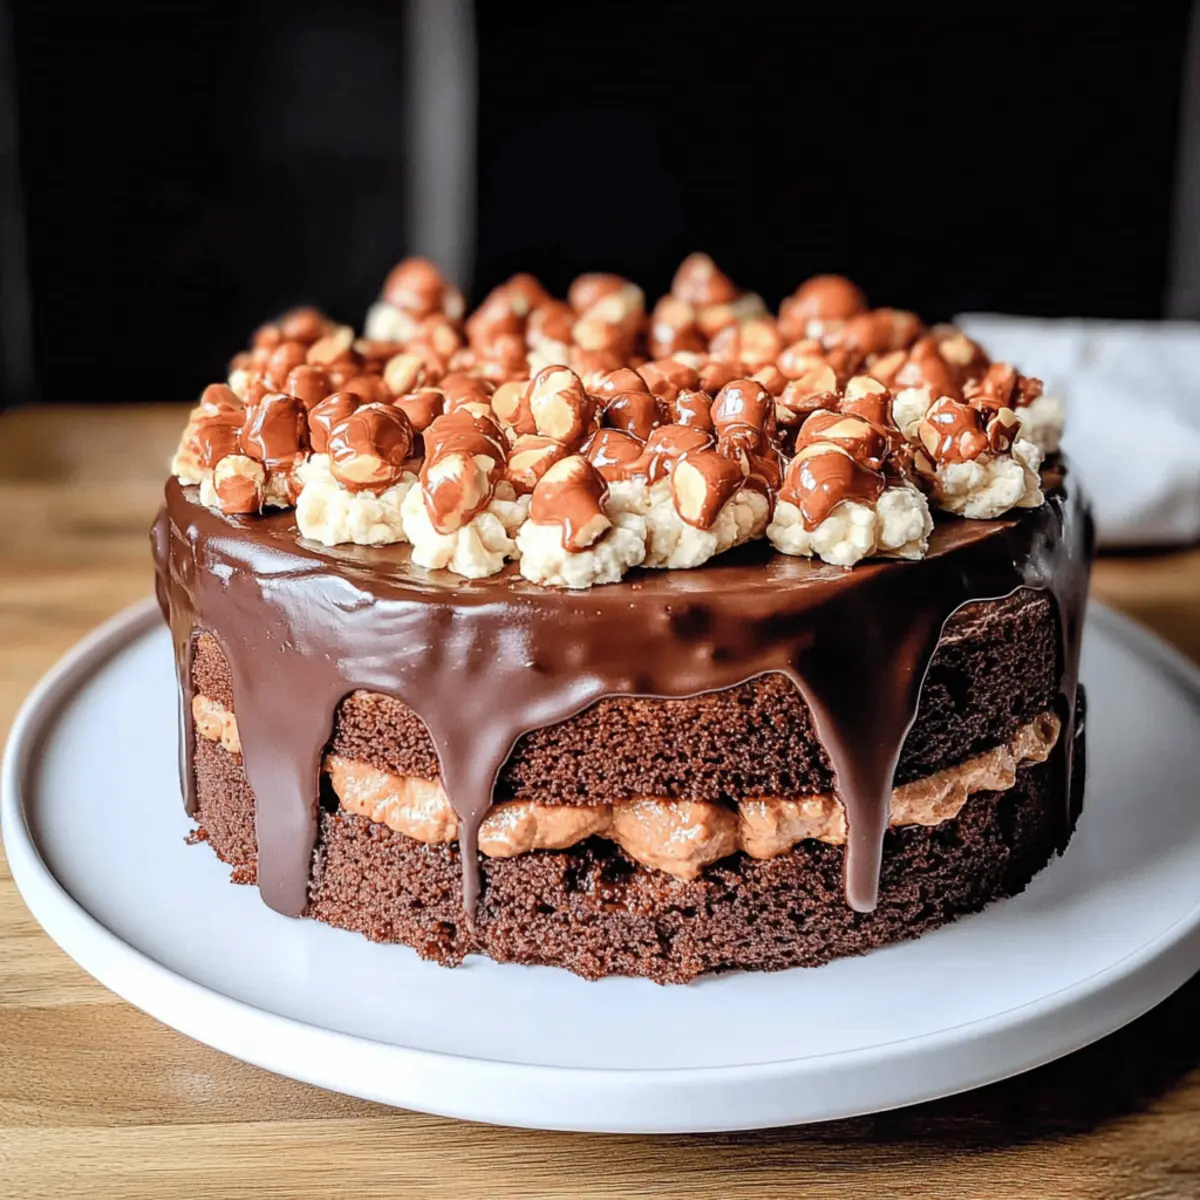
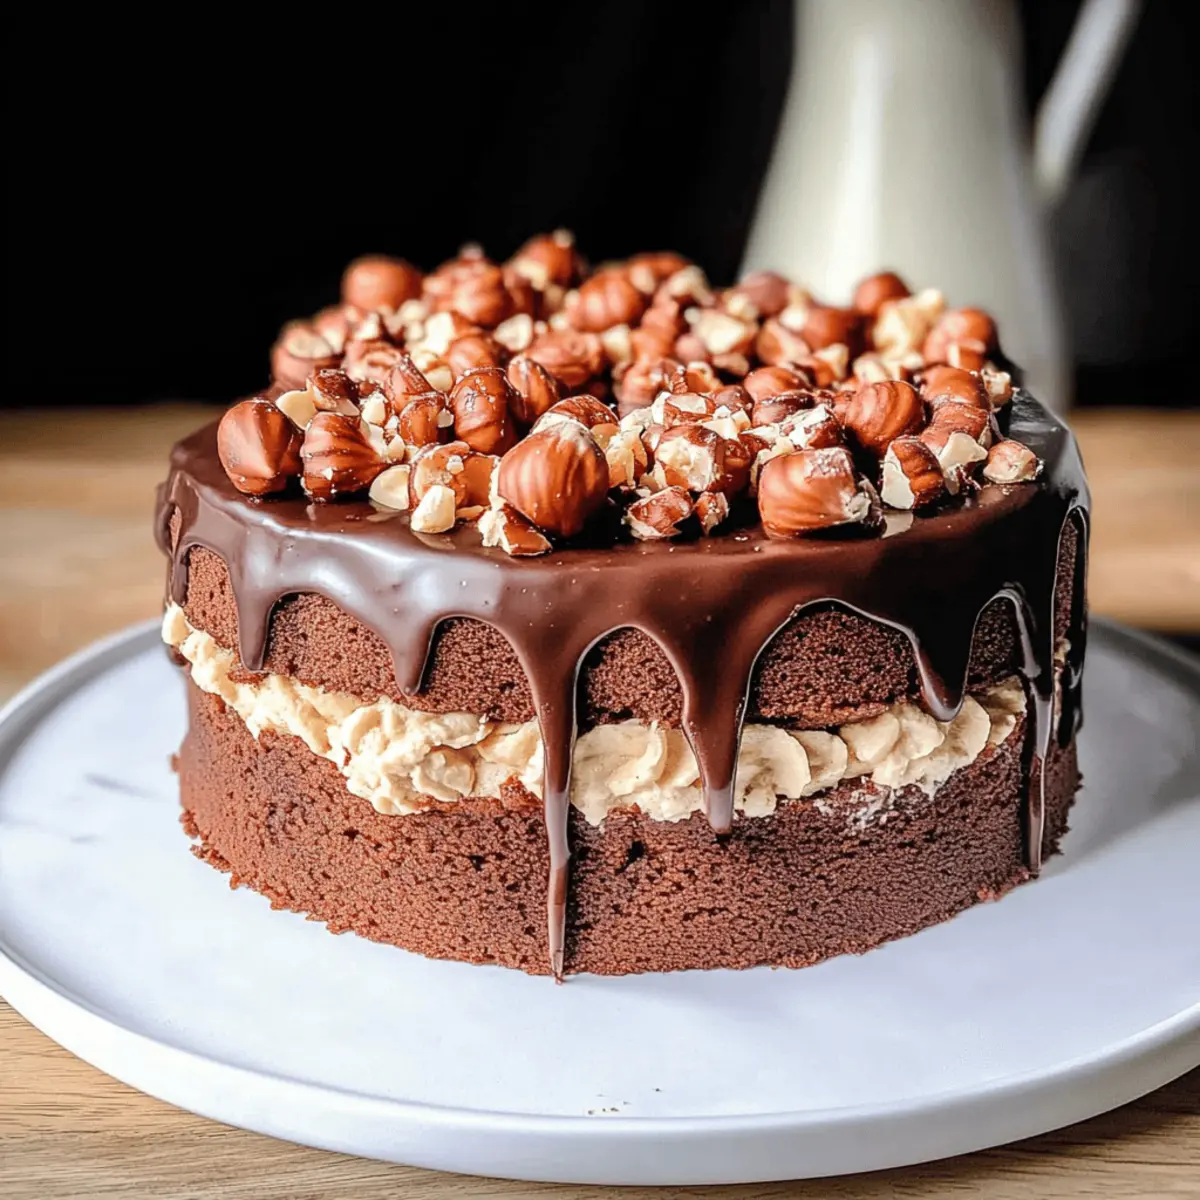
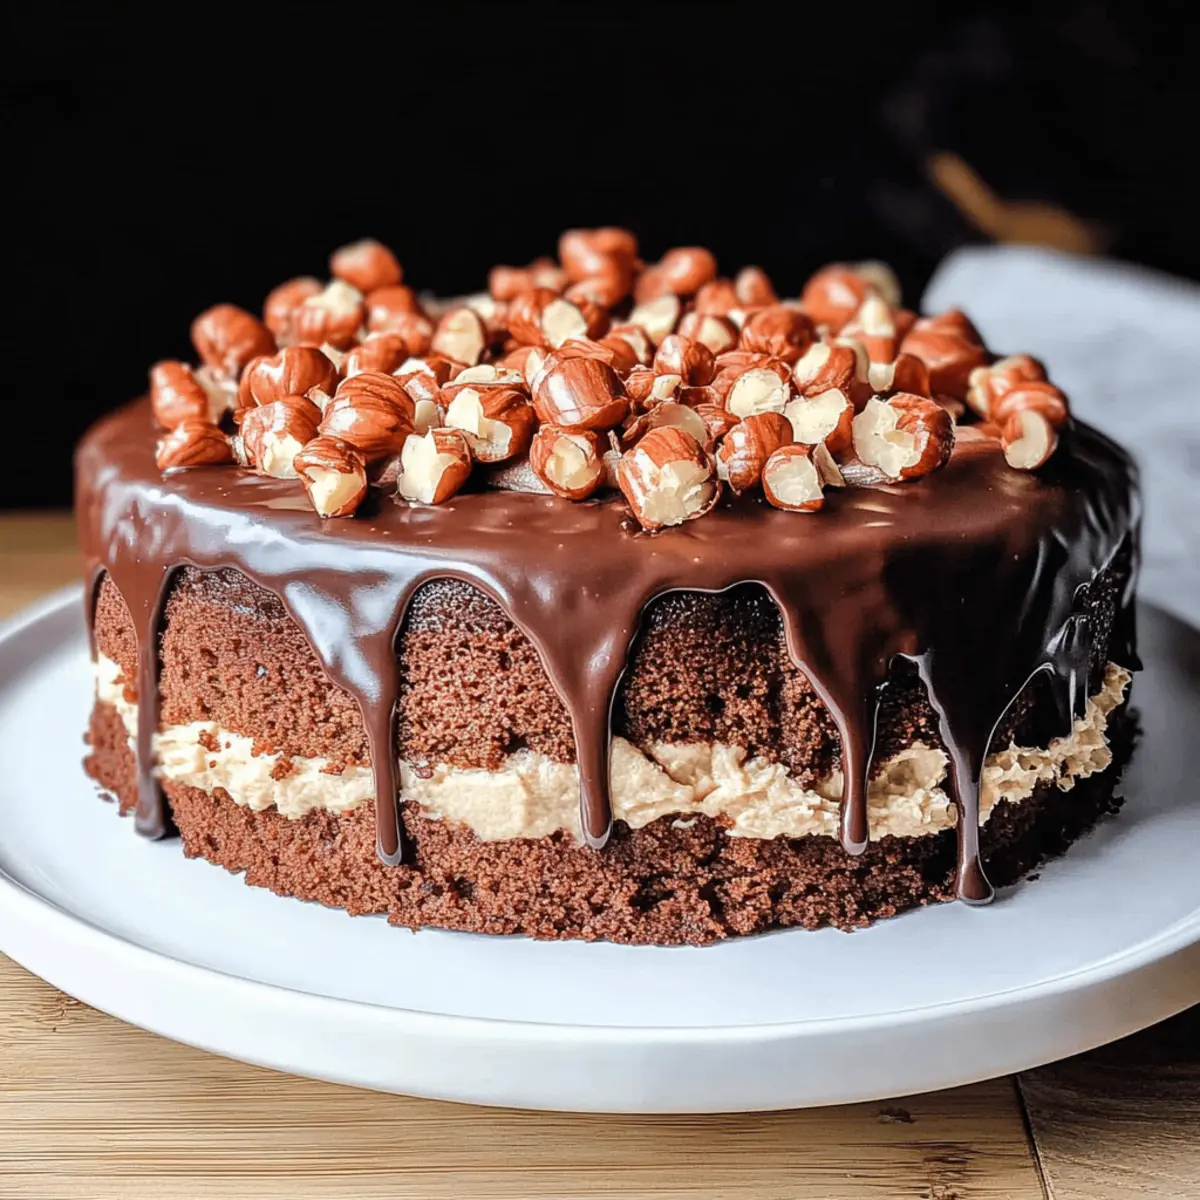
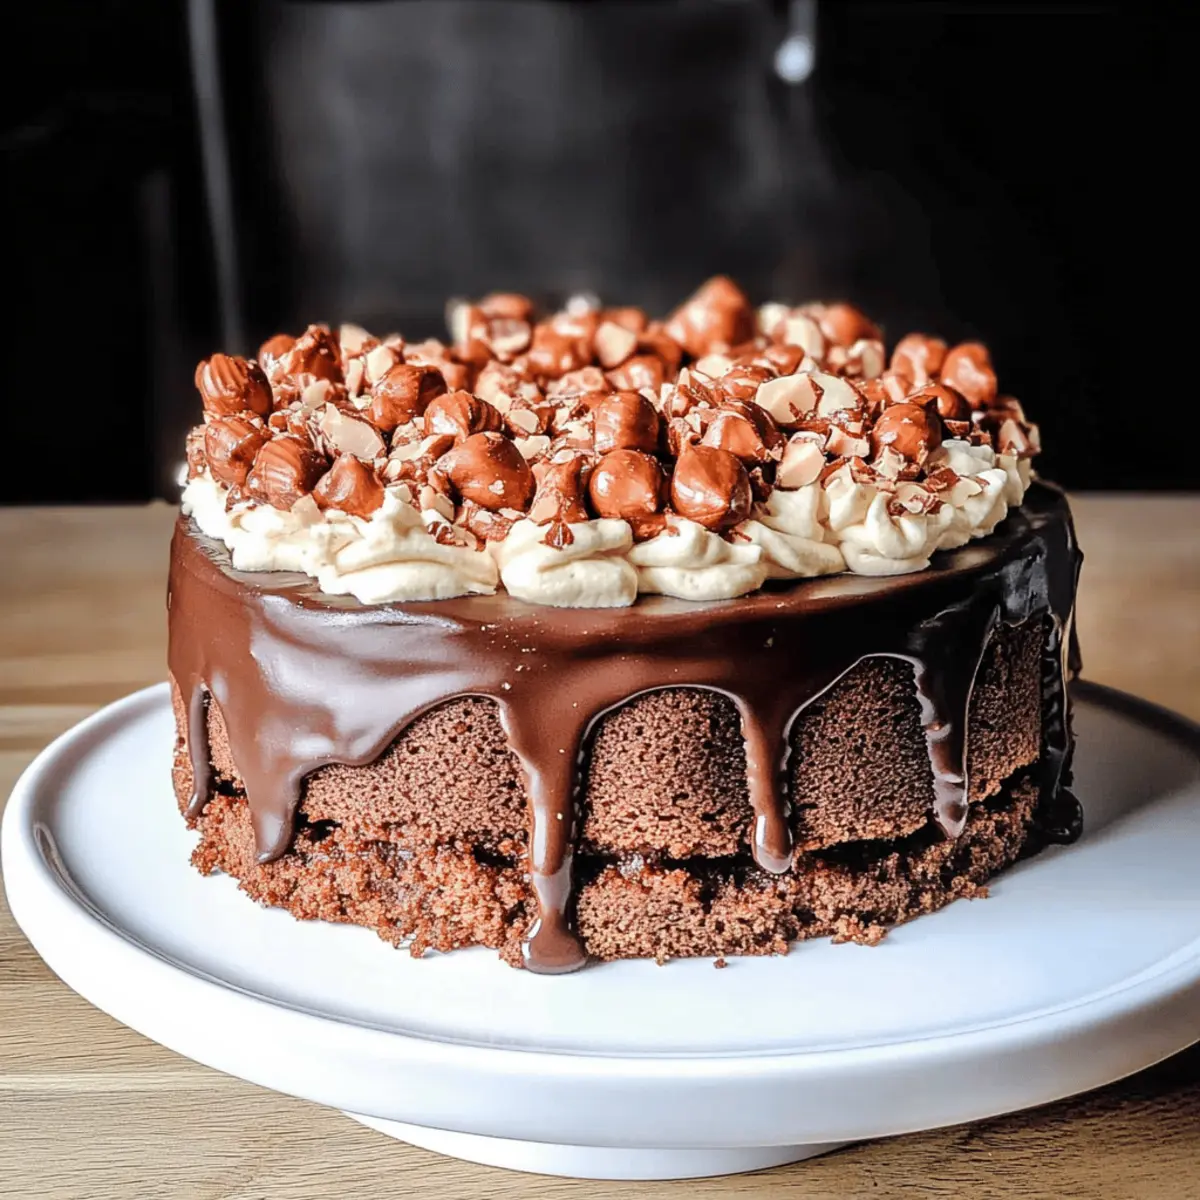
Step 6: Layer Cake
Once the dacquoise layers have cooled completely, carefully remove them from the pans. In a springform pan, layer the dacquoise with the silky chocolate pastry cream, reserving some pastry cream for the sides. Repeat the layers, ensuring even distribution for a stunning final look.
Step 7: Prepare Glazes
For the vanilla glaze, blend powdered sugar with melted butter until you achieve a smooth consistency. Split this glaze, mixing one portion with cocoa powder to create a chocolate glaze. Set both aside, as you’ll use them to finish decorating your Chocolate Hazelnut Cake.
Step 8: Assemble and Chill
Pour the vanilla glaze over the top of your assembled cake, allowing it to gently cascade down the sides for a beautiful finish. Chill the cake for at least 4 hours or overnight to set completely. Before serving, coat the sides with the reserved pastry cream and generously sprinkle with any leftover hazelnut crumbs for that lovely crunch.
How to Store and Freeze Chocolate Hazelnut Cake
Fridge: Store any leftover Chocolate Hazelnut Cake in an airtight container in the refrigerator for up to 3 days to maintain its moisture and flavor.
Freezer: Individual slices can be wrapped tightly in plastic wrap and stored in the freezer for up to 2 months. Thaw in the fridge overnight before serving for best results.
Reheating: If desired, reheat slices in the microwave for about 10-15 seconds on medium power. This will bring back the cake’s delightful softness and melt the chocolate slightly.
Wrap Carefully: When freezing, ensure the cake or slices are well-wrapped to prevent freezer burn and keep the rich flavors intact.
Chocolate Hazelnut Cake Variations & Substitutions
Feel free to play with these variations to create a customized version of this delightful dessert that everyone will enjoy!
-
Gluten-Free: Swap regular flour with a gluten-free blend for an equally delicious cake that caters to those with dietary restrictions. It ensures everyone can indulge without worry!
-
Nut-Free: Replace ground hazelnuts with sunflower seed flour for a nut-free alternative. This offers a similar texture and flavor without compromising on that beloved richness.
-
Vegan Option: Use aquafaba and plant-based butter to create a vegan version of this decadent cake. It’s amazing how simple swaps can yield a delightful dessert everyone will love!
-
Citrusy Twist: Incorporate a teaspoon of orange or lemon zest into the pastry cream for a fresh, fragrant lift. The bright notes will beautifully complement the rich chocolate.
-
Mocha Bliss: Add a tablespoon of strong brewed coffee to the chocolate pastry cream for a delightful coffee-chocolate combination. It’s perfect for those who love a little pick-me-up in their dessert!
-
Decadent Toppings: Top your cake with edible flowers or chocolate shavings for an elegant finish. It adds not only beauty but a playful texture to your dessert, enhancing the overall experience.
-
Fruit Additions: Layer fresh raspberries or strawberries in between the dacquoise and cream for a fruity burst of flavor. This adds a lovely tartness that balances the sweetness beautifully.
-
Spice It Up: Add a pinch of cinnamon or a dash of cayenne pepper for a subtle warm spice that elevates your cake’s taste profile. The kick will surprise and delight your taste buds!
Want more heavenly desserts? Check out my Coconut Cloud Cake for a light treat or indulge yourself with Ingredient Chewy Chocolate Oat Cookies!
Make Ahead Options
These Chocolate Hazelnut Layer Cakes are perfect for meal prep enthusiasts! You can prepare the pastry cream and hazelnut praline up to 3 days in advance; simply store them in airtight containers in the refrigerator. Additionally, the dacquoise layers can be baked and kept in the fridge for up to 24 hours. To maintain their freshness and prevent moisture, ensure they are completely cooled and wrapped tightly. When you’re ready to finish the cake, layer the dacquoise with the chilled pastry cream, assemble it, and pour the glazes over. This way, you can enjoy a stunning dessert with minimal effort on the day of your gathering!
Expert Tips for Chocolate Hazelnut Cake
-
Stiff Peaks Magic: Ensure egg whites are whipped to stiff peaks for optimal dacquoise texture. Underwhipping could lead to a denser cake.
-
Cooling is Key: Allow the dacquoise layers to cool completely before assembly; this guarantees they maintain their delicate structure during layer stacking.
-
Offset Spatula Use: Utilize an offset spatula for even pastry cream distribution between layers, ensuring a beautiful, professional finish to your cake.
-
Chill for Perfection: Grant ample chilling time for the cake to set before slicing. This not only enhances texture but also makes cutting much easier.
-
Fresh Storage: Store any leftovers in an airtight container in the fridge to preserve the delightful flavors and textures of your chocolate hazelnut cake.
What to Serve with Hazelnut and Chocolate Layer Cake
Indulging in a slice of this divine cake is just the beginning of your dessert experience; let’s elevate it even further!
- Fresh Berries: The tartness of raspberries or strawberries adds a delightful contrast that cuts through the richness of the cake.
- Whipped Cream: A dollop of lightly sweetened whipped cream creates a luxurious creaminess that beautifully complements the chocolate layers.
- Espresso: A steaming cup of rich, aromatic espresso enhances the chocolate flavors, creating a sophisticated pairing that’s sure to impress any guest.
- Chocolate Ganache: For true chocolate lovers, drizzling extra ganache over the cake offers an indulgent bonus that intensifies the chocolate experience.
Pair with a light, zesty citrus salad to refresh the palate and contrast the cake’s decadence. It’s a perfect ending to balance out this heavenly dessert.
- Vanilla Ice Cream: Serve alongside a scoop of creamy vanilla ice cream for an irresistible combination that brings a cool, velvety texture to each bite.
- Mint Tea: A fragrant mint tea can cleanse the palate and uplift the rich flavors of the cake, making it a refreshing choice after dessert.
- Pistachio Crumble: Adding a crunchy pistachio topping not only brings color but also adds an extra layer of texture that pairs beautifully with the cake’s smooth elements.
With these delightful pairings, your Hazelnut and Chocolate Layer Cake will shine even brighter on the dessert table!
Chocolate Hazelnut Cake Recipe FAQs
How do I select the best hazelnuts for this cake?
Absolutely! Look for hazelnuts that are plump and have no dark spots all over or any signs of mold. Freshly roasted hazelnuts will enhance the flavor immensely. If possible, buy them whole and toast them yourself; this brings out their natural oils and aroma.
What’s the best way to store Chocolate Hazelnut Cake?
To keep this indulgent treat fresh, store any leftover cake in an airtight container in the refrigerator for up to 3 days. This helps maintain its moisture and prevents it from drying out. If you have individual slices, you can wrap them tightly in plastic wrap for maximum freshness.
Can I freeze Chocolate Hazelnut Cake?
Very much so! For freezing, wrap each slice tightly in plastic wrap and place them in a freezer bag or airtight container. You can store them in the freezer for up to 2 months. To enjoy, simply thaw in the fridge overnight; this keeps the cake’s texture lovely and moist.
What if my dacquoise layers collapse or don’t rise?
It happens! Ensure that your egg whites are whipped to stiff peaks—this is crucial for the airy texture of your dacquoise. If they seem underwhipped, the layers may not rise properly. Take care while folding in the hazelnut mixture, as overmixing can deflate the egg whites.
Are there any dietary considerations for Chocolate Hazelnut Cake?
Definitely! This cake can be modified to cater to various dietary needs. For a gluten-free version, simply substitute all-purpose flour with a gluten-free blend. If nut allergies are a concern, you can replace hazelnuts with sunflower seed flour for a nut-free adaptation. For a vegan option, swap egg whites with aquafaba and butter with plant-based alternatives.
How long should I chill the assembled cake before serving?
I often recommend chilling the assembled cake for at least 4 hours or even overnight. This not only allows the pastry cream to set properly but also enhances the cake’s flavors, making each bite truly delightful. The chilling process lets the flavors marry beautifully.
Decadent Chocolate Hazelnut Cake to Impress Any Guest
Ingredients
Equipment
Method
- Preheat your oven to 170°C (340°F) and line two round cake pans with baking paper.
- Spread the toasted hazelnuts on a baking tray and roast for about 20 minutes until golden and fragrant.
- In a saucepan, whisk together the corn starch, caster sugar, and fine salt. Gradually add the warm whole milk while continuously whisking. Cook over medium heat until thickened, about 5-7 minutes, then stir in butter and dark cooking chocolate until smooth.
- In a small saucepan, combine sugar and water over medium heat until dissolved, and boil gently until golden caramel. Stir in toasted hazelnuts and spread on a baking sheet to cool.
- Process half of the remaining hazelnuts into fine crumbs. In a bowl, beat the egg whites until stiff peaks form, then fold in the hazelnut crumbs and sugar. Spoon into pans and bake for 15 minutes until lightly golden.
- Cool the dacquoise layers completely, then layer with chocolate pastry cream in a springform pan, reserving some pastry cream for the sides.
- Prepare glazes by blending powdered sugar with melted butter, split it and mix one portion with cocoa powder.
- Pour the vanilla glaze over the top of your assembled cake, chill for at least 4 hours and coat the sides with reserved pastry cream and sprinkle with hazelnut crumbs before serving.
Leave a Reply