
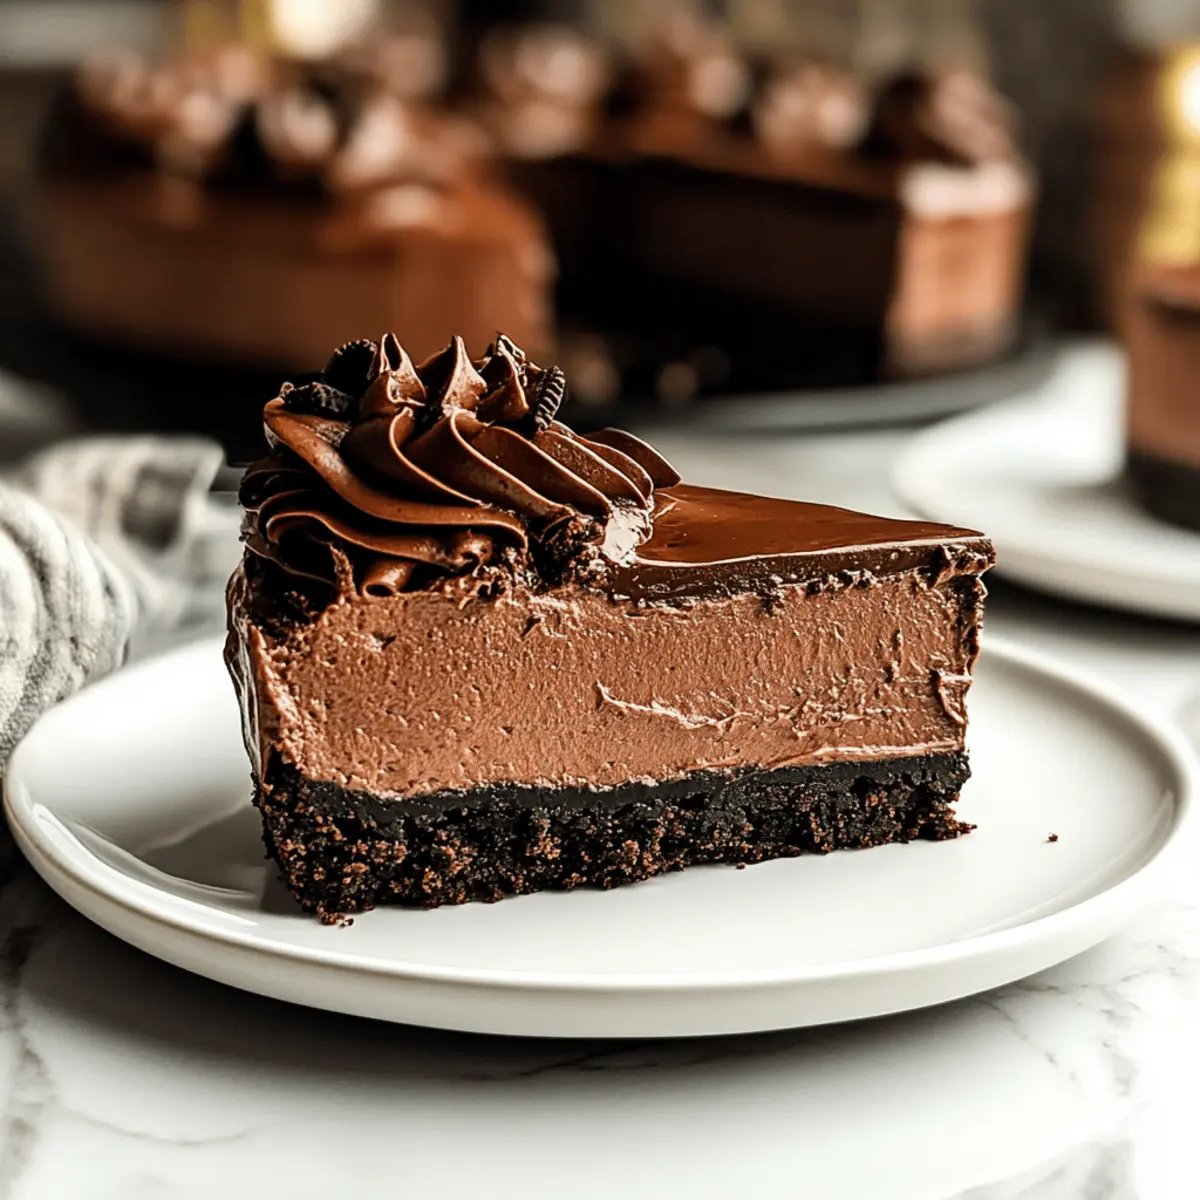
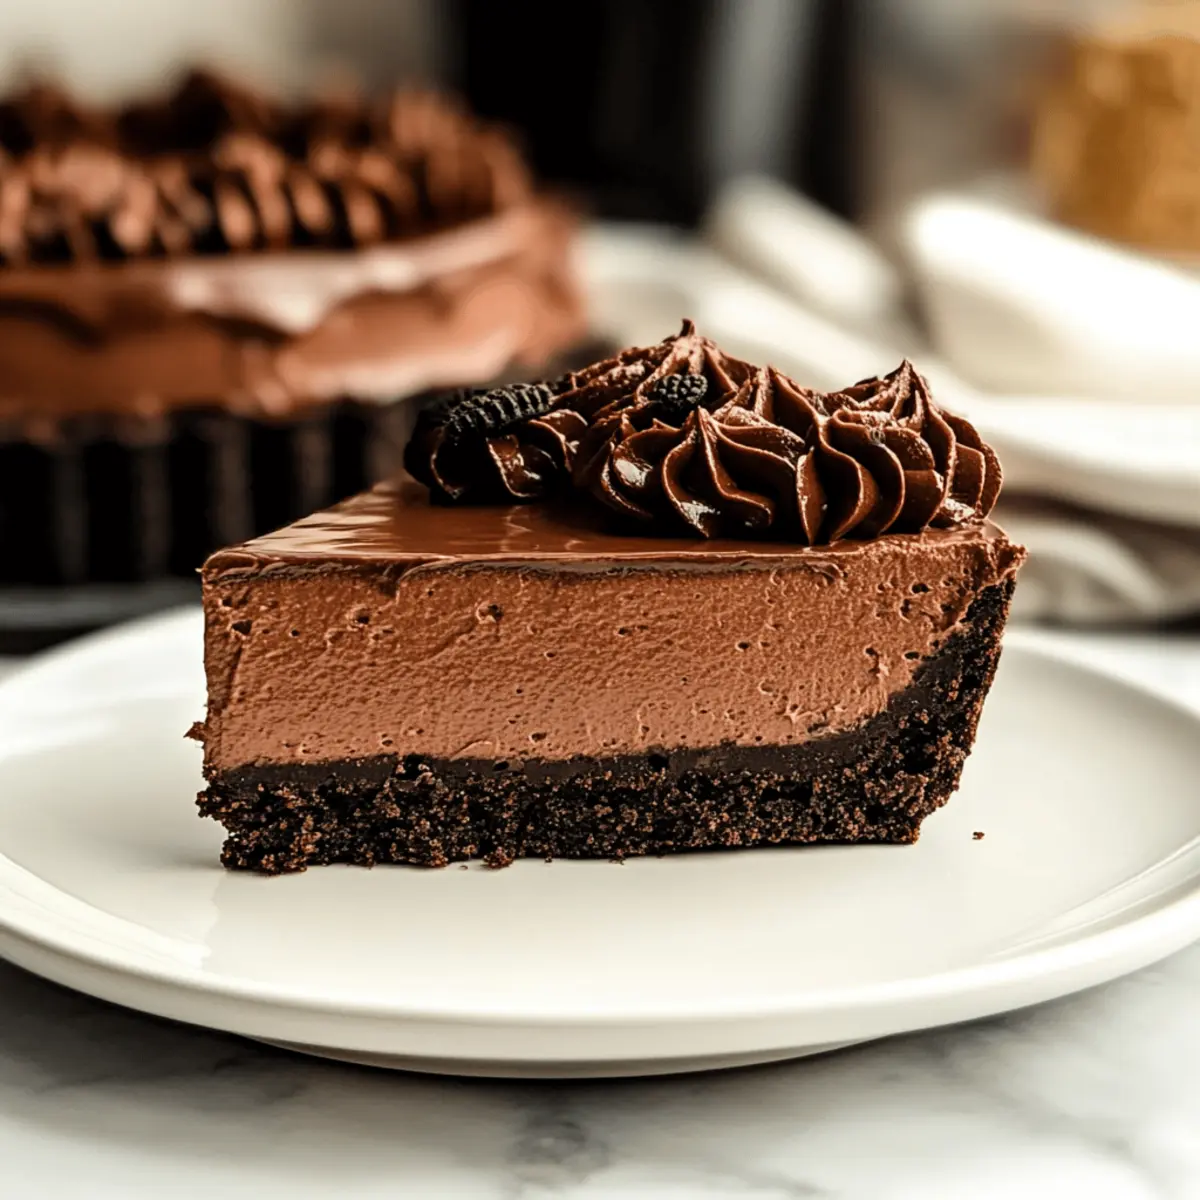
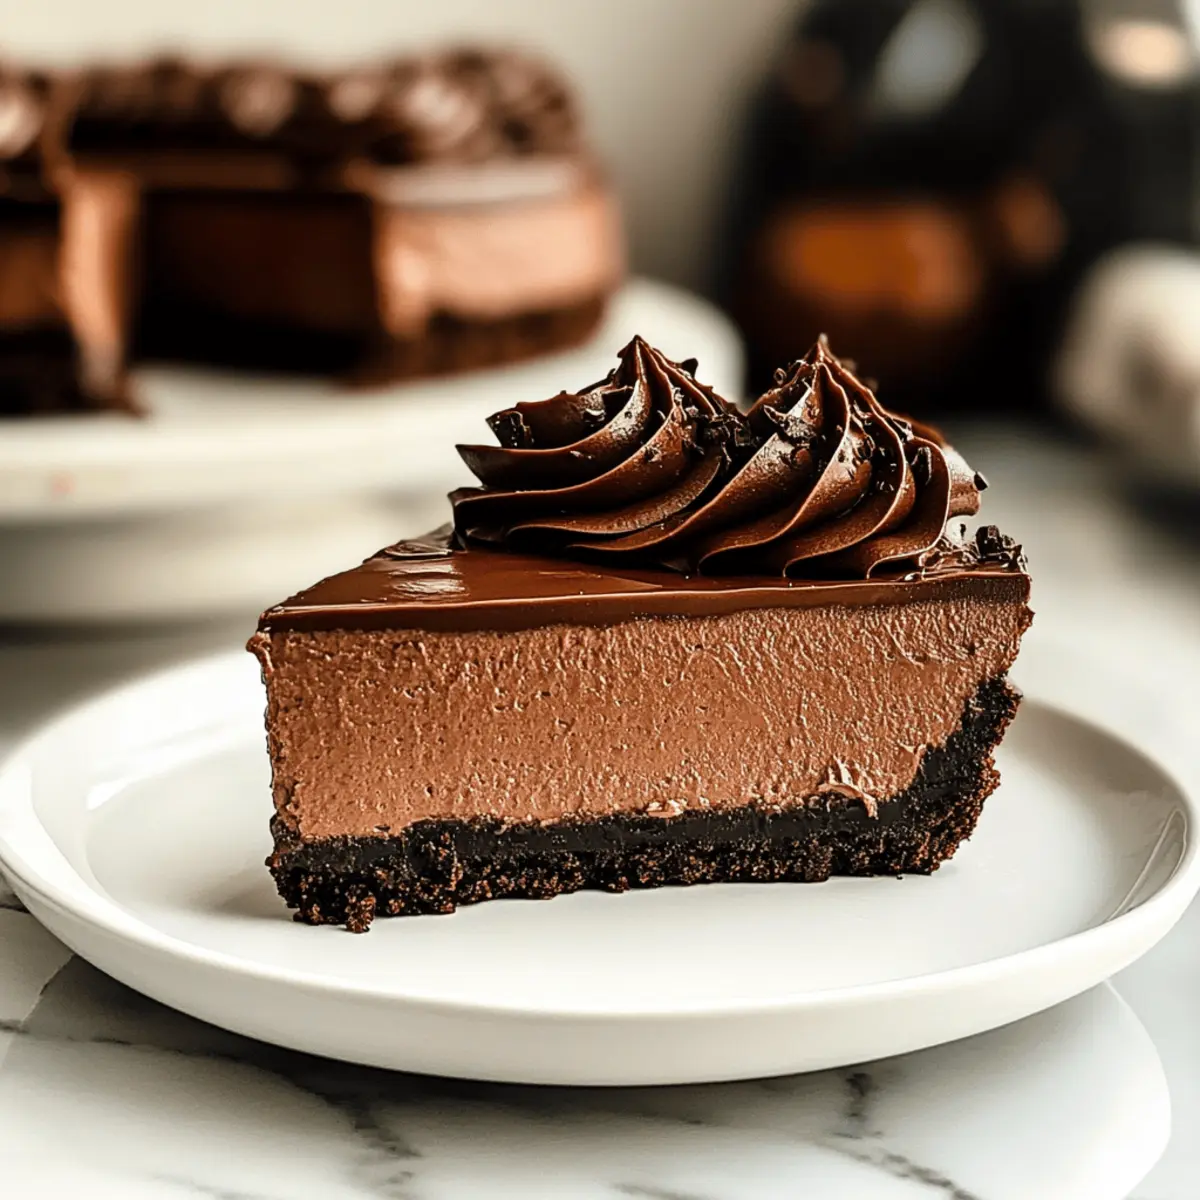
In a world where time is precious and hunger strikes unexpectedly, a luscious dessert doesn’t need to be complicated. That’s where my No-Bake Chocolate Cheesecake comes in—a quick, rich, and creamy chocolate cheesecake that’s sure to impress even the most discerning chocolate lovers. With a perfectly crunchy Oreo crust and a glossy ganache topping, this indulgent treat requires no oven, making it the perfect solution for any occasion. Not only is it incredibly easy to whip up, but it also promises to satisfy those sweet cravings while freeing you up to enjoy more of life’s little moments. Could there be a better way to treat yourself or delight your guests? Let’s dive into the irresistible details of this cheesecake that’s both simple and divine.
Why is this cheesecake so irresistible?
Ease of Preparation: This no-bake cheesecake is a breeze to make, allowing you to whip up an indulgent dessert without turning on the oven.
Decadent Chocolate Flavor: Every bite bursts with rich chocolatey goodness, making it a true treat for chocolate lovers!
Versatile Base: The Oreo crust not only adds a delightful crunch but can easily be swapped for your favorite chocolate cookie, with options like a homemade one for added flair.
Crowd-Pleaser: Perfect for gatherings or dinner parties, this cheesecake will have everyone coming back for seconds—or thirds!
Make-Ahead Delight: Prepare it in advance and chill, freeing up your time for other preparations; it’s a win-win situation!
Elevate your dessert game with this amazing Brownie Cheesecake or keep it simple with the classic and refreshing Lemon Cheesecake.
Rich & Creamy Chocolate Cheesecake Ingredients
For the Crust
- Oreo Cookies – The base of the crust providing chocolate flavor; feel free to swap with any chocolate cookie for variety.
- Melted Butter – Binds the crust together; margarine can be a suitable alternative for a different flavor profile.
For the Filling
- Cream Cheese – Adds creaminess and structure to the filling; mascarpone can be used for a rich twist.
- Powdered Sugar – Sweetens the filling perfectly; in a pinch, granulated sugar works too, though it may alter the texture slightly.
- Vanilla Extract – Enhances the flavor; almond extract is a delightful substitute worth trying!
- Semi-Sweet/Dark Chocolate – Provides the rich chocolate flavor; using high-quality chocolate will elevate your cheesecake.
- Heavy Whipping Cream – Essential for a light, airy texture in the filling; coconut cream is a great non-dairy alternative.
For the Ganache
- Chopped Semi-Sweet Chocolate – The main star of the ganache that drizzles over the cheesecake; dark chocolate can be used for a bolder taste.
- Heavy Cream (for ganache) – Important for achieving a smooth texture; full-fat coconut milk can serve as a non-dairy option if preferred.
This rich & creamy chocolate cheesecake combines all these fantastic ingredients to create a dessert that will leave your taste buds rejoicing!
Step‑by‑Step Instructions for Rich & Creamy Chocolate Cheesecake
Step 1: Prepare the Crust
Begin by crushing approximately 24 Oreo cookies into fine crumbs using a food processor or a sturdy bag and a rolling pin. In a mixing bowl, combine the cookie crumbs with melted butter, stirring until the mixture resembles wet sand. Press this mixture firmly into the bottom of a 9-inch springform pan. Chill the crust in the refrigerator for about 30 minutes to set.
Step 2: Make the Filling
While the crust chills, melt 8 ounces of semi-sweet or dark chocolate until smooth, either in a microwave or using a double boiler. Allow the melted chocolate to cool slightly. In a separate bowl, beat together 16 ounces of softened cream cheese, 1 cup of powdered sugar, and 1 teaspoon of vanilla extract until creamy and well combined. Gently fold in the melted chocolate until the mixture is smooth and evenly blended.
Step 3: Incorporate Whipped Cream
In a large mixing bowl, whip 1 cup of heavy whipping cream until stiff peaks form, which should take about 3-4 minutes with an electric mixer on medium-high speed. Carefully fold the whipped cream into the chocolate-cream cheese mixture using a spatula, ensuring you maintain the airy texture of the whipped cream. This step is key for creating a light and creamy filling for your rich & creamy chocolate cheesecake.
Step 4: Assemble and Chill
Spread the chocolate filling evenly over the chilled Oreo crust using a spatula, smoothing the top for an even finish. Be sure to cover any exposed crust at the edges. Once done, cover the cheesecake with plastic wrap and refrigerate for at least 6 hours, or preferably overnight, to allow it to firm up and the flavors to meld beautifully.
Step 5: Prepare the Ganache
To make the chocolate ganache, heat 1 cup of heavy cream in a small saucepan over medium heat until it begins to steam, being careful not to let it boil. Pour the hot cream over 8 ounces of chopped chocolate in a heatproof bowl. Let it sit for a minute, then stir until the chocolate is fully melted and the ganache is smooth. Allow it to cool slightly before drizzling it over the chilled cheesecake.
Step 6: Final Chill
Once the ganache is drizzled over the cheesecake for a luscious finish, refrigerate the dessert again for an additional 30 to 60 minutes. This final chilling step allows the ganache to set nicely, making it easier to slice. When ready, remove the cheesecake from the springform pan, slice, and serve to enjoy your rich & creamy chocolate cheesecake.

Expert Tips for Rich & Creamy Chocolate Cheesecake
-
Room Temperature Cream Cheese: Make sure your cream cheese is at room temperature to ensure a smoothly blended filling without any lumps.
-
Gentle Folding Essential: When incorporating whipped cream into the chocolate mixture, fold gently to maintain the lightness and avoid deflation for a truly airy cheesecake.
-
Chilling Time Matters: If your cheesecake isn’t firm enough after chilling, give it more time in the refrigerator or briefly place it in the freezer to achieve that perfect set.
-
High-Quality Chocolate: Using high-quality semi-sweet or dark chocolate contributes to the richness of the cheesecake; avoid lower-quality chocolate as it can affect flavor and texture.
-
Customize Your Crunch: If you’re looking for a unique twist, consider using a blend of chocolate cookies for the crust, or even a homemade version, for added depth in flavor in your rich & creamy chocolate cheesecake.
Make Ahead Options
This Irresistible No-Bake Chocolate Cheesecake is perfect for meal prep, allowing you to enjoy a delicious dessert without the last-minute stress. You can prepare the crust and filling up to 24 hours in advance, refrigerating them separately to maintain freshness. To do this, make the crust and refrigerate it as directed, then prepare the chocolate filling and keep it in an airtight container in the refrigerator. When you’re ready to serve, simply spread the filling over the crust, drizzle with ganache, and chill for an additional 30-60 minutes. This way, you get to savor a rich and creamy chocolate cheesecake that tastes just as indulgent, without the chaos!
What to Serve with Irresistible No-Bake Chocolate Cheesecake
Pairing this luscious dessert with complementary dishes can elevate your dining experience and tantalize your taste buds.
-
Fresh Berries: Their natural sweetness and slight acidity provide a fresh contrast to the rich, creamy cheesecake. Strawberries, raspberries, or blueberries not only enhance flavor but also add a pop of color.
-
Vanilla Ice Cream: A scoop of this classic favorite balances the cheesecake’s richness and adds a delightful creaminess that melts in your mouth. The warmth of the ice cream against the chilled cheesecake creates a perfect textural harmony.
-
Chocolate Sauce Drizzle: For the ultimate indulgence, serve a warm chocolate sauce alongside, enhancing the dessert’s chocolatey depth. A drizzle of this luxurious addition will mesmerize any chocolate lover!
-
Espresso or Coffee: A warm cup of espresso or coffee complements the dessert beautifully by cutting through the sweetness. The rich flavors bring out the best in chocolate, creating a delightful pairing to be savored.
-
Whipped Cream Topping: Light, airy whipped cream brings a dreamy texture to each bite. Its subtle sweetness enhances the chocolate without overwhelming it, making it a perfect finishing touch.
-
Mini Cheesecake Parfaits: For a fun presentation, serve mini cheesecake parfaits layered with crushed cookies and whipped cream. Each spoonful is a blend of textures, making them a festive crowd-pleaser.
-
Sparkling Wine: A glass of sweet sparkling wine or champagne can be an elegant accompaniment, enhancing the celebratory feel of your special dessert. The bubbly effervescence adds a delightful twist.
These serving suggestions will make your no-bake chocolate cheesecake an unforgettable centerpiece!
Rich & Creamy Chocolate Cheesecake Variations
Feel free to get creative with this luscious cheesecake; the options are endless and oh-so-delicious!
-
Dairy-Free: Substitute cream cheese and heavy cream with cashew cream or coconut yogurt for a deliciously creamy vegan version. Feel free to experiment with your favorite non-dairy options!
-
Nutty Twist: Add 1/2 cup of finely chopped nuts (like hazelnuts or almonds) to the crust to bring an extra crunchy texture. It pairs wonderfully with chocolate and adds a delightful surprise in every bite.
-
Fruit Fusion: Incorporate fresh raspberries or strawberries into the filling for a fruity burst of flavor. Just gently fold in the berries before spreading over the crust, adding a refreshing twist to your chocolate cheesecake.
-
Minty Fresh: Add a few drops of peppermint extract to the filling for a refreshing mint chocolate cheesecake. Perfect for those who love a beachy vibe!
-
Spicy Kick: Add a pinch of cayenne pepper or chili powder to the ganache for a spicy chocolate experience. This unexpected flavor will take your cheesecake to a whole new level!
-
Coffee Lovers: Mix in 1 tablespoon of espresso powder with the melted chocolate to infuse a delightful coffee flavor. If you love coffee, this pairing will be a match made in heaven!
If you’re inspired, don’t forget to check out my scrumptious Brownie Cheesecake or the zesty Lemon Cheesecake for more options to please your palate!
Storage Tips for Rich & Creamy Chocolate Cheesecake
Refrigerator: Store your cheesecake in the fridge, covered with plastic wrap or in an airtight container for up to 5 days. This keeps it fresh and delicious!
Freezer: For longer storage, freeze the cheesecake before adding the ganache for up to 2 months. Wrap it tightly in plastic wrap and then in aluminum foil to prevent freezer burn.
Thawing: When ready to enjoy, transfer the frozen cheesecake to the fridge and let it thaw overnight. Once thawed, prepare the ganache and enjoy!
Reheating: This cheesecake is best served cold, so avoid reheating. Simply slice and serve chilled for the perfect indulgence!
Rich & Creamy Chocolate Cheesecake Recipe FAQs
How do I choose ripe ingredients for this cheesecake?
Absolutely! For the best results, ensure your cream cheese is at room temperature for a smooth blend. If using dark chocolate, opt for high-quality chocolate (minimum 60% cocoa) for a richer flavor. When selecting your cookies, look for Oreos that are fresh and intact, as stale cookies can lead to a less-than-ideal crust texture.
How should I store the cheesecake after making it?
Store your rich & creamy chocolate cheesecake in the refrigerator, covered with plastic wrap or in an airtight container, for up to 5 days. This helps maintain its creamy texture and flavor. If you’re making it in advance, it’s also a great idea to freeze it for longer storage.
Can I freeze the cheesecake, and how should I do it?
Yes, you can freeze your cheesecake for up to 2 months! Make sure to wrap it tightly in plastic wrap first, then cover it with aluminum foil to avoid freezer burn. Avoid adding the ganache before freezing; instead, prepare it fresh when you’re ready to serve. When you’re set to enjoy it, thaw the cheesecake overnight in the fridge before garnishing and slicing.
What should I do if my cheesecake doesn’t set properly?
If your cheesecake isn’t firm after the recommended chilling time, don’t worry! Simply cover it and allow it to chill for a few more hours in the fridge. If you’re in a rush, you can place it in the freezer for about 30 minutes to help it set faster. Just be sure to keep an eye on it to avoid freezing.
Are there any dietary considerations I should be aware of with this cheesecake?
Indeed! This recipe contains cream cheese, heavy cream, and chocolate, which are all dairy products. If you’re making this for someone with a dairy allergy, substituting with non-dairy alternatives, such as coconut cream and non-dairy chocolate, can make this cheesecake suitable. Additionally, always double-check ingredients, especially chocolates, for any allergens.
Can pets safely consume any part of this cheesecake?
It’s best to keep this cheesecake away from pets. Ingredients like chocolate, cream cheese, and sugar may be harmful to animals. Ensure any leftovers are securely stored away from curious paws!
Decadent Rich & Creamy Chocolate Cheesecake for Every Occasion
Ingredients
Equipment
Method
- Crush approximately 24 Oreo cookies into fine crumbs and mix with melted butter. Press into a 9-inch springform pan and chill for about 30 minutes.
- Melt 8 ounces of chocolate, allow to cool. Mix cream cheese, powdered sugar, and vanilla until creamy, then fold in melted chocolate.
- Whip 1 cup of heavy cream until stiff peaks, then gently fold into the chocolate-cream cheese mixture.
- Spread the filling over the crust, cover, and refrigerate for at least 6 hours or overnight.
- Heat 1 cup of heavy cream until steaming, pour over 8 ounces of chopped chocolate and stir until smooth. Let it cool before drizzling over cheesecake.
- Chill for 30 to 60 minutes after adding ganache to set before slicing and serving.
Leave a Reply