
As I unwrapped a package of Mint Oreos, the vibrant green caught my eye, instantly whisking me away to memories of festive St. Patrick’s Day celebrations. This year, I decided to combine that nostalgia with a quick, no-bake dessert that everyone will adore: the St. Patrick’s Day Brownie Trifle. With layers of rich brownies, creamy vanilla pudding, and a delightful crunch from those minty cookies, this easy dessert is perfect for whipping up a show-stopping treat in just 30 minutes. Not only does it look amazing on any table, but it’s also a crowd-pleaser that will have your guests coming back for seconds. So, are you ready to impress your friends and family with this festive delight?

Why will you love this trifle?
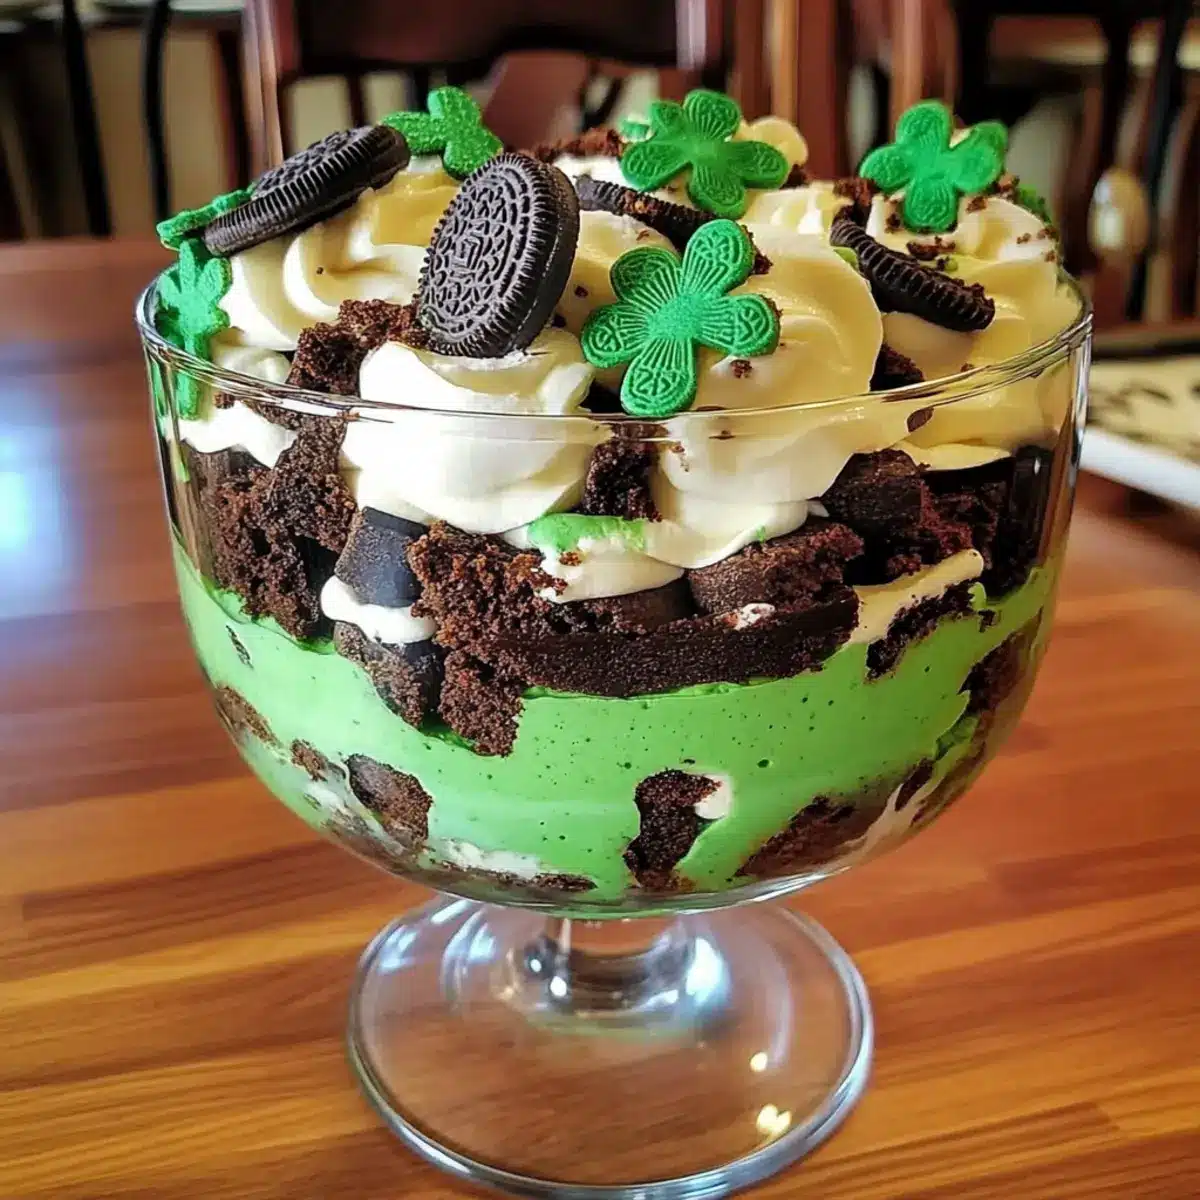
Irresistible Layers: Dive into a decadent dessert that features layers of fudgy brownies and creamy vanilla pudding, beautifully topped with crushed Mint Oreos for that perfect crunch.
Quick and Easy: This no-bake recipe can be prepared in just 30 minutes, making it an ideal choice for last-minute celebrations.
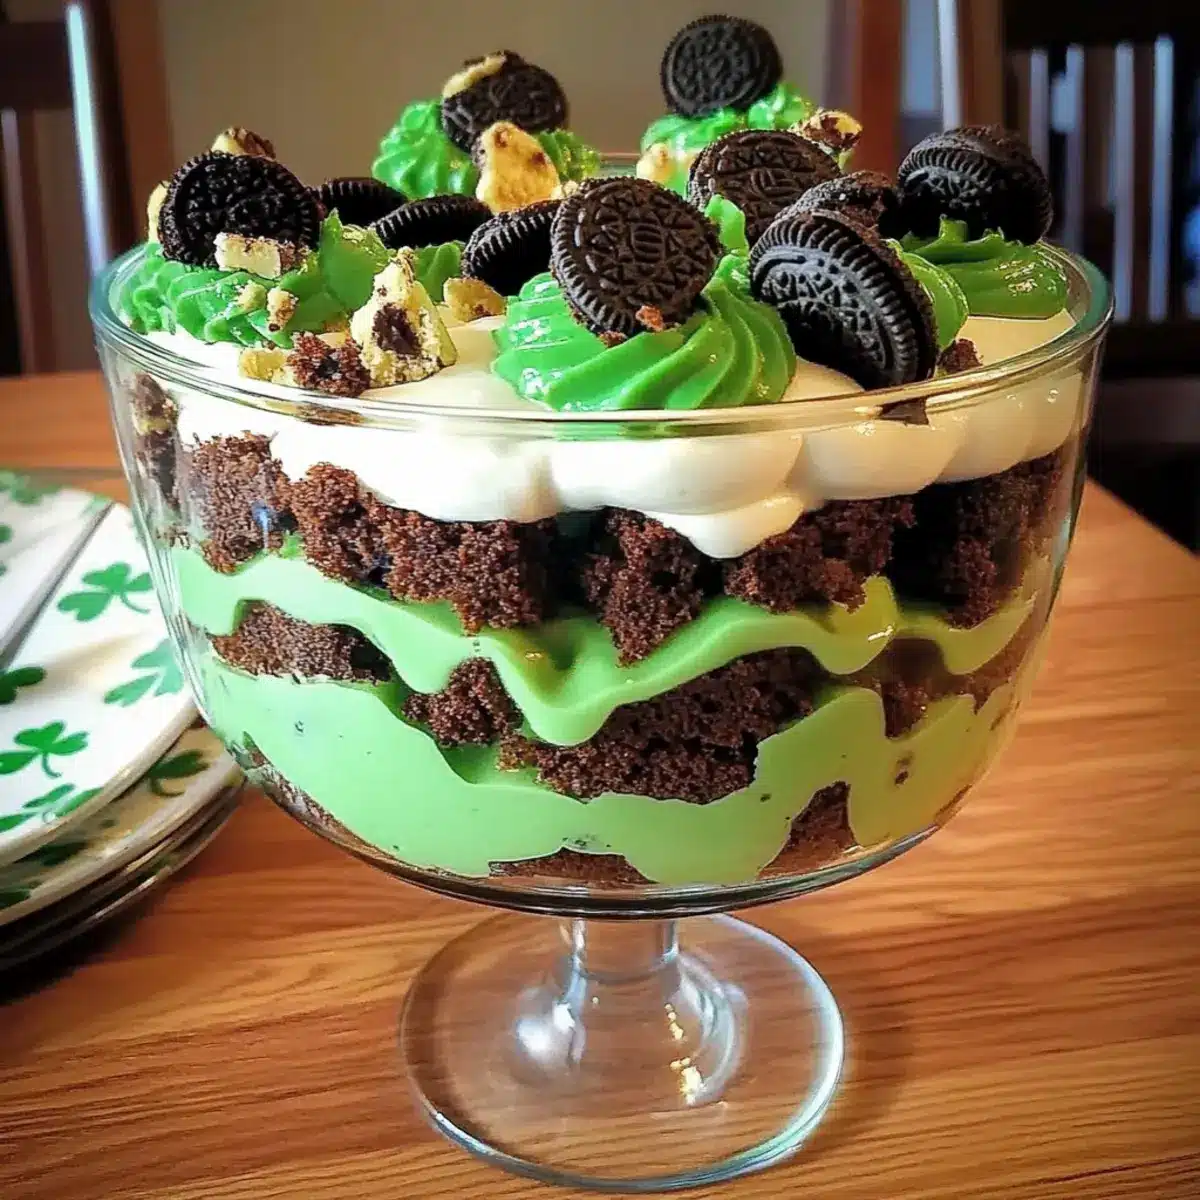
Festive Appeal: The vibrant green hues and eye-catching layers make it a stunning centerpiece for your St. Patrick’s Day gathering, sure to impress guests.
Versatile Delight: Feel free to substitute with ube brownies deliciously or explore a gluten-free twist to accommodate various dietary preferences.
Memory-Making Treat: Each bite evokes the joy of festive gatherings, ensuring this trifle is not just a dessert, but a cherished memory waiting to happen.
St. Patrick’s Day Brownie Trifle Ingredients
• Gather these simple ingredients for a delightful treat.
For the Brownie Layer
- Brownie Mix – Provides the dessert’s base layer; follow package instructions for best results.
- Eggs – Essential for binding and moisture; add as directed on the brownie mix package.
- Oil or Butter – Use to bring richness to the brownies; choose butter for a deeper flavor.
For the Pudding Layer
- Instant Vanilla Pudding Mix – Gives creaminess and sweetness; consider a large box for a full-sized trifle.
- Milk – Follow the pudding mix directions for creamy consistency; whole milk is ideal for richness.
- Green Food Coloring – Enhances the festive appearance; omit if opting for pistachio pudding instead.
For the Topping
- Cool Whip – Supplies a light, airy texture; whipped cream can be a fresh substitute.
- Mint Oreos – Adds a delicious crunch with a minty flavor; swap for regular Oreos for simplicity.
With these ingredients, you’re all set to create your stunning St. Patrick’s Day Brownie Trifle that will surely delight everyone at your celebration!
Step‑by‑Step Instructions for St. Patrick’s Day Brownie Trifle
Step 1: Prepare the Brownies
Preheat your oven as per package instructions for the brownie mix. In a mixing bowl, combine the brownie mix, eggs, and oil or butter until smooth. Pour the batter into a greased baking dish and spread evenly. Bake according to package directions until a toothpick inserted comes out with a few moist crumbs, usually about 20-25 minutes. Allow the brownies to cool completely before assembly, giving them time to set.
Step 2: Mix the Pudding
While the brownies cool, in a large bowl, whisk together the instant vanilla pudding mix and the milk until well combined and thickened, typically about 2 minutes. Add a few drops of green food coloring and stir until you reach your desired festive shade. This colorful pudding layer will add both flavor and a visual pop to your St. Patrick’s Day Brownie Trifle, making it even more appealing.
Step 3: Crush the Mint Oreos
Grab a sealed Ziploc bag and add the Mint Oreos. Using a rolling pin, gently crush the cookies until you have nice, small pieces, resembling coarse crumbs. Keep some larger chunks aside for the top layer of your trifle. This crushed Oreo layer will provide a delightful crunch and a burst of minty flavor that beautifully complements the rich brownie and creamy pudding layers.
Step 4: Layer the Ingredients
In a large trifle bowl or individual serving cups, begin layering your St. Patrick’s Day Brownie Trifle. Start by placing a layer of brownie pieces at the bottom, breaking them up if necessary. Next, spoon in a layer of the prepared vanilla pudding, followed by a layer of Cool Whip. Top this with a generous sprinkle of the crushed Mint Oreos, then repeat the layers in the same order until the bowl is filled to your desired height.
Step 5: Finish the Trifle
After completing the layers, be sure to finish with a final layer of brownie pieces topped with vanilla pudding. Then, scatter the remaining crushed Oreos over the top for a visually appealing finish. This final touch will make your St. Patrick’s Day Brownie Trifle look festive and inviting, ready to impress your guests when you serve it!
Step 6: Chill Before Serving
Cover the trifle with plastic wrap and place it in the refrigerator to chill for at least one hour. Allowing time for the flavors to meld is key to enhancing the overall taste of your St. Patrick’s Day Brownie Trifle. You can also prepare it the night before to make your celebration day hassle-free, giving it ample time to set and develop deliciousness.
Make Ahead Options
These St. Patrick’s Day Brownie Trifles are perfect for busy home cooks looking to save time without sacrificing flavor! You can prepare the brownie layer and pudding mixture up to 24 hours in advance; simply bake the brownies, cool, and store them wrapped in the refrigerator, while chilling the pudding in an airtight container. The Mint Oreos can be crushed a day ahead as well, stored in a separate container to maintain their crunch. When you’re ready to serve, layer the prepped components, top with Cool Whip, and refrigerate until it’s time to enjoy. This allows the flavors to meld beautifully, ensuring your dessert is just as delicious when served!
St. Patrick’s Day Brownie Trifle Variations
Feel free to get creative with your trifle; the possibilities are as delightful as the dessert itself!
-
Pistachio Twist:
Substitute pistachio pudding to skip the food coloring and infuse a unique flavor that still feels festive. The nutty undertones blend wonderfully with the rich brownies. -
Homemade Brownies:
Use homemade brownies instead of boxed mix for a personal touch. This swap elevates the dessert and brings warmth to your family tradition. -
Gluten-Free:
Opt for a gluten-free brownie mix to cater to dietary needs, ensuring everyone can enjoy this delicious treat without compromise. -
Mint Chocolate Chip:
Add mini chocolate chips to the vanilla pudding layer to enhance the chocolate flavor, creating an exhilarating minty experience with each bite! -
Fruit Layer:
Introduce a fresh fruit layer, such as sliced strawberries or raspberries, between the brownies and pudding for a refreshing contrast. It brightens up the palette beautifully. -
Heat It Up:
For a little kick, add a dash of peppermint extract to the pudding. It adds a lovely depth and warmth, perfect for those who crave a stronger mint flavor. -
Decadent Toppings:
Top with a drizzle of chocolate or caramel sauce before serving for an indulgent touch that enhances both flavor and presentation. -
Alternative Cookies:
Swap Mint Oreos for regular Oreos or even chocolate chip cookies to change the flavor profile while keeping the crunch factor intact. Each variation brings its own charm!
With these simple tweaks, your St. Patrick’s Day Brownie Trifle can transform into something uniquely yours, much like those cherished family memories!
What to Serve with St. Patrick’s Day Brownie Trifle
Elevate your festive gathering with delightful sides and drinks that perfectly complement the rich indulgence of this no-bake dessert.
-
Fresh Mint Salad: A light and refreshing salad adds a burst of flavor. Tossed with lemon vinaigrette, it balances the sweetness of the trifle beautifully.
-
Irish Cream Coffee: This warm beverage with velvety Irish cream liqueur is a cozy pairing that perfectly complements the dessert’s chocolatey richness.
-
Chocolate-Covered Strawberries: For a touch of elegance, serve these fresh berries. They provide a delightful contrast to the brownie and mint flavors, enhancing the overall experience.
-
Vanilla Ice Cream: A scoop of vanilla ice cream brings an amazing creaminess that pairs perfectly with the minty chocolate notes of the trifle.
-
Buttery Scones: Flaky, warm scones with a hint of sweetness are a delightful addition. They can be a perfect contrast to the rich textures of the trifle.
-
Lemonade Spritzers: Cool and effervescent, these drinks add a zesty freshness that cuts through the dessert’s creaminess. Enjoy them as a refreshing palate cleanser!
-
Dark Chocolate Mousse: For an extra layer of indulgence, pair your trifle with a light and airy dark chocolate mousse, offering bittersweet notes that enhance the minty flavors.
-
Fruit Tart: A colorful fruit tart brings out the vibrancy of spring and offers a fruity contrast to the rich layers of your St. Patrick’s Day Brownie Trifle.
-
Green Velvet Cake: Continuing the festive theme, this unique take on a classic adds a fun and celebratory touch—and who doesn’t love cake?
Expert Tips for St. Patrick’s Day Brownie Trifle
-
Chill Time: Allow your trifle at least one hour to chill; this helps flavors meld beautifully for a more delightful experience.
-
Layering Technique: For the best visual appeal, make sure to spread each layer evenly and gently press down, allowing the layers to really shine.
-
Crushed Oreos: Don’t crush the Mint Oreos too fine; leaving some larger chunks adds a lovely texture and enhances crunchiness in your St. Patrick’s Day Brownie Trifle.
-
Make Ahead: Prepare your trifle a day in advance; not only does it save time, but it allows the flavors to blend beyond compare.
-
Customizable Layers: Feel free to swap the pudding flavor; pistachio offers a unique twist, eliminating the need for food coloring and adding a different yet festive touch.
How to Store and Freeze St. Patrick’s Day Brownie Trifle
Fridge: Store the trifle in an airtight container in the refrigerator for up to 3 days to maintain its fresh taste and texture.
Make-Ahead: Prepare the trifle a day in advance for the best flavor melding; simply cover with plastic wrap before chilling.
Freezer: If you need to freeze leftovers, layer the brownies and pudding separately and freeze for up to 2 months. Thaw in the fridge before reassembling and enjoying.
Reheating: There’s no need to reheat; this St. Patrick’s Day Brownie Trifle is best served chilled for optimal flavor and texture!
St. Patrick’s Day Brownie Trifle Recipe FAQs
What type of brownie mix should I use?
Absolutely! You can use any standard brownie mix, but for the best texture and flavor, I recommend using a mix that includes chocolate chunks or is labeled fudgy. This will enhance the dessert’s richness and complement the creaminess of the pudding.
How long can I store the trifle in the fridge?
Very! Your St. Patrick’s Day Brownie Trifle can be stored in the refrigerator for up to 3 days. Just make sure to keep it covered with plastic wrap or in an airtight container to maintain its freshness and prevent it from drying out.
Can I freeze the St. Patrick’s Day Brownie Trifle?
Yes, you can! To freeze, I suggest layering the brownies and pudding separately in airtight containers. This way, you can freeze them for up to 2 months. When you’re ready to enjoy, simply thaw them in the fridge overnight and reassemble the trifle without having to worry about ice crystals ruining the texture.
What should I do if my pudding isn’t thickening as expected?
It happens sometimes! If your instant pudding isn’t thickening after the recommended 2 minutes, try whisking it for an extra minute or two. If it’s still runny, ensure you’re using the right milk-to-pudding mix ratio as stated on the package. Adding a bit more pudding mix is also an option to reach your desired consistency.
Can I make this dessert gluten-free?
Absolutely! Just select a gluten-free brownie mix and double-check that the other ingredients, like the Mint Oreos and Cool Whip, are gluten-free as well. This way, everyone can enjoy a slice of your delicious St. Patrick’s Day Brownie Trifle!
How should I garnish the trifle for the best presentation?
For a delightful finish, consider garnishing with a sprinkle of crushed Mint Oreos on top and perhaps a few fresh mint leaves for added color. Serving it in clear glass cups allows guests to see those beautiful layers, making your trifle not just a treat for the taste buds but also a feast for the eyes!

St. Patrick's Day Brownie Trifle: Indulge in Minty Bliss
Ingredients
Equipment
Method
- Preheat your oven as per package instructions for the brownie mix. In a mixing bowl, combine the brownie mix, eggs, and oil or butter until smooth. Pour the batter into a greased baking dish and spread evenly. Bake according to package directions until a toothpick inserted comes out with a few moist crumbs, usually about 20-25 minutes. Allow the brownies to cool completely before assembly.
- While the brownies cool, in a large bowl, whisk together the instant vanilla pudding mix and the milk until well combined and thickened, typically about 2 minutes. Add a few drops of green food coloring and stir until you reach your desired shade.
- Grab a sealed Ziploc bag and add the Mint Oreos. Using a rolling pin, crush the cookies until you have small pieces resembling coarse crumbs, keeping some larger chunks aside for the top layer.
- In a large trifle bowl or individual serving cups, start layering your trifle. Begin with a layer of brownie pieces at the bottom, followed by a layer of prepared vanilla pudding, then Cool Whip, and top with crushed Mint Oreos. Repeat layers until the bowl is filled to your desired height.
- Finish with a final layer of brownie pieces topped with vanilla pudding, and scatter the remaining crushed Oreos over the top for a festive finish.
- Cover the trifle with plastic wrap and refrigerate for at least one hour to allow the flavors to meld.
Leave a Reply