
The fragrant aroma of freshly baked bread wafts through the kitchen, instantly elevating the mood for anyone lucky enough to be nearby. That’s exactly what happens when I make these Handmade Sub Rolls, a wonderful solution for sandwich lovers craving something homemade and heartwarming. With their delightful combination of softness and sturdiness, these rolls are tailor-made to support even the most indulgent fillings. They’re a joy to shape and bake, forging a connection between the everyday and the extraordinary. Beyond their easy prep, which will have you back to making your favorite subs in no time, these rolls shine in versatility—they can easily be transformed into Italian Herb and Cheese variations for a flavorful twist! Curious about how to master these perfect rolls? Let’s dive in!
Why Are Handmade Sub Rolls a Must-Try?
Homemade Goodness: Nothing beats the satisfaction of baking your own bread! These Handmade Sub Rolls take your sandwich experience to new heights, filled with warmth and personality.
Versatile Options: Not just for subs, they can easily transform into Italian Herb and Cheese variations for a gourmet touch.
Time-Saving Appeal: With straightforward steps, you’ll have fresh rolls ready in less than two hours!
Sturdy Structure: Designed to hold hearty fillings, these rolls ensure your favorite ingredients stay nestled within.
Flavorful Base: Get ready for a rich flavor profile that elevates any filling beyond the ordinary. Serve alongside your favorite sides or use them as a base for a stunning meal!
Handmade Sub Rolls Ingredients
For the Dough
- Whole Milk – Provides moisture and richness; feel free to substitute with oat milk and add an extra tablespoon of butter for fat.
- Sugar – Activates yeast and adds subtle sweetness; honey or maple syrup can work as alternatives.
- Active Dry Yeast – Essential leavening agent; ensure it’s fresh for effective rising.
- Bread Flour – Creates a strong gluten network for structure; all-purpose flour can be used but may yield a softer roll.
- Fine Sea Salt – Enhances flavor and helps control yeast fermentation.
- Eggs – Contributes to richness and tenderness, and aids in browning; using beaten eggs provides a better texture.
- Unsalted Butter (Cold, Cubed) – Adds fat and flavor; using cold butter extends kneading time, creating a better dough. Substitution: salted butter is fine, but adjust salt in the recipe accordingly.
For the Egg Wash
- Egg White and Water – Provides a glossy finish when baked.
These Handmade Sub Rolls will not only bring a comforting aroma to your kitchen but also make for sturdy bases for your favorite sandwich fillings!
Step‑by‑Step Instructions for Handmade Sub Rolls
Step 1: Prepare Yeast
In a mixing bowl, combine 1 cup of warm whole milk with 2 tablespoons of sugar and 2 teaspoons of active dry yeast. Stir gently and allow this mixture to bloom for about 5 to 10 minutes until it becomes frothy, signaling that the yeast is activated and ready to help your Handmade Sub Rolls rise.
Step 2: Mix Dry Ingredients
In the bowl of a stand mixer, combine 4 cups of bread flour with 1 teaspoon of fine sea salt. Use the paddle attachment to mix the dry ingredients until they are well blended. This dry base will provide the structure needed for your soft yet sturdy sub rolls, so ensure they are evenly combined before moving on.
Step 3: Combine Ingredients
Pour the yeast mixture into the dry ingredients and add 2 beaten eggs. Mix on low speed until a shaggy dough begins to form, which should take about 3 to 5 minutes. This initial mixing helps incorporate the ingredients, creating a foundation for your Handmade Sub Rolls that will soon be deliciously pliable.
Step 4: Add Butter
Gradually add 4 tablespoons of cold, cubed unsalted butter to the shaggy dough. Continue kneading on medium speed for another 8 to 10 minutes until the dough becomes smooth and elastic. The cold butter will enrich the dough, contributing to its tender texture and ensuring each bite of your rolls is flavorful.
Step 5: First Rise
Shape the kneaded dough into a ball and place it in a greased bowl, turning it to coat. Cover the bowl with a clean kitchen towel and let it rise in a warm place for about 1 hour or until it has doubled in size. This is crucial for the development of a soft, airy texture in your Handmade Sub Rolls.
Step 6: Shape Rolls
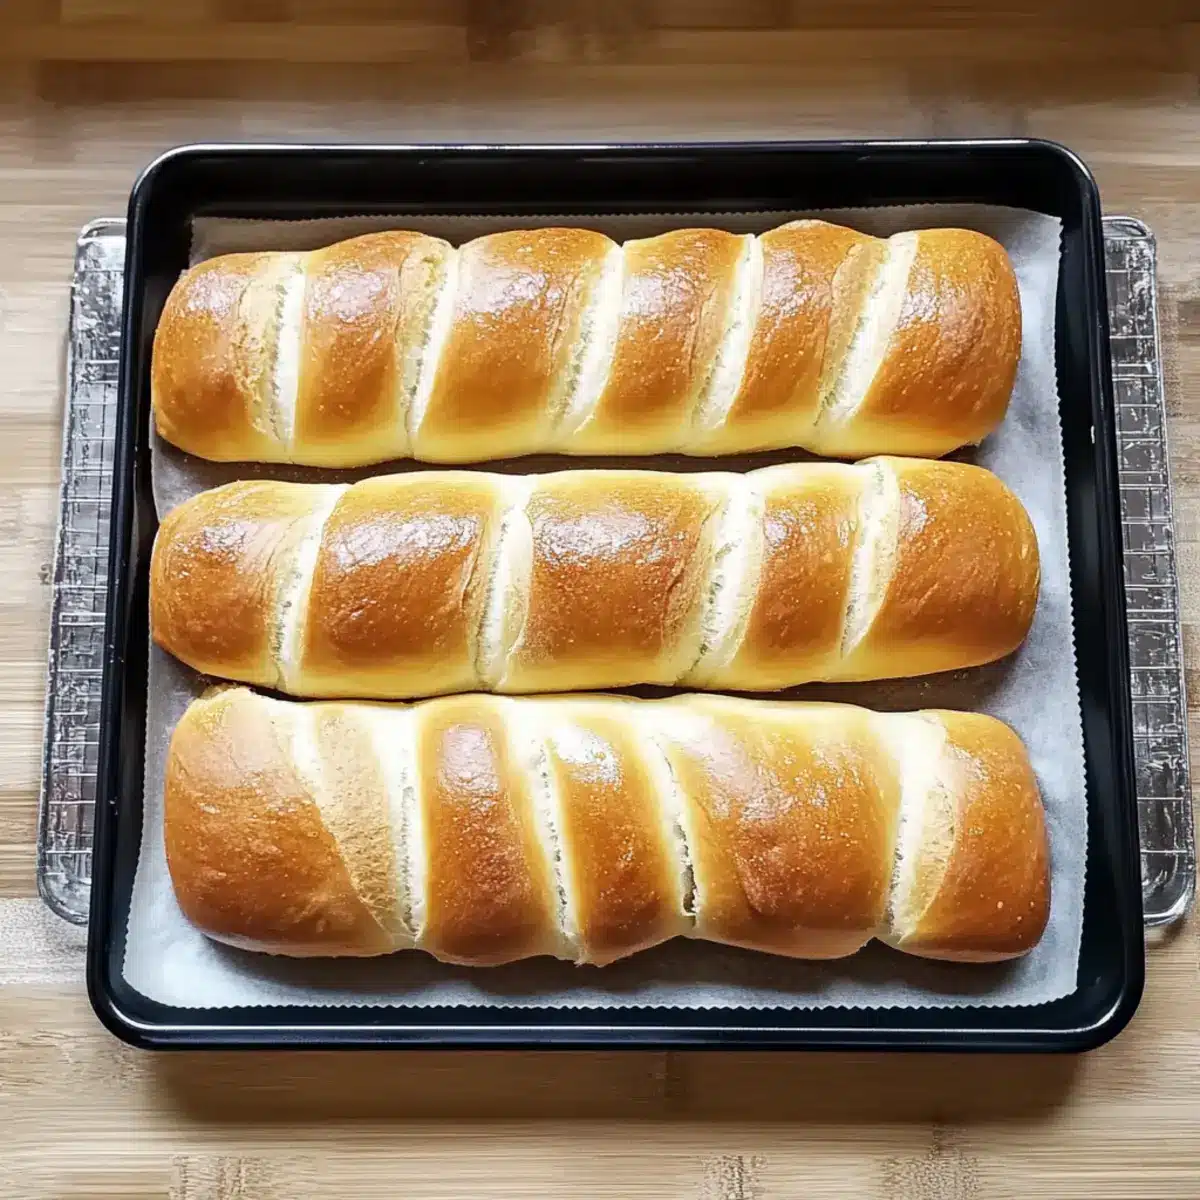
Once the dough has risen, gently punch it down to release excess air. Divide the dough into 6 equal pieces, then flatten and roll each piece into a log shape. Place the rolls seam-side down on a parchment-lined baking tray, ensuring they have enough space to rise again.
Step 7: Second Rise
Cover the shaped rolls with a damp cloth and let them rise for an additional 30 minutes. During this time, the dough will expand, preparing your Handmade Sub Rolls for the oven and ensuring they achieve that delightful chewy texture once baked.
Step 8: Preheat Oven & Prepare Egg Wash
While the rolls are rising, preheat your oven to 400°F (200°C). In a small bowl, combine 1 egg white with 1 tablespoon of water to create an egg wash. This mixture will give your rolls a beautiful, glossy finish when baked, enhancing both appearance and taste.
Step 9: Bake
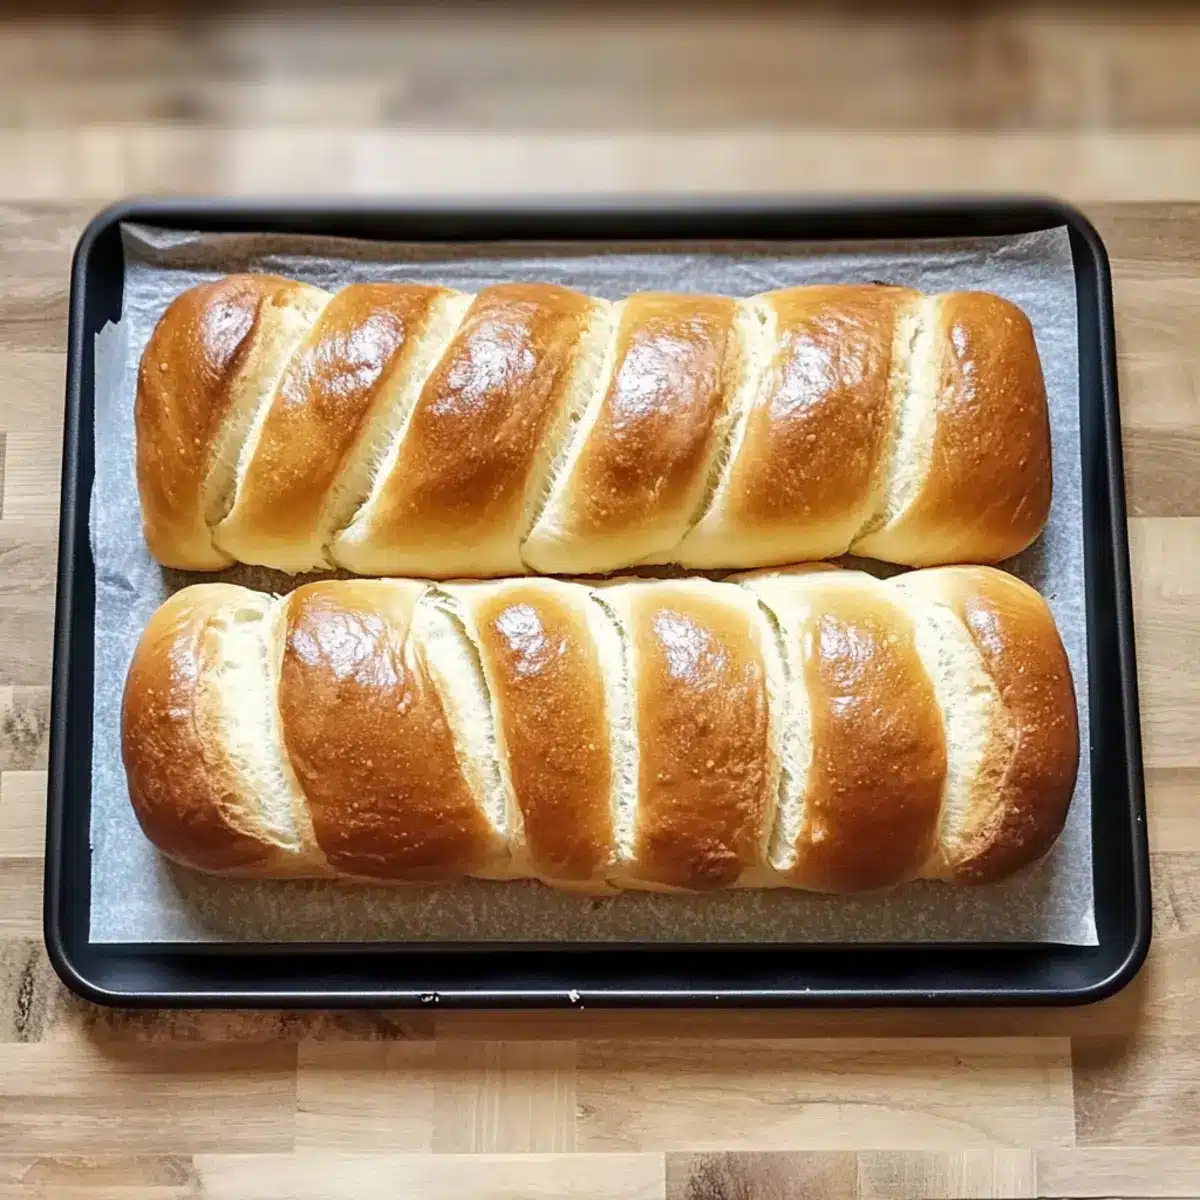
After brushing the tops of the rolls with the egg wash, score each roll with a sharp knife to allow steam to escape while baking. Place the tray in the preheated oven and bake for 15 minutes, or until the rolls are golden brown and register an internal temperature of 195-200°F.
Step 10: Cool
Once baked, remove the Handmade Sub Rolls from the oven and transfer them to a wire rack. Allow them to cool completely before slicing. This step is key to achieving the perfect texture, ensuring they are ready to hold your favorite sandwich fillings.
Expert Tips for Handmade Sub Rolls
-
Measure Accurately: Using a kitchen scale ensures precise measurements and more consistent results, leading to perfect Handmade Sub Rolls each time.
-
Avoid Excess Flour: It can be tempting to add more flour when the dough is sticky, but resist! The gluten will develop beautifully as it rises.
-
Timing Is Key: Allow adequate time for both rises. A longer second rise can significantly improve the texture of your rolls, preventing them from being dense.
-
Cold Butter Benefits: Using cold, cubed butter in your dough helps form a better structure and gives your rolls a delightful, tender crumb.
-
Egg Wash for Shine: Don’t skip the egg wash! It not only adds a beautiful golden hue but also enhances the overall presentation of your Handmade Sub Rolls.
Make Ahead Options
These Handmade Sub Rolls are a fantastic choice for meal prep, allowing busy home cooks to enjoy homemade goodness without the last-minute rush. You can prepare the dough up to 24 hours in advance by letting it rise in the refrigerator instead of at room temperature, which will enhance the flavor. After the first rise, simply shape the rolls and place them on a baking tray. Cover with plastic wrap and store in the refrigerator, then let the rolls come to room temperature before the second rise. When you’re ready to bake, brush them with the egg wash and pop them in the oven for fresh, warm rolls that are just as delicious as if they were made that day!
Handmade Sub Rolls Variations & Substitutions
Feel free to personalize your Handmade Sub Rolls and take them to another level of deliciousness with these delightful twists!
- Dairy-Free: Substitute whole milk with oat milk and add an extra tablespoon of butter for a rich, creamy texture.
- Sweet Twists: For sweeter rolls, consider increasing the sugar or adding a splash of honey or maple syrup for a subtle twist.
- Herb-Infused: Mix in dried Italian herbs directly into the dough to introduce a savory, aromatic depth or sprinkle them on top before baking.
- Cheesy Delight: Add shredded cheese, like mozzarella or Parmesan, to the dough for extra flavor and a delightful cheesy stretch in every bite.
- Spicy Kick: For those who enjoy a little heat, incorporate crushed red pepper flakes into the dough or top the rolls with spicy seasoning for a fiery surprise.
- Whole Wheat Version: Swap out half the bread flour for whole wheat flour to add nutritional value and a nutty flavor, offering a heartier roll.
- Garlic Flavors: For a mouthwatering aroma, blend minced garlic into the butter before incorporating it into the dough—perfect for garlic bread lovers!
- Seed Topping: Before baking, sprinkle sesame seeds or poppy seeds on top for added crunch and visual appeal.
These variations make each batch a fresh experience! Plus, try serving them alongside your delicious homemade soups or even use them for a scrumptious meatball sub for a family feast everyone will rave about! Don’t hesitate to get creative—your kitchen should be a canvas of flavors!
Storage Tips for Handmade Sub Rolls
- Room Temperature: Store Handmade Sub Rolls in an airtight container at room temperature for up to 3 days to maintain freshness. Avoid leaving them uncovered to prevent drying out.
- Fridge: If you need to keep them longer, you can refrigerate them, but be aware this may change their texture; consume within a week.
- Freezer: For extended storage, freeze the rolls in a zip-top bag for up to 2 months. Ensure they’re properly sealed to prevent freezer burn.
- Reheating: When ready to enjoy, thaw at room temperature, then warm them in the oven at 350°F (175°C) for about 10 minutes to restore softness.
What to Serve with Handmade Sub Rolls?
Nothing pairs quite like delicious sides and drinks to elevate your homemade sandwich experience.
-
Savory Meatballs: Rich and juicy meatballs in marinara sauce nestled in your sub rolls create a mouthwatering symphony of flavors.
-
Crispy French Fries: Golden, crispy fries offer a satisfying crunch alongside the softness of the rolls, balancing texture perfectly.
-
Fresh Garden Salad: A light, vibrant salad with mixed greens, cherry tomatoes, and a tangy vinaigrette complements the heartiness of the subs effortlessly.
-
Loaded Nachos: Cheesy, gooey nachos drizzled with jalapeños and sauces make a fun, flavorful side that will impress your guests.
-
Grilled Veggies: Smoky, grilled vegetables like bell peppers and zucchini add a burst of freshness and healthful crunch to a rich sandwich.
-
Italian Herb and Cheese Spread: A delightful spread with herby undertones ups the ante on flavor, making every bite of your sub roll even more tantalizing.
-
Homemade Coleslaw: Creamy, crunchy coleslaw brings a refreshing contrast, cutting through rich flavors while adding a satisfying crunch.
-
Lemonade Spritzers: A refreshing mix of zesty lemonade and sparkling water makes for a light, bubbly drink to wash down those savory bites.
-
Chocolate Chip Cookies: End on a sweet note with warm cookies—soft, gooey, and perfect for dunking, they add a delightful conclusion to your meal.
-
Fruit Salad: A colorful medley of fresh fruits provides a light and sweet balance, perfectly rounding out your hearty sandwich experience.
Handmade Sub Rolls Recipe FAQs
How do I choose the right milk for my Handmade Sub Rolls?
Absolutely! Whole milk provides moisture and richness, but if you prefer a dairy alternative, oat milk works well. Just add an extra tablespoon of butter to maintain the fat content for the best flavor and texture.
What’s the best way to store Handmade Sub Rolls?
To keep your rolls at their freshest, store them in an airtight container at room temperature for up to 3 days. If you want them to last longer, freeze the rolls in a zip-top bag for up to 2 months. When ready to use, just let them thaw at room temperature and warm in the oven to regain their softness.
Can I freeze Handmade Sub Rolls?
Yes, you can! After baking and cooling your rolls completely, place them in a zip-top freezer bag, ensuring to remove as much air as possible. They can be frozen for up to 2 months. When you’re ready to enjoy, thaw them first and then warm them in a 350°F oven for about 10 minutes to get that fresh-baked feel again.
What if my dough is too sticky when making Handmade Sub Rolls?
If your dough feels sticky, resist the urge to add too much extra flour. It’s perfectly normal for the dough to be a bit tacky at first. Just allow it to rise as instructed—this will help develop the gluten and improve the final texture. If it seems overly dense after the first rise, the second rise is crucial; allowing it more time can enhance fluffiness.
Are there any dietary considerations with these Handmade Sub Rolls?
Indeed! The primary allergens are dairy and eggs, so if you’re making these rolls for someone with allergies, you can substitute whole milk with oat milk and use a flax egg in place of the regular egg. For healthier versions, feel free to experiment with alternatives like whole wheat flour, though the texture may differ slightly.
How can I make Italian Herb and Cheese variation of these rolls?
Creating an Italian Herb and Cheese version is a delightful way to add flavor! Simply mix in 1-2 teaspoons of dried Italian herbs, such as oregano or basil, into the dry ingredients. You can also fold in shredded cheese, like mozzarella or Parmesan, into the dough before the first rise, or sprinkle some on top before baking for a cheesy crust. Enjoy the delicious twist!
Handmade Sub Rolls That Elevate Your Sandwich Game
Ingredients
Equipment
Method
- In a mixing bowl, combine warm whole milk, sugar, and active dry yeast. Stir gently and allow to bloom for about 5 to 10 minutes.
- Combine bread flour and fine sea salt in the stand mixer bowl. Mix until well blended.
- Pour the yeast mixture into the dry ingredients and add beaten eggs. Mix on low speed until a shaggy dough forms.
- Gradually add cold cubed unsalted butter to the shaggy dough, kneading on medium speed until smooth and elastic.
- Shape the dough into a ball and place in a greased bowl. Cover and let rise in a warm place for about 1 hour, until doubled in size.
- Gently punch down the risen dough. Divide into 6 pieces, shape into logs, and place seam-side down on a baking tray.
- Cover the shaped rolls with a damp cloth and let rise for an additional 30 minutes.
- Preheat your oven to 400°F (200°C). Create the egg wash by combining egg white and water.
- Brush the rolls with egg wash and score each roll with a sharp knife. Bake for 15 minutes or until golden brown.
- Remove from oven and transfer to a wire rack to cool completely before slicing.
Leave a Reply