
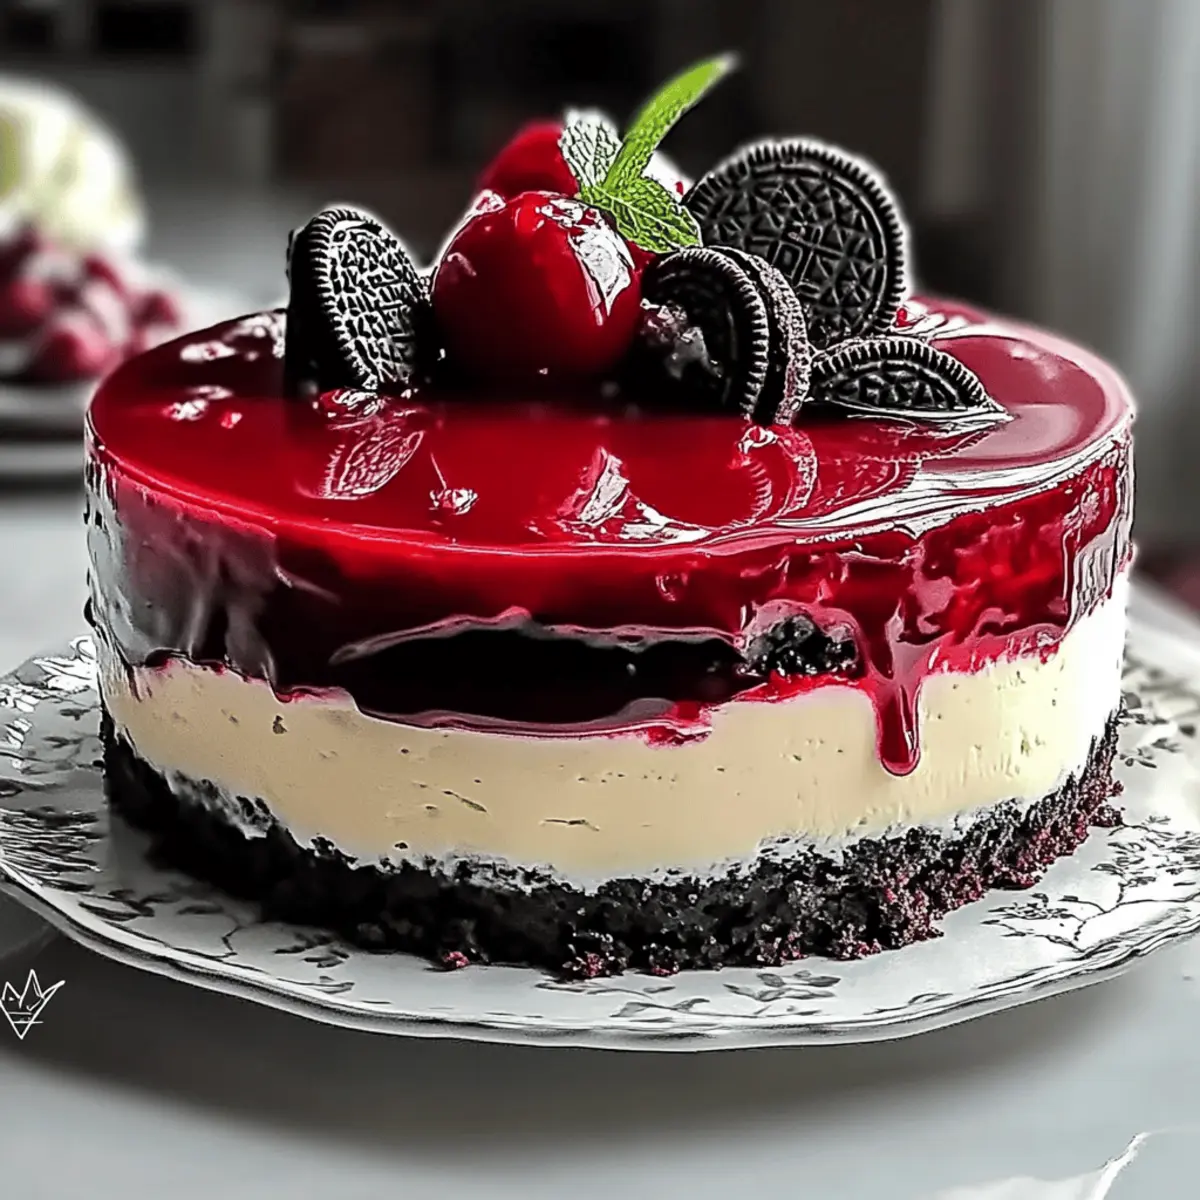
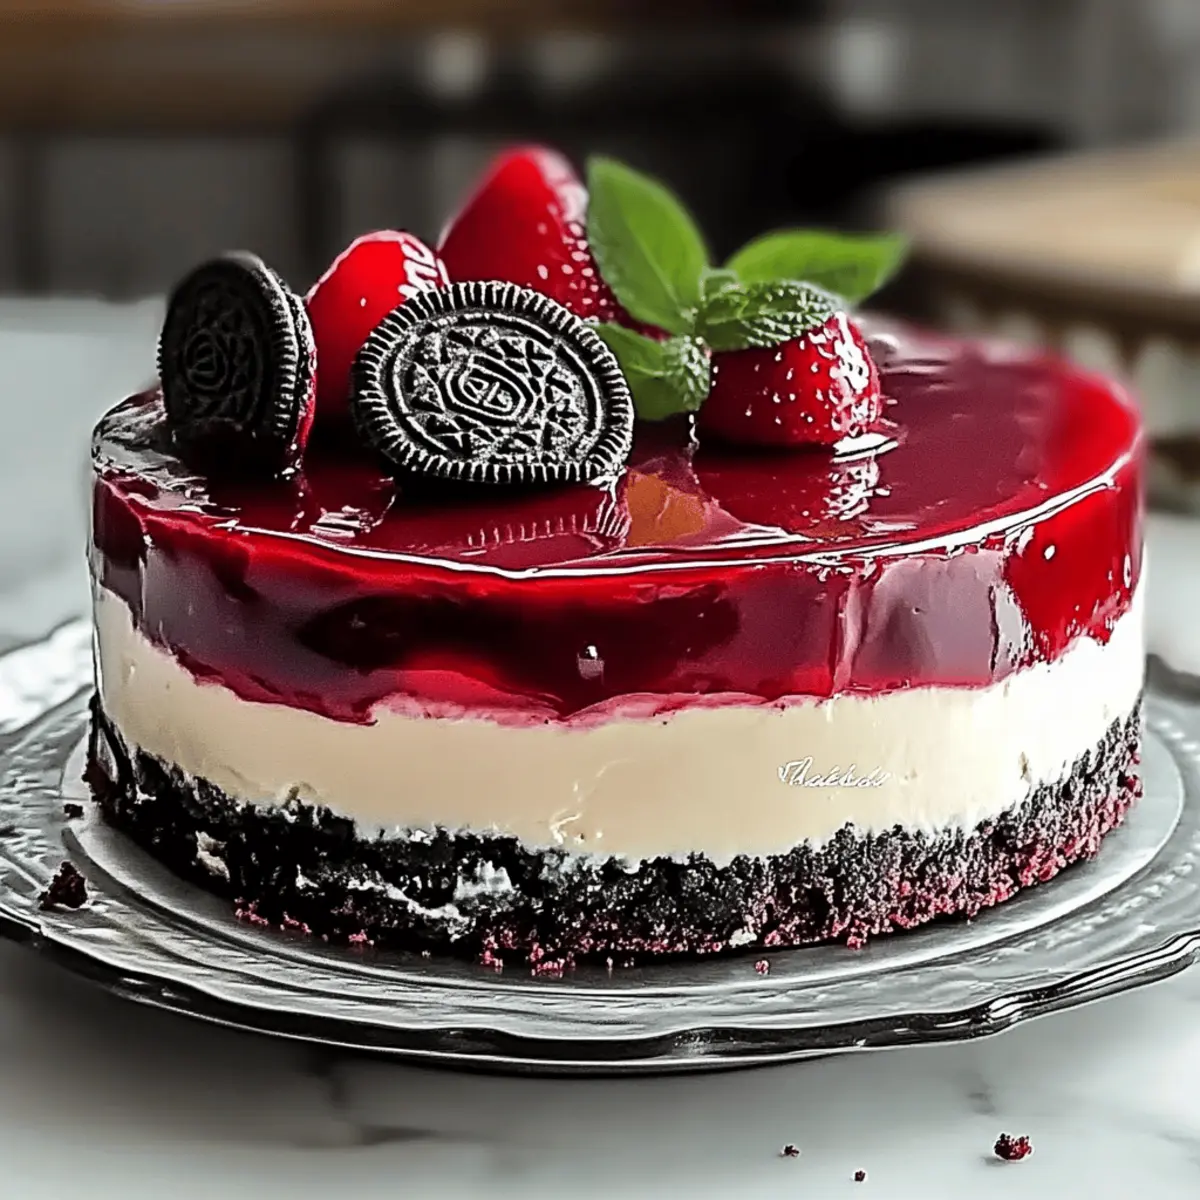
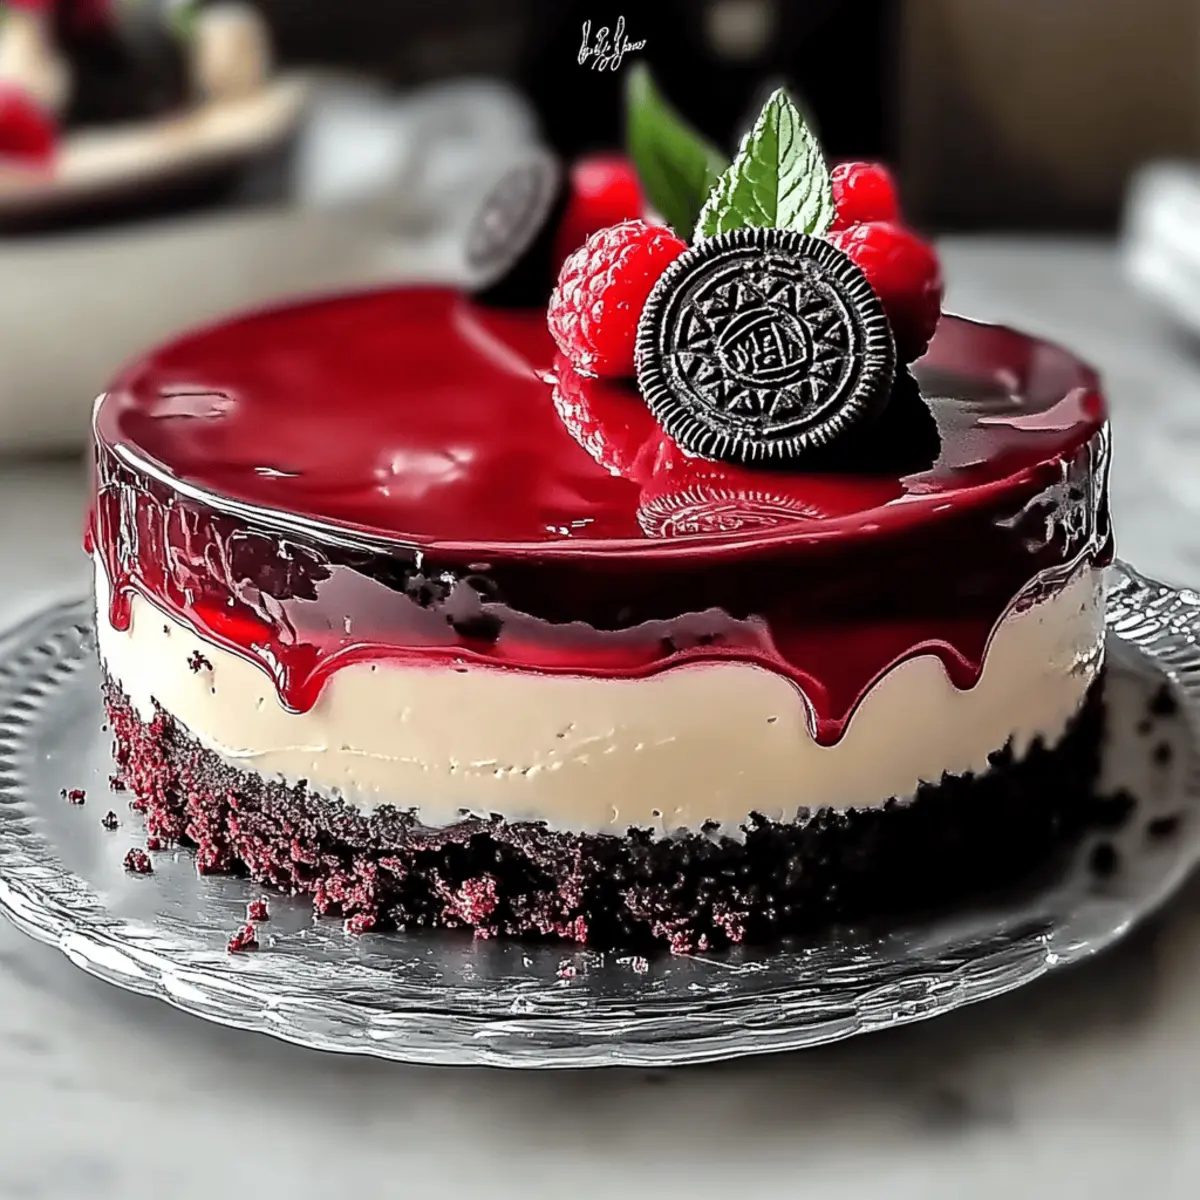
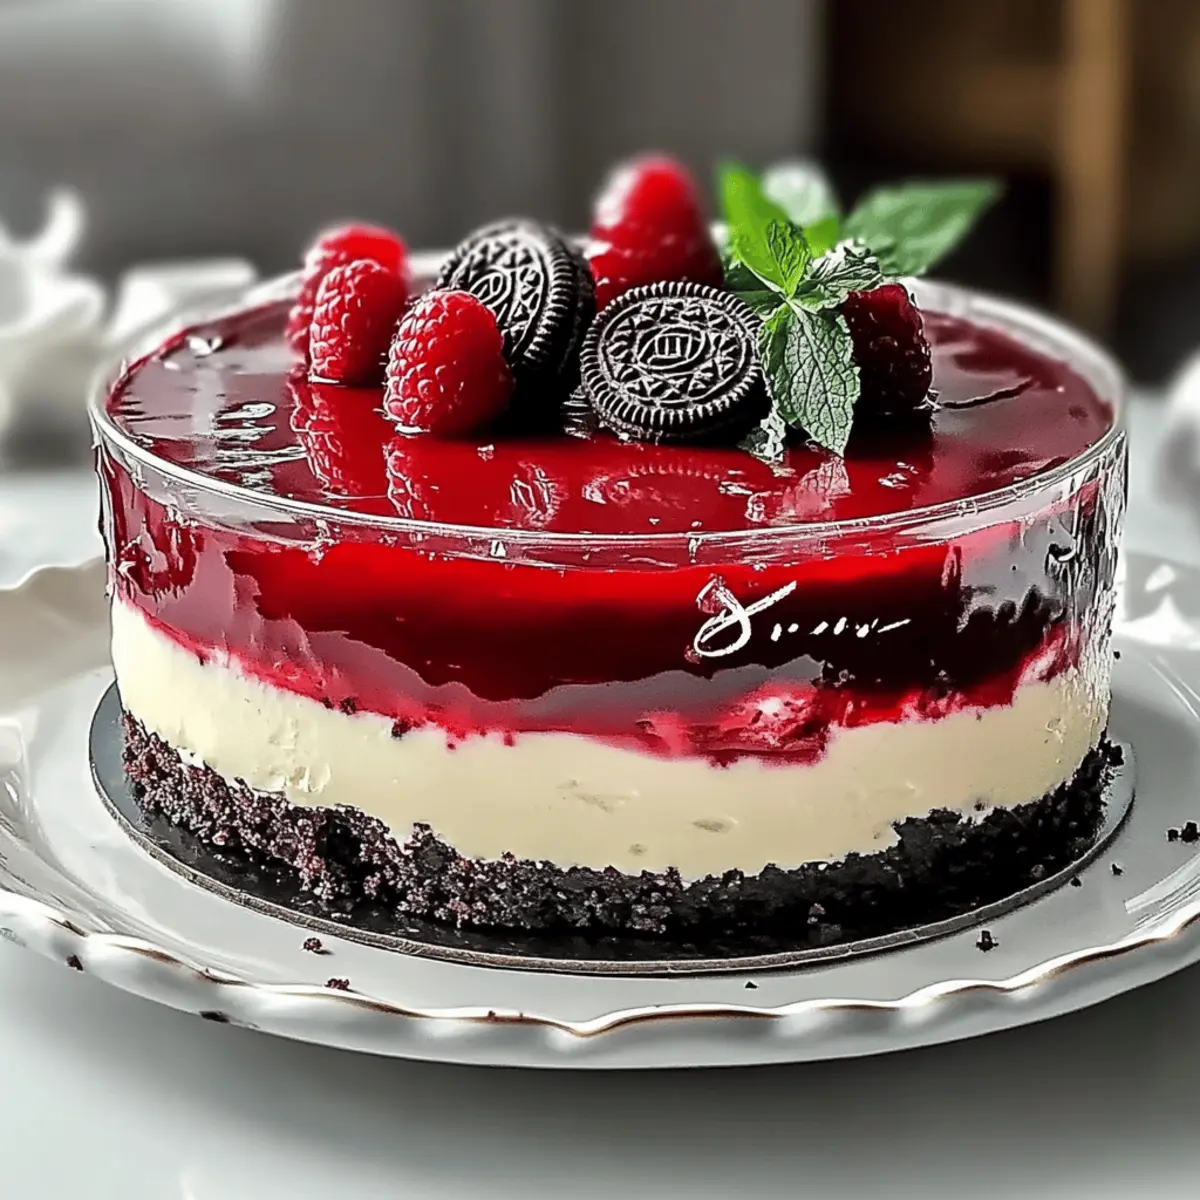
As I sift through vibrant red flour and cocoa powder, the rich aroma reminds me of cozy celebrations and laughter filled with sweet memories. Today, I’m excited to share my take on a show-stopping dessert: Red Velvet Cheesecake with Oreo Delight. This recipe marries the classic charm of red velvet cake with a luscious Oreo-infused cheesecake layer, making it a guaranteed crowd-pleaser. Not only is it visually stunning, but it’s also quick to prepare, allowing you to impress your guests without spending hours in the kitchen. Plus, with a gluten-free option available, everyone can indulge in its creamy, dreamy delight! Ready to bake your way to dessert heaven? Let’s dive in!
Why is this Red Velvet Cheesecake special?
Decadent Layers: This cheesecake features layers of velvety red cake and creamy Oreo cheesecake that create a dramatic visual appeal. Joyful Celebrations: Perfect for parties, holidays, or just because—it’s sure to spark delightful conversations around the table! Quick and Easy: With straightforward steps, you can impress without the stress. Want more delicious options? Try our Brownie Cheesecake Sweet for another crowd favorite! Flexible Ingredients: Whether you opt for the gluten-free version or keep it classic, this dessert caters to every palate. Nostalgic Flavor: The combination of rich chocolate and crispy Oreos will evoke sweet memories and smiles from everyone who tastes it!
Red Velvet Cheesecake Ingredients
• Everything you need to create this irresistible dessert!
For the Cake
- All-Purpose Flour – Provides structure; substitute with gluten-free flour blend for a gluten-free version.
- Cocoa Powder – Adds chocolate flavor and depth to the cake.
- Salt – Enhances overall flavor and balances sweetness.
- Butter – Contributes richness and moisture; use unsalted for better salt control.
- Granulated Sugar – Sweetens the cake.
- Sour Cream – Adds tanginess and moisture.
- Vegetable Oil – Keeps the cake moist and tender.
- Vanilla Extract – Enhances the overall flavor profile.
- Eggs – Provide binding and structure; use room temperature for better mixing.
- Red Food Coloring – Gives the cake its iconic red hue.
- Buttermilk – Adds moisture and acidity for a tender crumb.
- Baking Soda & Vinegar – Acts as leavening agents for a light, fluffy cake.
For the Cheesecake filling
- Oreos – Crushed for flavor and texture in the cheesecake filling.
- Cream Cheese – Provides a creamy base; use full-fat for best texture.
- Cornstarch – Stabilizes the filling to prevent cracking.
- Heavy Cream – Used for ganache, adding a rich texture.
- Dark Chocolate Chips – Creates the ganache topping, delivering a luscious finish.
Step‑by‑Step Instructions for Irresistible Red Velvet Cheesecake with Oreo Delight
Step 1: Preheat and Prepare
Begin by preheating your oven to 350°F (175°C). While it’s heating, line a 9-inch springform pan and an 8-inch round cake pan with parchment paper, spraying the surfaces with non-stick spray. This crucial step ensures easy removal from the pans after baking, letting your stunning Red Velvet Cheesecake shine with its vibrant layers.
Step 2: Mix Dry Ingredients
In a spacious mixing bowl, whisk together the all-purpose flour, cocoa powder, and salt until evenly combined. This step is essential as it ensures the dry ingredients are uniformly distributed, contributing to the fluffy texture of your cheesecake. Set the bowl aside as you move on to the next delicious phase of creating your cheesecake.
Step 3: Cream Butter and Sugar
In another mixing bowl, cream the butter and granulated sugar until the mixture is light and fluffy, about 3-5 minutes. This is a vital step in creating a rich and moist Red Velvet Cheesecake as it incorporates air into the batter. Next, blend in the sour cream, vegetable oil, vanilla extract, eggs, and the bold red food coloring, mixing until smooth and fully combined.
Step 4: Combine Wet and Dry Ingredients
Gradually add the flour mixture to the wet ingredients, alternating with the buttermilk to maintain moisture. As you mix, add the baking soda and vinegar, which will create a delightful reaction, lightening the batter. Stir until just combined, being careful not to overmix, as this will maintain the tenderness of your Red Velvet Cheesecake layers.
Step 5: Bake the Red Velvet Layers
Divide the rich red batter evenly between the prepared pans. Bake in your preheated oven for about 18-20 minutes or until the cakes spring back when touched lightly. Once done, remove them from the oven and allow the layers to cool in the pans for about 10 minutes before transferring to wire racks to cool completely.
Step 6: Prepare the Cheesecake Filling
While the red velvet cake layers cool, crush the Oreos into fine crumbs. In a large mixing bowl, combine the crushed Oreos with cream cheese, sugar, cornstarch, sour cream, vanilla extract, and eggs. Beat until the mixture is velvety smooth and creamy, ensuring there are no lumps, which is key for that dreamy filling in your Irresistible Red Velvet Cheesecake.
Step 7: Assemble the Cheesecake
Once the red velvet layers have cooled, place one layer in the bottom of the springform pan. Pour the smooth cheesecake mixture over the cake layer, spreading it evenly. Gently place the second red velvet layer on top, ensuring a clean finish. This assembly will create the beautiful and delicious layers of your cheesecake.
Step 8: Bake the Cheesecake
Prepare a water bath by placing the springform pan into a larger baking dish filled with hot water. Bake the assembled cheesecake at 300°F (150°C) for about 90 minutes, or until the center is just set and slightly jiggly. This gentle baking method will keep your cheesecake moist and minimize cracks as it cools down.
Step 9: Cool Gradually
Turn off the oven and crack the door open, allowing the cheesecake to cool slowly in the oven for at least an hour. This gradual cooling is important to prevent surface cracks on your beautiful Red Velvet Cheesecake. Afterward, transfer it to the refrigerator to chill overnight, enhancing its flavor and texture.
Step 10: Prepare the Ganache Topping
To create the luxurious ganache topping, heat heavy cream in a small saucepan until it simmers. Remove from heat and add dark chocolate chips, stirring until the chocolate is melted and smooth. This glossy ganache will bring an extra touch of richness to your completed Irresistible Red Velvet Cheesecake.
Step 11: Final Touches and Serve
Once the cheesecake has chilled overnight, remove it from the springform pan and pour the velvety ganache over the top, allowing it to cascade down the sides. Cut into slices and consider pairing it with fresh berries or a drizzle of chocolate sauce to enhance the presentation. Enjoy every delightful bite of your homemade creation!
What to Serve with Irresistible Red Velvet Cheesecake with Oreo Delight
Imagine a feast for the senses, where your Red Velvet Cheesecake takes center stage, surrounded by delightful dishes that elevate your dessert experience.
-
Fresh Berries: The tartness of strawberries or raspberries cuts through the cheesecake’s richness, adding a refreshing burst of flavor.
-
Chocolate Drizzle: A silky chocolate sauce drizzled over the cheesecake enhances its indulgence and adds another layer of sweetness.
-
Whipped Cream: Light and fluffy whipped cream provides a delightful contrast to the dense layers of the cheesecake, making each bite a creamy delight.
-
Nutty Brownie Bites: Small fudgy brownie bites complement the cheesecake’s flavors and textures, creating a decadent dessert table.
-
Coffee or Espresso: A rich cup of coffee enhances the dessert’s taste experience, bringing out the chocolate notes in the Red Velvet Cheesecake.
-
Vanilla Ice Cream: Affectionately melting alongside the cheesecake, a scoop of vanilla ice cream adds cool creaminess, pairing beautifully with warm, fresh flavors.
-
Caramel Sauce: Drizzling warm caramel over the cheesecake introduces a sweet and salty element, balancing out the flavors perfectly.
-
Savory Cheese Platter: A selection of mild cheeses can provide a savory contrast that heightens the dessert experience, offering unexpected flavor combinations.
-
Homemade Lemonade: A glass of refreshing lemonade adds a vibrant zing, cleansing the palate between bites of silky cheesecake.
These delightful accompaniments will perfectly complement your stunning Red Velvet Cheesecake, creating a memorable dessert spread!
Tips for the Best Red Velvet Cheesecake
• Room Temperature Ingredients: Ensure all ingredients are at room temperature for optimal mixing and a smoother batter.
• Avoid Overmixing: Mix the batter just until combined, especially after adding eggs. Overmixing can create cracks in your Red Velvet Cheesecake.
• Water Bath Magic: Always bake your cheesecake in a water bath to keep it moist and minimize cracking. This gentle baking method is a game-changer!
• Gradual Cooling: Cool the cheesecake gradually in the oven after baking. This helps prevent sudden temperature changes that can lead to cracks.
• Chill Overnight: For the best flavor and texture, refrigerate your cheesecake overnight before serving. The waiting game will be worth it!
Make Ahead Options
Save valuable time on busy days by prepping your Irresistible Red Velvet Cheesecake in advance! You can easily prepare the red velvet cake layers up to 24 hours before you plan to serve. Simply allow them to cool completely, wrap them tightly in plastic wrap, and refrigerate. Additionally, the cheesecake filling can be made 1-2 days ahead; store it covered in the fridge to keep it fresh and creamy. When it’s time to finish the cheesecake, layer the filling onto the chilled red velvet cake, bake, and then cool. The gradual cooling in the oven will maintain that smooth texture, ensuring your dessert is just as delicious as if made fresh that day!
How to Store and Freeze Red Velvet Cheesecake
Fridge: Keep your Red Velvet Cheesecake covered in the refrigerator for up to 5 days. Use plastic wrap or an airtight container to preserve its creamy texture and prevent drying.
Freezer: If you want to enjoy your cheesecake later, wrap it tightly in plastic wrap and aluminum foil, then freeze for up to 3 months. This prepares it for a delicious future treat!
Thawing: When you’re ready to indulge, simply transfer the cheesecake to the fridge to thaw overnight. This slow defrosting helps maintain its velvety texture.
Reheating: Use a microwave at a low setting for just a few seconds if you prefer it slightly warmed, but be careful not to overheat, as this can alter the creamy texture.
Red Velvet Cheesecake Variations
Feel free to let your creativity shine while customizing this delectable dessert!
- Gluten-Free: Use a gluten-free flour blend in place of all-purpose flour to accommodate gluten sensitivities.
- Alternative Cookies: Swap Oreos for chocolate or vanilla sandwich cookies, or even graham crackers for a lighter flavor twist. Each option brings a unique taste profile to the cheesecake.
- Nutty Surprise: Add crushed nuts, such as pecans or walnuts, into the cheesecake filling for a delightful crunch that perfectly contrasts the creamy texture.
- Different Sugar: Try brown sugar instead of granulated sugar for a deeper, caramel-like flavor that complements the rich red velvet cake.
- Enhanced Flavor: Incorporate flavored extracts, like almond or orange, to give a refreshing twist to the recipe. Just a teaspoon can elevate the entire dessert experience!
- Dairy-Free Option: Substitute cream cheese with a dairy-free alternative and use coconut cream for the ganache to create a vegan-friendly version that doesn’t compromise on taste.
- Spicy Kick: Add a dash of cayenne pepper or chili powder to the chocolate ganache to create a bold flavor contrast that will intrigue adventurous taste buds.
- Topping Twists: Instead of chocolate ganache, top with a tangy cream cheese frosting or a rich caramel sauce for an irresistible finish. Consider trying a drizzle of thick lemon glaze for a refreshing contrast.
Feel inspired? Perhaps after this, you’ll want to explore our Burnt Basque Cheesecake for another stunning dessert experience!
Red Velvet Cheesecake Recipe FAQs
How do I select the best ingredients for my Red Velvet Cheesecake?
Absolutely! To choose the best ingredients, opt for high-quality cocoa powder and food coloring for a vibrant hue. Make sure the cream cheese is full-fat for a rich and creamy filling. When selecting your eggs, look for ones that are room temperature, as they incorporate better into the batter. If you’re going gluten-free, a good-quality gluten-free flour blend will work wonderfully without compromising flavor.
How should I store my Red Velvet Cheesecake?
Very simple! Cover your Red Velvet Cheesecake in the refrigerator with plastic wrap or transfer it to an airtight container for up to 5 days. This keeps it fresh and creamy. If you have leftovers, you can freeze your cheesecake tightly wrapped in plastic wrap and aluminum foil to preserve its flavor for up to 3 months.
Can I freeze my Red Velvet Cheesecake? How?
Absolutely! To freeze your cheesecake, make sure it’s completely cooled and set. Wrap it tightly in plastic wrap, then in aluminum foil to protect it from freezer burn. When you’re ready to enjoy it, transfer the cheesecake to the refrigerator to thaw overnight. This way, it maintains its creamy texture and flavor.
What should I do if my cheesecake cracks during baking?
Don’t worry, it happens to the best of us! If your cheesecake develops cracks, the easiest fix is to cover them up with your ganache or a frosting layer. This not only hides any imperfections but adds deliciousness. To avoid this situation in the future, ensure you bake your cheesecake in a water bath, which provides gentle heat and moisture, minimizing the risk of cracks.
Is this Red Velvet Cheesecake safe for pets or individuals with allergies?
Be aware! This cheesecake contains ingredients like chocolate (from Oreos), which can be harmful to dogs. Additionally, it has dairy and eggs, commonly known allergens. If you’re making it for someone with dietary restrictions or allergies, ensure to check their specific needs. The recipe does have a gluten-free option that can help accommodate those who are sensitive to gluten!
Can I use other cookies instead of Oreos in my cheesecake filling?
Absolutely! You can swap Oreos for other sandwich cookies or even graham crackers to impart different flavors. For instance, chocolate sandwich cookies, golden Oreos, or even crushed digestive biscuits will work beautifully, adding a unique twist to your cheesecake while still achieving that delightful crunch!
Decadent Red Velvet Cheesecake That's Irresistibly Creamy
Ingredients
Equipment
Method
- Preheat your oven to 350°F (175°C). Line a 9-inch springform pan and an 8-inch round cake pan with parchment paper and spray with non-stick spray.
- In a mixing bowl, whisk together the flour, cocoa powder, and salt until uniformly combined.
- Cream the butter and sugar until light and fluffy. Blend in the sour cream, vegetable oil, vanilla extract, eggs, and red food coloring until smooth.
- Gradually add the flour mixture to the wet ingredients, alternating with the buttermilk. Add baking soda and vinegar, stirring gently until just combined.
- Divide the batter into prepared pans and bake for 18-20 minutes until springy. Allow to cool in pans for 10 minutes before transferring to wire racks.
- Crush Oreos and mix with cream cheese, sugar, cornstarch, sour cream, vanilla extract, and eggs until smooth.
- Place one red velvet layer in the springform pan, pour cheesecake mixture over, and top with the second layer.
- Bake in a water bath at 300°F (150°C) for about 90 minutes until the center is set and slightly jiggly.
- Turn off the oven, crack the door, and cool in the oven for at least an hour, then refrigerate overnight.
- Heat heavy cream until simmering, then add chocolate chips and stir until melted and smooth for ganache.
- Remove cheesecake from the pan, pour ganache over the top and let it cascade down the sides. Serve with berries or chocolate sauce.
Leave a Reply